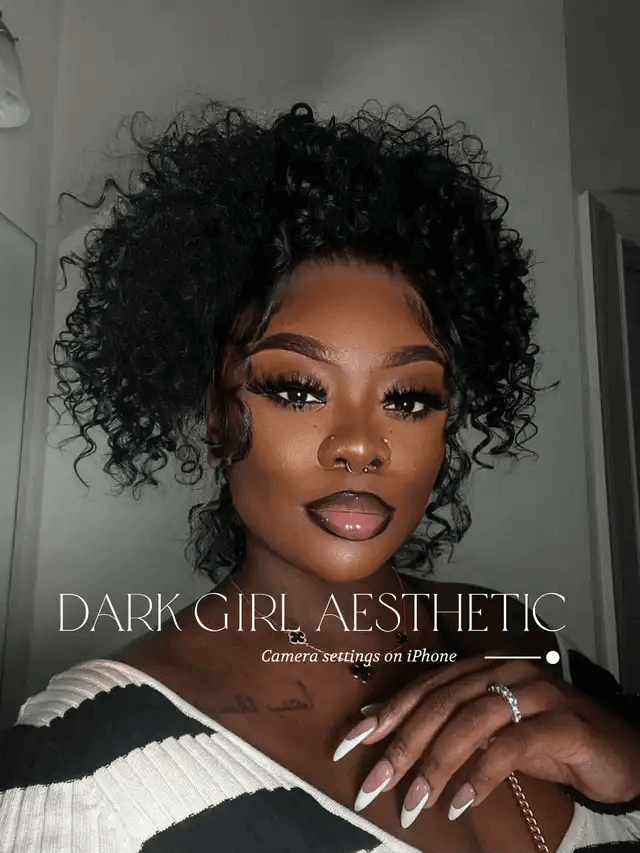
This is what I do to get the dark aesthetic on all my videos!
This visual style allows us to channel a sense of exclusivity, elevating our brand and content to a level that resonates with those who appreciate the finer things in life.
Whether it’s fashion, lifestyle, or art, the dark aesthetic adds a touch of grandeur and allure, enhancing the overall experience and making a lasting impression on our audience.
When we work with light and shadow, we craft a space that feels intimate yet powerful, a unique blend that sets the tone for premium content.
By applying a few key video settings, you can achieve this distinct look and create an aesthetic that captivates your viewers while making your videos stand out in a sea of content.
Let’s break down each setting and its role in achieving that perfectly polished, high-end dark aesthetic.
Key Adjustments for the Dark Aesthetic:
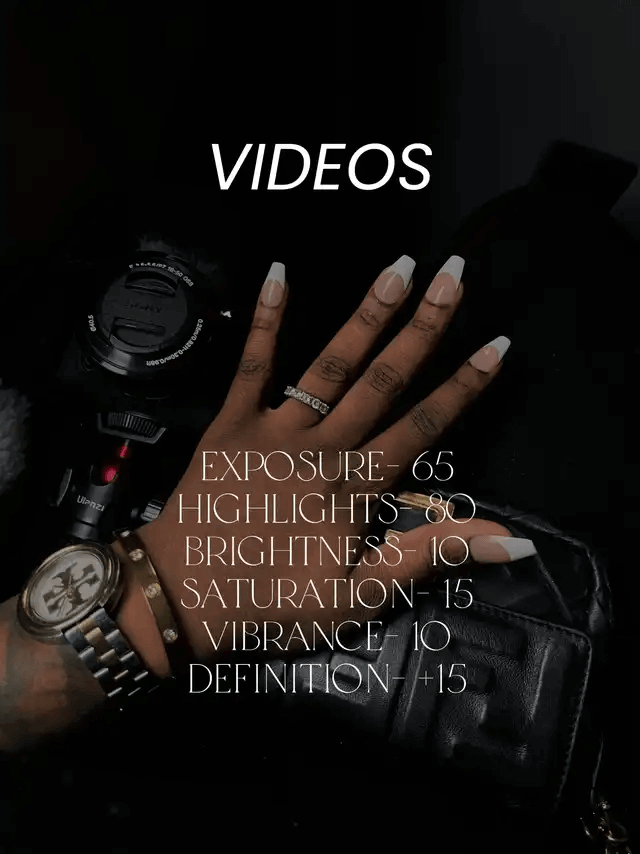
Exposure -65
The first step to capturing that deep, moody feel is adjusting your exposure.
By lowering the exposure to -65, you pull back the intensity of the light in your shots, allowing shadows to dominate while still bringing focus to your subject.
This setting essentially reduces the overall brightness, deepening darker areas and giving your footage a bold, refined look.
It’s about striking a balance—too much light can flatten the scene, but with controlled exposure, you introduce depth and dimension that make your visuals pop.
Highlights -80
Next, let’s talk about highlights.
Reducing the highlights to -80 is crucial for controlling any overly bright spots or reflective areas in your frame.
Bright highlights can wash out important details, especially when shooting scenes with a lot of contrast. By toning them down, you’re preserving the texture and nuance of your subject, ensuring nothing looks overexposed.
This step helps create a more even light distribution, where shadows still dominate, but without sacrificing the clarity or sharpness of the brighter elements in your video.
Brightness -10
A slight tweak in brightness at -10 may seem minimal, but it’s essential for keeping your dark aesthetic cohesive.
You don’t want the scene to appear too dull, but at the same time, too much brightness can ruin the moody vibe.
This small reduction maintains the atmosphere and ensures the shadows stay intact while keeping your subject visible and engaging.
It’s the subtle balancing act between light and dark that brings your aesthetic to life.
Saturation -15
When working with a dark theme, it’s easy to overpower the frame with too much color. By reducing saturation to -15, you create a softer, more sophisticated palette that doesn’t clash with the dark tones.
This setting mutes intense colors just enough to complement the shadows, making the overall look feel more high-end and elegant.
The reduced saturation allows the focus to remain on the interplay of light and darkness, rather than on bold colors that can detract from the luxurious vibe you’re aiming for.
Vibrance -10
Similarly, lowering the vibrance to -10 ensures that less dominant colors in your scene aren’t too vibrant or distracting.
Vibrance is more selective than saturation, as it reduces the intensity of only the weaker colors while preserving the stronger ones.
This adjustment allows for a more balanced, subtle color scheme. It enhances the muted, classy aesthetic without completely desaturating your footage, ensuring that any remaining color feels rich and intentional.
Definition +15
Finally, to tie everything together, you’ll want to increase the definition by +15. Adding definition sharpens the image, bringing out the details in your subject while maintaining the softness of the shadows.
This setting gives your footage a crisp, professional edge, ensuring that nothing looks too blurry or faded.
It’s the finishing touch that makes your videos feel polished and premium. With just enough sharpness, your subject will stand out beautifully against the dark backdrop.
By carefully adjusting these settings, you can craft a visual style that feels not only luxurious but also personal and artistic.
The dark aesthetic works especially well in content where you want to evoke a sense of mystery, elegance, and depth.
It’s perfect for branding your work with a unique, high-quality look that sets you apart from the competition.
This combination of exposure, highlights, brightness, saturation, vibrance, and definition is what gives my videos that unmistakably sleek and high-end look.
Copy these settings, and see how they transform your own videos into visually stunning, moody masterpieces that speak to your audience on an entirely different level.
🫶🏾 Feel free to try it and elevate your content!
Whether you’re shooting for social media, product showcases, or even personal projects, this setup will make your videos stand out with an effortlessly premium touch.