Were you looking for a free Google Docs Index card template that you can print at home?
If so, this article is for you!
You can also use Index cards to create meeting agendas, create a to-do list, or capture ideas as they come your way.
Plus, they’re great for jotting down phone numbers, addresses, and other important information.
This guide will teach you how to create a custom index card in Google Docs. I’ll also include some free Index card templates you can edit in Google Docs.
Let’s get started!
How to Make Index Cards on Google Docs?
Step 1: Install the Foxy Labels add-on
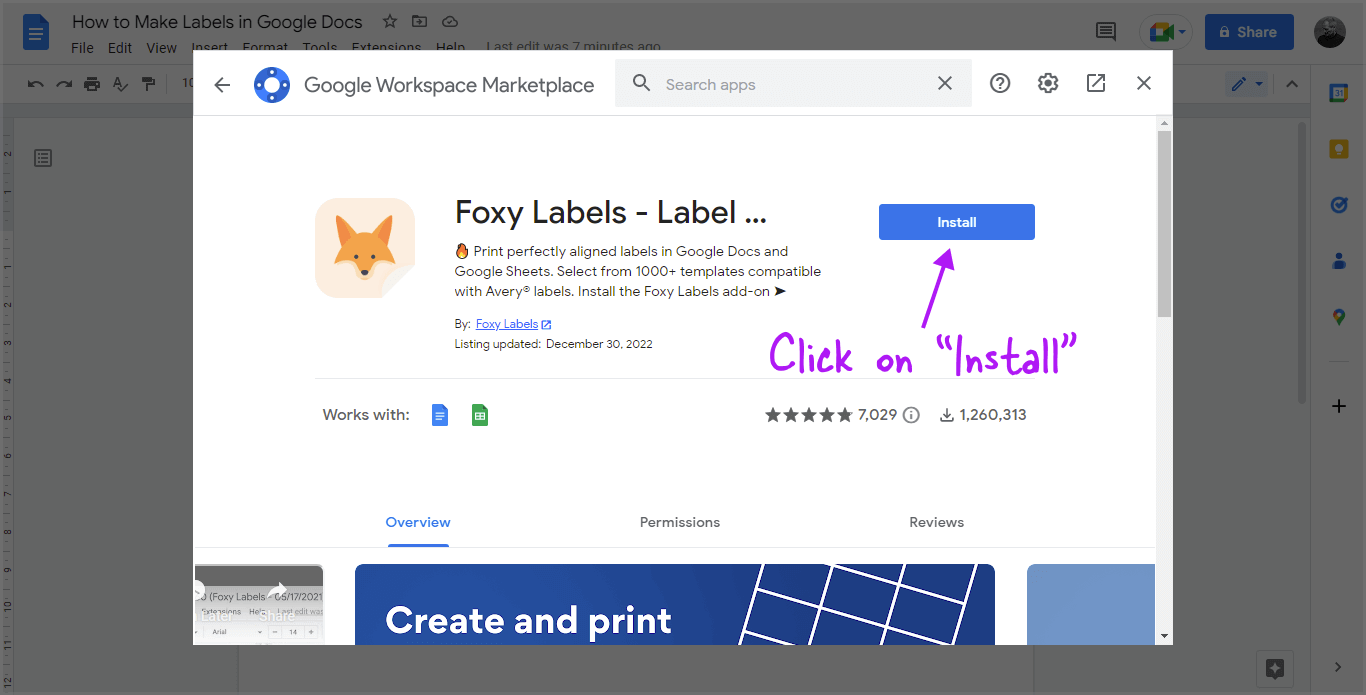
The first step is to open a blank document in Google Docs and create an index card layout. To create the layout, you need to install the Foxy Label add-on.
Foxy Label is a free add-on that can be used to create labels and index cards.
To install the add-on, go to Extensions > Add-ons > Get-add-ons.
Look for the “Foxy Labels” add-on using the search box.
Finally, press the “Install” button to begin installing the extension. For the add-on to function correctly, you may need to grant certain permissions.
Step 2: Select a template
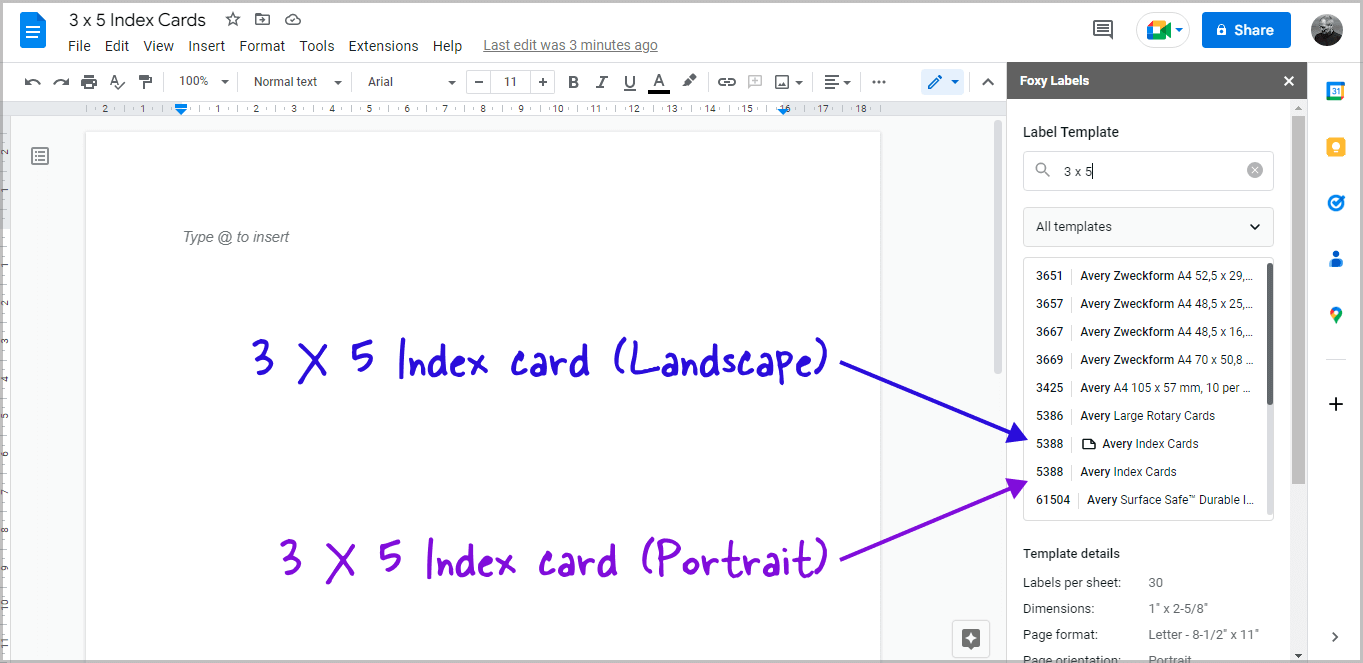
After you’ve installed the template, you’ll need to choose an Index card template.
To select a template, go to Extensions > Foxy Labels > Create labels.
Click “Select a template” and enter the desired Index card size.
The popular Index card sizes are 3 x 5, 4 x 6, 5 x 7, and 5 x 8.
Now, choose a template from the search results.
For example, I needed a 3 x 5 index card, so I typed “3 x 5” into the “Select a template” box and chose the “5388 Avery Index Cards” template.
Scroll down and click the “Apply template” option after selecting the template.
Step 3: Create a table
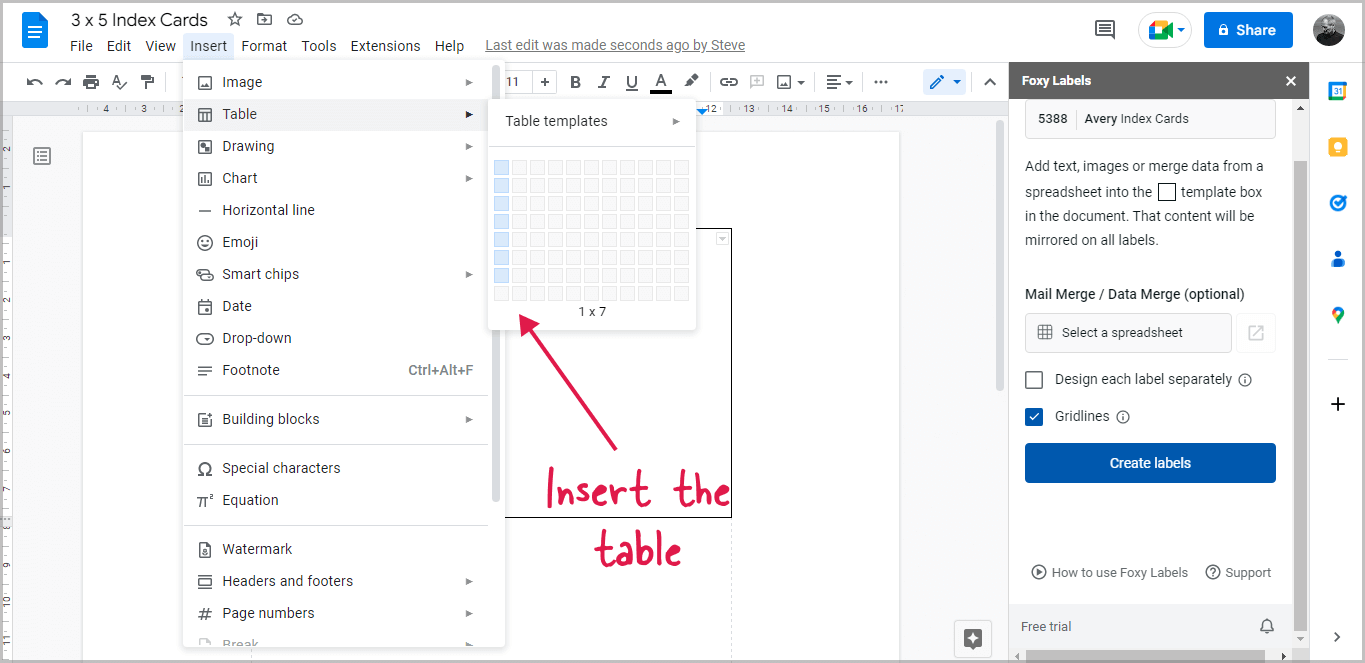
Select the first card in the layout by clicking on it. Then, from the top menu, pick “Insert,” then “Table,” and finally, a 1 x 7 table.
Because I’m planning to make 3 x 5 index cards, I chose the 1 x 7 table; you may change the number of rows to suit your needs.
Make sure that the table fits neatly inside the card layout.
Step 4: Remove the table borders
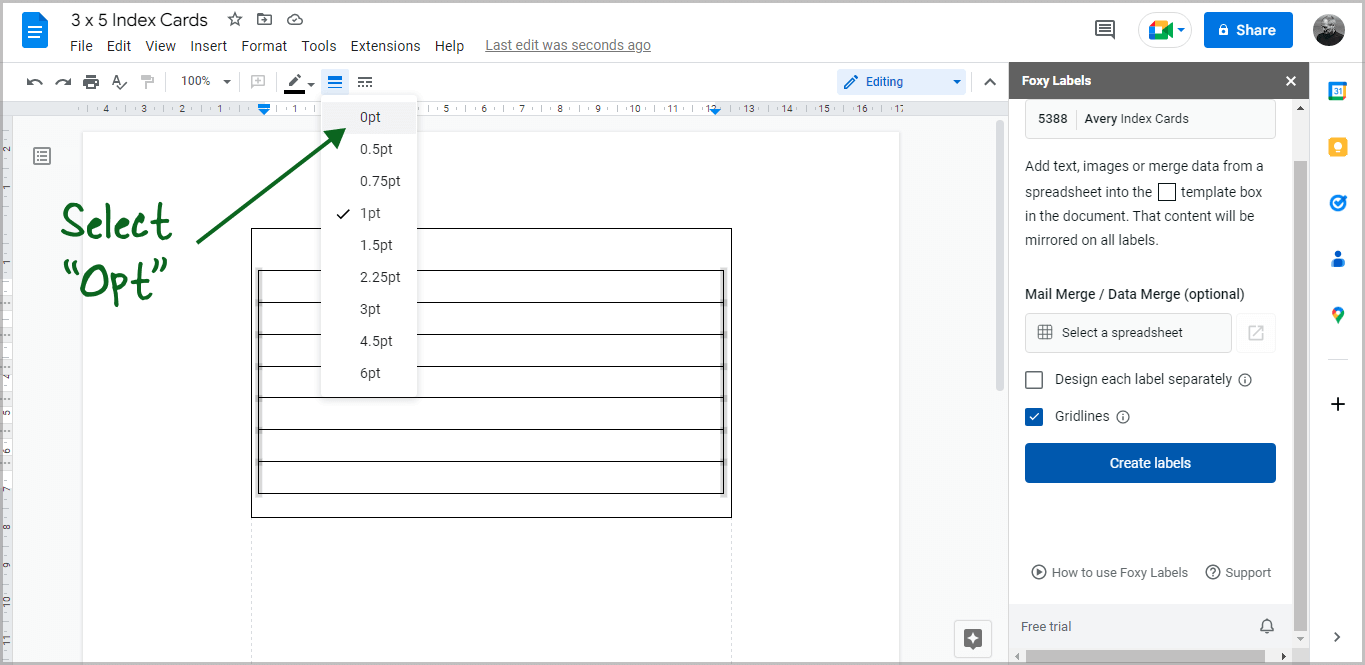
We’ll now remove the table borders so that the rows resemble lines. You can skip this step if you want to keep the borders.
We’ll just remove the left and right table borders.
To remove the borders, hold down the “Shift” key on your keyboard and manually select each row’s border.
Then, select “Border width” from the toolbar and choose “0pt” from the drop-down menu.
Step 5: Color the lines
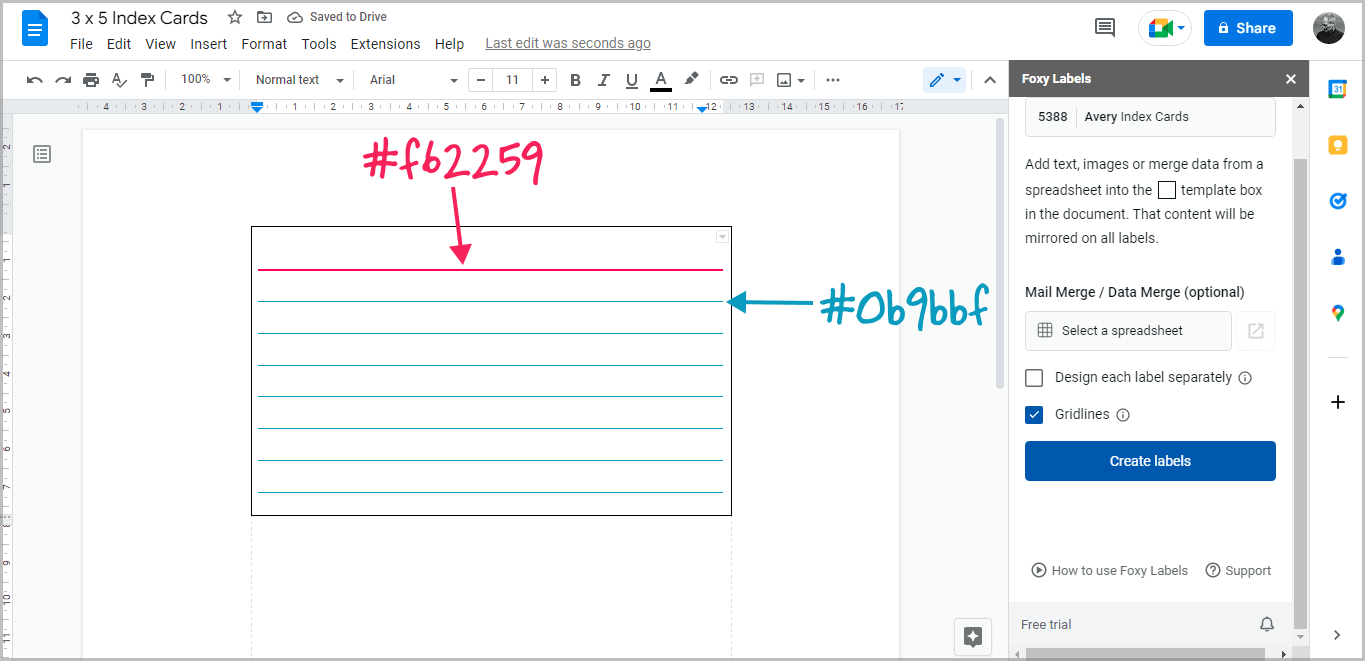
We’ll color the line in this step so that the index cards look like those sold online.
You may skip this step if you wish to print the index cards in black and white.
Select the first line, then click on “Border color” from the toolbar, then click on the “+” sign below the heading “CUSTOM” and enter the color code “#f62259”, then click on “Border width” and choose “1.5pt” from the drop-down menu.
Select the remaining lines by holding the “Shift” key and clicking on them. Apply the custom color “#0b9bbf” to the remaining lines to change their colors.
You might even select any color you like.
Finally, in the “Foxy Labels” box, click the “Create labels” button, then the “Open” button.
Step 6: Print the Index cards
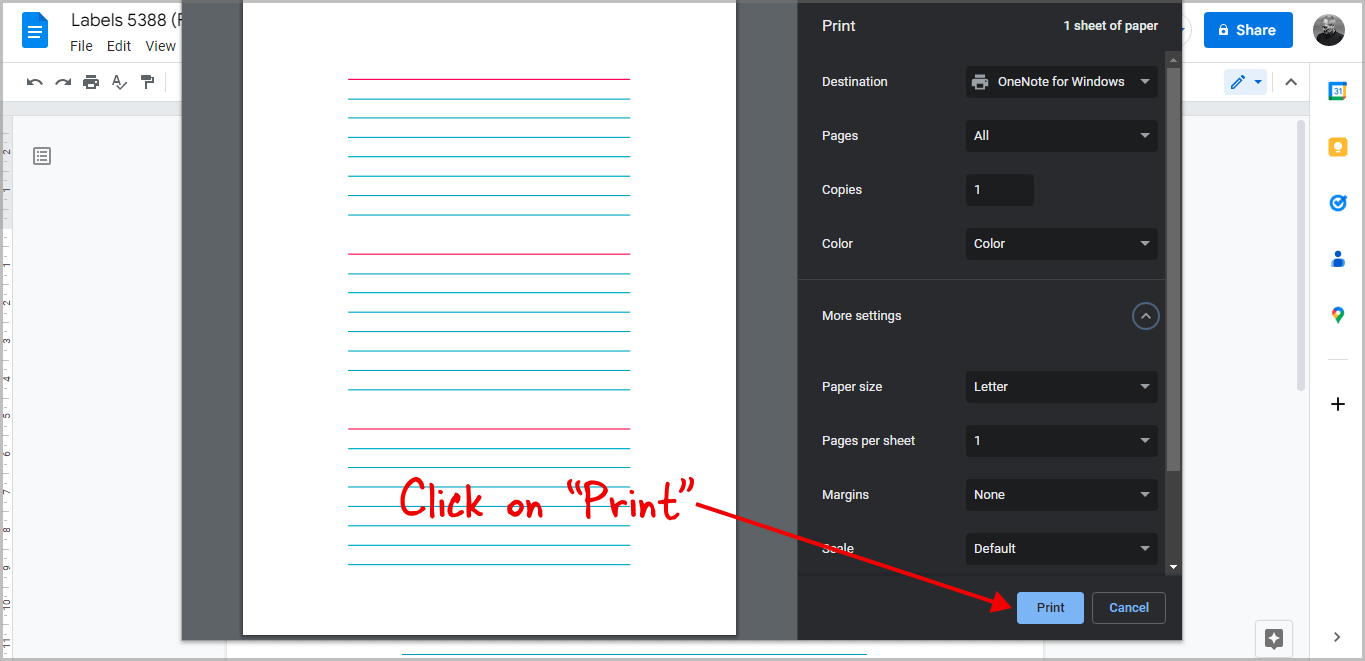
After the Index cards document opens in a new tab, press Ctrl+P, pick the “Letter” paper, and keep the margins “0”.
Finally, press the “Print” button to print your Index cards.
Index Card Template Google Docs
How to print the Index cards:
- Click on the template link
- Go to File > Make a copy
- Press Ctrl+P
- Select “Letter” paper
- Keep margins “0”
- Press “Print”
You can also download these templates in PDF format from here: https://drive.google.com/drive/folders/1sE6VhVGPYlHHocuDSGF4haMxnSinqHsm?usp=share_link
3×5 Index Card Template Google Docs


4×6 Index Card Template Google Docs

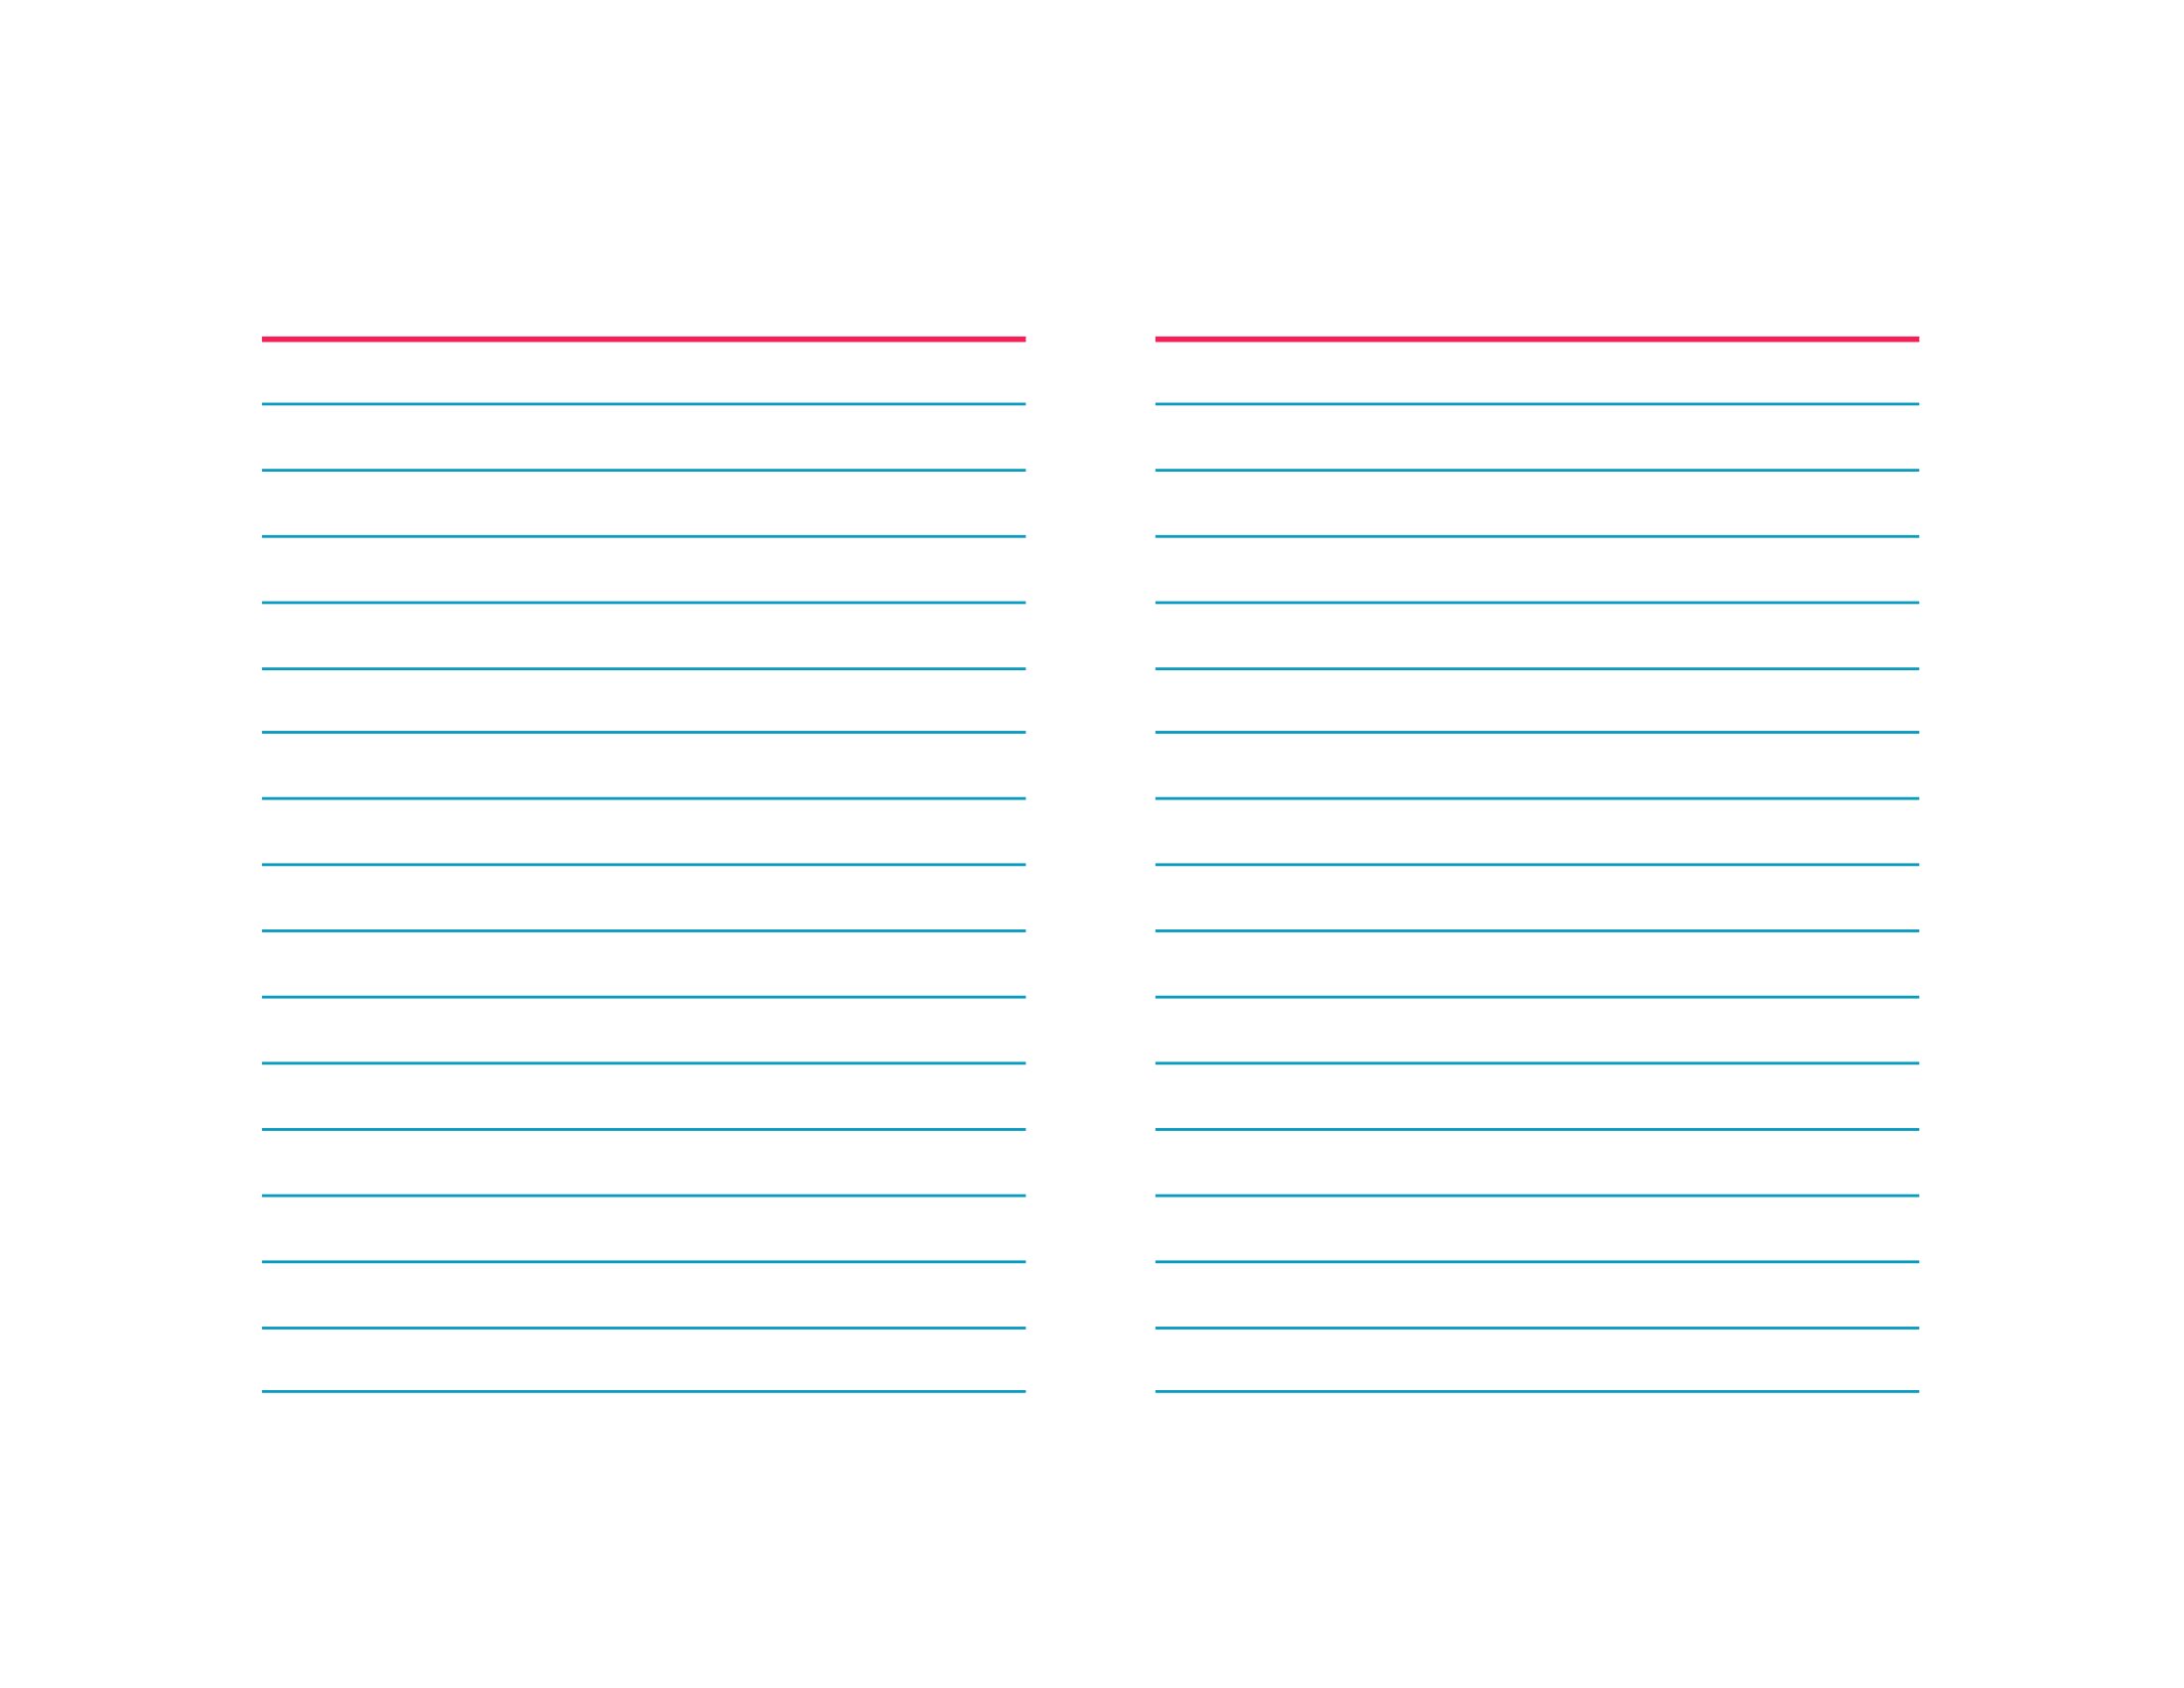
5×7 Index Card Template Google Docs

5×8 Index Card Template Google Docs
