Looking to use the Star Wars font in your Google Docs document?
Want to add a touch of galactic style?
No need to search any further!
In this article, we will show you how to use the famous Star Wars font in your Google Docs.
Get ready to make your documents truly out of this world!
Also read: (opens in new tab)
Harry Potter Fonts on Google Docs
Taylor Swift Speak Now Font
Reputation Font Google Docs
Best Bubble Letter Fonts on Google Docs
25 Spooky Fonts on Google Docs
Star Wars Font Google Docs
Google Docs does not offer a Star Wars font in its font library. However, you can use online Star Wars font generators to create the desired text. Once generated, you can then paste the text as an image into your document.
Here’s how to use the Star Wars font in your Google Docs document:
Step 1: Go to a Star Wars font generator website
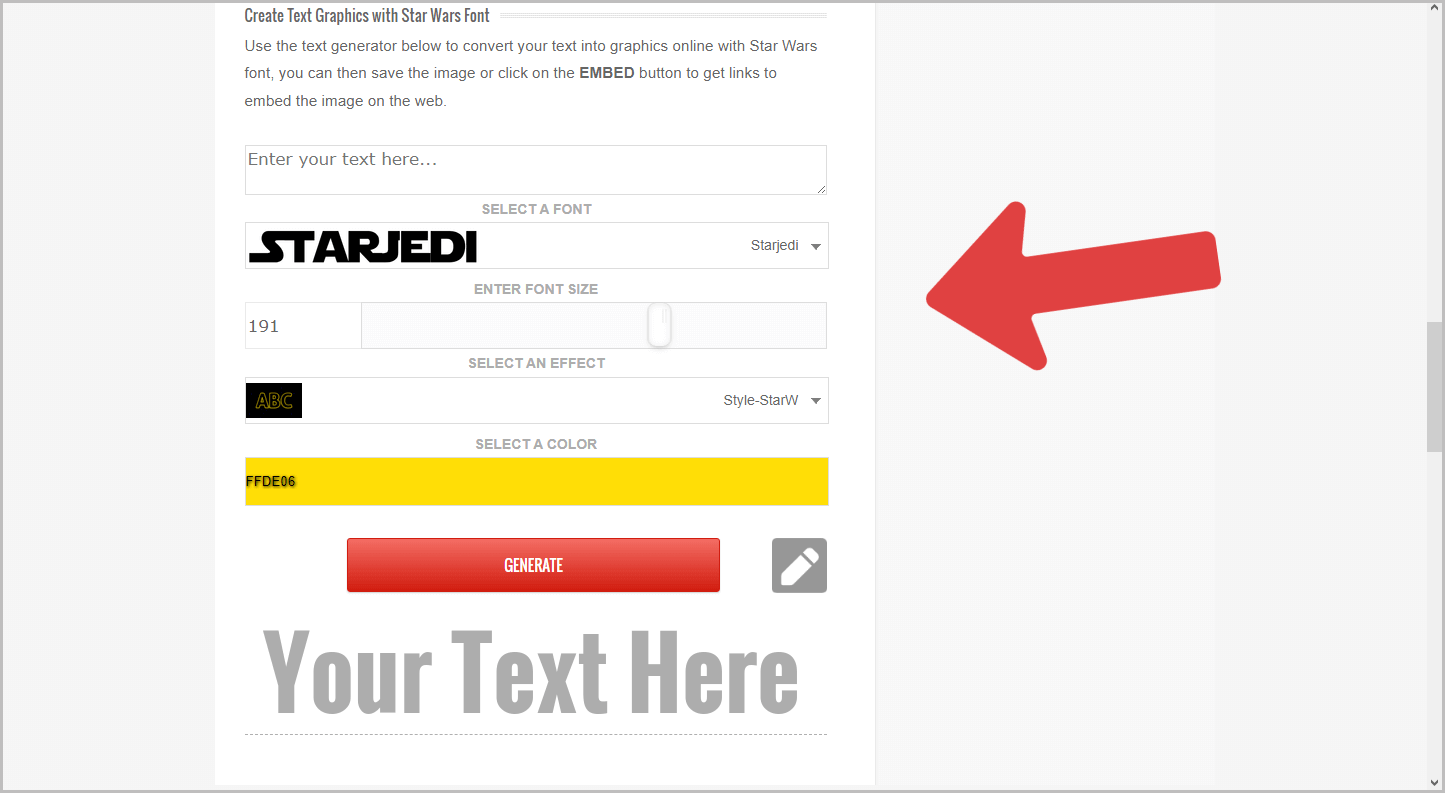
There are several online Star Wars font generators available for free. Here are some of the best ones:
- https://fontmeme.com/star-wars-font/
- https://www.fontspace.com/star-jedi-font-f9641
- https://www.font-generator.com/fonts/StarJedi/
- https://flamingtext.com/logo/Design-Star-Wars
- https://www.fontget.com/font/star-jedi/
Choose any of the tools listed above and proceed to the next step. Personally, I recommend using the first one.
Step 2: Enter your desired text and customize the font settings
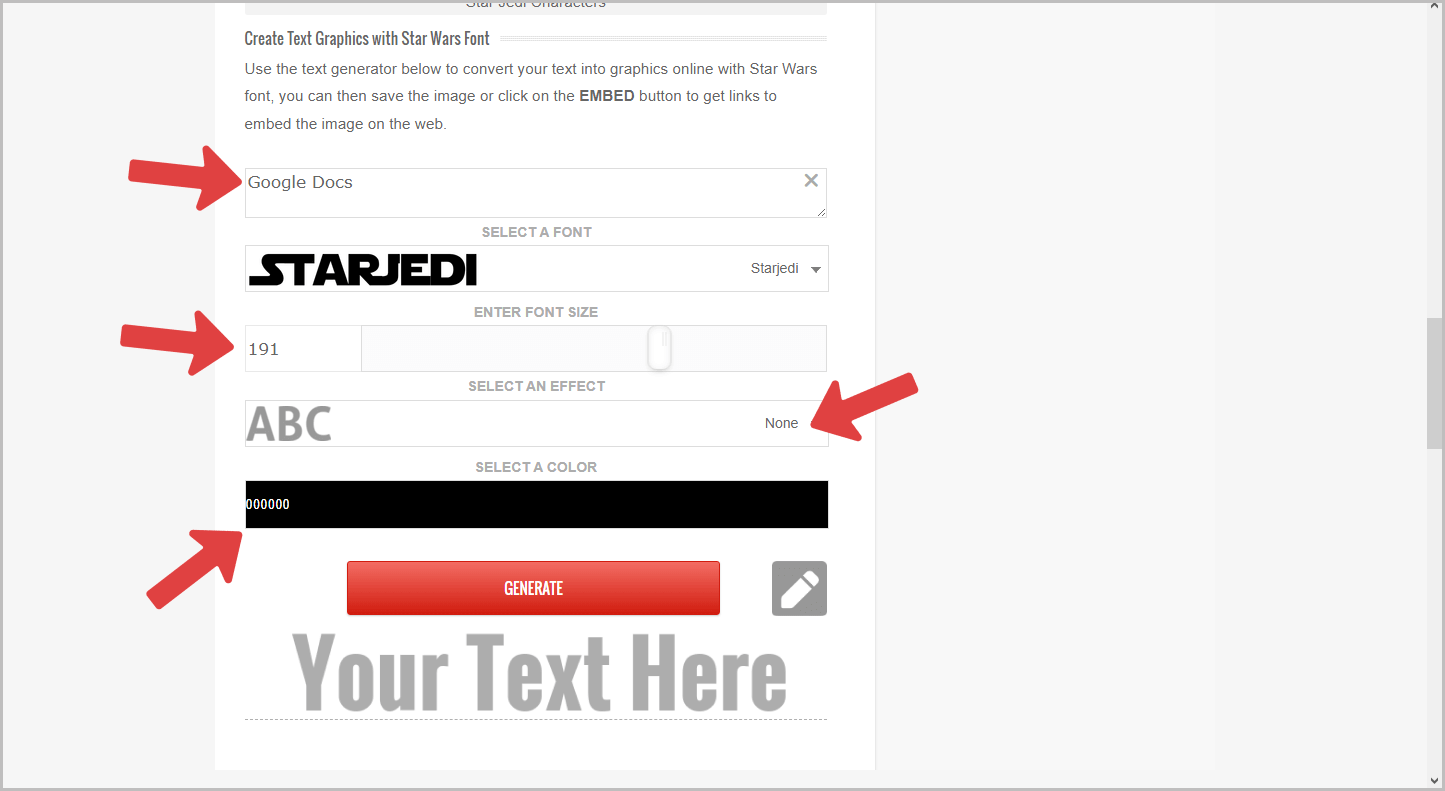
If you have selected the first option, scroll down to the middle of the page to view the generator.
Enter your text in the provided text box.
The StarJedi font is selected by default, so keep it as it is.
Next, choose a font size (it is fine to keep it as it is).
Now, select an effect. I chose “None” as I didn’t want any effect.
Finally, choose the text color of your preference. I chose black.
Step 3: Click “Generate”
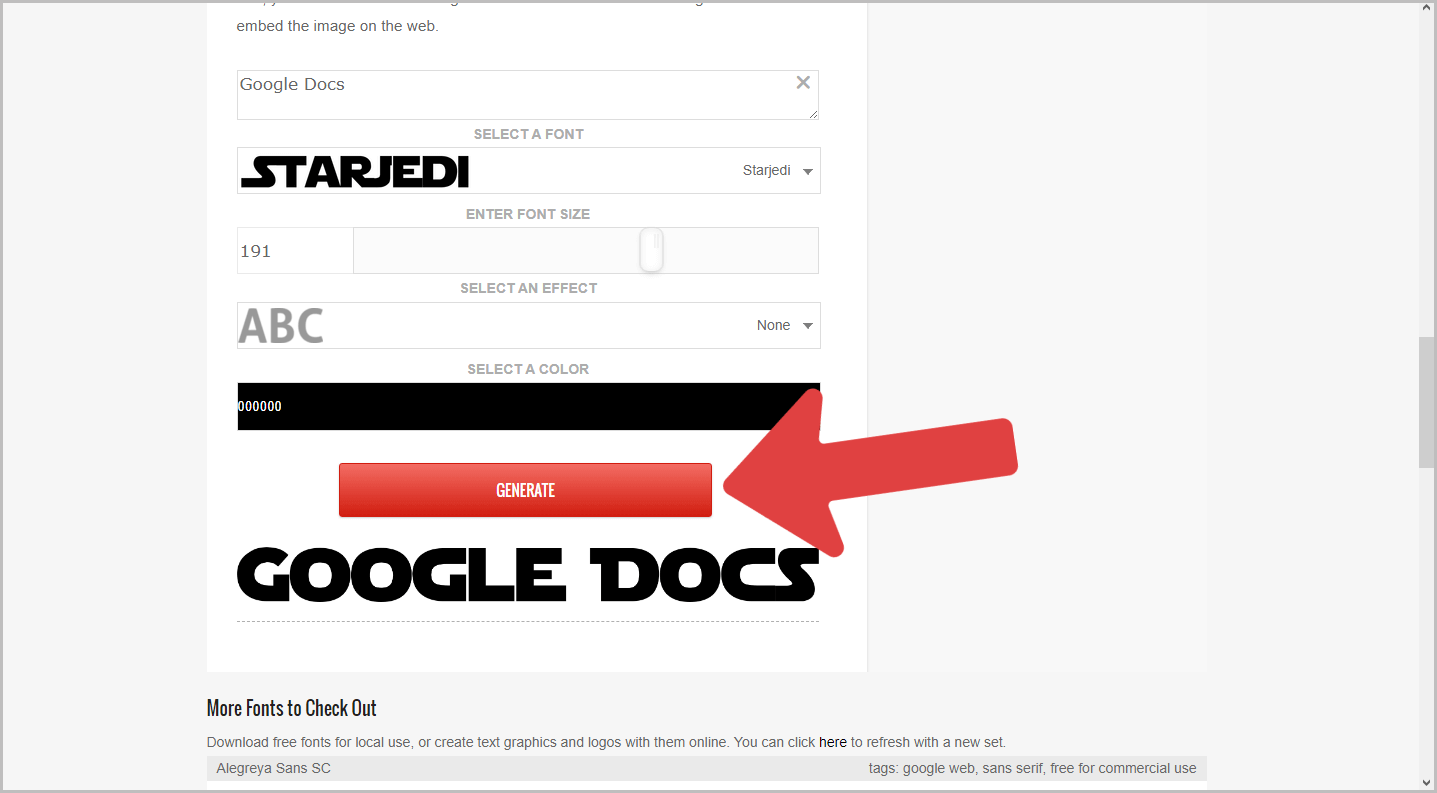
Click on the “Generate” button to generate the text.
The tool will create a font similar to Star Wars for the text you entered in the box and display it as an image.
Proceed to the next step.
Step 4: Right-click on the image and select “Copy image”
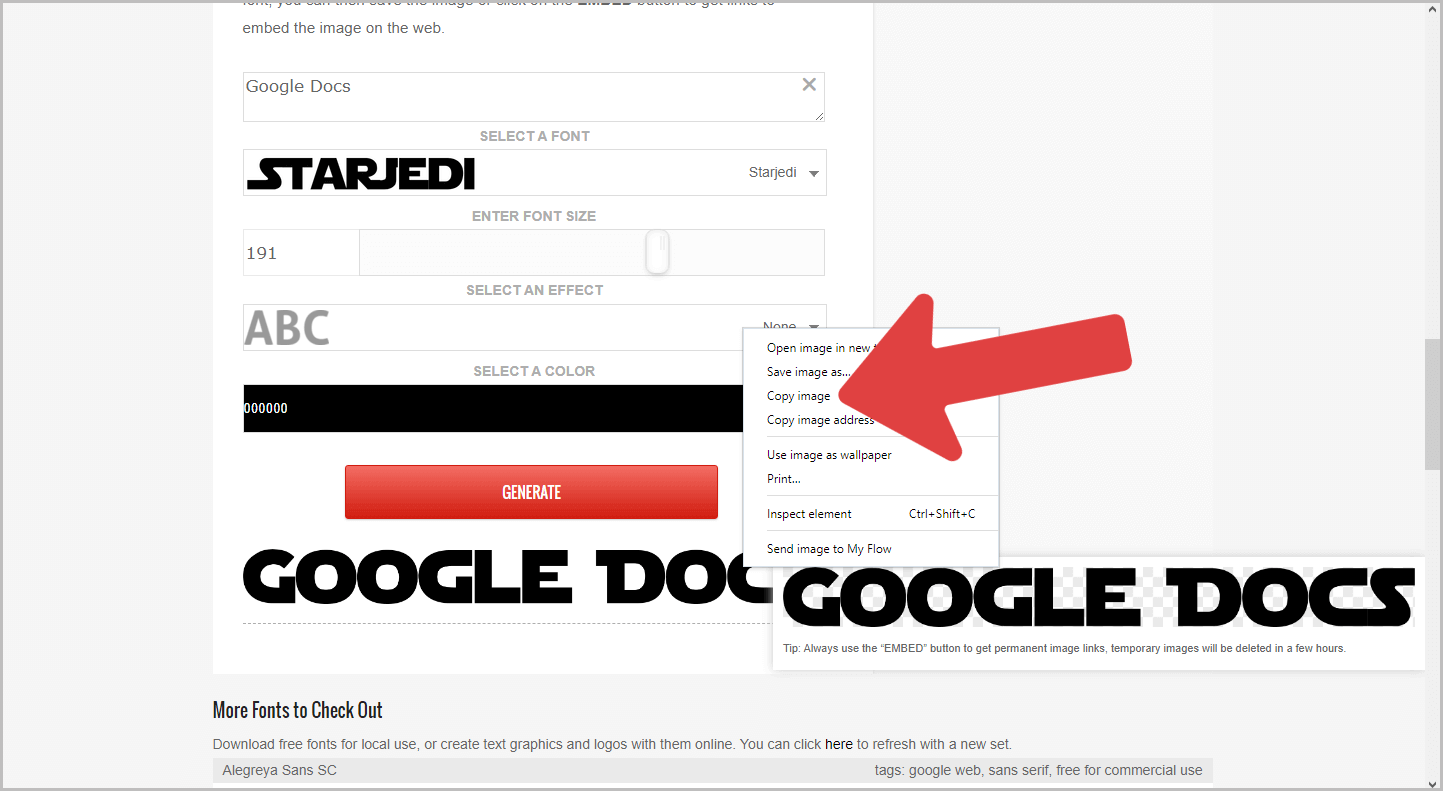
Once the image is generated, right-click on it and select “Copy image” to copy it to the clipboard.
Alternatively, you can choose to download the image.
Step 5: Open your Google Docs document and paste the image
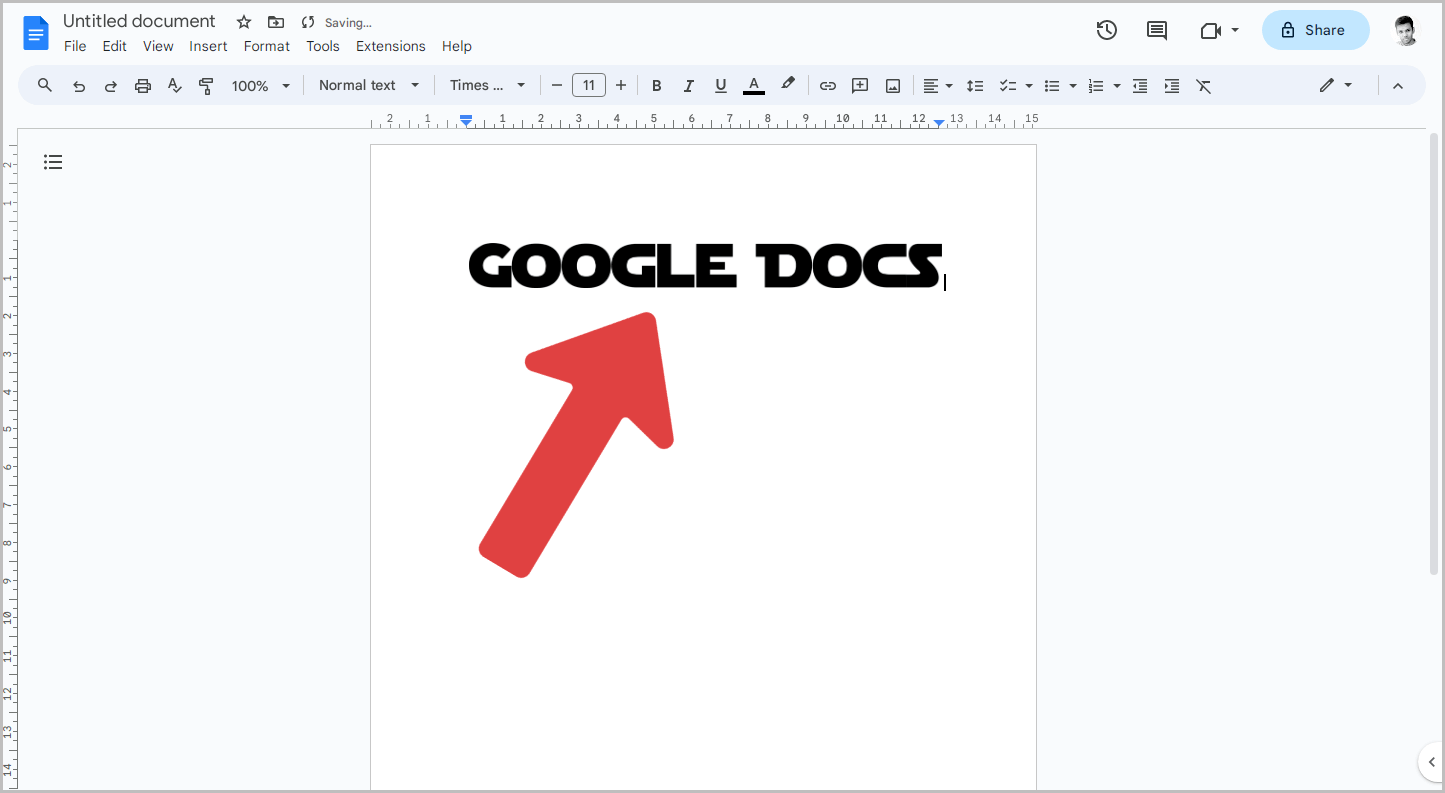
Now, open the Google Docs document where you want to enter the Star Wars font, and then press Ctrl+V (or Cmd+V on a Mac) to paste the image.
The image will be inserted into the document.
Now proceed to the next step.
Step 6: Click on the image and then select the “In front of text” wrap option
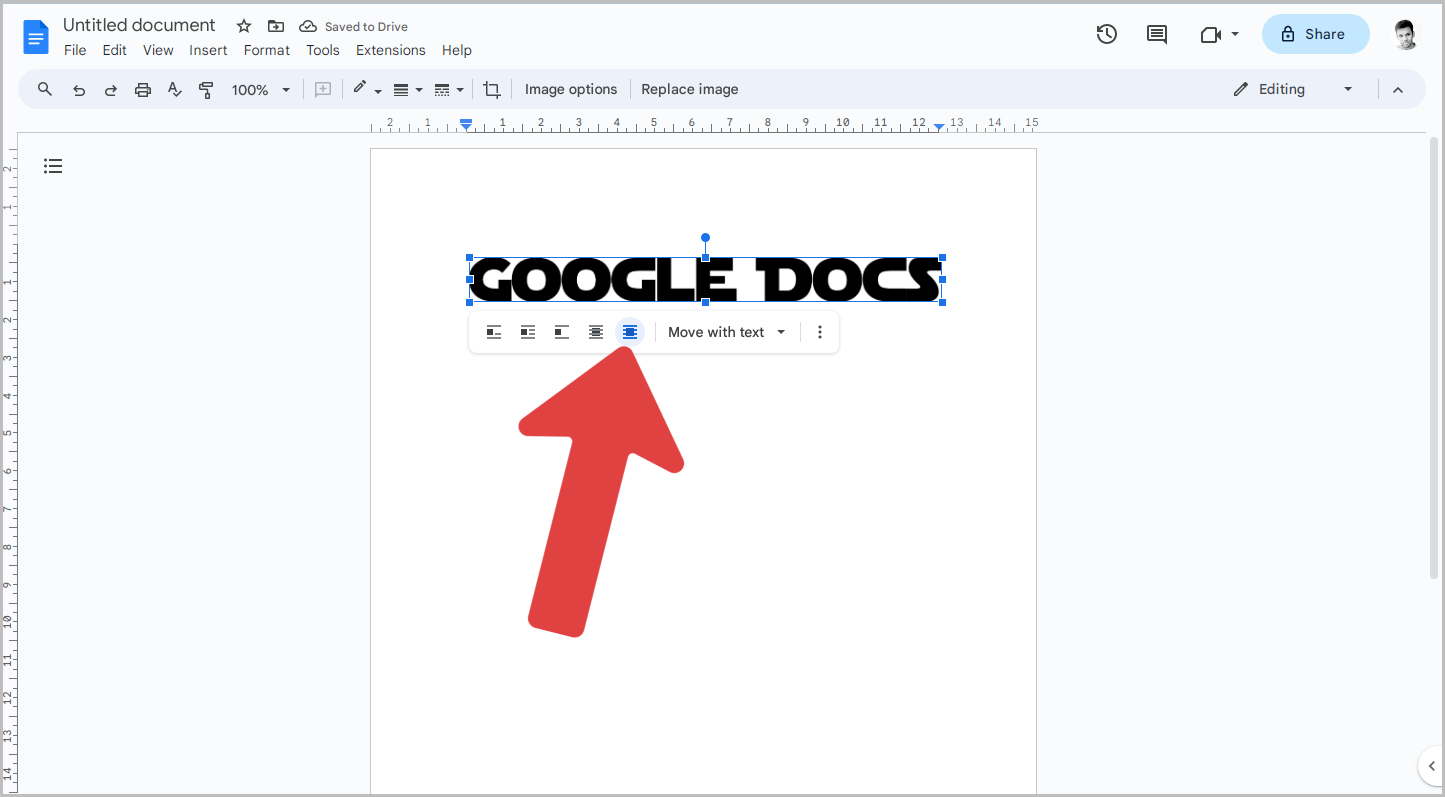
This step is crucial, so be sure not to skip it.
After inserting the image into the document, you may need to reposition it to your desired location.
However, this can be difficult with the current settings.
To resolve this issue, click on the image and choose the “In front of text” wrap option from the image panel (refer to the screenshot above).
Now proceed to the next step.
Step 7: Position and resize the image as desired
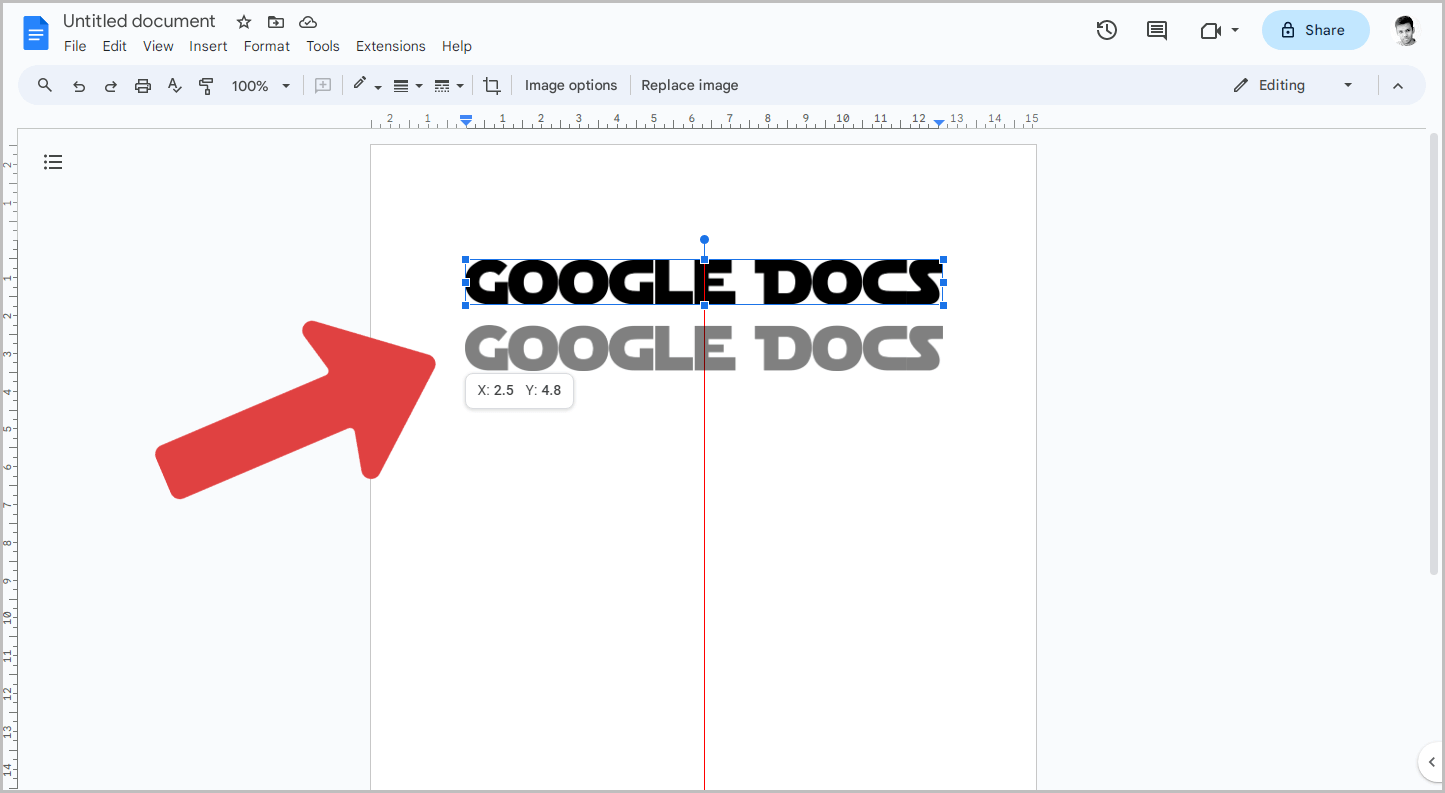
Now you can freely move the image around the document.
Make sure to resize the image while pressing and holding the Ctrl button on your keyboard to maintain its aspect ratio.
FAQs
How to get Star Wars font on Google Docs?
The Star Wars font is not available on Google Docs. However, you can use a Star Wars font generator tool to create an image of the font, and then insert it into your document.
What is the Star Wars font called on Google Docs?
The Star Wars font is called Star Jedi, but it is not available on Google Docs.
What is the Star Wars font called on Google Slides?
The Star Wars font is called Star Jedi, but it is not available on Google Slides.
Summary
While Google Docs doesn’t offer a Star Wars font in its library, you can use online Star Wars font generators to create the desired text.
Here are the steps to follow:
- Go to a Star Wars font generator website, such as FontMeme or FontSpace.
- Enter your desired text and customize the font settings, including font size, effect, and text color.
- Click “Generate” to create the Star Wars font text as an image.
- Right-click on the image and select “Copy image” to copy it to the clipboard.
- Open your Google Docs document and paste the image (Ctrl+V or Cmd+V) to insert it.
- Click on the image and select the “In front of text” wrap option for better positioning.
- Position and resize the image as desired while maintaining its aspect ratio.

