Who can resist the charm of those store-bought slice-and-bake cookies that come in a tube, with adorable holiday shapes in the middle?
These cookies are not just delicious but also bring a sense of nostalgia and fun to any baking session.
But what if you could make them at home, from scratch, with even more love and care?
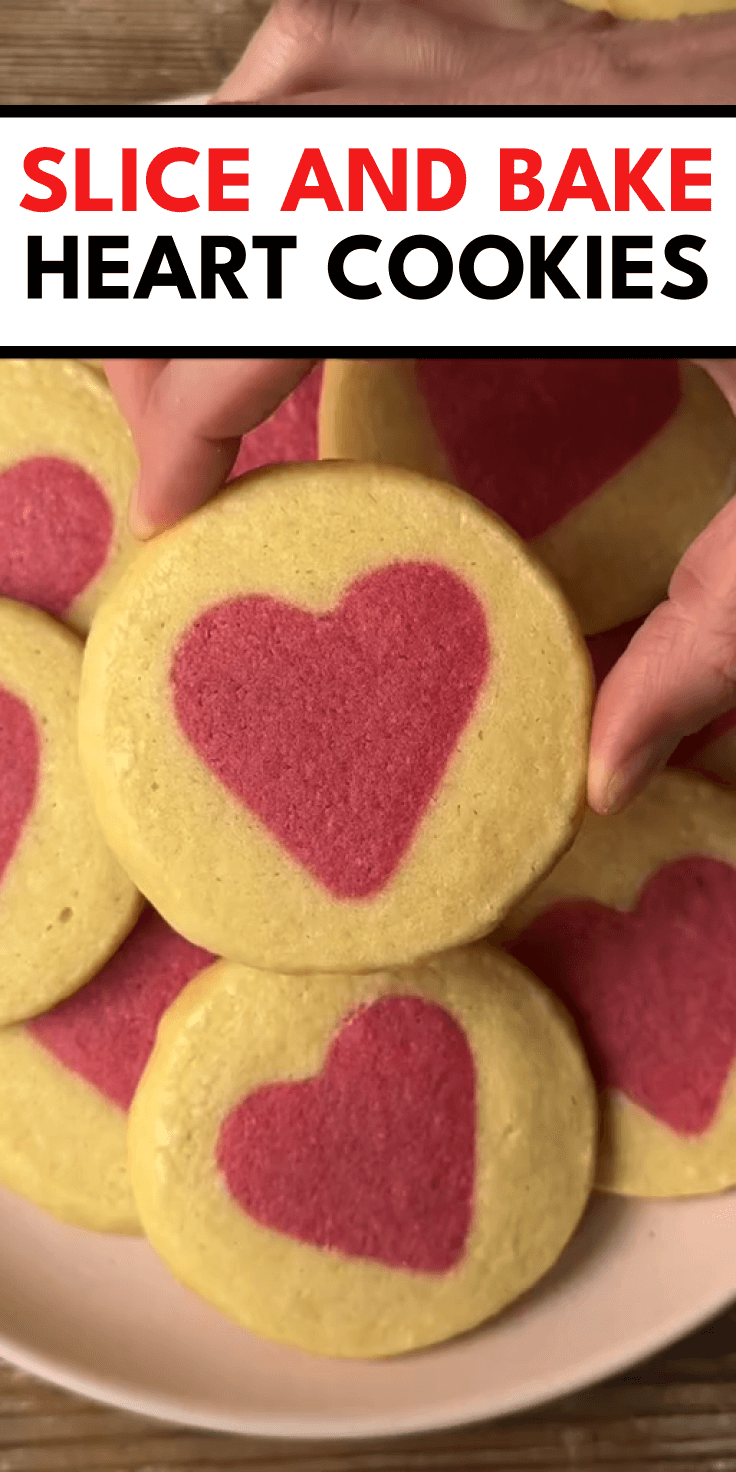
Enter the DIY Slice and Bake Heart Cookies!
Perfect for Valentine’s Day or any time you want to spread a little extra love, these cookies are as delightful to make as they are to eat.
Plus, you’ll know exactly what ingredients are going into them, making them a healthier and more wholesome choice.
Ingredients
- 3/4 cup unsalted butter, softened to room temperature
- 1 cup granulated sugar
- 1 teaspoon vanilla extract
- 2 large eggs
- 2 1/2 cups all-purpose flour (spooned and leveled)
- 1 teaspoon baking powder
- 1/2 teaspoon salt
- Red or pink food coloring (we use natural food coloring – linked on our Amazon page)
Steps
1. Cream the Butter and Sugar
Add butter, sugar, and vanilla to a large mixing bowl.
Beat at medium speed until light and fluffy, about 3 minutes.
This step is crucial as it incorporates air into the mixture, giving your cookies a tender texture.
2. Incorporate the Eggs
Add in eggs one at a time, mixing just until combined.
Be careful not to overmix, as this can result in tougher cookies.
The eggs should be fully integrated into the butter and sugar mixture before moving on to the next step.
3. Combine the Dry Ingredients
In a separate bowl, whisk together the flour, baking powder, and salt.
This ensures that the baking powder and salt are evenly distributed throughout the flour, which helps the cookies rise evenly.
4. Mix the Dough
Add the dry ingredients to the wet ingredients in 3-4 batches, until the dough comes together.
Mixing in batches helps prevent overmixing and ensures a smoother dough.
5. Color the Dough
Remove about 1/2-2/3 of the dough and set it aside.
Add several drops of food coloring to the remaining dough and mix until combined.
Add more food coloring to reach the desired hue.
Using natural food coloring is a great option if you prefer to avoid artificial dyes.
6. Shape the Hearts
Place the pink dough in the freezer for 5 minutes, then roll it out into a rectangle about 1/2-inch thick on a lightly floured surface.
Returning it to the freezer for 15-20 minutes will make it much easier to cut out the hearts without ruining their shape.
7. Cut Out the Hearts
Use a small heart cookie cutter to cut out hearts.
Dip a finger in a little bit of water and lightly rub on the floured side of the cookie before adhering another heart.
This helps them stick together, but don’t overdo the water; you only need a tiny amount.
Repeat with all hearts until you have a log about 10 inches long.
8. Freeze the Heart Log
Return the log to the freezer for about 30 minutes, or until frozen solid.
This step ensures that the hearts hold their shape when you wrap the plain dough around them.
9. Wrap with Plain Dough
Remove the log from the freezer and press the plain cookie dough directly onto and around the hearts.
Make sure to really press it in so you don’t end up with any gaps. Roll into a smooth log.
This part might require a bit of patience, but it’s worth it for the final look!
10. Chill the Dough
Wrap in plastic wrap and chill for at least 30 minutes.
Chilling the dough again helps it firm up, making it easier to slice without distorting the shapes.
11. Preheat the Oven
Preheat oven to 350˚F and line 2 baking sheets with parchment paper.
Parchment paper prevents the cookies from sticking and ensures even baking.
12. Slice and Bake
When you’re ready to bake, slice the dough into 1/4-inch rounds, then space them 2 inches apart on the baking sheets.
Bake for about 12 minutes, or until the bottoms are light golden brown.
This gives the cookies a perfect crisp edge while keeping the center soft.
13. Cool and Enjoy
Remove from the oven and let cool.
These cookies are best enjoyed fresh, but they also store well in an airtight container for several days.
Tips and Tricks
- Freezing the dough at various stages is essential to maintain the integrity of the heart shapes. Don’t skip these steps!
- If your dough becomes too soft while working, return it to the freezer for a few minutes. This will make it easier to handle.
- Experiment with different colors and shapes for various holidays or occasions. Once you master the basic technique, the possibilities are endless.
Conclusion
Making your own slice-and-bake cookies at home is a rewarding experience that combines creativity with deliciousness.
These DIY Slice and Bake Heart Cookies not only taste amazing but also make a heartfelt gift for loved ones.
With their charming appearance and delightful flavor, they are sure to become a favorite in your baking repertoire.
Happy baking!