In this article, we will list the top 5 3D fonts available on Google Docs.
Additionally, we will explain how you can create your own 3D text using free online tools and embed it in your document to add even more 3D fonts.
Let’s get started!
Also read (opens in new tab):
27 Best Romantic Fonts on Google Docs
Sad Fonts on Google Docs
Best Bubble Letter Fonts on Google Docs
25 Spooky Fonts on Google Docs
Pretty Fonts on Google Docs
3D Fonts on Google Docs
Don’t know how to add these fonts in Google Docs?
Read this guide: How to Add Fonts to Google Docs
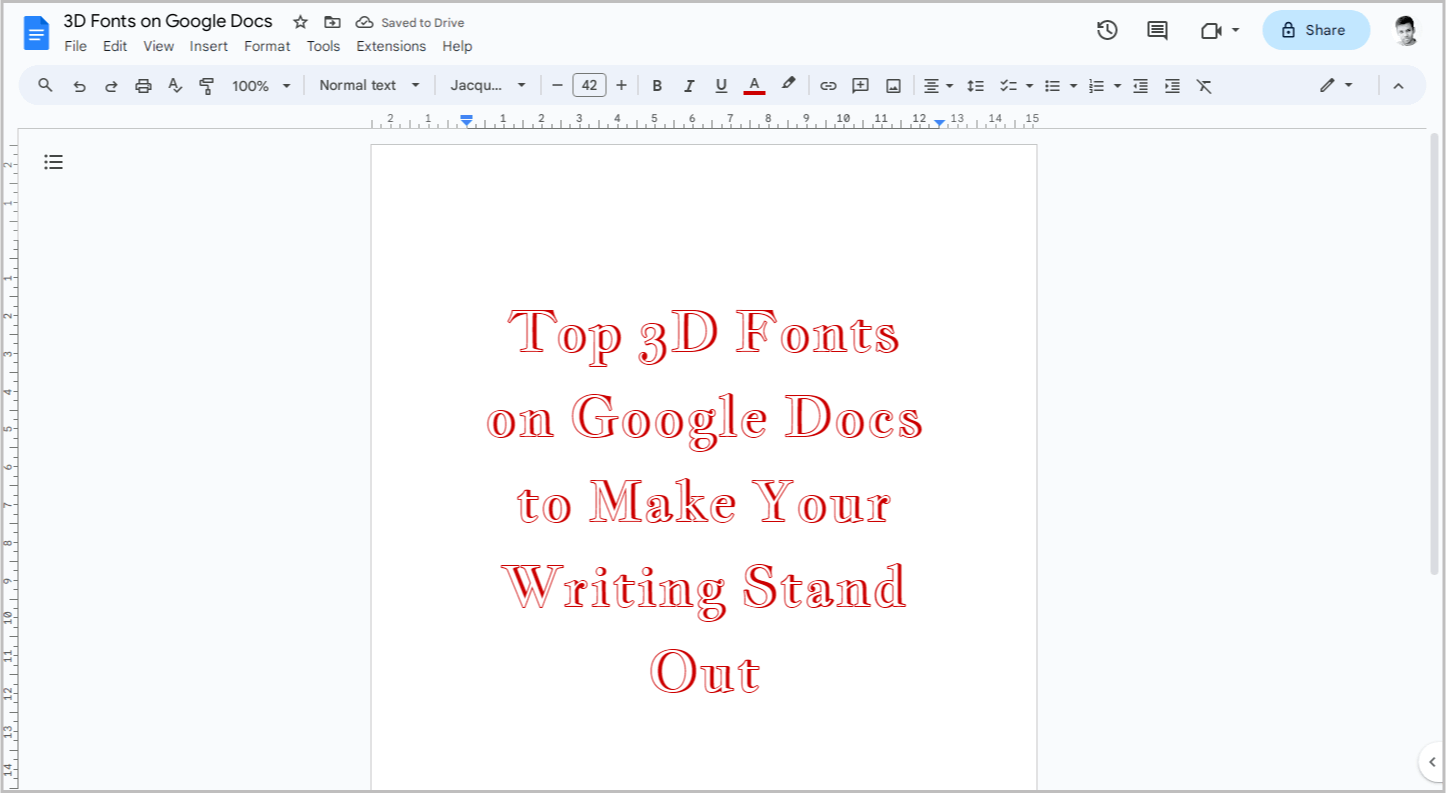
1. Jacques Francois Shadow
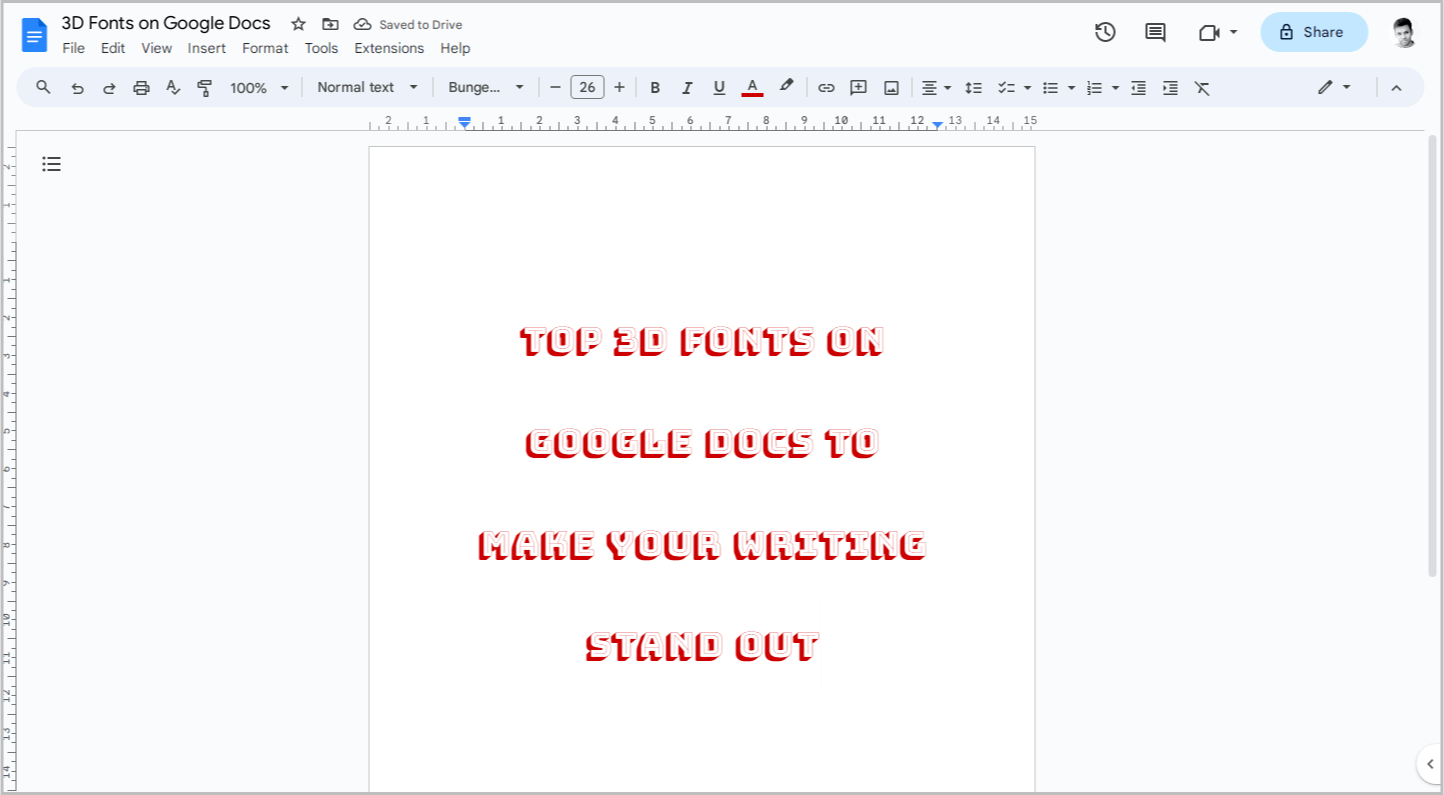
2. Bungee Shade
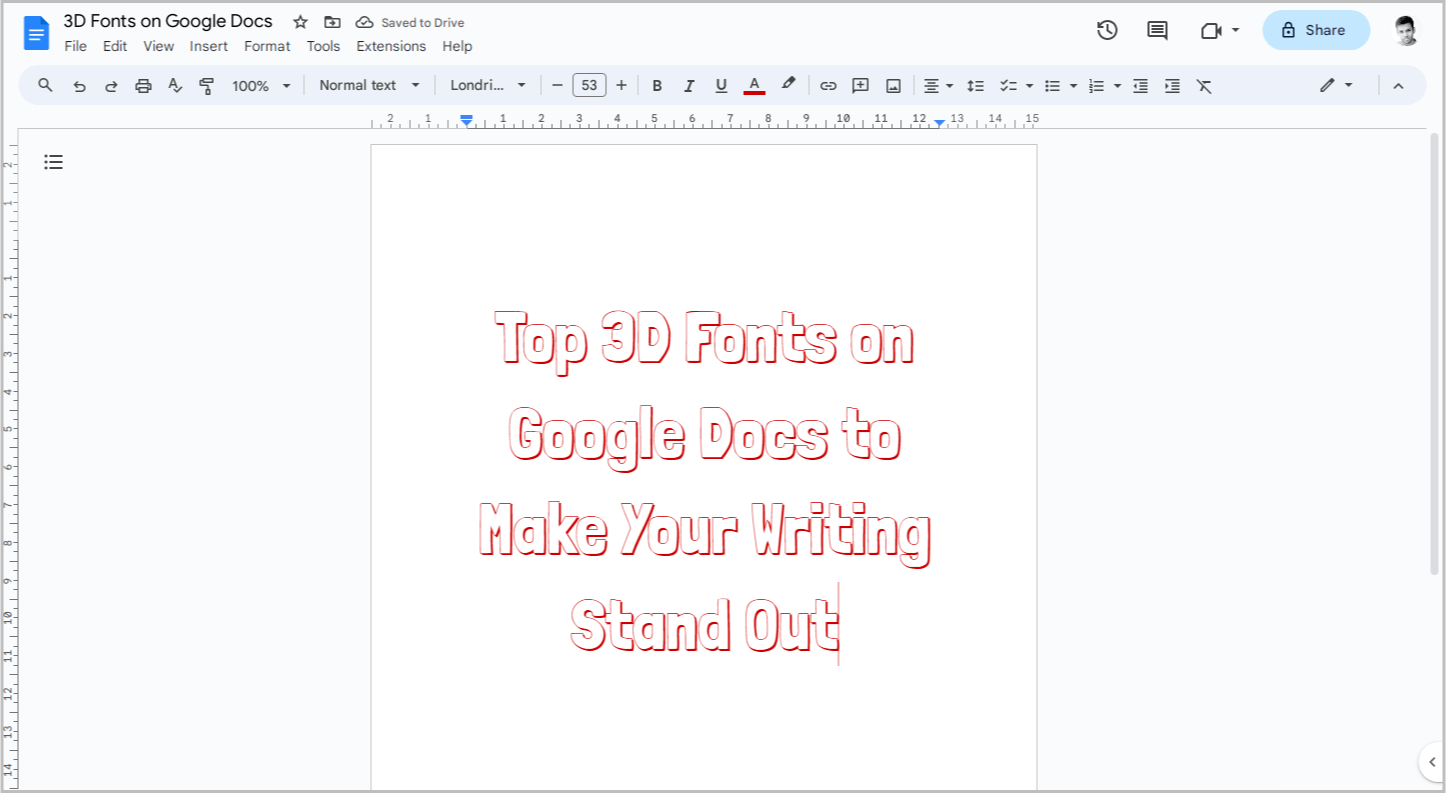
3. Londrina Shadow
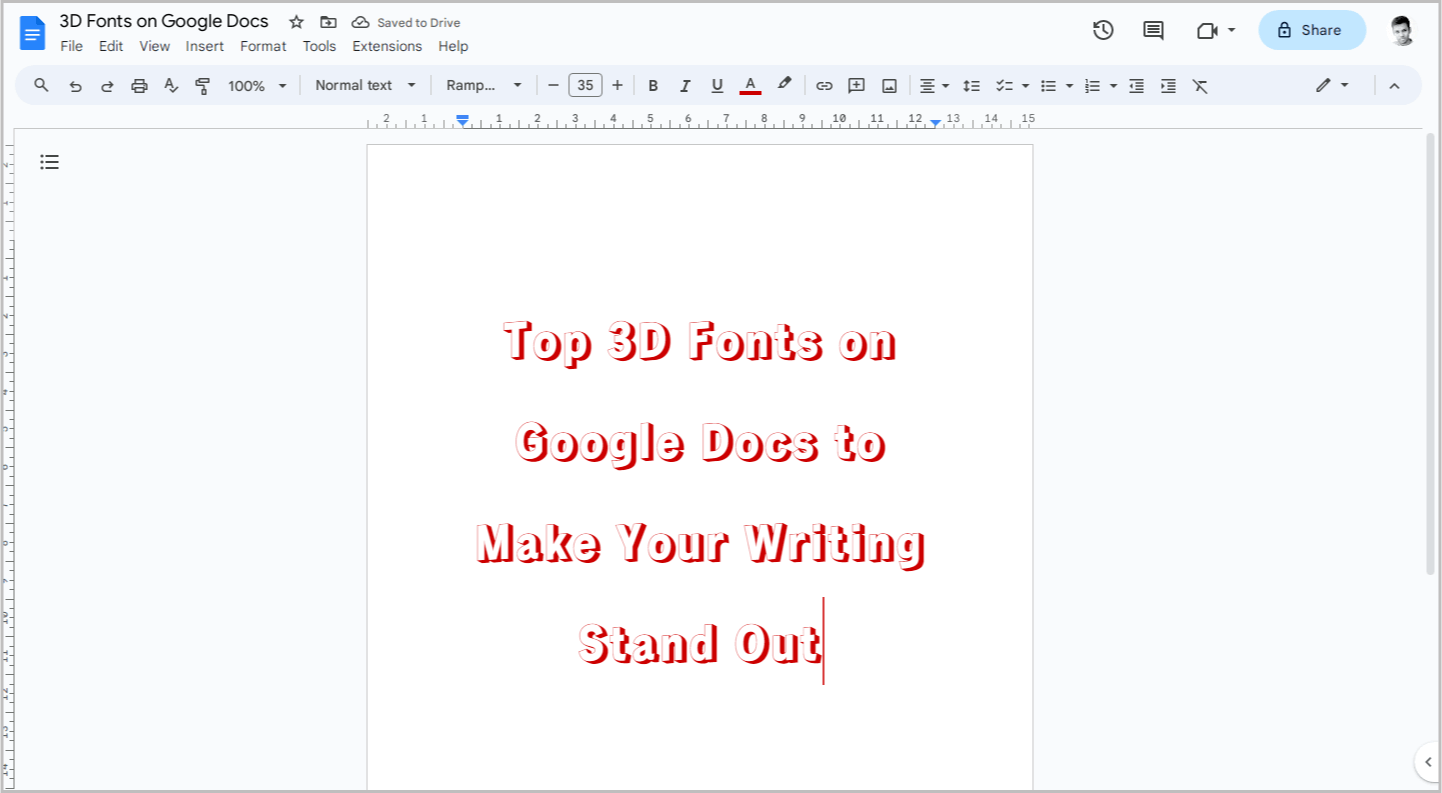
4. Rampart One
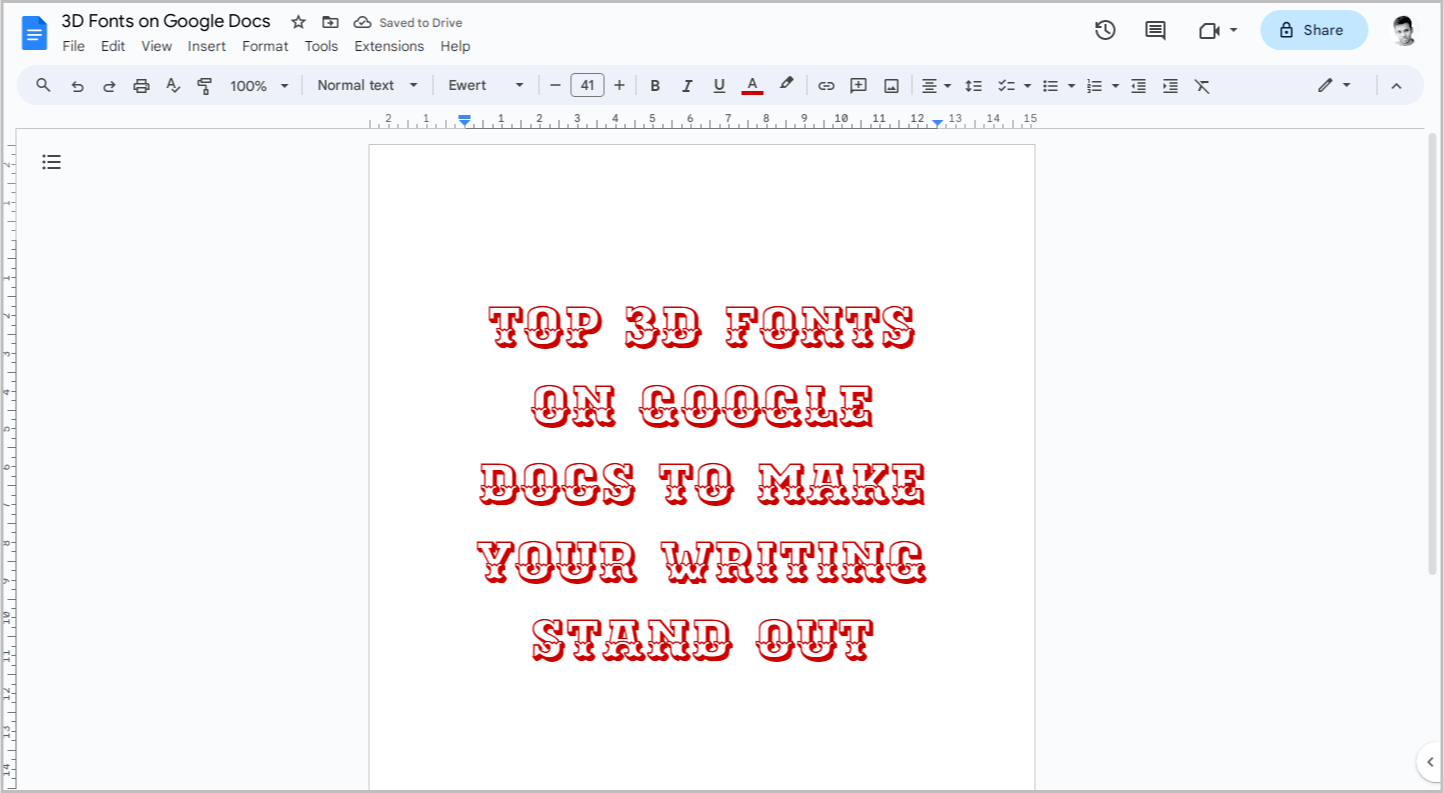
5. Ewert
How to Add More 3D Text to Your Google Docs Document
Google Docs offers a limited selection of 3D fonts.
We’ve listed the top 5 options above.
However, if you don’t find one that suits your needs, you can easily create your own 3D text using free online tools.
Step 1: Choose an Online 3D Font Generator
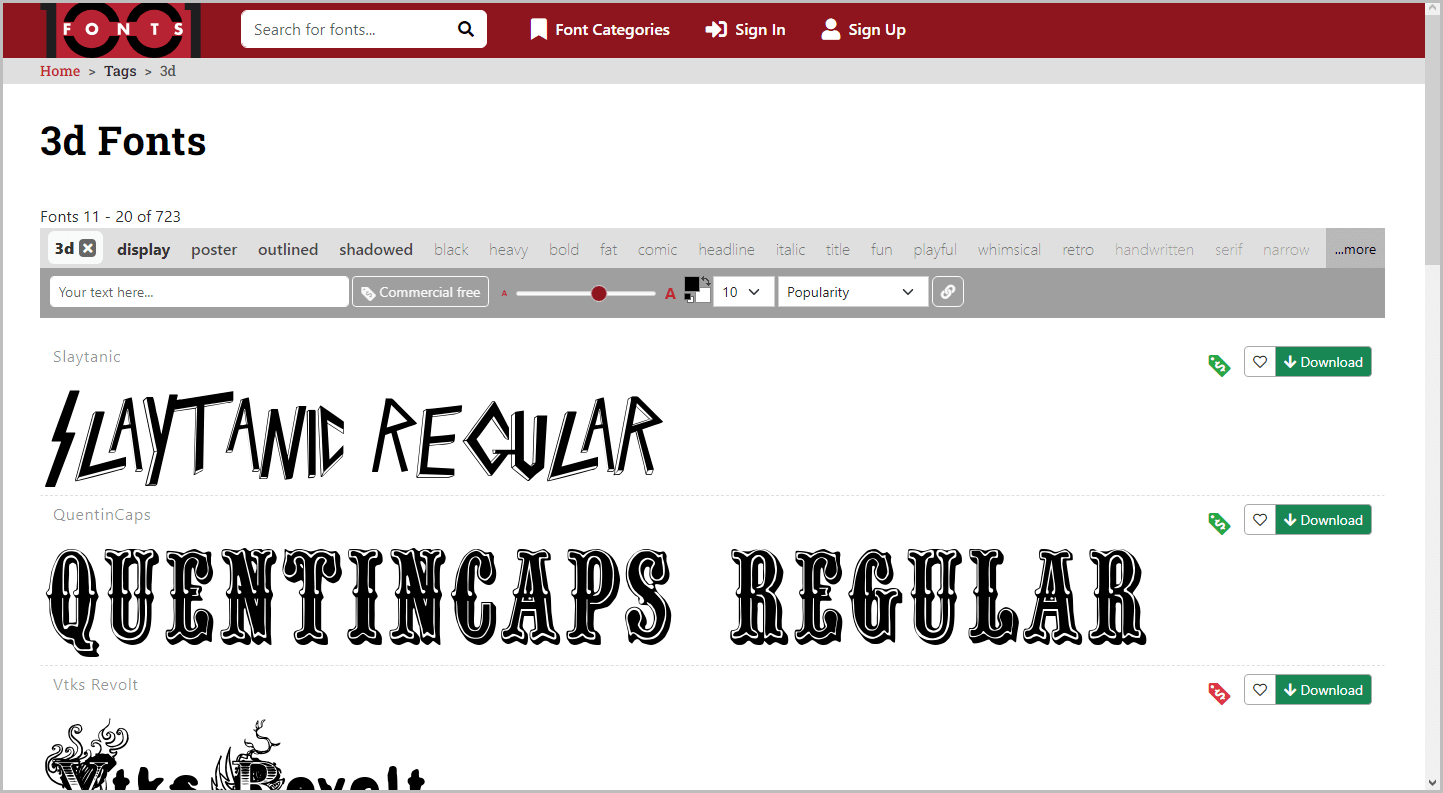
The first step is to select an online 3D font generator.
There are numerous tools available online, each offering a variety of features and fonts.
One popular option is 1001 Fonts, which provides a comprehensive collection of 3D fonts. You can access this tool here: https://www.1001fonts.com/3d-fonts.html
Alternatively, you can explore other available tools by searching for “online 3D font generator” on Google.
This will provide you with a wide range of options to choose from.
Step 2: Enter your text
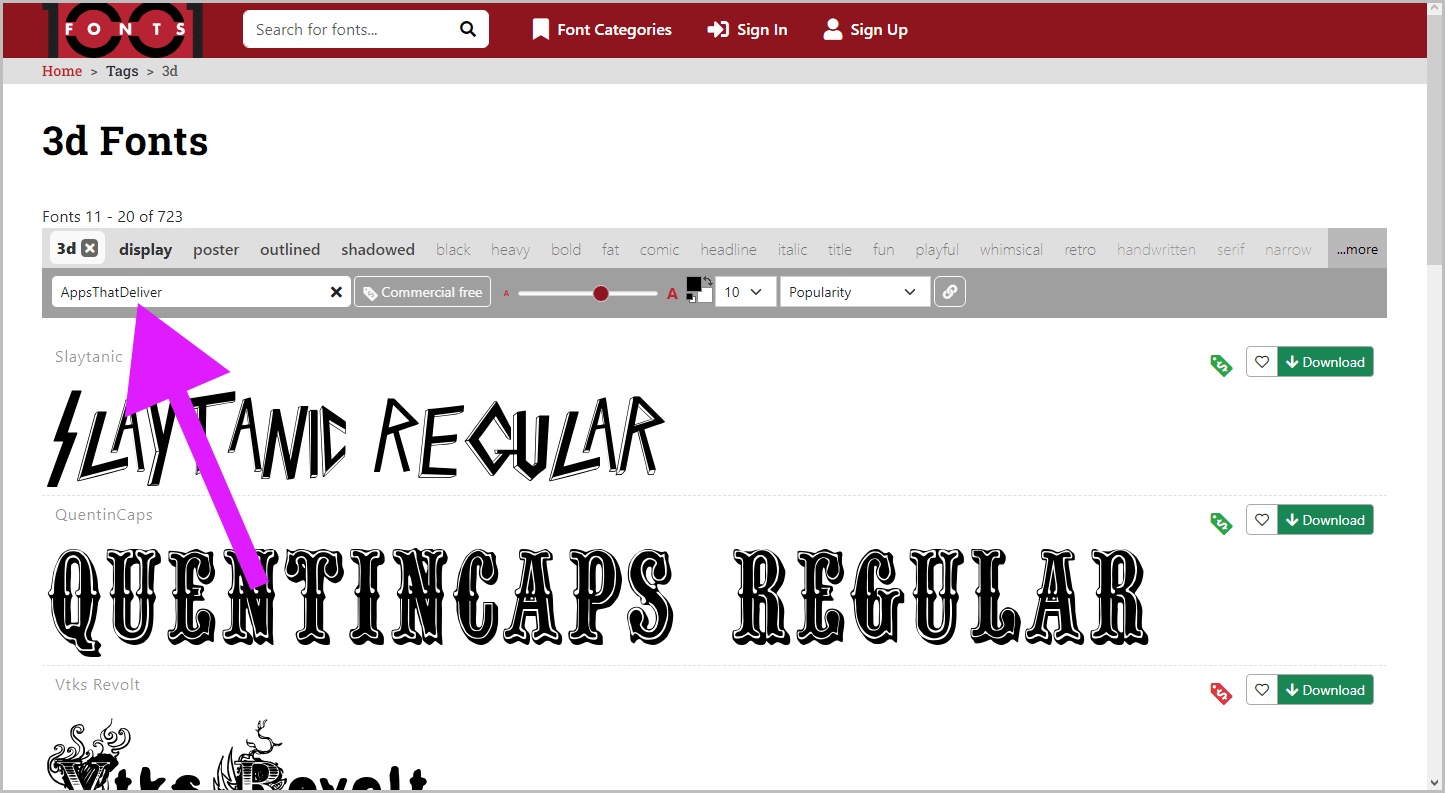
Now, click inside the “Your text here…” box and enter your desired text.
Step 3: Adjust the font size
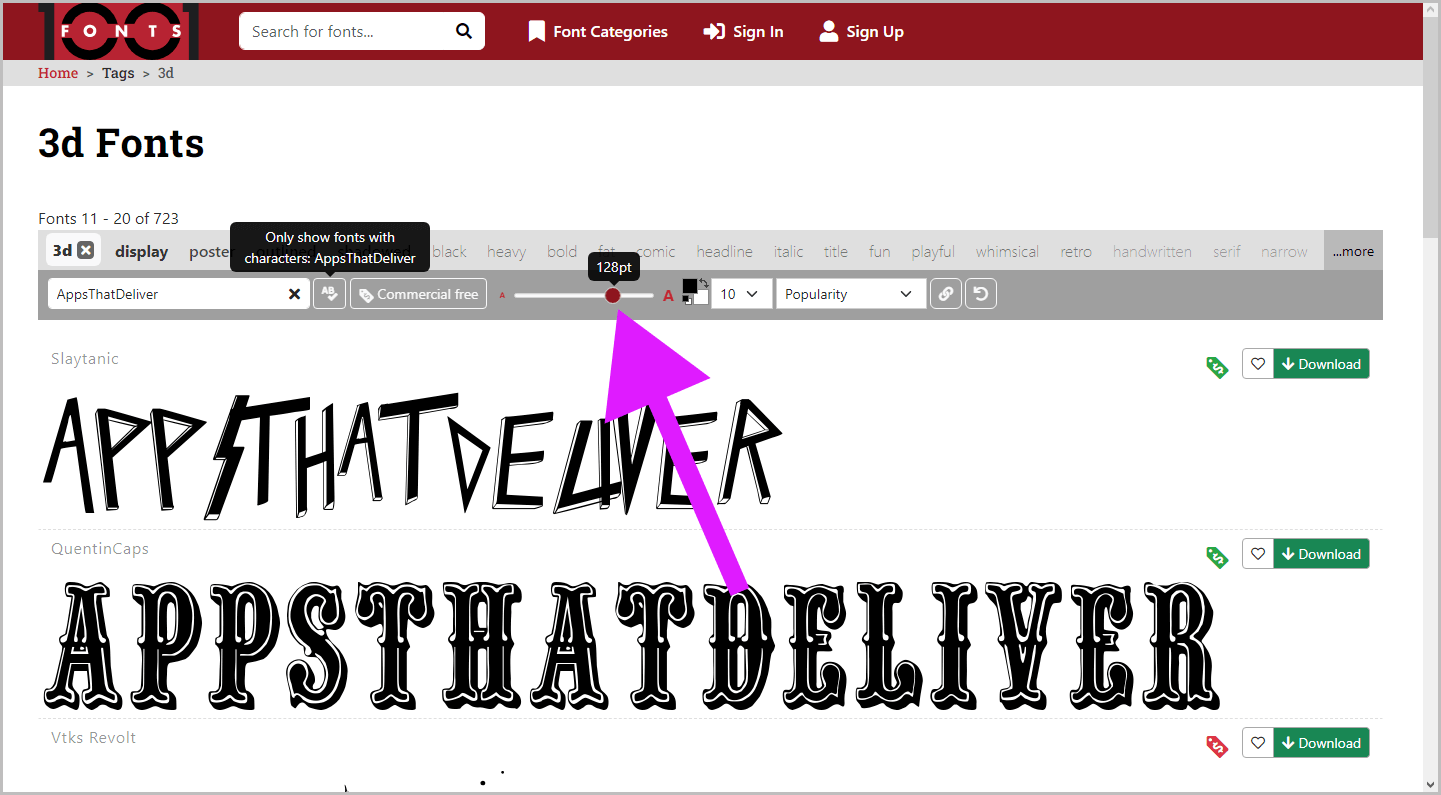
To adjust the font size, simply drag the slider.
Dragging the slider to the left will decrease the font size, while dragging it to the right will increase the font size.
For now, you can leave the font size as it is, as you can easily adjust it later in your Google Docs document.
The goal at this stage is to get a general idea of how the font will look in 3D.
Once you’re satisfied with the initial font size, you can proceed to the next step.
Step 4: Choose your font color
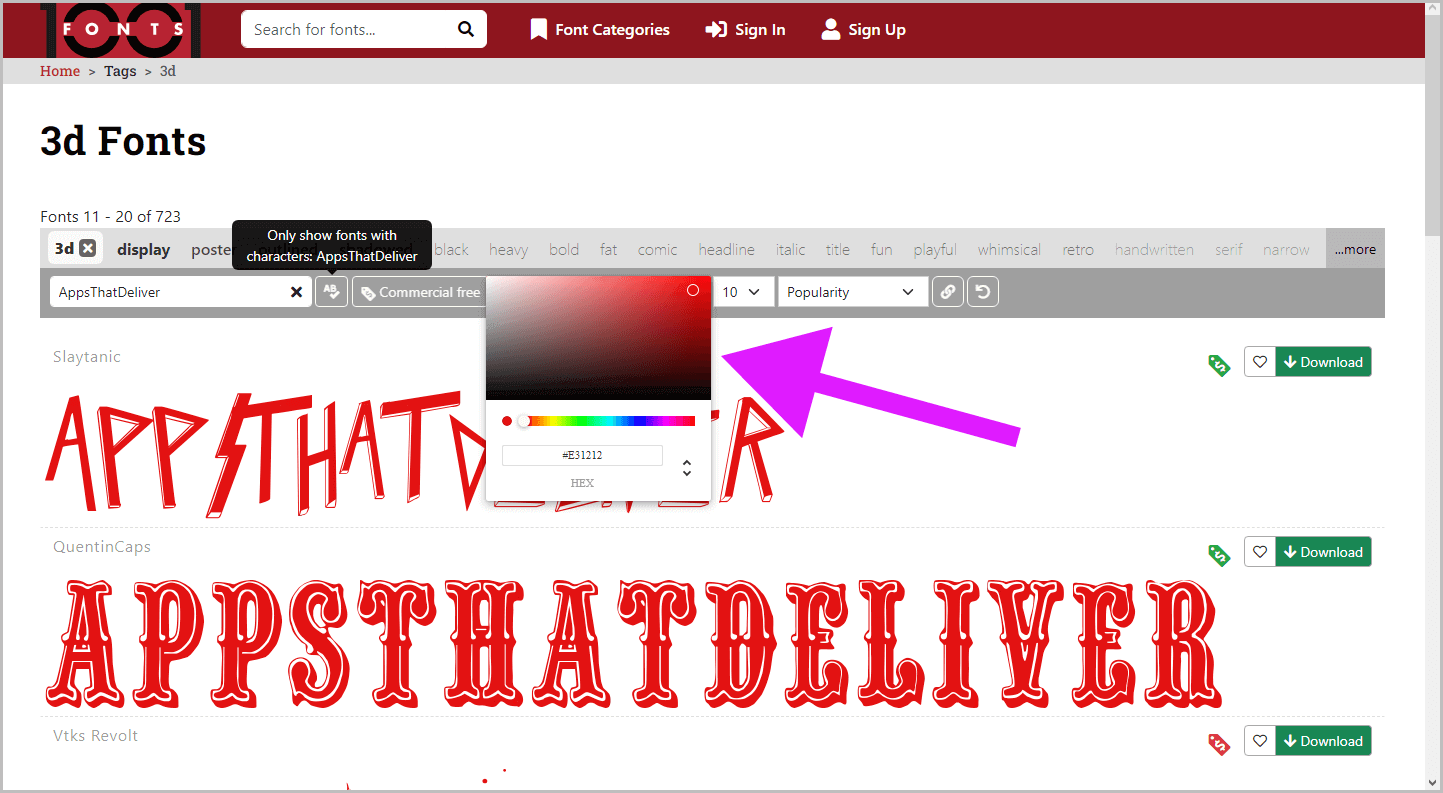
Now, choose the font color you prefer.
Click on the black square and select your desired font color from the palette.
If you want to choose a different background color, click on the white square.
Step 5: Select a 3D font of your choice
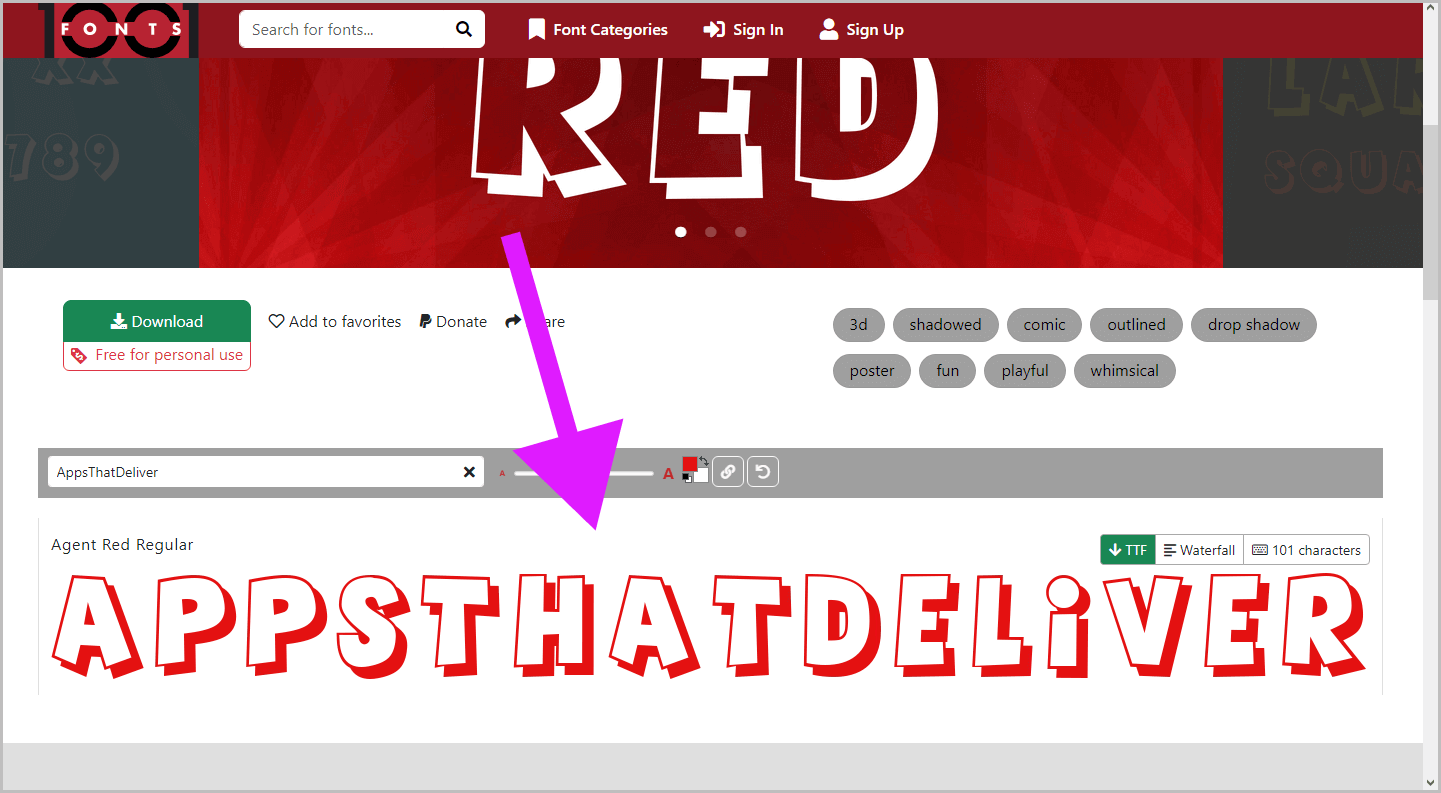
Now, scroll down and find a 3D font that you like.
There are more than 700 fonts to choose from.
If you don’t find a font that you like on the first page, simply navigate to the next page using the pagination controls.
Step 6: Right-click on the image and select “Copy image”
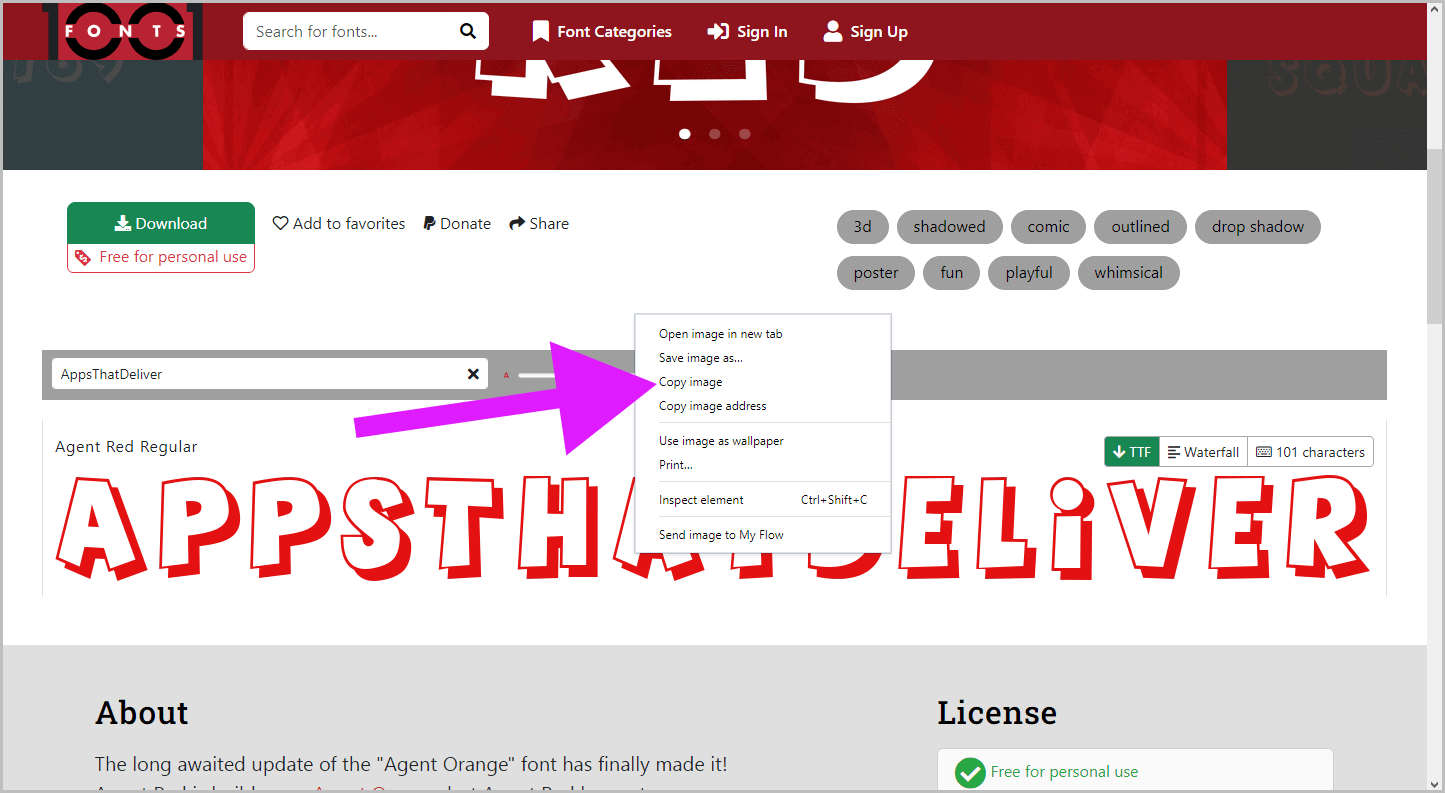
Once you’ve selected your desired 3D font, it’s time to copy the image of your text.
Right-click on the generated 3D text and choose the “Copy image” option from the context menu.
This will copy the 3D text image to your clipboard, allowing you to paste it into your Google Docs document.
Alternatively, you can save the image file to your computer and proceed to the next step.
Step 7: In your Google Docs document, press Ctrl+V
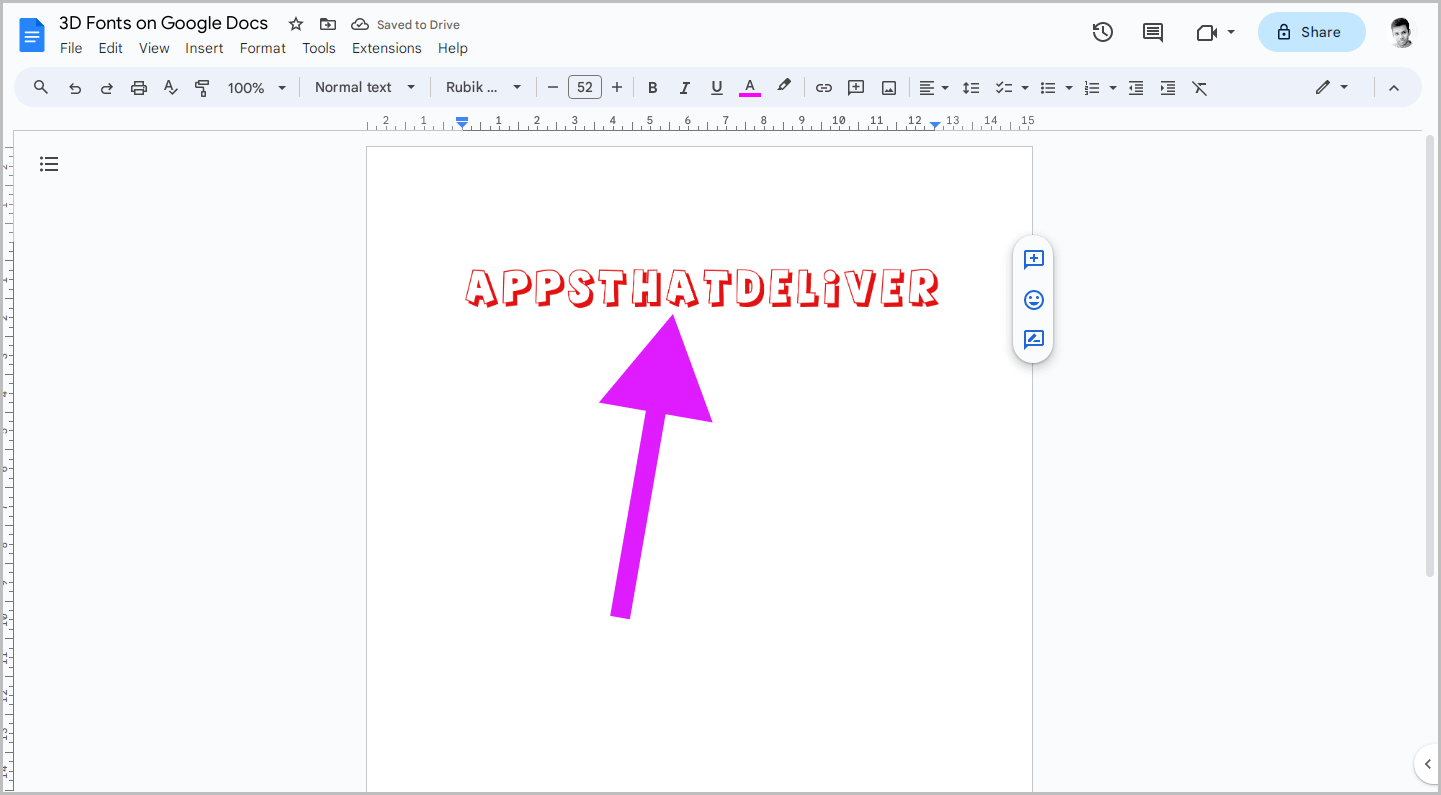
Once you’ve copied the 3D text image or saved it to your computer, it’s time to insert it into your Google Docs document.
Open your Google Docs document and position the cursor where you want to insert the 3D text.
For Windows users, press the “Ctrl+V” keys simultaneously.
For Mac users, press “Cmd+V” instead.
The copied 3D text image will be pasted into your document at the current cursor position.
Step 8: Click on the image and select “In front of text”
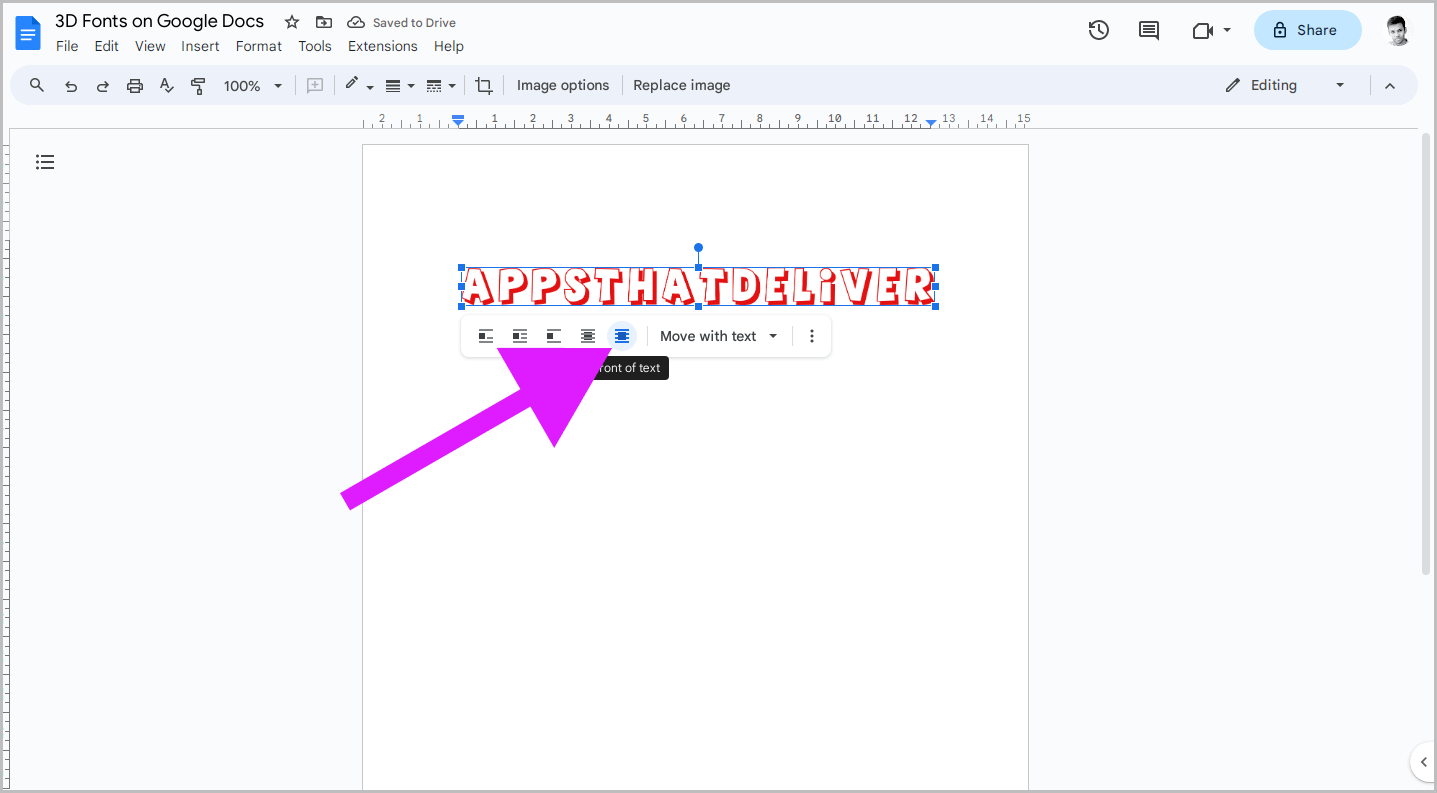
The image can be freely moved on your document because it needs to be wrapped first.
To do this, click on the image and then select the “In front of text” wrap option.
Now, proceed to the next step.
Step 9: Adjust the size and position of the image
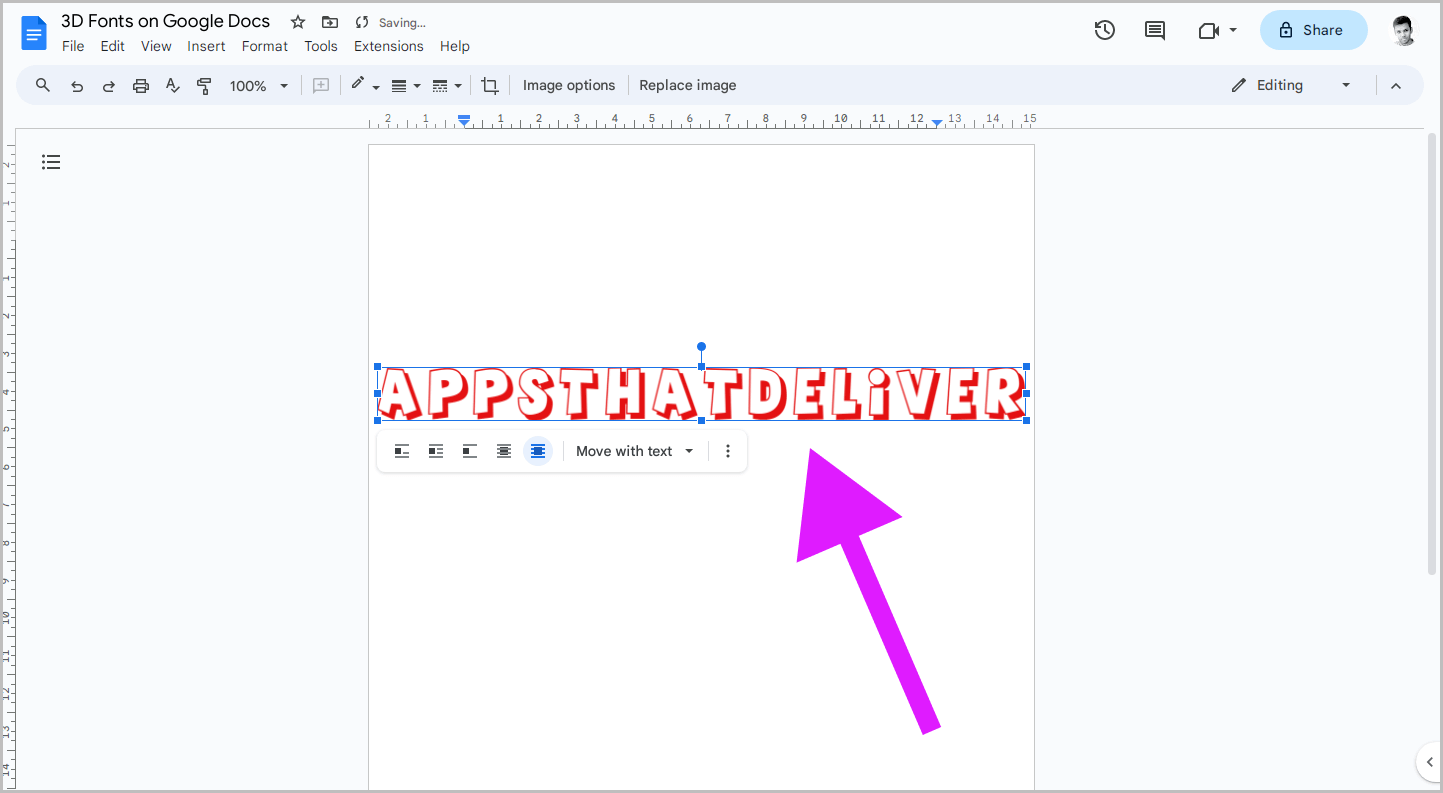
To adjust the size of the image, simply click on the image to select it.
Then, adjust the image size by dragging the small square at any corner inward to make it smaller or outward to enlarge it.
To move the image, click and drag it to the desired location within the document.
Conclusion
- Google Docs offers a limited selection of 3D fonts.
- The top 5 options are Jacques Francois Shadow, Bungee Shade, Londrina Shadow, Rampart One, and Ewert.
- If you don’t find a 3D font that suits your needs in Google Docs, you can easily create your own using free online tools.
- The process of adding 3D text to your Google Docs document involves:
- Selecting an online 3D font generator.
- Entering your text and adjusting the font size and color.
- Choosing a 3D font of your choice.
- Copying the 3D text image.
- Inserting the 3D text image into your Google Docs document.
- Adjusting the size and position of the image.

