Google Docs is a great software for writing and editing documents, but it can be a bit monotonous when it comes to formatting.
Wouldn’t it be nice if there was a way to change the underline color practically on the fly?
Google provides plenty of customization options for its users, but some of them are hidden behind menus.
By following these steps, you’ll be able to change the underline color in Google Docs with just a few simple clicks.
Change Underline Color Google Docs
- Go to Insert > Drawing > New
- Draw a line
- Change the line color and click on “Save and close”
- Select the line and click on “Behind text”
- Click on the three dots and select “All image options”
- Adjust the line’s position
- Adjust the line’s thickness
Note: You can also select the text and press Ctrl+U to underline it, then change the color of the text to change the color of the underline. The only disadvantage of this method is that you’ll have to also change the text color. If you only want to change the color of the underline, follow the steps outlined below.
How to Change Underline Color in Google Docs?
Step 1: Go to Insert > Drawing > New
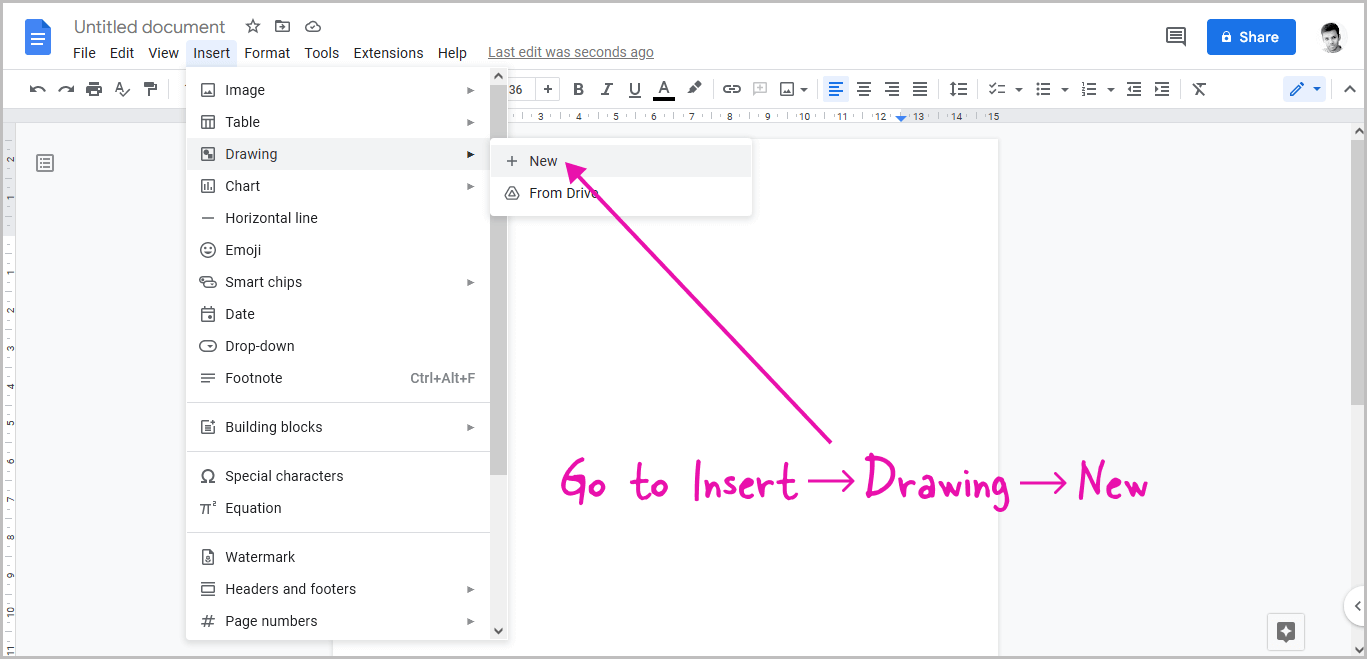
The first step is to type the text that you wish to underline.
Bring the cursor to the end of the text once you finish typing it.
Select “Insert,” then “Drawing”, and then “New” from the top menu.
Step 2: Draw a line
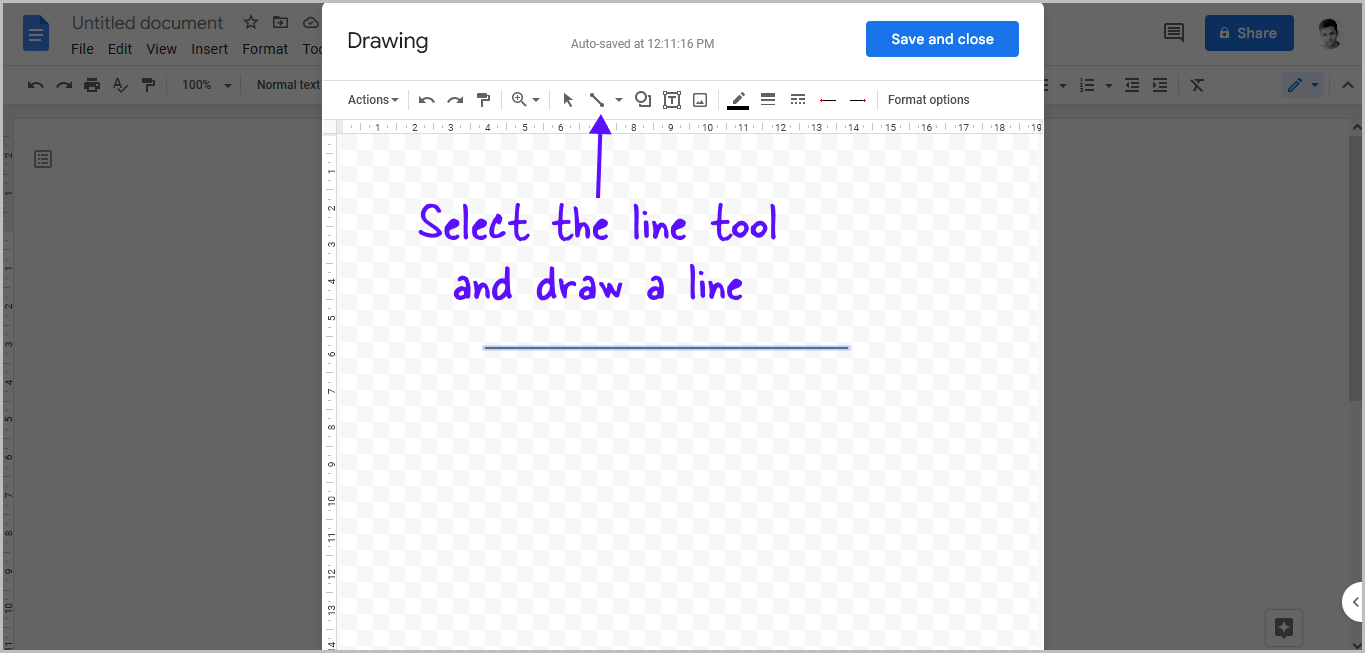
You will now see the drawing board, where you may draw whatever you want and place it into your document.
Since we need a line, we’ll draw a line.
To draw the line, simply select the “Line” tool and draw a horizontal line.
Hold the “Shift” key while drawing the line to create a straight line.
Step 3: Change the line color and click on “Save and close”
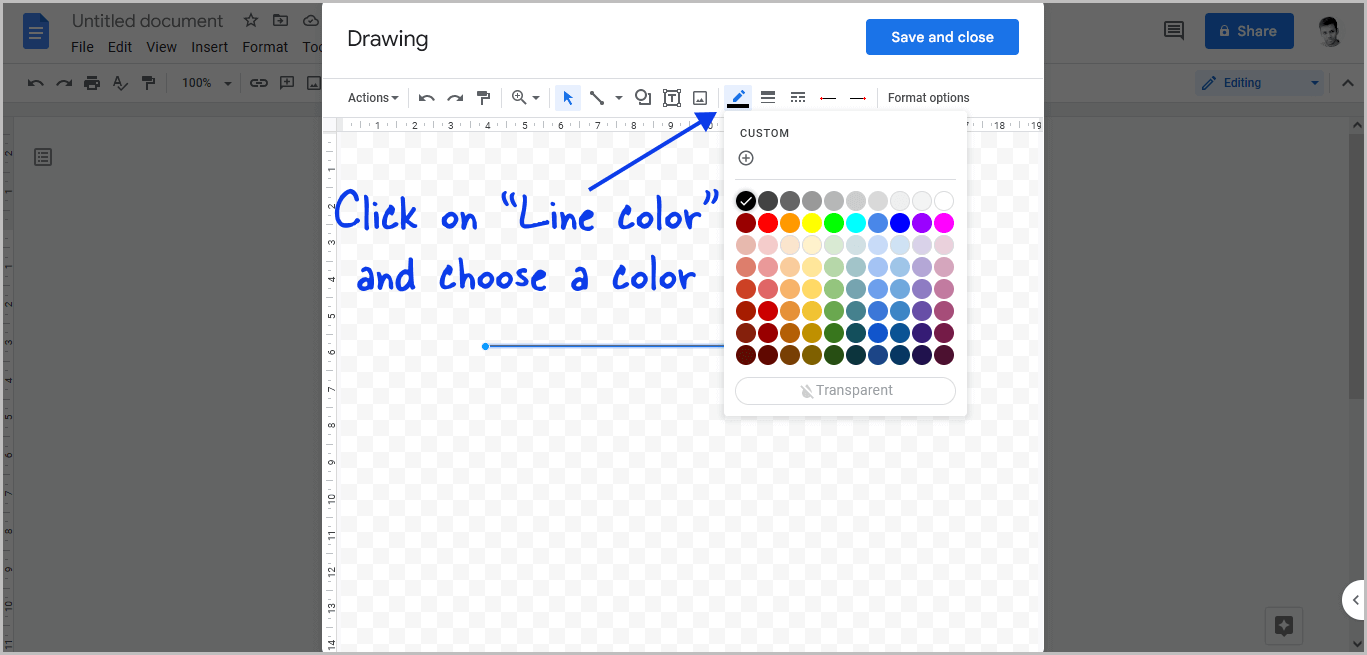
After you draw the line, click on the “Line color” tool from the toolbar and choose a color of your choice.
Once you’ve colored the line, click the “Save and close” button to add it to your document.
Step 4: Select the line and click on “Behind text”
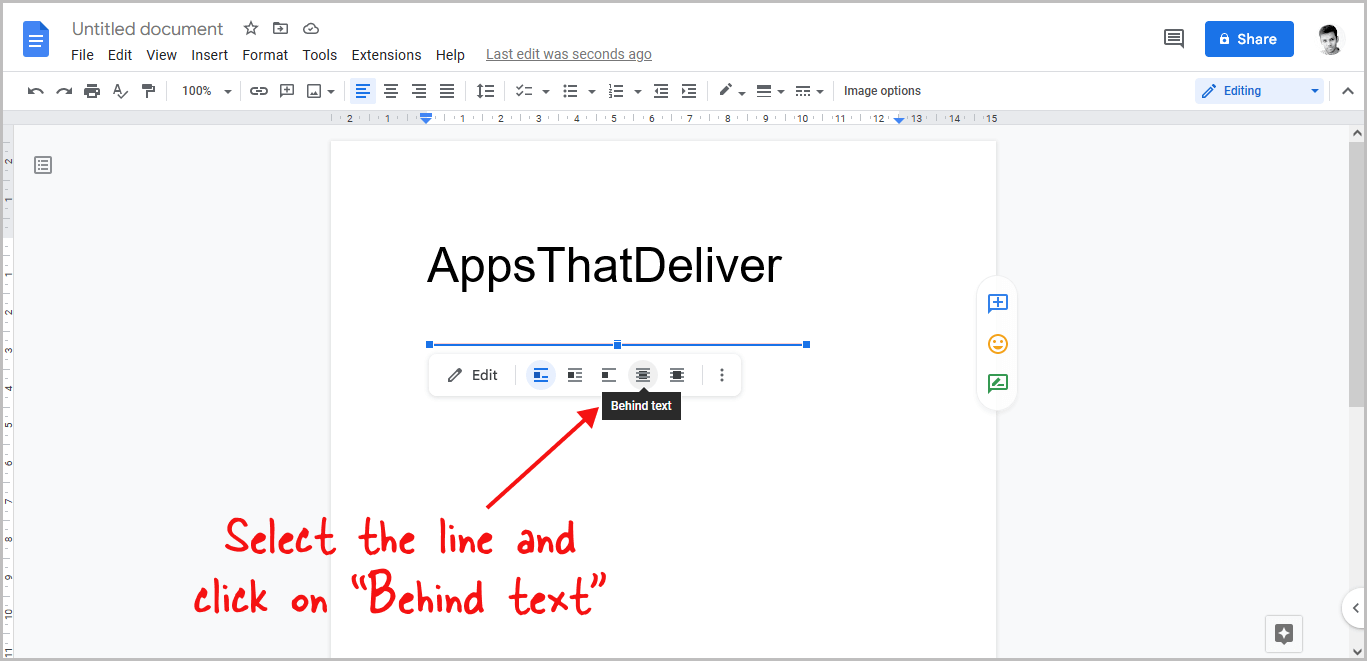
Now, select the line by clicking on it and then selecting “Behind text” from the line options.
This step is necessary to turn on the “Line position” feature, which will be required in Step 6.
Step 5: Click on the three dots and select “All image options”
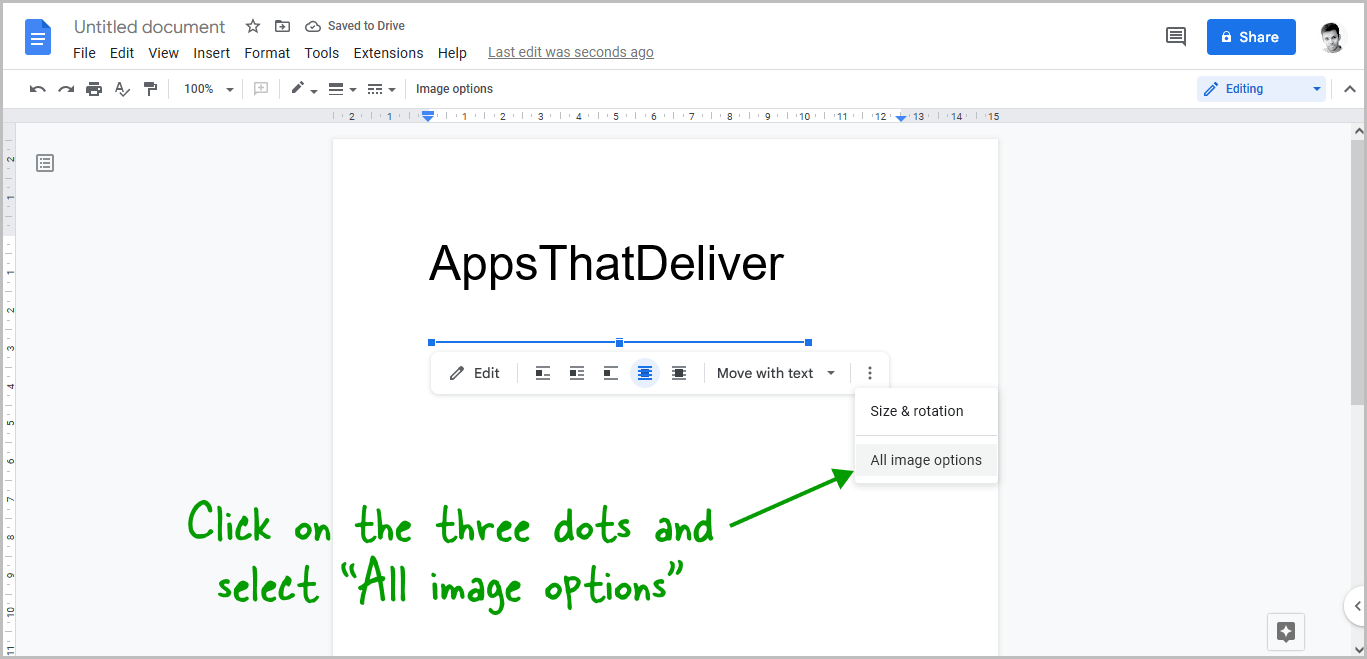
Click the three dots from the line options and select “All image options” from the drop-down menu.
Step 6: Adjust the line’s position
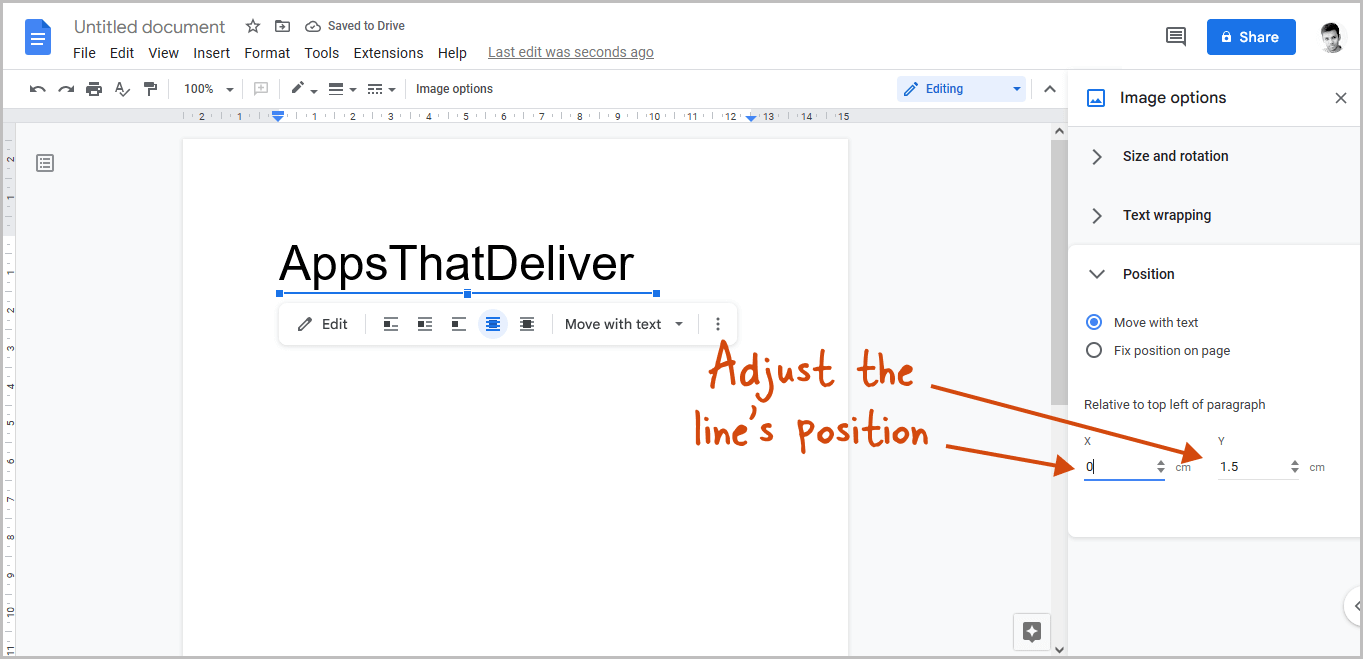
Now, click on the “Position” option from the sidebar and adjust the line’s position.
Adjust the “Y-axis” values to move the line up or down, and the “X-axis” values to move the line left or right.
Make sure the line is right below your text.
You may alternatively click on the line and drag it below the text, then fine-tune the location by adjusting the values in the “Position” option.
Step 7: Adjust the line’s thickness
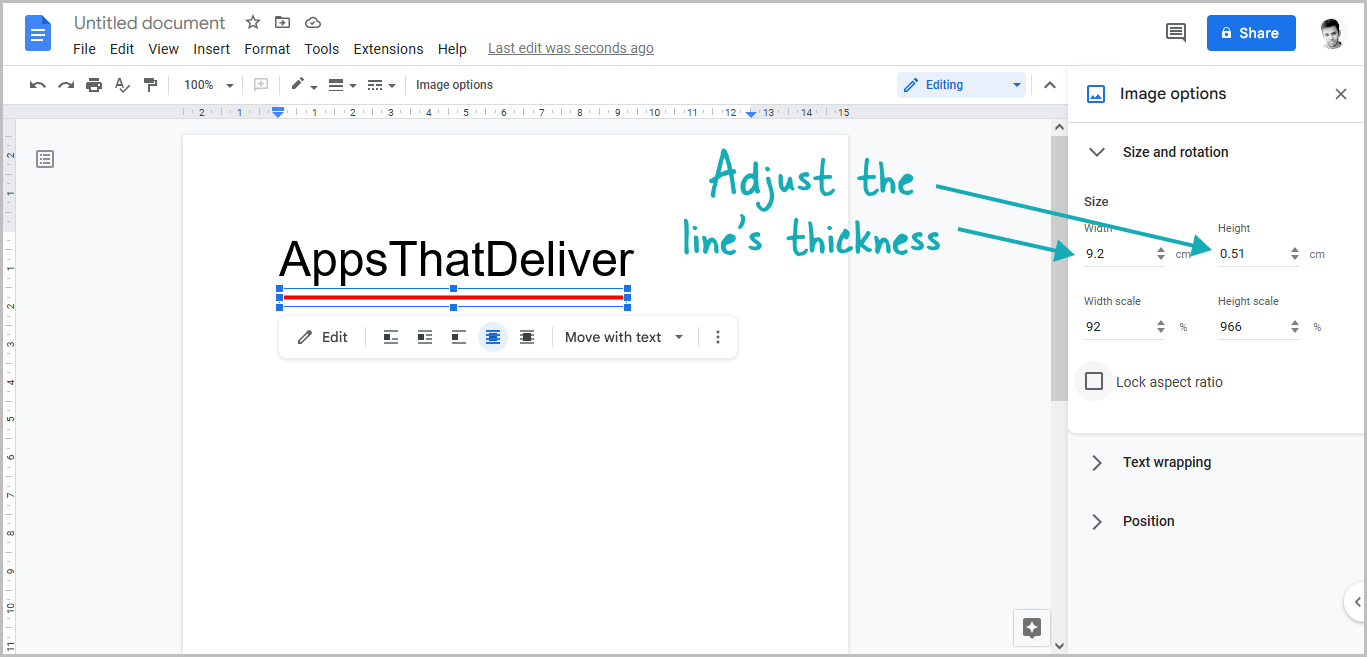
Finally, click “Size and rotation” from the sidebar and adjust the line’s length and height.

