Do you want to know how to remove section breaks in Google Docs?
Google Docs has a function that allows you to easily divide your document into multiple sections or chapters by adding section breaks.
To insert a section break, simply go to Insert > Break > Section break (next page)/Section break (continuous).
However, you may find that you need to remove these section breaks later on.
Unfortunately, simply pressing backspace won’t work!
But don’t worry, it is possible to remove section breaks in Google Docs, and it’s actually quite easy to do.
In this article, you’ll learn how to remove section breaks in Google Docs.
Also read: (opens in new tab)
How to Show Paragraph Marks in Google Docs
How to Jump to a Page in Google Docs
How to Delete a Column in Google Docs
How to Put Text Over an Image in Google Docs
How to Remove Section Breaks in Google Docs?
Step 1: Go to View > Show non-printing characters
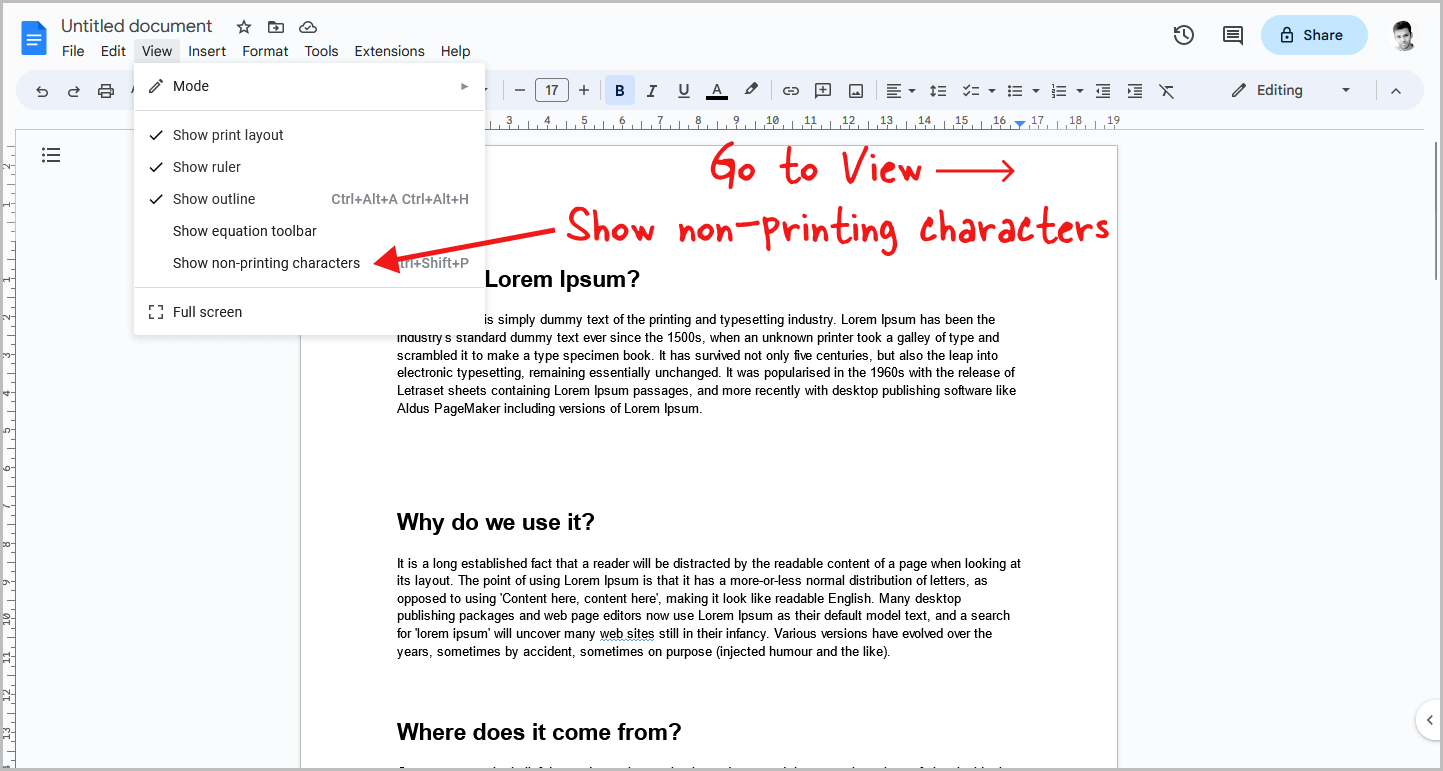
To remove section breaks in Google Docs, you must first locate them. Fortunately, Google Docs provides an easy way to do this.
The first step is to click on the “View” option in the top menu.
From there, select “Show non-printing characters” in the drop-down menu.
Once you have done this, you will be able to see all of the non-printing characters in your document, including section breaks.
Step 2: Locate the section break you want to remove
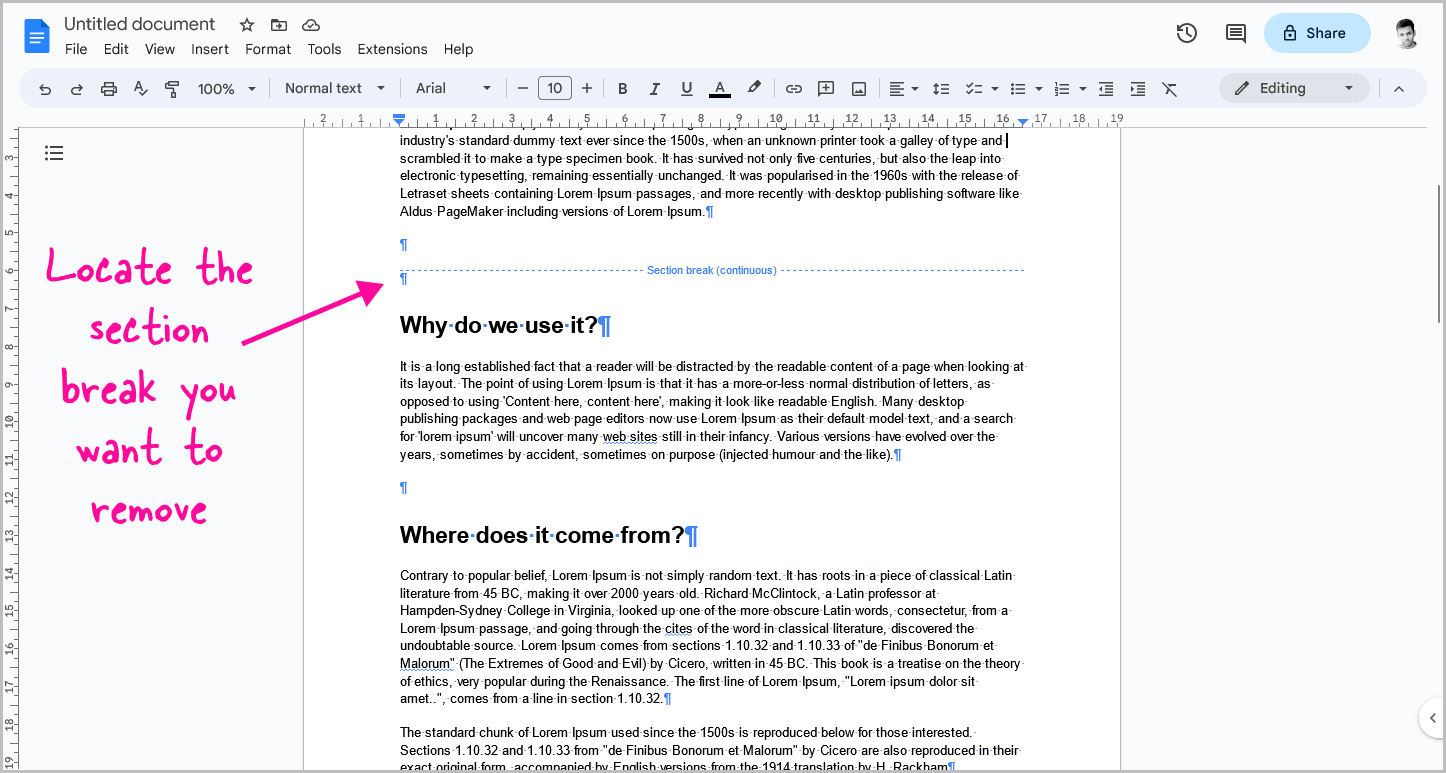
Now, you can see the section break(s) in your document.
Locate the one you want to delete by scrolling to that section and proceed to the next step.
Step 3: Place the cursor above the section break
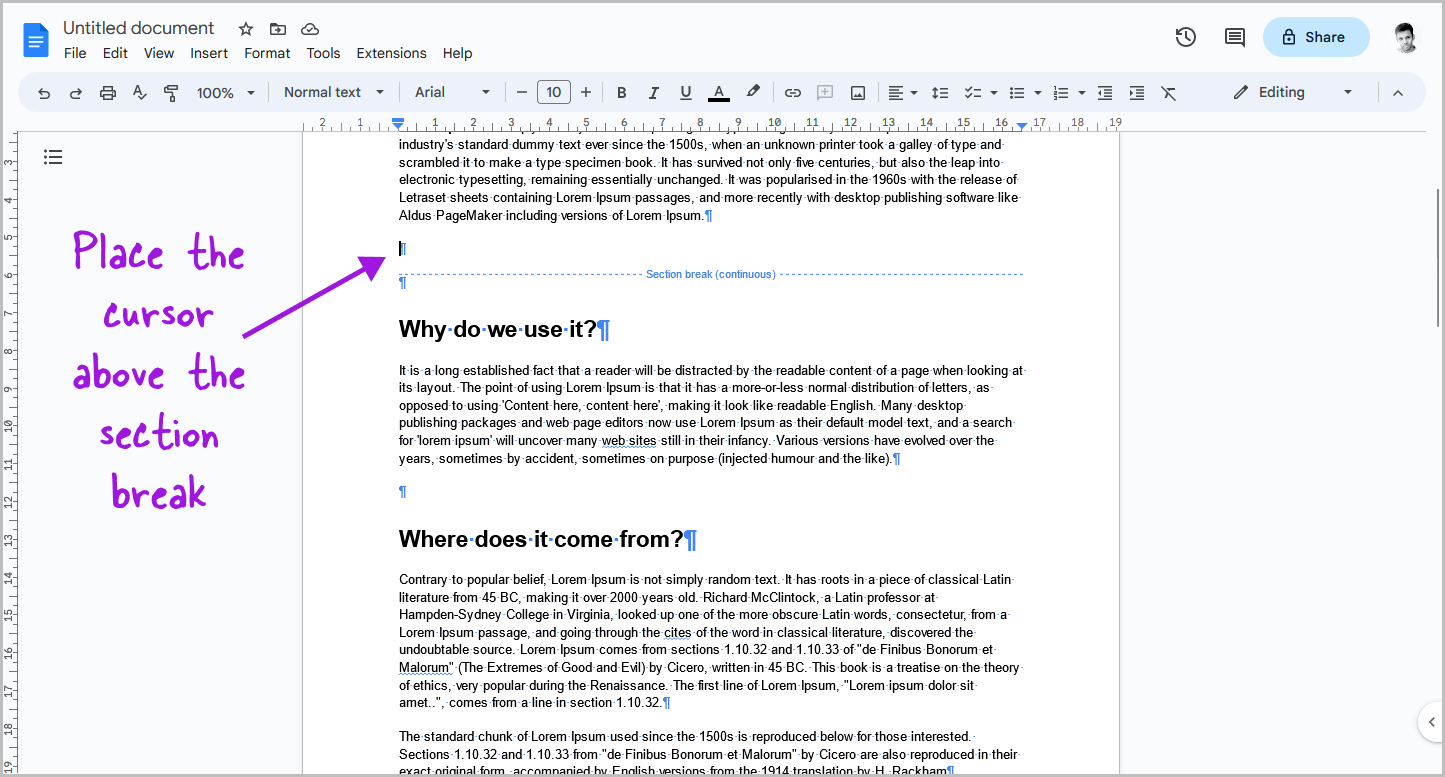
After locating the section break you want to remove, it’s important to place the cursor just above it, on the line above the section break.
Step 4: Press the “Delete” button on your keyboard
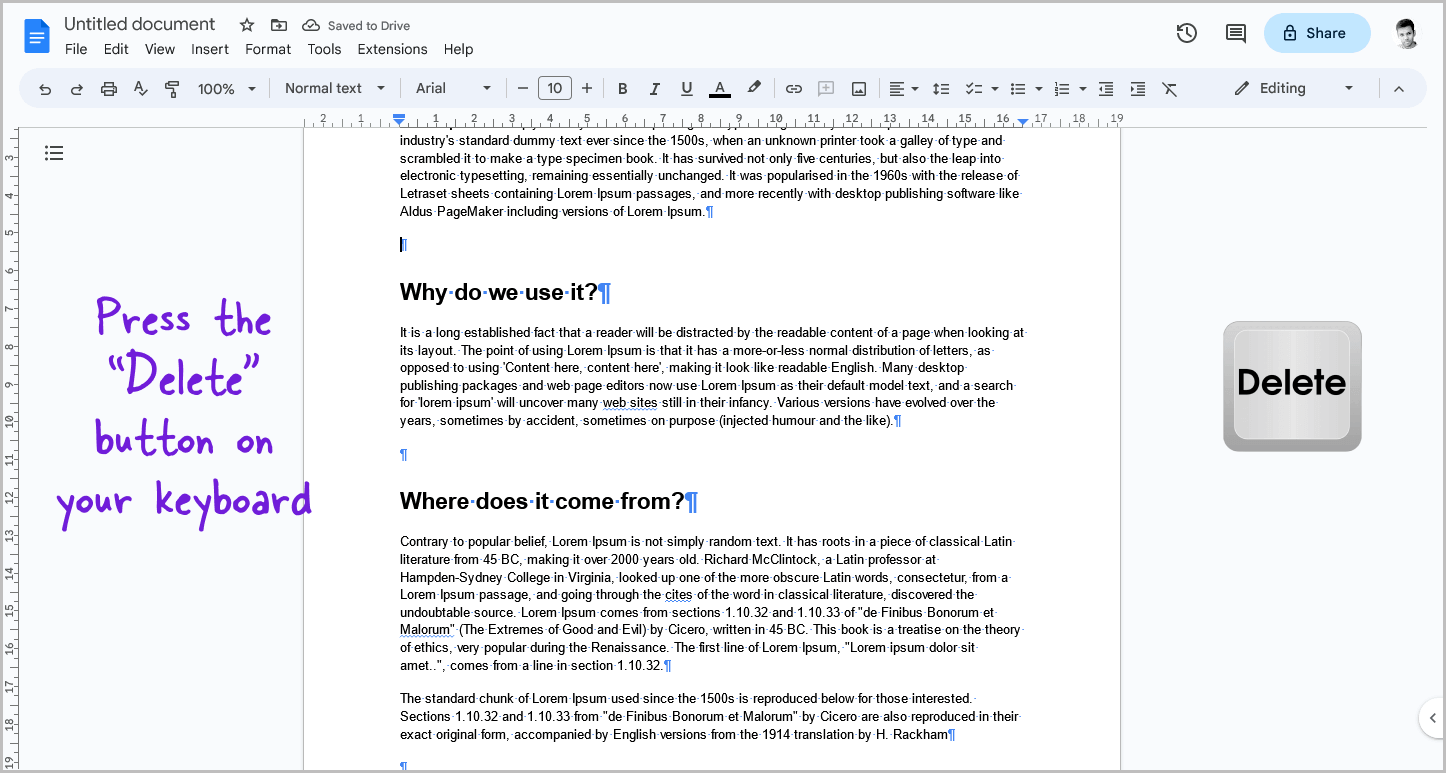
Now, press the “Delete” button on your keyboard.
It’s important to note that pressing the “Backspace” key won’t remove the section break, so using the “Delete” button is the correct way.
Once you’ve successfully removed the section break, you can proceed to delete any other section breaks in your document.
After you’ve deleted any additional section breaks, you can move on to the next step in the process.
Step 5: In the “View” menu, deselect “Show non-printing characters”
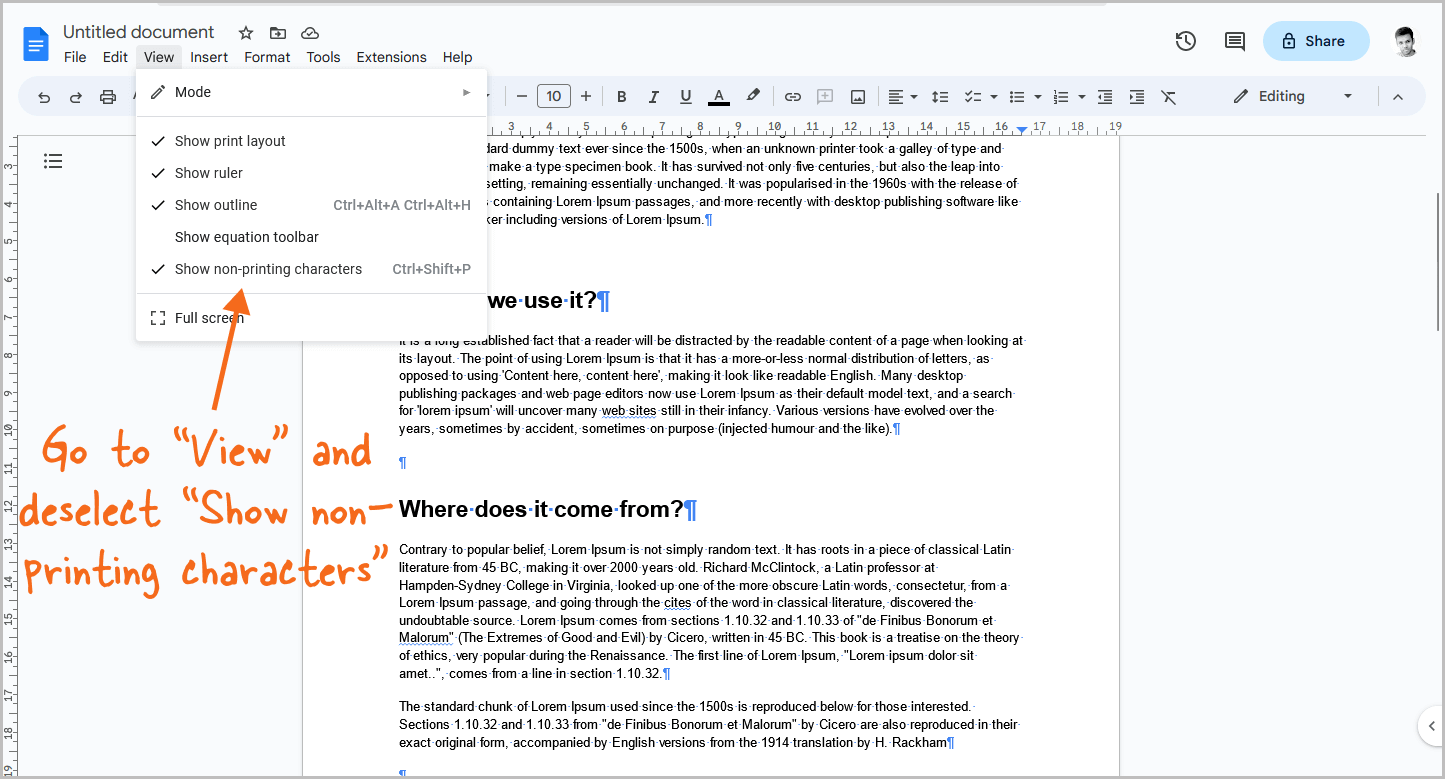
Now it’s time to hide all non-printing characters in the document.
To do this, click on the “View” option and then deselect the “Show non-printing characters” option.
FAQs
How Do I Remove a Section Break in Google Docs?
To remove a section break in Google Docs, click on “View,” select “Show non-printing characters,” position your cursor above the section break, and press “Delete” on your keyboard.
How to Delete a Section Break in Google Docs?
To delete a section break in Google Docs, click “View” and select “Show non-printing characters.” Place your cursor above the section break, and press “Delete” on your keyboard.
How to Get Rid of a Section Break in Google Docs?
To get rid of a section break in Google Docs, go to View > Show non-printing characters > place the cursor above the section break > press the “Delete” button.
Why Can’t I Remove a Section Break in Google Docs?
You have to press the “Delete” key to remove the section break. Pressing the “Backspace” key won’t remove the section break in Google Docs.
Conclusion
In conclusion, removing section breaks in Google Docs is a simple process that can be done in just a few steps:
- Go to View > Show non-printing characters
- Locate the section break you want to remove
- Place the cursor above the section break
- Press the “Delete” button on your keyboard
- In the “View” menu, deselect “Show non-printing characters”
By following these steps, you’ll be able to remove section breaks in Google Docs easily and efficiently.

