Do you want to learn how to place text over an image in Google Docs?
Placing text over an image can be useful for labeling an image or creating a poster with an image background.
Unfortunately, many people use the “Drawing” tool in Google Docs.
This method can cause pixelation, reducing the quality of both the image and the text.
Fortunately, there is a better option available in Google Docs that allows you to easily add text over an image without sacrificing quality.
In this article, we’ll explore the step-by-step process for putting text over an image in Google Docs.
Also read: (opens in new tab)
Using a Picture as a Bullet Point in Google Docs
How to Center an Image in Google Docs
Google Docs Unsupported Image Type
How to Merge or Combine Google Docs
How to Put Text Over an Image in Google Docs?
Step 1: Add text to the document
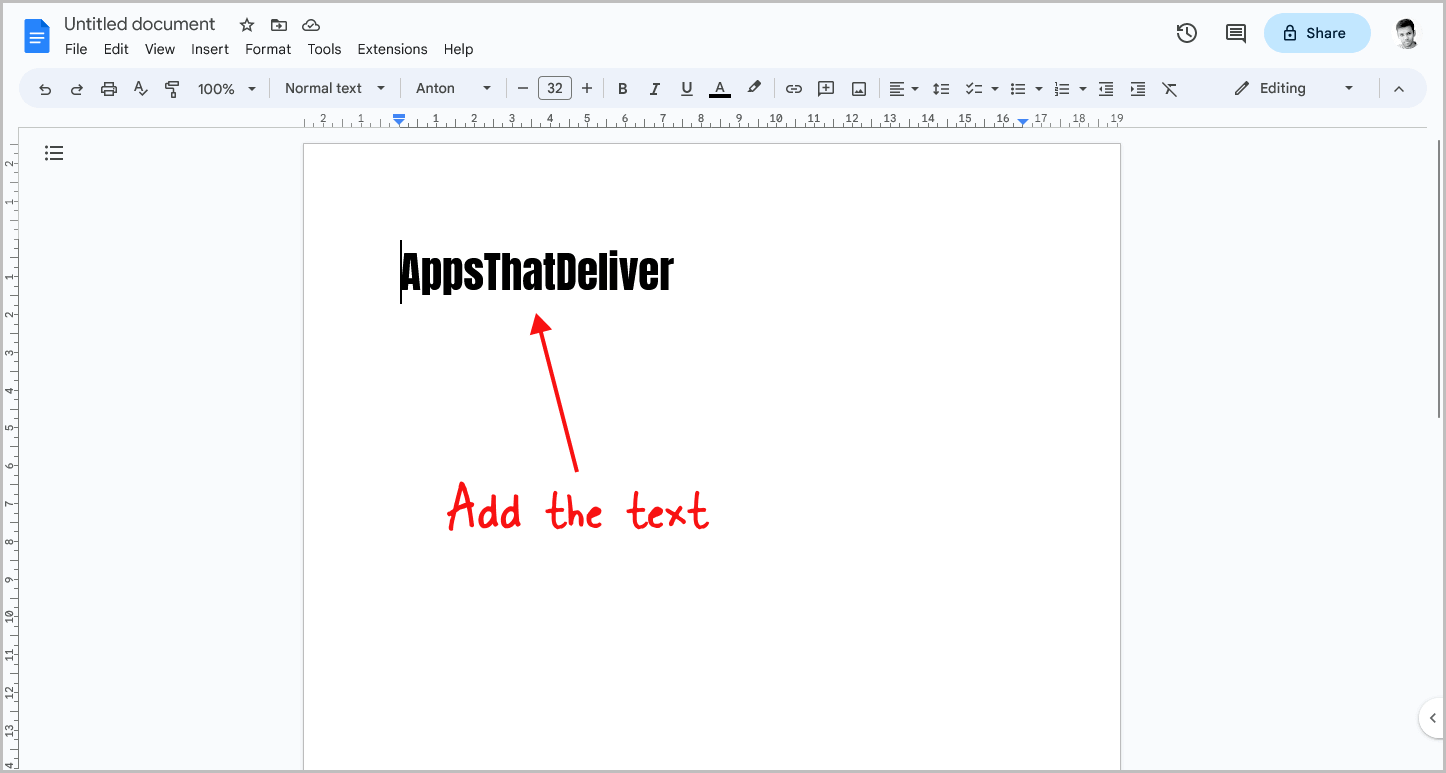
The first step is to open the document and enter the text that you want to put over an image.
You can format the text by changing the font size, color, style, etc.
Don’t worry about the placement of the text at this point, as we’ll adjust it later.
Simply enter the text, format it, and proceed to the next step.
Step 2: Adjust the location of the text
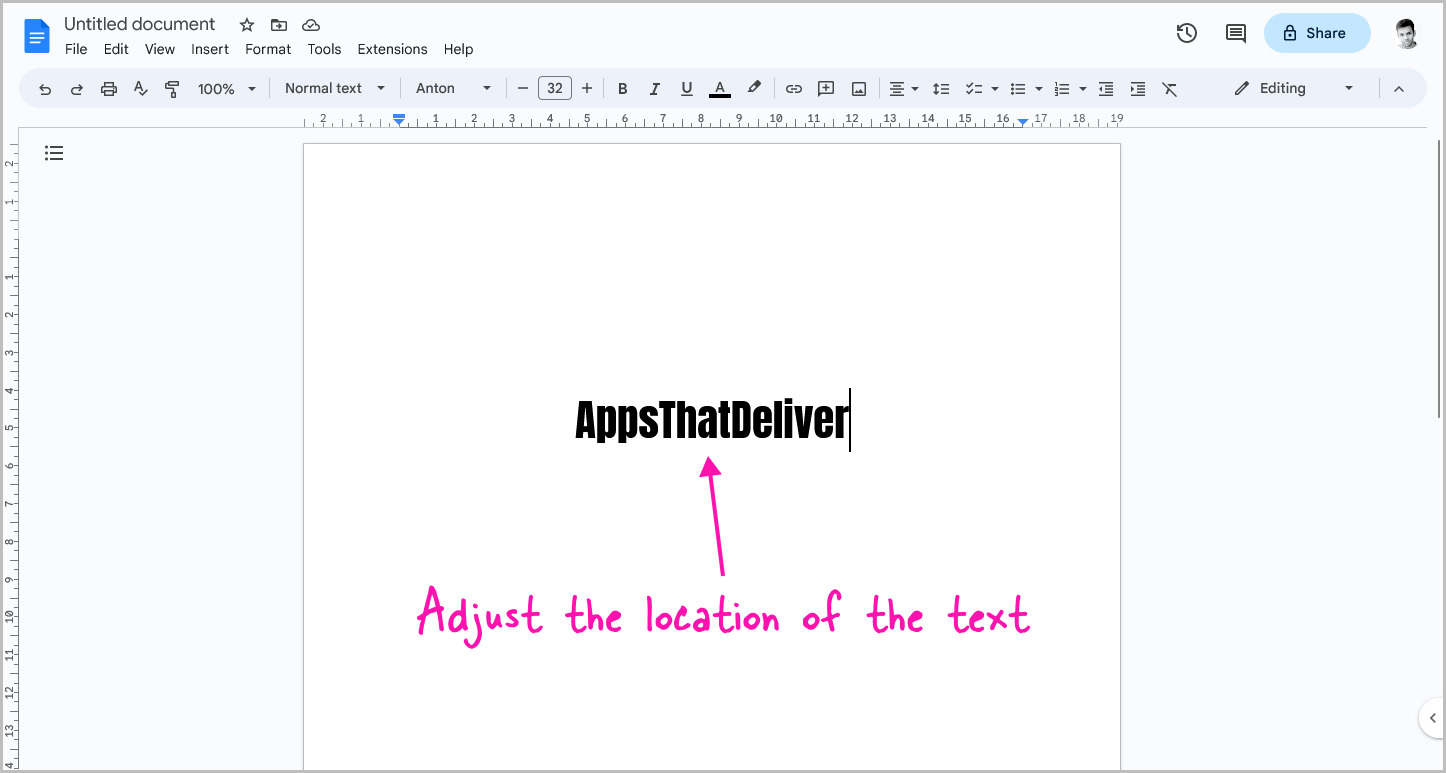
If you need to reposition text in your document, you can do so using your keyboard.
To move the text to the right, place your cursor before the text and press the spacebar.
Conversely, to move the text to the left, press the backspace key.
Additionally, you can move the text down by pressing the enter key.
If you want to center the text, select it and click on the “Center align” option in the toolbar.
These simple steps will allow you to easily reposition text exactly where you want it in your document.
Step 3: Insert the image and adjust its size
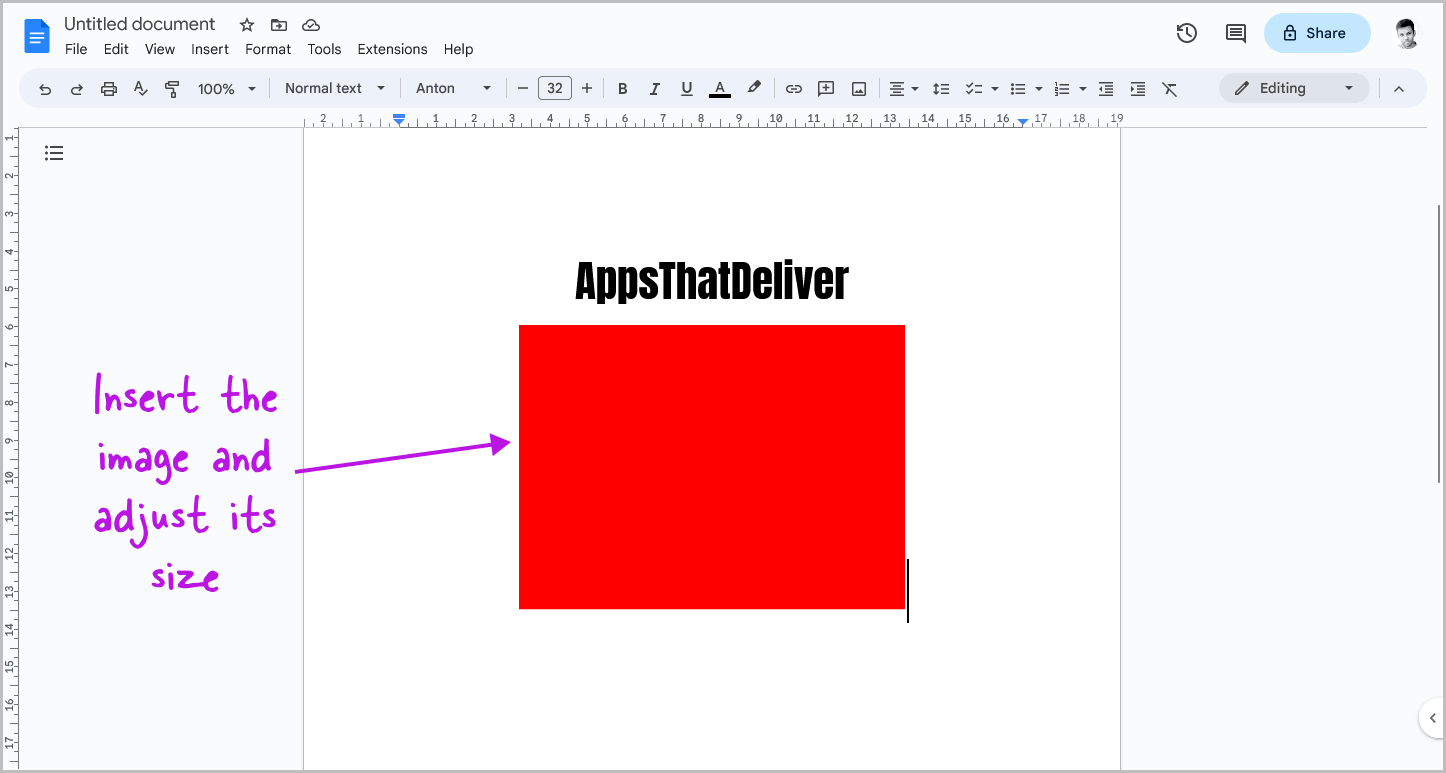
After adjusting the location of the text, it is time to insert an image into the document.
To do so, simply drag and drop the image into the document.
After inserting the image, adjust its size according to your needs.
Don’t worry about the placement; we’ll take care of that in the later steps.
Step 4: Click on the image and select “Behind text”
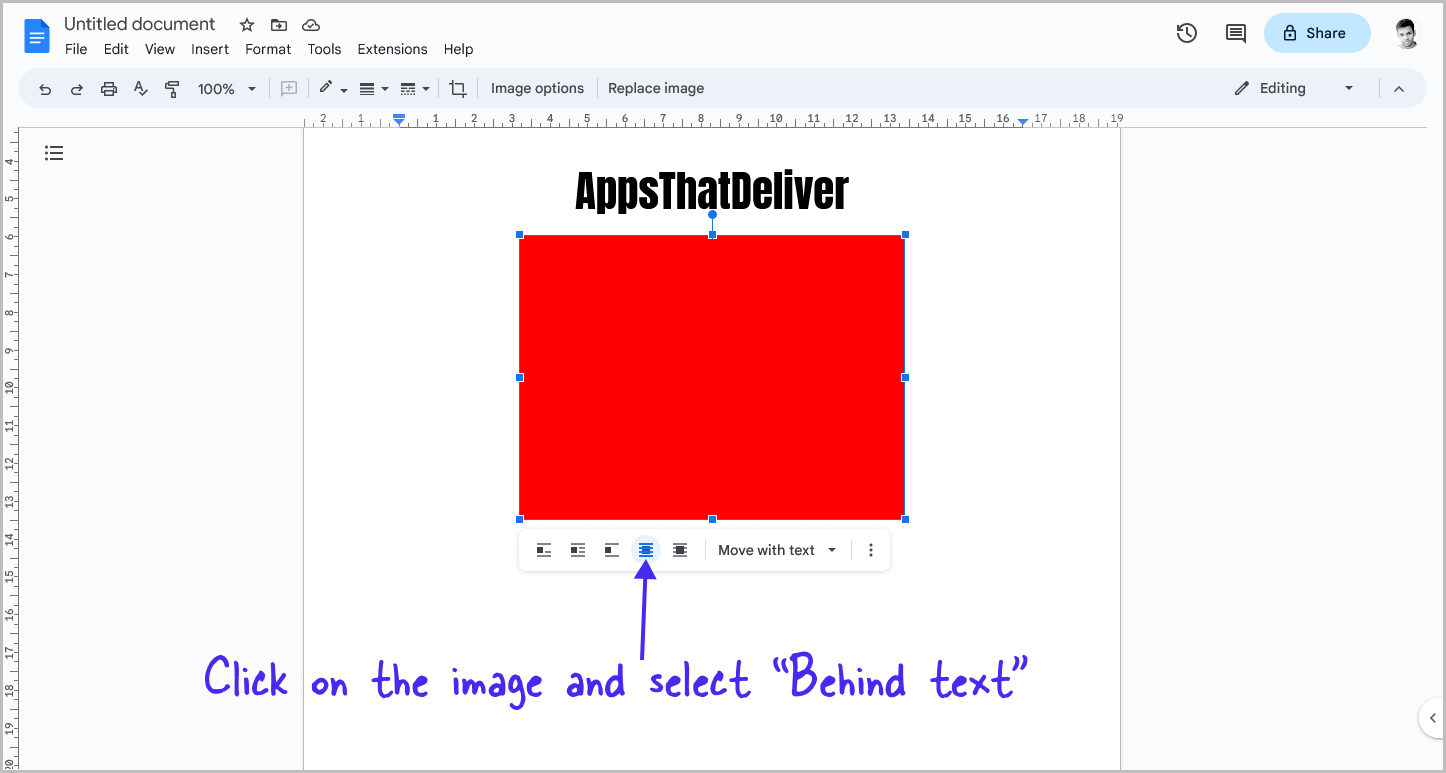
Now, it is time to put the image behind the text in the document.
In this step, we will be basically telling Google Docs that we want this image to be behind the text.
To do so, click on the image.
After clicking on the image, you’ll see a small panel below the image with a few icons.
Click on the “Behind” text option from the panel and proceed to the next step.
Step 5: Drag the image behind the text
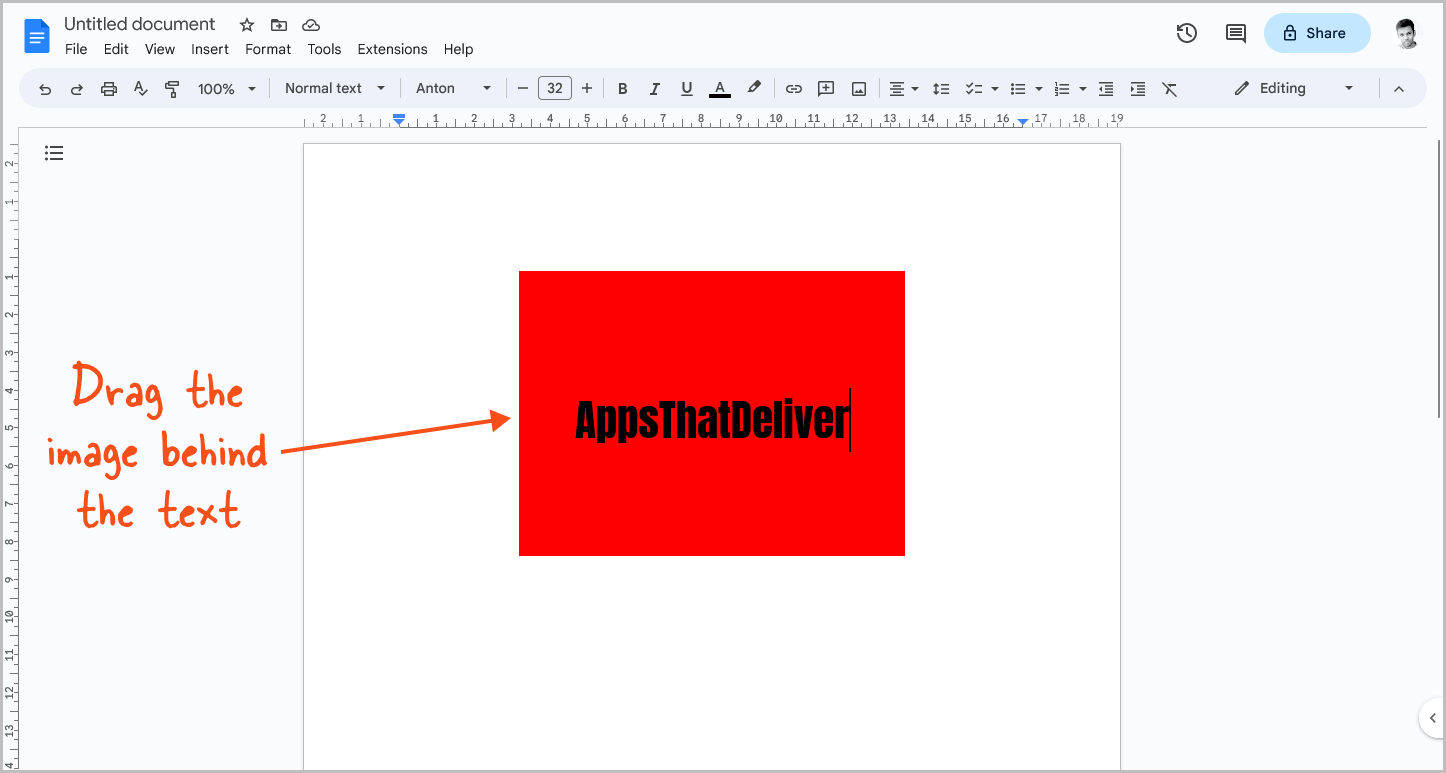
After clicking on the “Behind” text option, you can easily drag the image wherever you want in the document.
Simply click on the image and then drag it behind the text and make sure the image is exactly behind the text.
You’ll see red lines while dragging the image, the vertical line shows the horizontal center of the document while the horizontal red line shows the vertical center of the current page.
FAQs
Can You Put Text Over an Image in Google Docs?
Yes, you can put text over an image in Google Docs. Follow the steps outlined in this article to learn how to do so.
How to Add Text in Image in Google Docs?
To add text to an image in Google Docs, first, insert the text. Then, insert the image and click on it. Next, select the “Behind text” option to position the image behind the text.
How Do You Put Text on a Picture in Google Docs?
To put text on a picture in Google Docs, first, insert the text. Then, insert the image and click on it. Next, select the “Behind text” option to position the image behind the text. Finally, drag the image behind the text to the desired location.
Conclusion
In conclusion, adding text over an image in Google Docs can be easily accomplished by following these simple steps:
- Add text to the document.
- Adjust the location of the text.
- Insert the image and adjust its size.
- Click on the image and select “Behind text”.
- Drag the image behind the text.
By following these steps, you can easily place text over an image in Google Docs without sacrificing quality.
This is a useful technique for labeling images or creating posters with image backgrounds. Give it a try and enhance your Google Docs documents today!

