
Add the Midnights font to Google Docs and give your documents a Taylor Swift twist!
Google Docs has a vast library of fonts, including the exact font used on the cover of Taylor Swift’s Midnights album.
This font is perfect for adding a touch of Taylor Swift to your titles, headings, and other creative content.
In this tutorial, you’ll learn how to add the Midnights font to Google Docs and use it in your documents.
Also read: (opens in new tab)
Star Wars Font Google Docs & Google Slides
Taylor Swift Speak Now Font
Reputation Font Google Docs
Sad Fonts on Google Docs
Midnights Font Google Docs
To use the Midnights font in Google Docs, enter the text, select it, choose the “Arial” font, make it bold, and adjust the color and font size as needed.
Method 1: By Changing the Font Style Directly in the Toolbar
1. Type your text into a Google Docs document

The first step is to open your Google Docs document.
To do this, go to docs.google.com and open a blank document.
Now, enter the text that you want to format with the Midnights font.
2. Select the text

Now, select the text using the mouse to indicate to Google Docs that you want to format only the selected text.
3. Click on the “Font” menu in the toolbar

After selecting the text, click on the “Font” menu located in the toolbar.
4. In the Fonts drop-down menu, select the “Arial” font

Now you will see the most recently and most popular fonts from the Google Docs font library.
Select the “Arial” font from the list of fonts.
Jump to the next step if the Arial font is already selected.
5. Click on the “Bold” icon in the toolbar

Now you will see the font converted to the Midnights font.
However, there are some minor tweaks required.
Select the text and click on the “Bold” icon in the toolbar to make the selected text bold.
6. Adjust the font size and the font color

Now, let’s adjust the font size and color.
Select the text and find the font size option located next to the font menu.
Click on the plus sign to increase the font size and on the minus sign to decrease it.
Alternatively, you can enter the desired font size in the font size box.
Next, change the font color to resemble the Midnights font.
Method 2: By Using Word Art
This is the second method on how to use the Midnights font in Google Docs.
With this method, you can add gradient color to the text, giving your font the exact look of the album font.
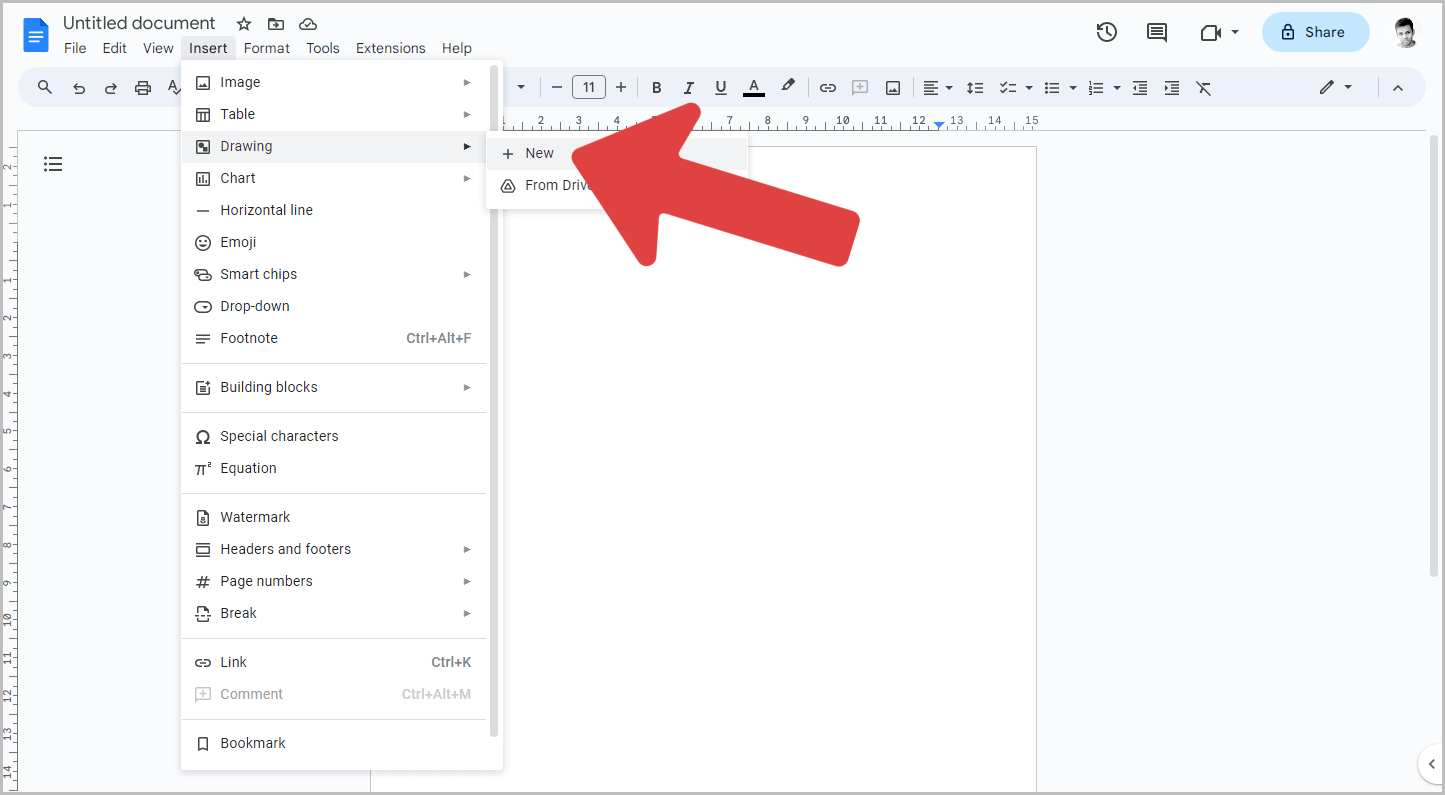
1. Go to Insert > Drawing > New
To begin, open a blank Google Docs document.
Then, click on the “Insert” option in the top menu and select “Drawing”.
From there, choose the “New” option.
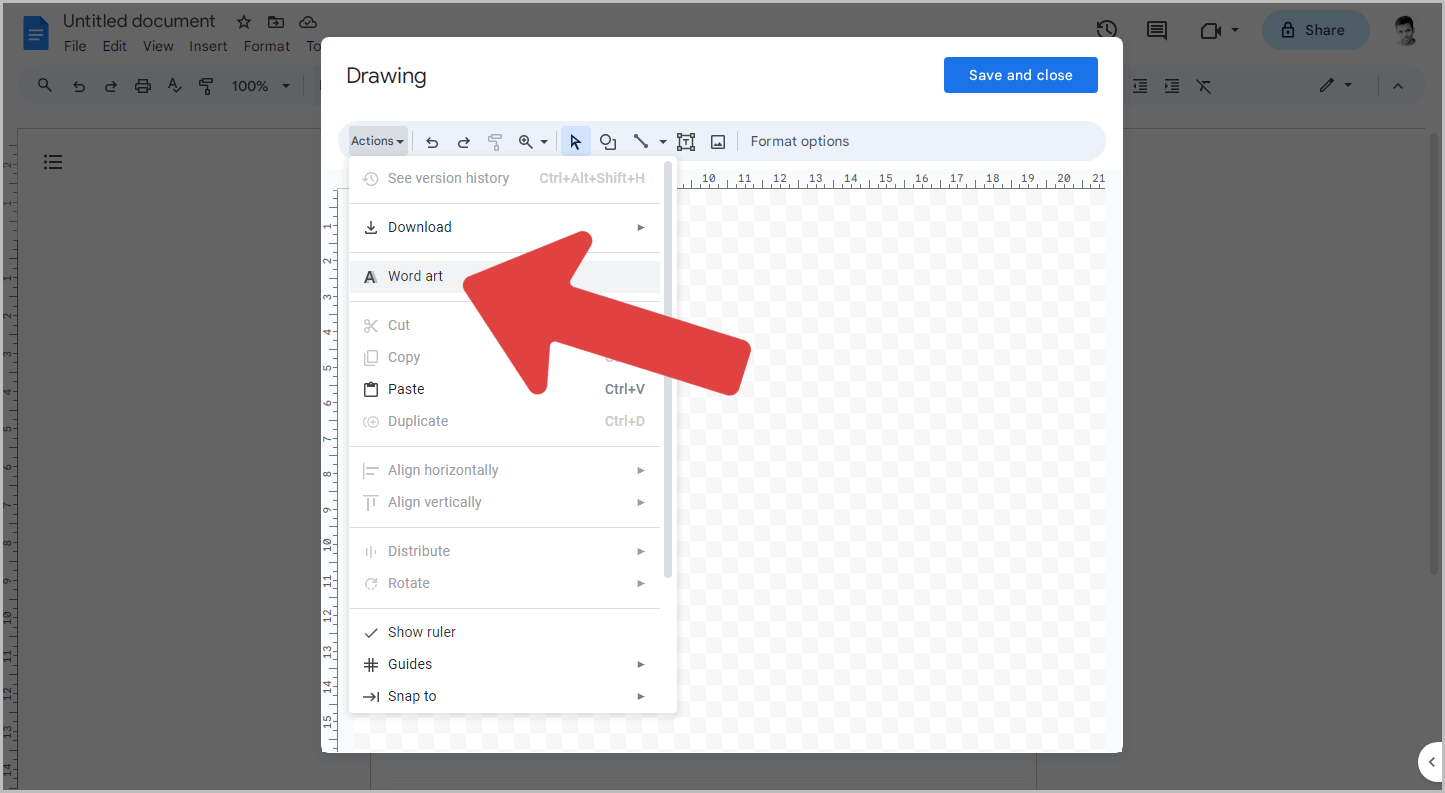
2. Click on “Actions” and select “Word art”
You will now see the Drawing canvas with a toolbar at the top.
On the far left of the toolbar, you will find the “Actions” menu.
Click on this menu and select the “Word art” option from the drop-down menu.
3. Type your text and press the Enter key

You will see a small pop-up with a text box.
Click inside the text box and start typing your desired text.
We will format this text to resemble the Midnights font.
After typing the text, press the “Enter” key to insert it into the drawing canvas.
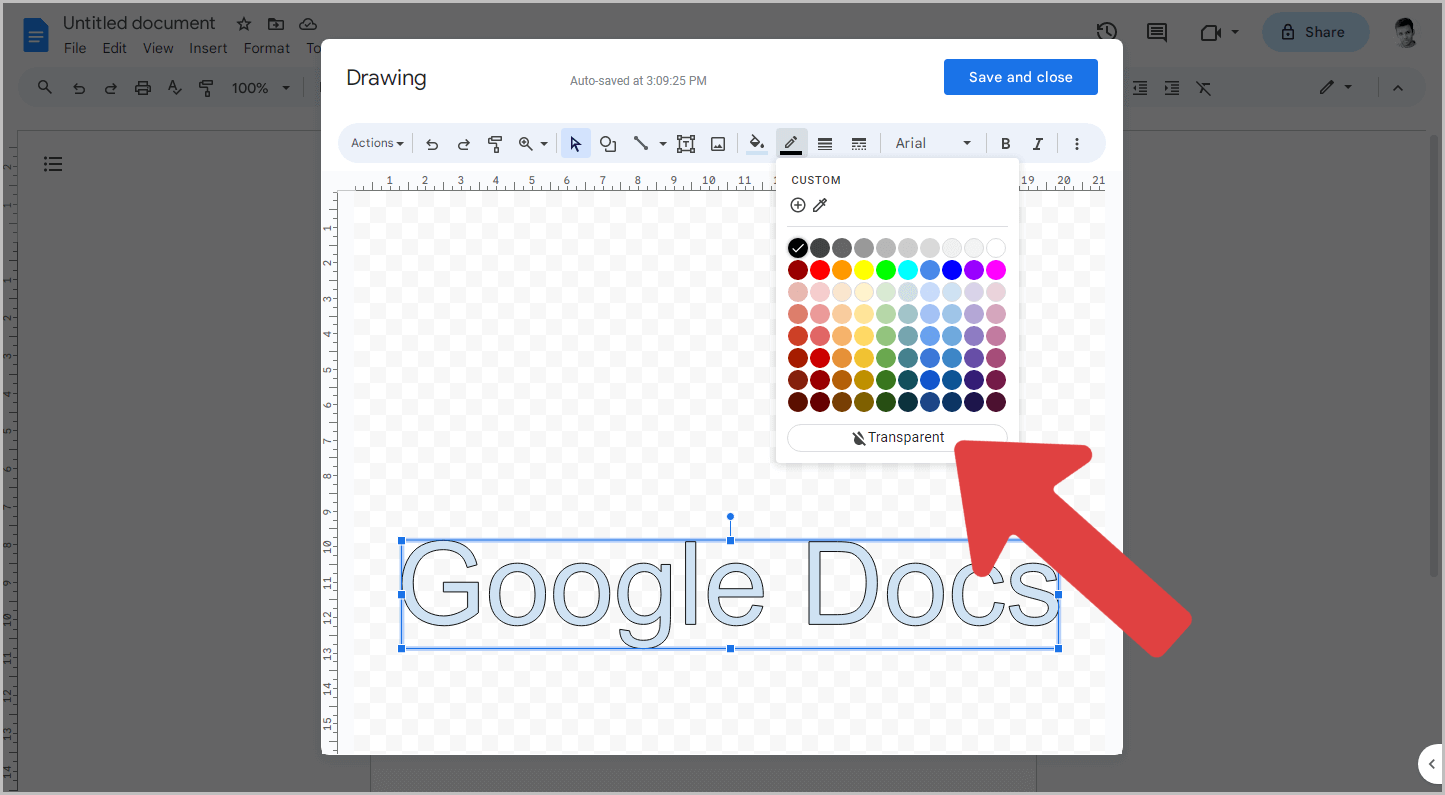
4. Click on “Border color” and select “Transparent”
After inserting the text into the drawing canvas, it is time to format the text.
Start by removing the text border.
To do this, click on the “Border color” icon in the toolbar and select the “Transparent” button.
This will remove the text border.
5. Click on the “Bold” icon
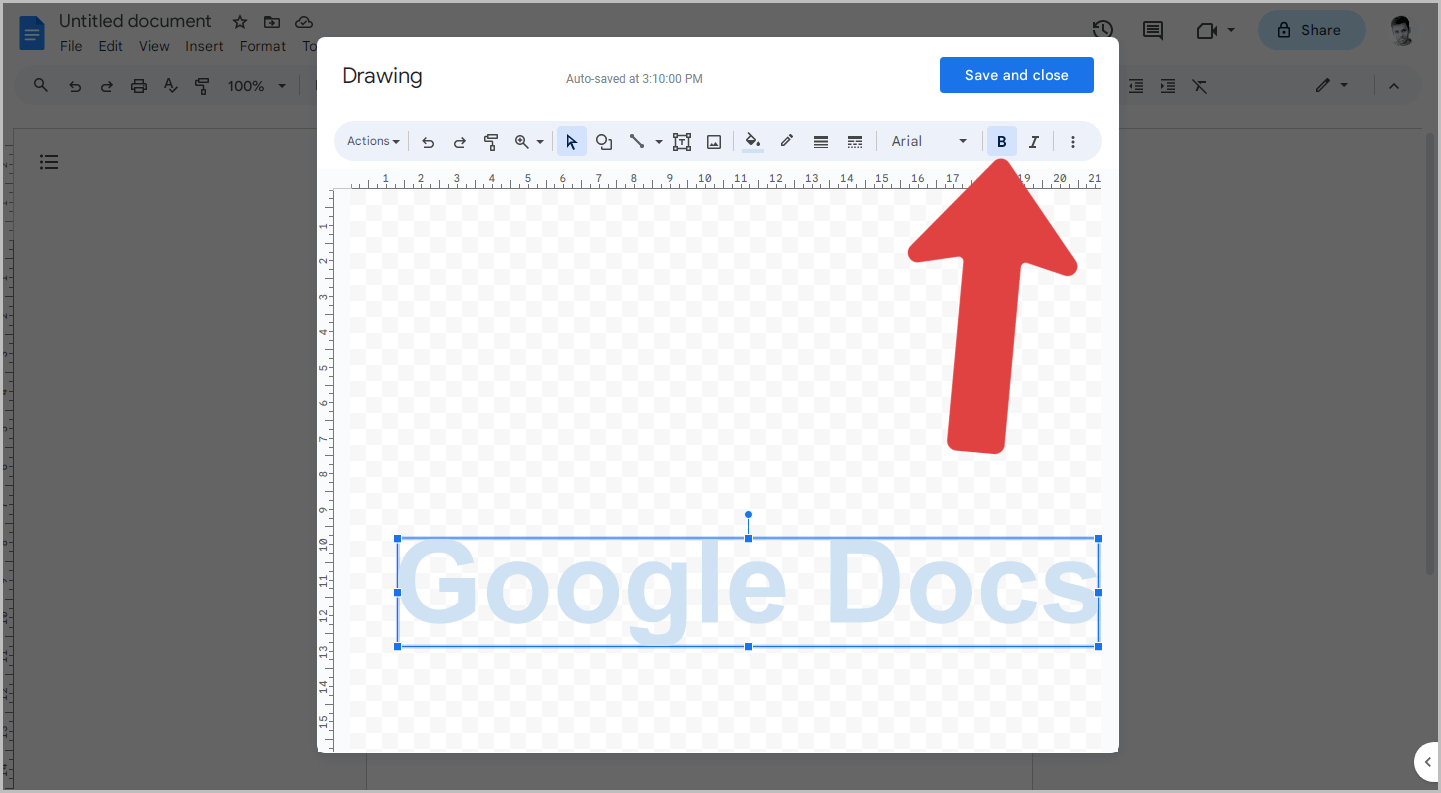
Now, select the text and click on the “Bold” icon from the toolbar to make the text bold.
6. Select the “Arial” font
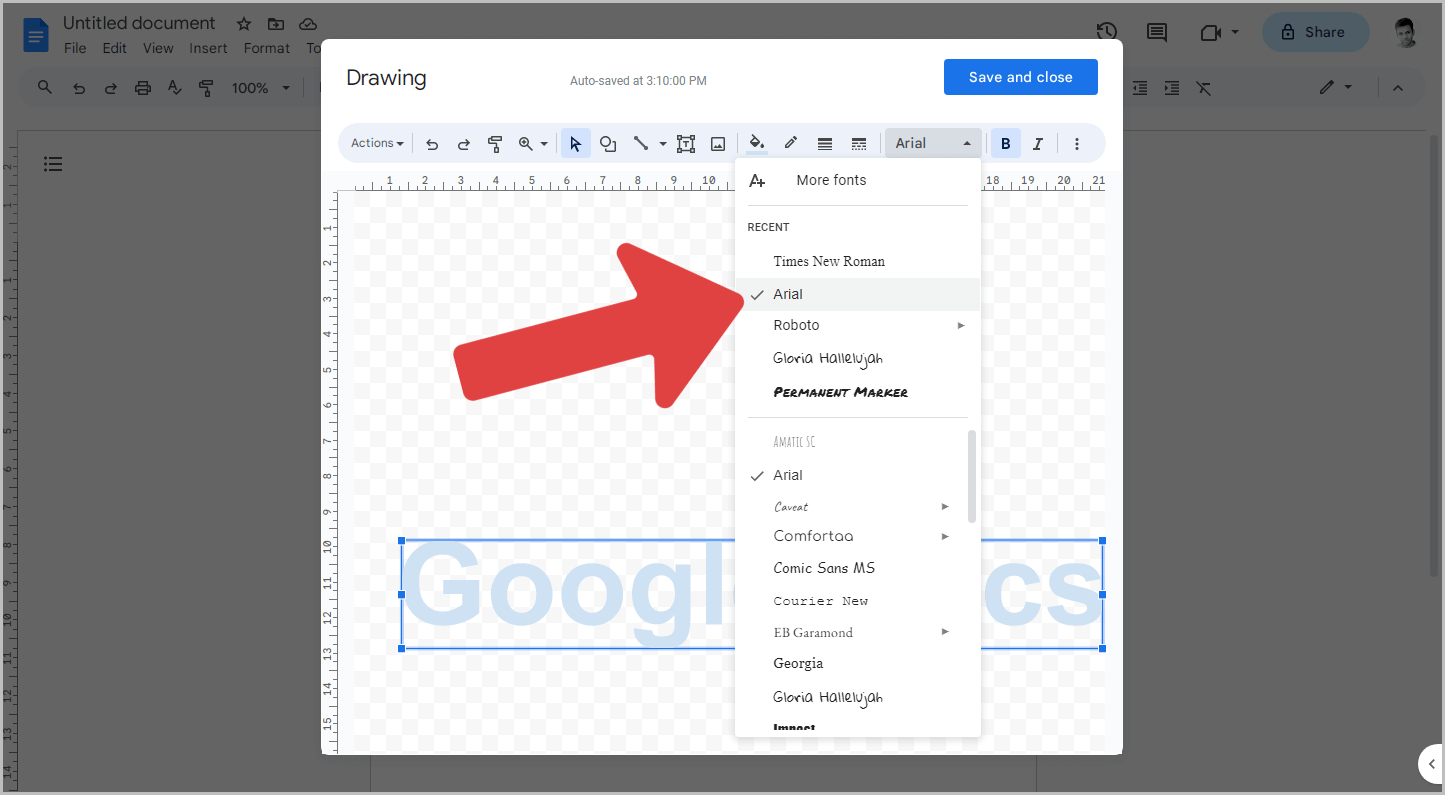
The Midnights font is the Arial font, so make sure to select the “Arial” font.
Click on the font menu on the Drawing toolbar and choose the Arial font.
Now that we have the text ready, all we need to do is add the gradient color to match the original color from the album.
7. Click on “Fill color” and select the “Gradient” tab
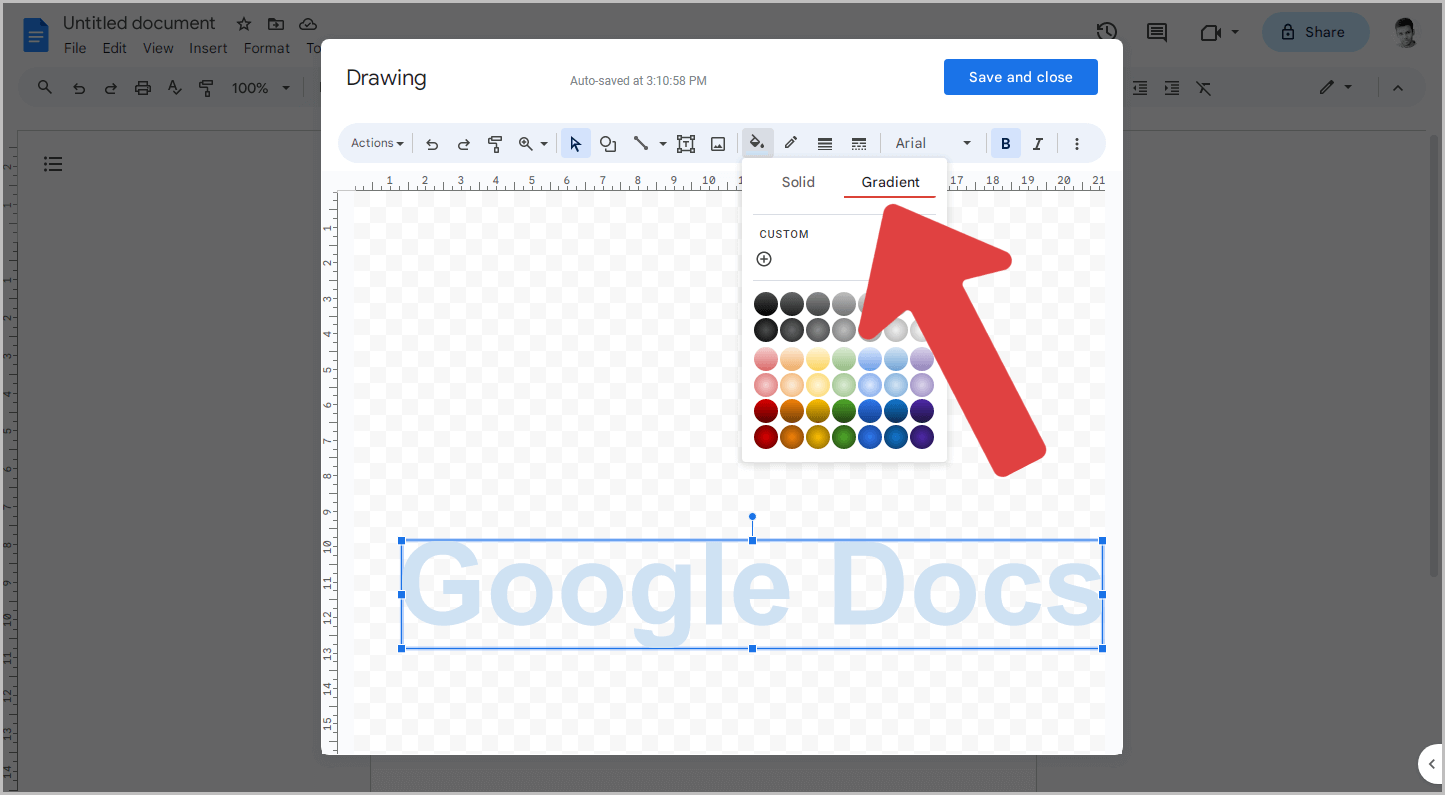
Now, click on the “Fill color” option in the toolbar.
Then, select the “Gradient” tab in the panel to view all available gradient color options.
8. Click on the “Add a custom color” icon
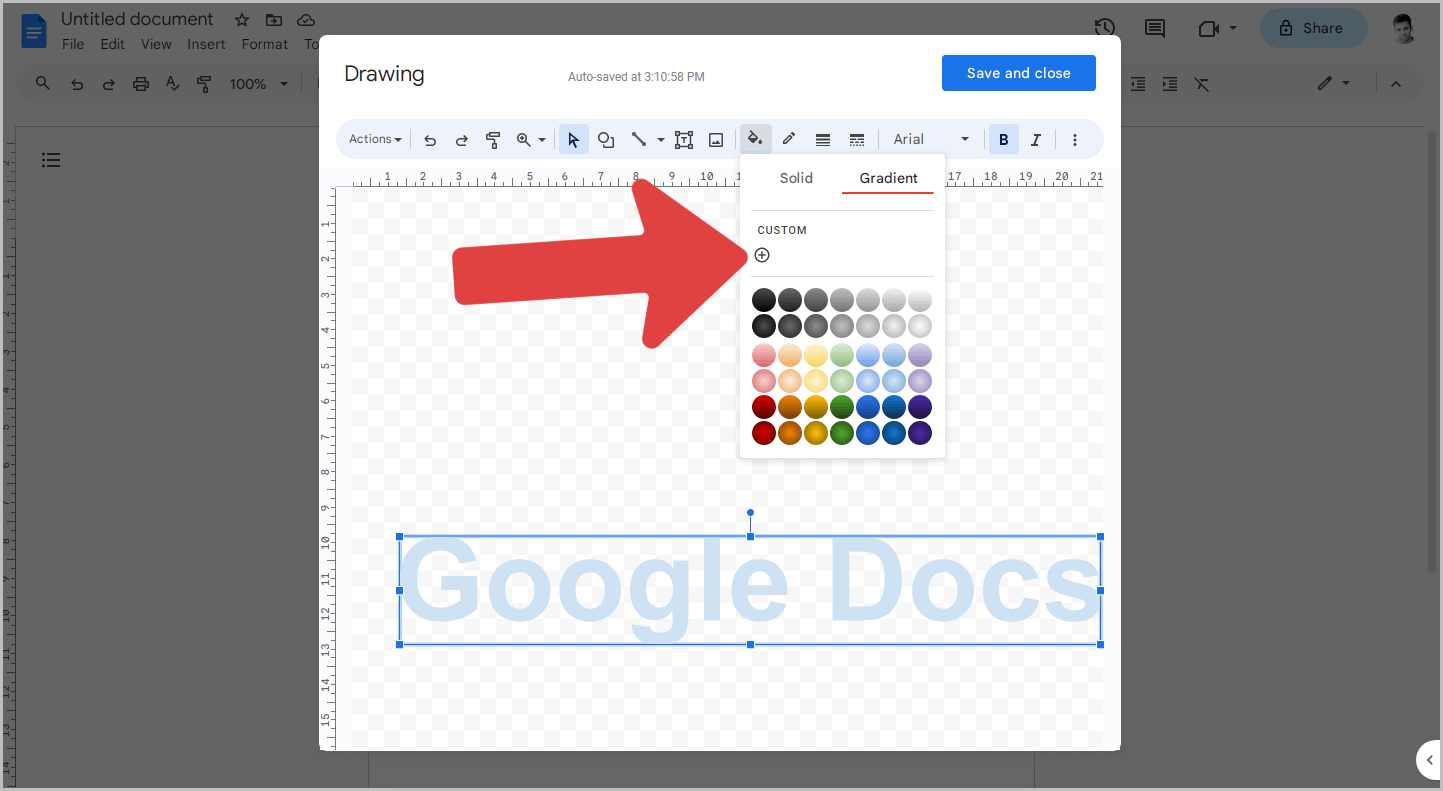
The Midnights album cover utilizes a custom color.
To add the custom color code, click on the “Add a custom color” icon.
9. Set the angle to “315”
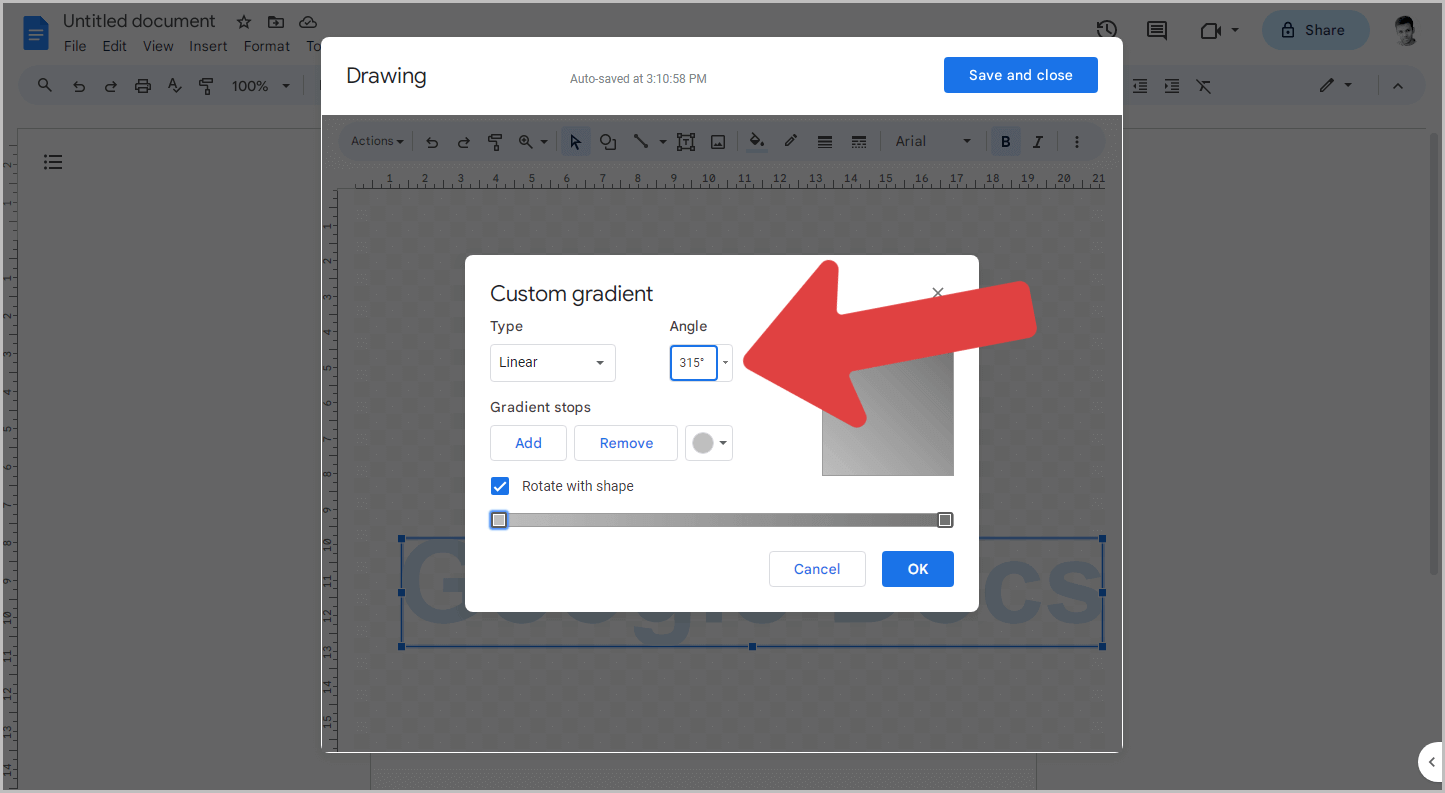
Now you will see the Custom gradient window.
The gradient type is set to “Linear” by default, and I suggest keeping it that way.
In the Angle menu, select “315”.
Now proceed to the next step.
10. Select the first color stop
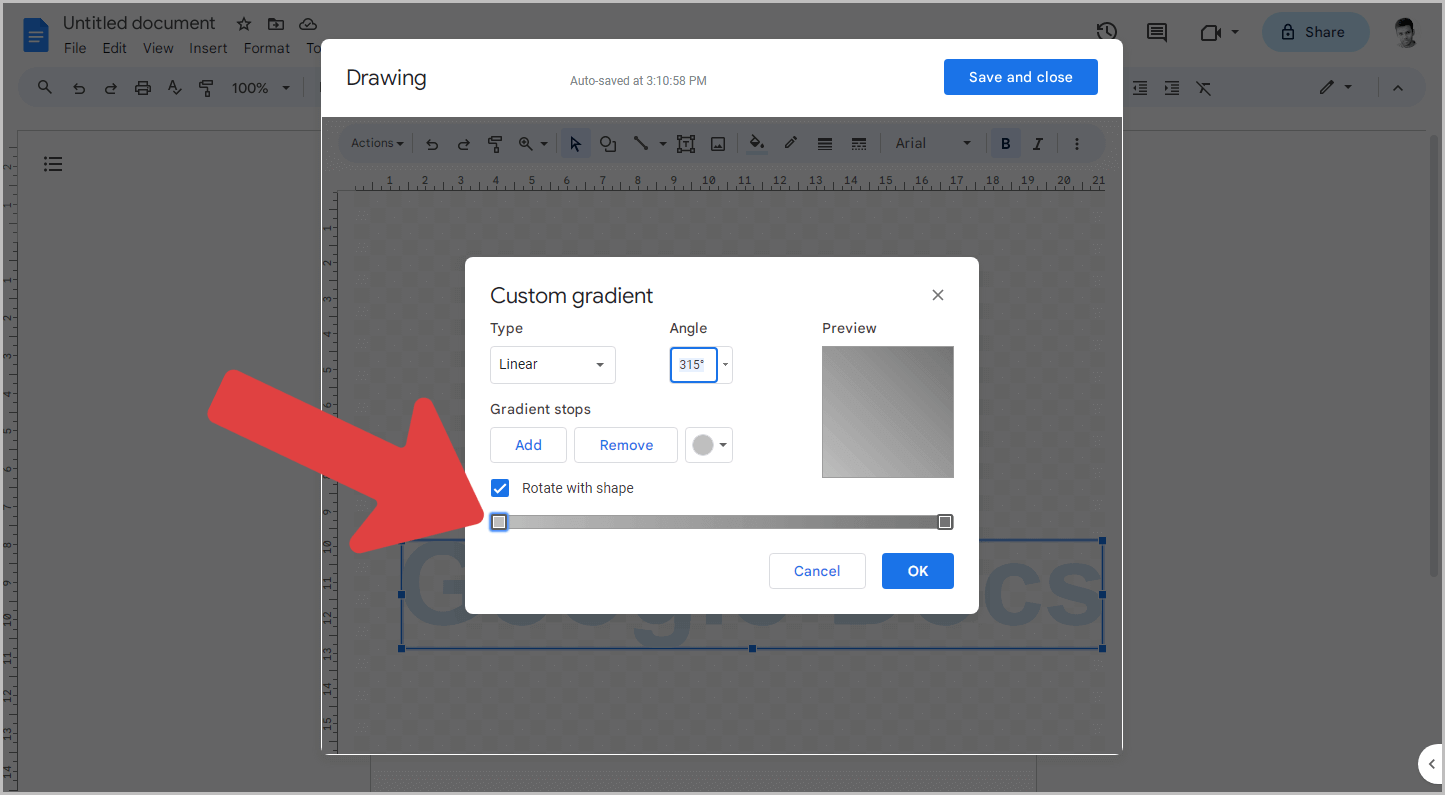
At the bottom of the window, you will see a color stripe with two boxes at each end.
These are the color stops that you can move to adjust the color.
Click on the first color stop, which is the box on the far left of the stripe.
11. Click on the color palette, then click on the “+” icon
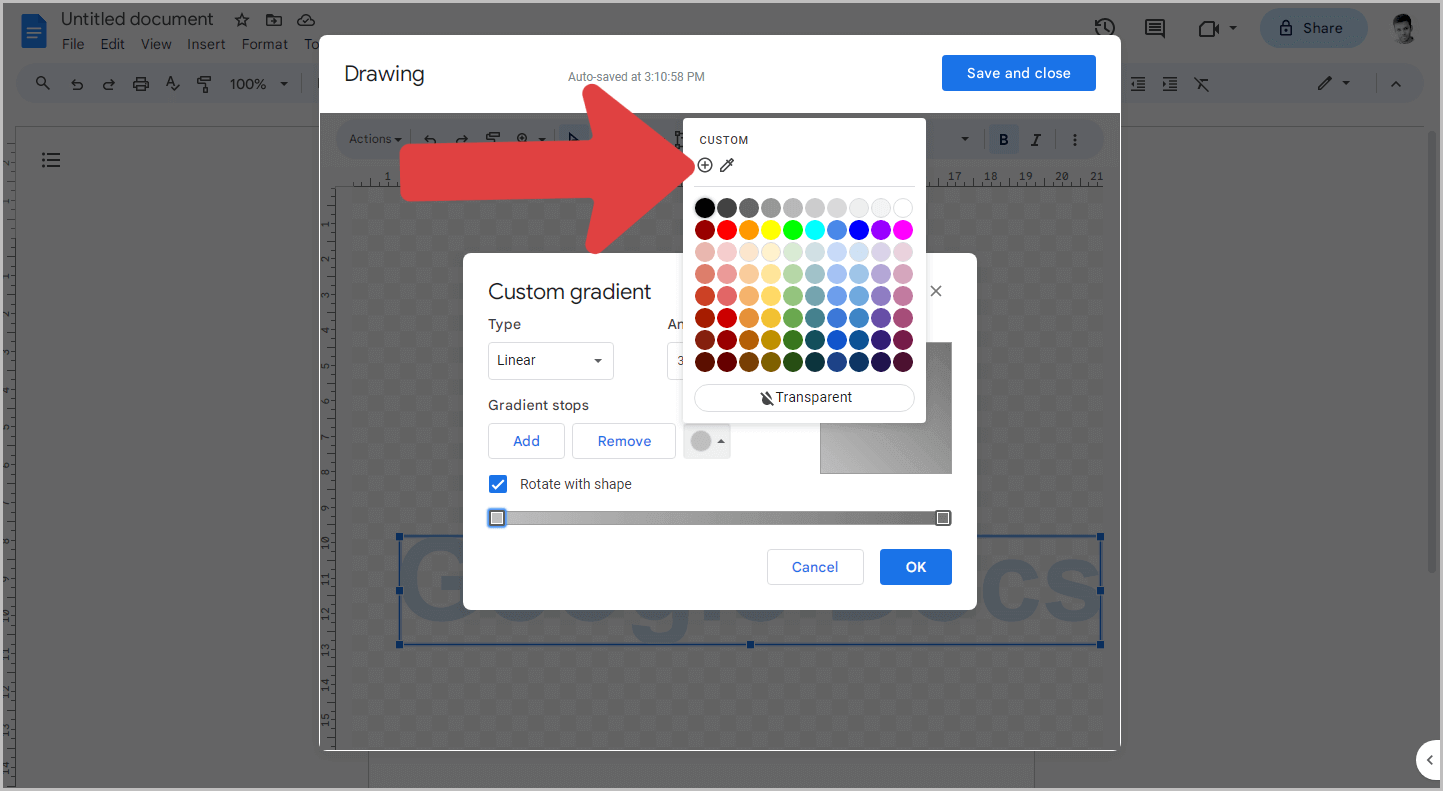
After selecting the first color stop, you will see that the box is highlighted with a blue border, indicating that it is selected.
Now, it is time to add the first color.
To do this, click on the color circle located below the title “Gradient stops”.
Next, click on the “+” symbol below the “Custom” section to add the custom color code.
12. Enter “#5b627eff” in the box and press “OK”
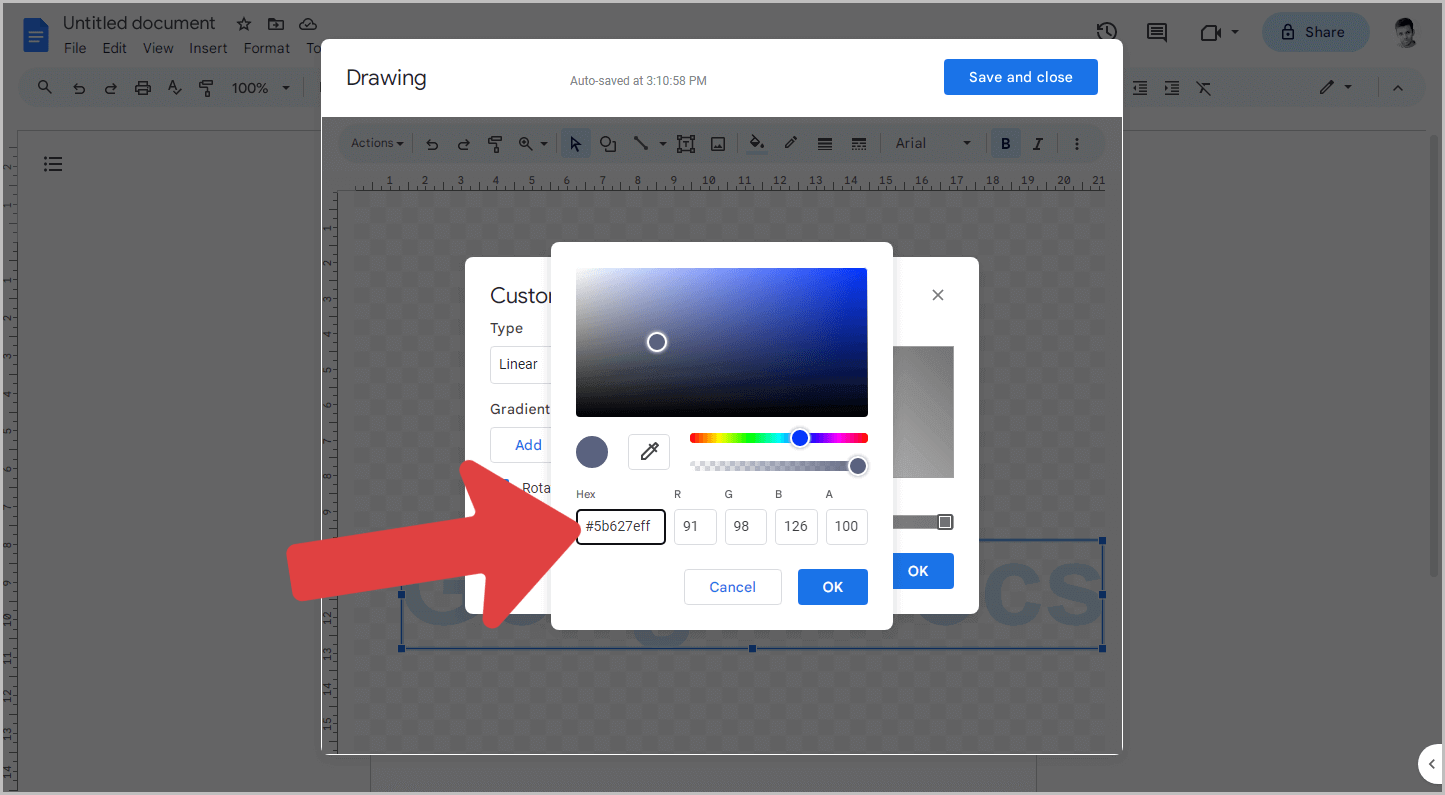
In the “HEX” box, paste this color code: #5b627eff.
Then, click on the “OK” button.
13. Select the second color stop and change it to “#7fa3b9ff”
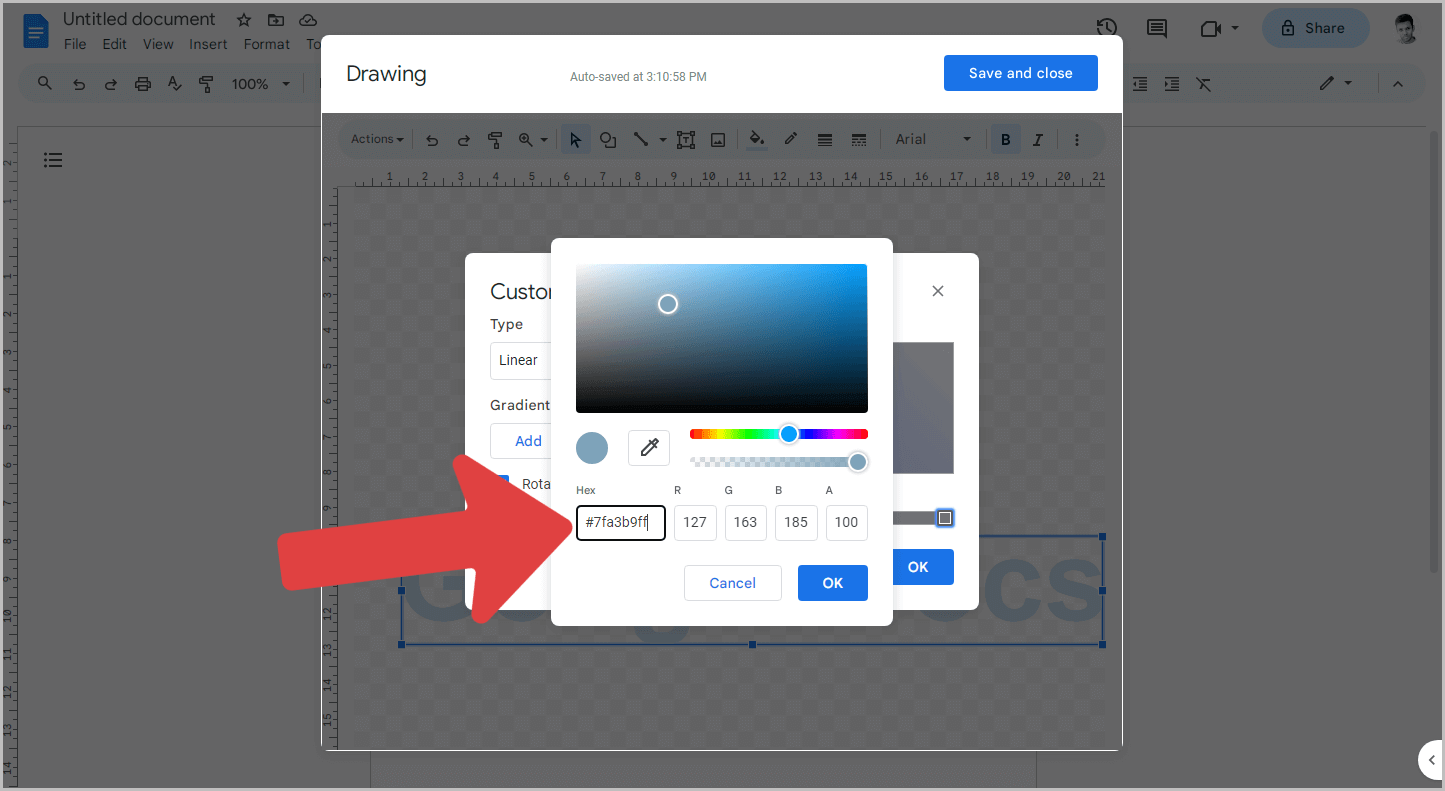
Similarly, select the second color stop, which is the box to the far right of the strip, and change the color to “#7fa3b9ff”.
14. Click on “Add” to add a third color stop
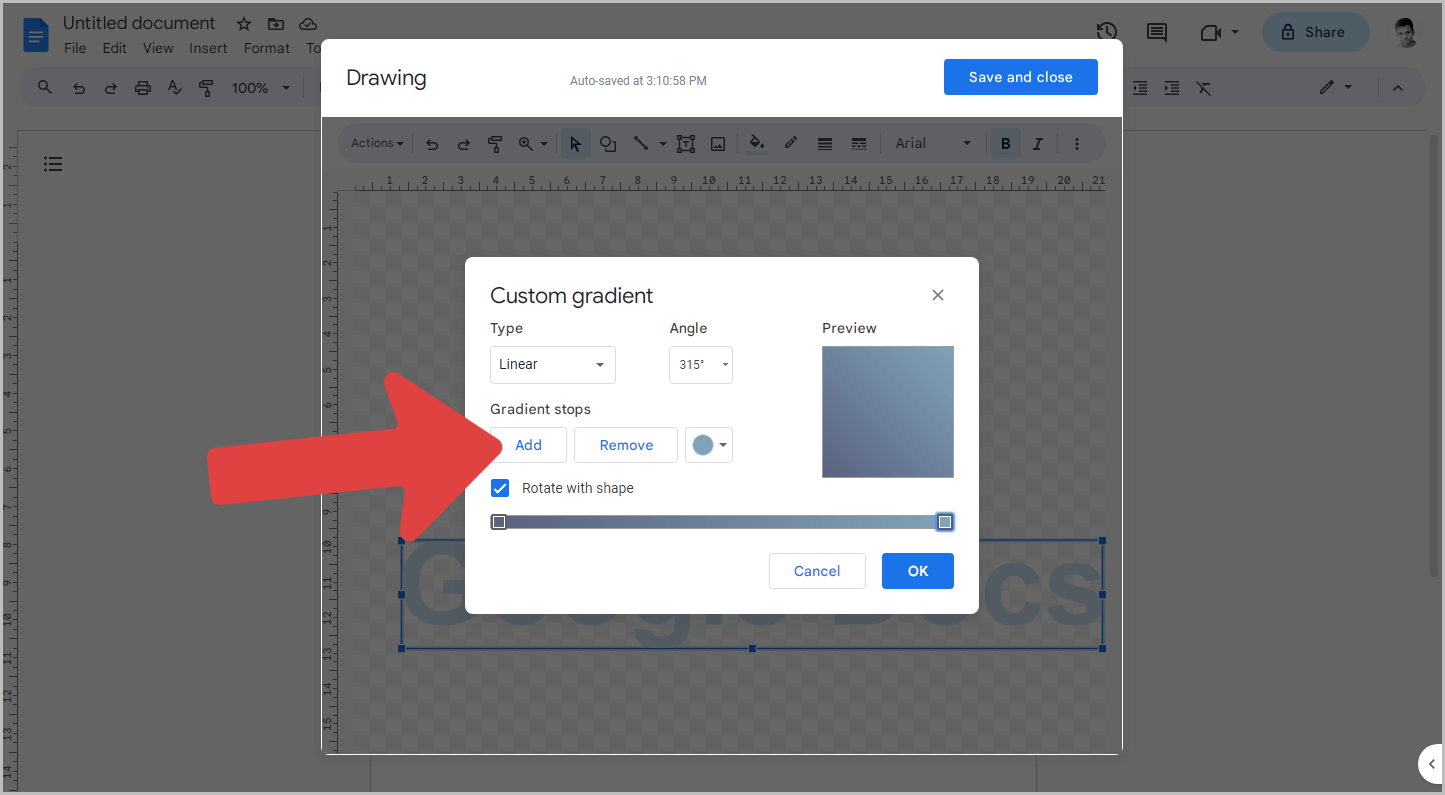
In the “Gradient stops” section, locate the “Add” button.
Click on it to add a third color stop to the stripe.
15. Move the third color stop to the left and press “OK”
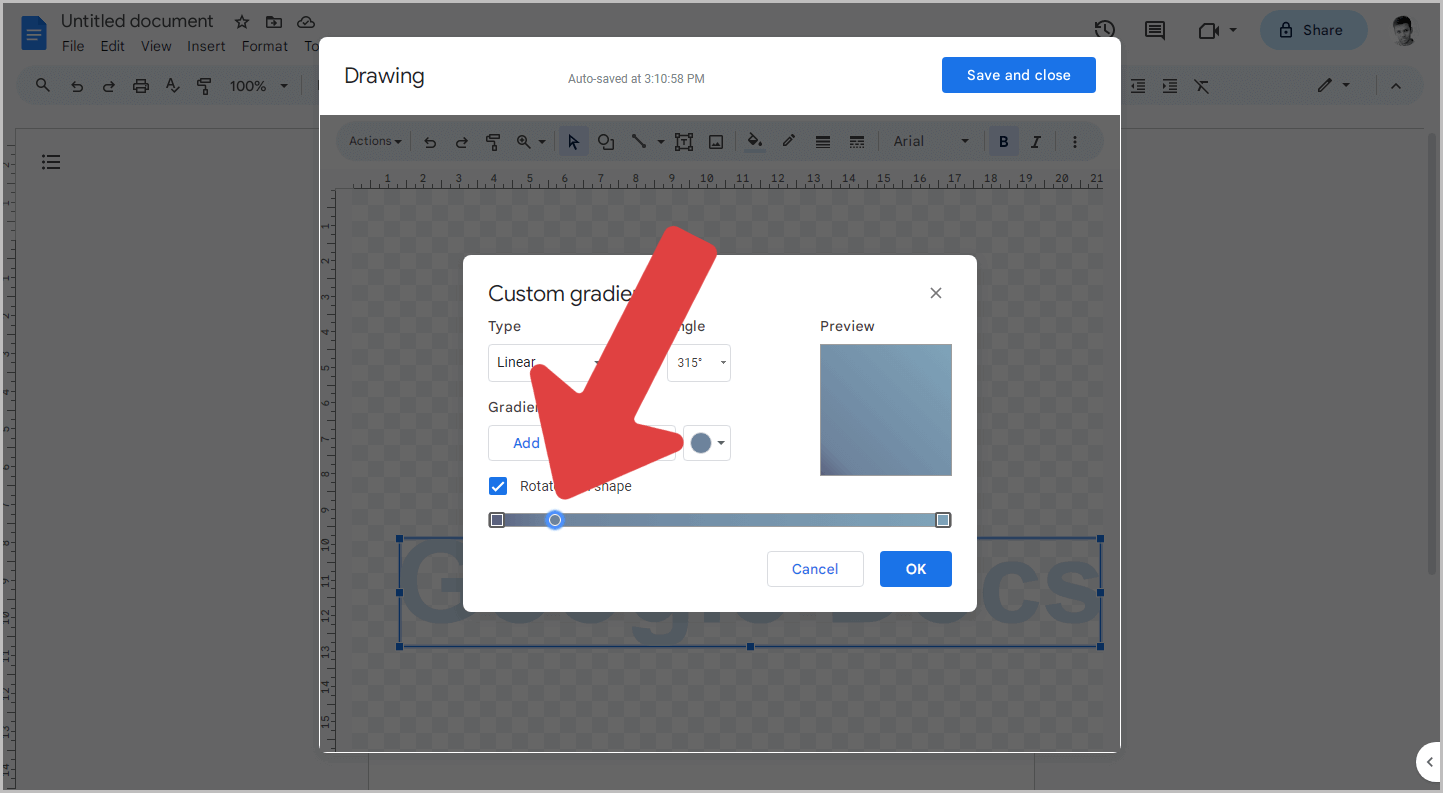
The third stop will be automatically added to the center of the stripe.
Click on this third box and move it to the left, as shown in the screenshot above.
Then, press the “OK” button.
16. Click on “Save and close”

Your text is now ready.
Click on the “Save and close” button to insert the text into your document.
The text will be added as an image in your document, so you will need to follow some additional steps to freely move the image around your document.
17. Click on the text and select “In front of text”
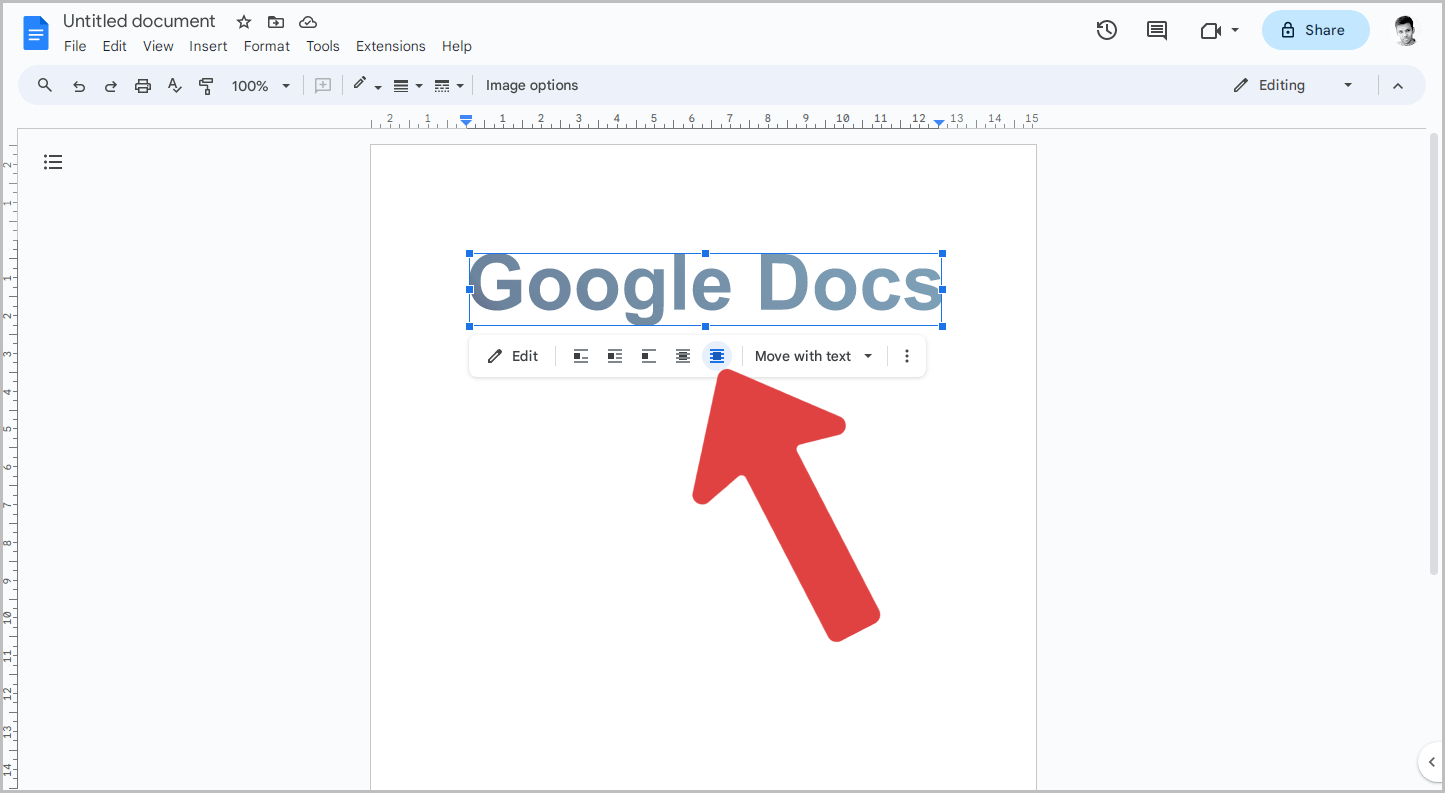
After inserting the image, click on it and then select the “In front of text” option from the image panel below the image.
18. Adjust the image size and move it to the desired location
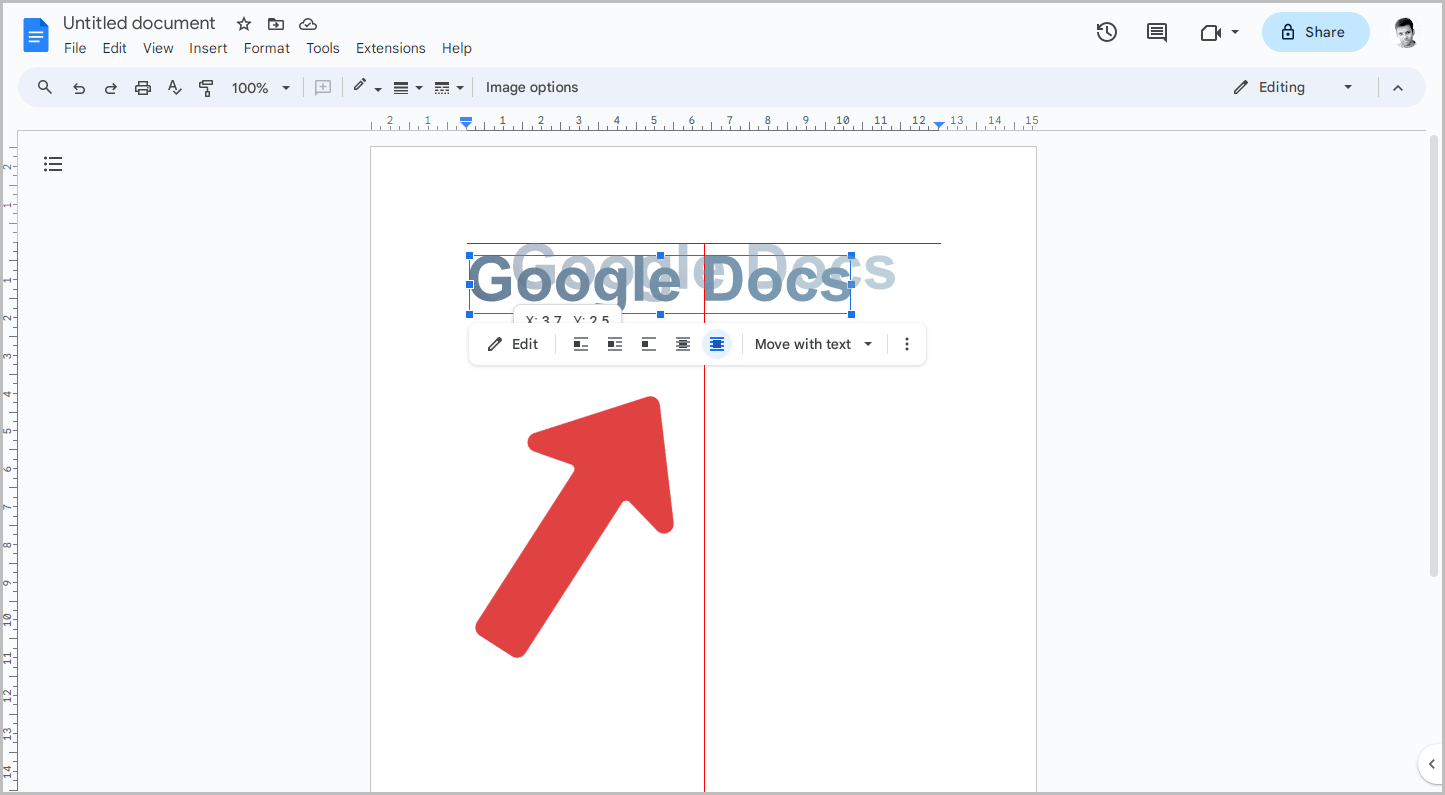
The final steps are to adjust the image size and then drag it to the desired location on the page.
To re-edit the image, simply double-click on it and you’ll see the Drawing canvas.
What Font Is Midnights Taylor Swift?
The font used on Taylor Swift’s album “Midnights” is Arial. Specifically, it is a bold version of the Arial font.