
Labels are an important part of mailing, and they can be tricky to create manually.
If you have a lot of labels to create, Google Sheets is a great way to automate the process.
By using Google Sheets, you can create labels in a very efficient way and it takes hardly a minute to create the labels.
In this article, you’ll learn how to use Google Sheets to mail merge labels.
Google Sheets Mail Merge Labels
- Open Google Sheets
- Install the “Foxy Labels” add-on
- Select a label template
- Design the label
- Print the labels
Did you know that you can create labels in Google Docs? Read this article: How to Make Labels in Google Docs
How to Use Google Sheets to Mail Merge Labels?
Step 1: Open Google Sheets
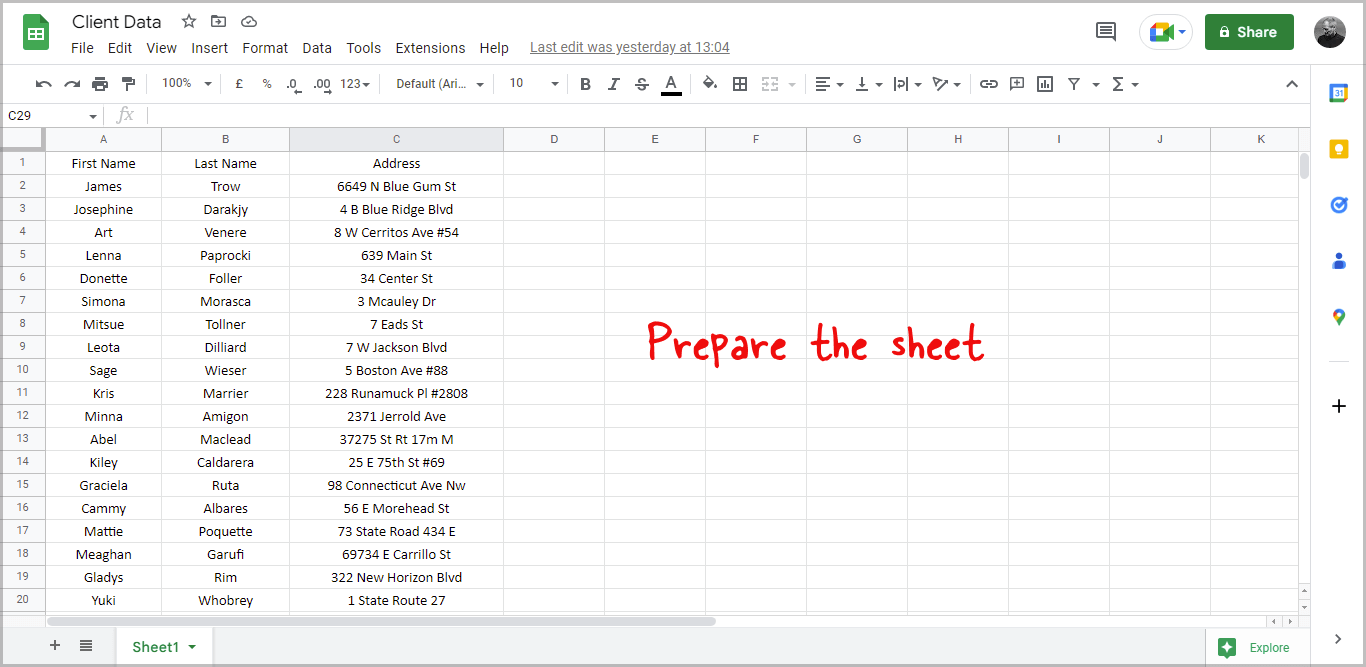
First, open Google Sheets and enter all the data you want to print on the labels.
For example, I wanted to print the customer’s name followed by the address.
So I had three columns in my Google Sheets: First name, Second name, and Address.
If you have the data in MS Excel, you can upload the file to Google Drive and then open the Excel file in Google Sheets.
You can access all your spreadsheets in your Google Drive by going to this link: docs.google.com/spreadsheets
After you have your data ready, you can proceed to the next step.
Step 2: Install the “Foxy Labels” add-on
In this step, you need to install an extension to get the label templates. You’ll also be able to merge the data from the spreadsheets.
There are many free add-ons available on Google Workplace Marketplace, but I personally use the Foxy Labels add-on as it is easy to use, has many free templates, and works on both Google Sheets and Google Docs.
To install the add-on, click on the “Extensions” option from the menu at the top of the sheet just below the sheet name.
From the drop-down menu, select “Add-ons” and then select “Get add-ons”.
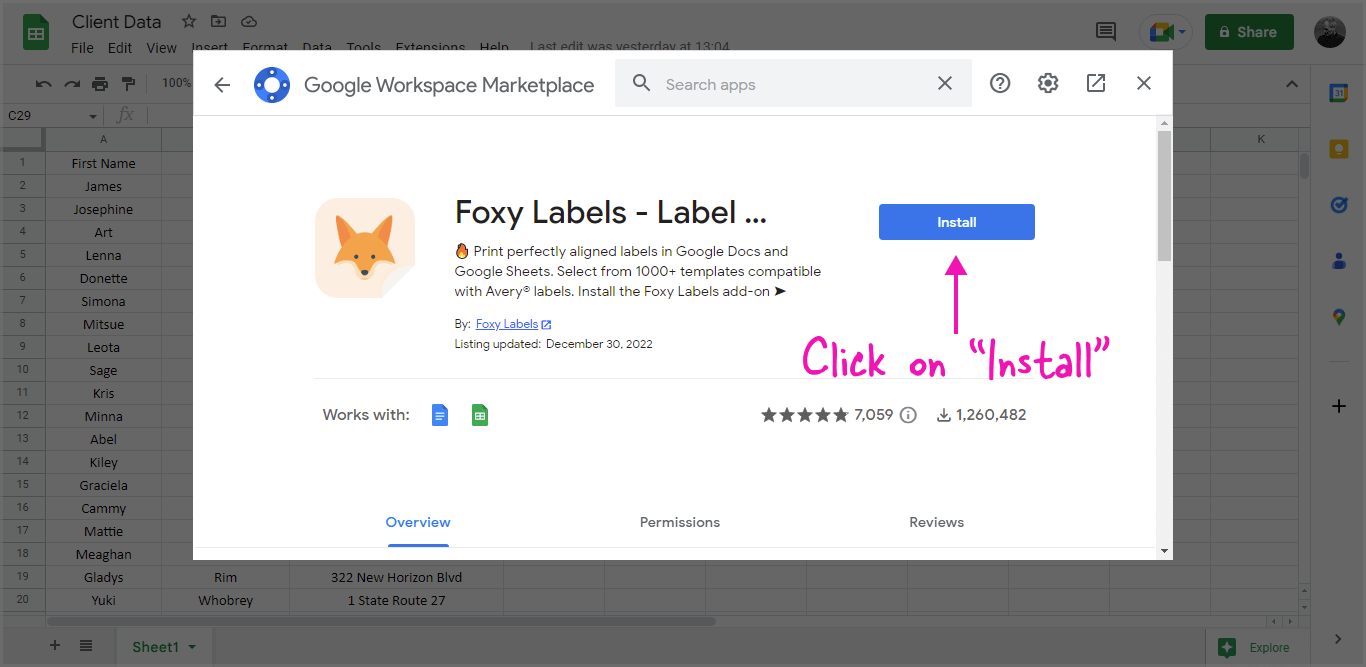
In the search bar, type “Foxy Labels” and press enter. Select the Foxy Labels add-on from the search results, and finally, click on the “Install” button to install the add-on.
You’ll have to grant a few permissions to the add-ons for it to work correctly.
Note: The Foxy Labels add-on is safe. It has more than a million users and a rating of 4.9 stars on Google Workplace Marketplace.
Step 3: Select a label template
Now that we have the data ready, we have also installed the add-on. It is now time to select the label template from the extension.
From the menu, select “Extensions” and then click on the “Foxy Labels” extensions, and finally, on the “Create labels” option.
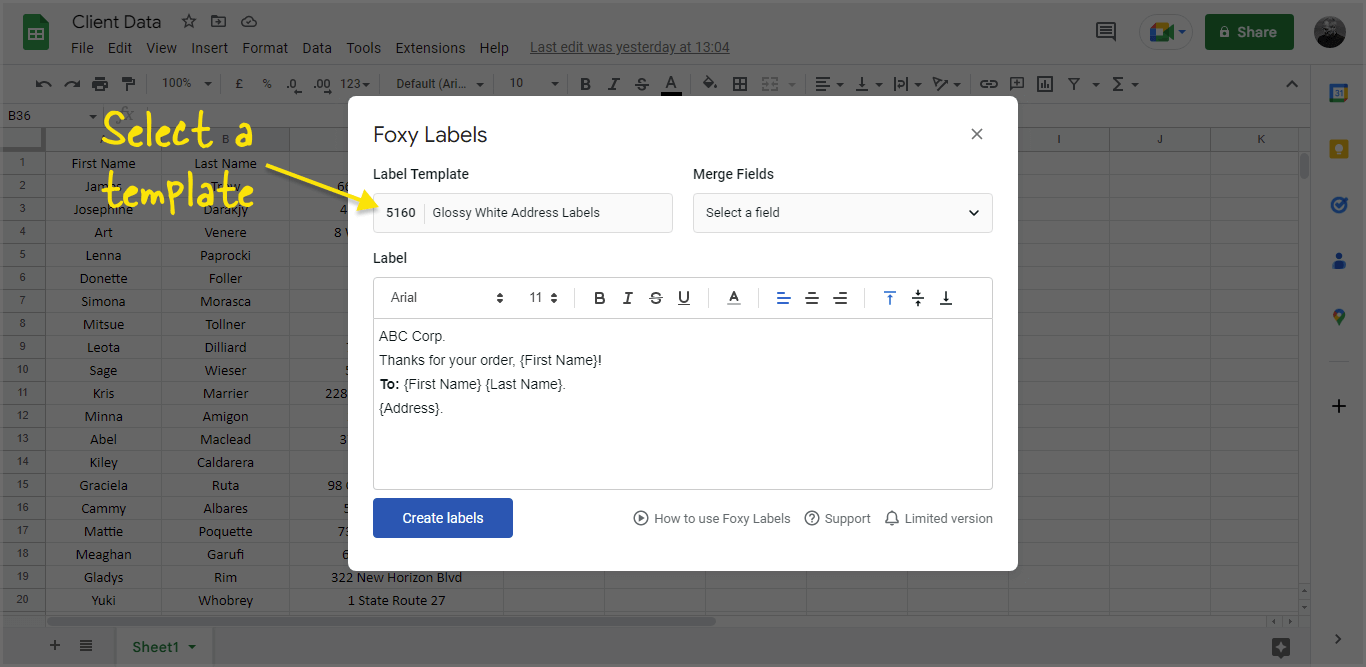
You’ll now see the Foxy Label pop-up. You’ll see three fields on this pop-up: Label Template, Merge Field, and Label.
Click on the Label Template field and choose the label template of your choice. You’ll see the label details in the right column after you select the template.
Click on the “Apply template” button to choose the template.
If you don’t know which label to select, simply choose the 5160 label template and proceed to the next step.
Step 4: Design the label

Click on the “Label” field and start entering the data.
For example:
If you want to print the name of the person on the first line and then the corresponding address of the person on the second line, you should first click on the “Label” field, then click on the second field, “Merge Fields” and then select the “Name” column.
You’ll now see the column “Name” in curly brackets in the “Label” field.
Go to the next line and insert the “Address” field from the “Merge Fields” menu.
You may also change the text color and font style, add emojis and do various other things.
Once your label is ready, click on the “Create labels” button.
Step 5: Print the labels
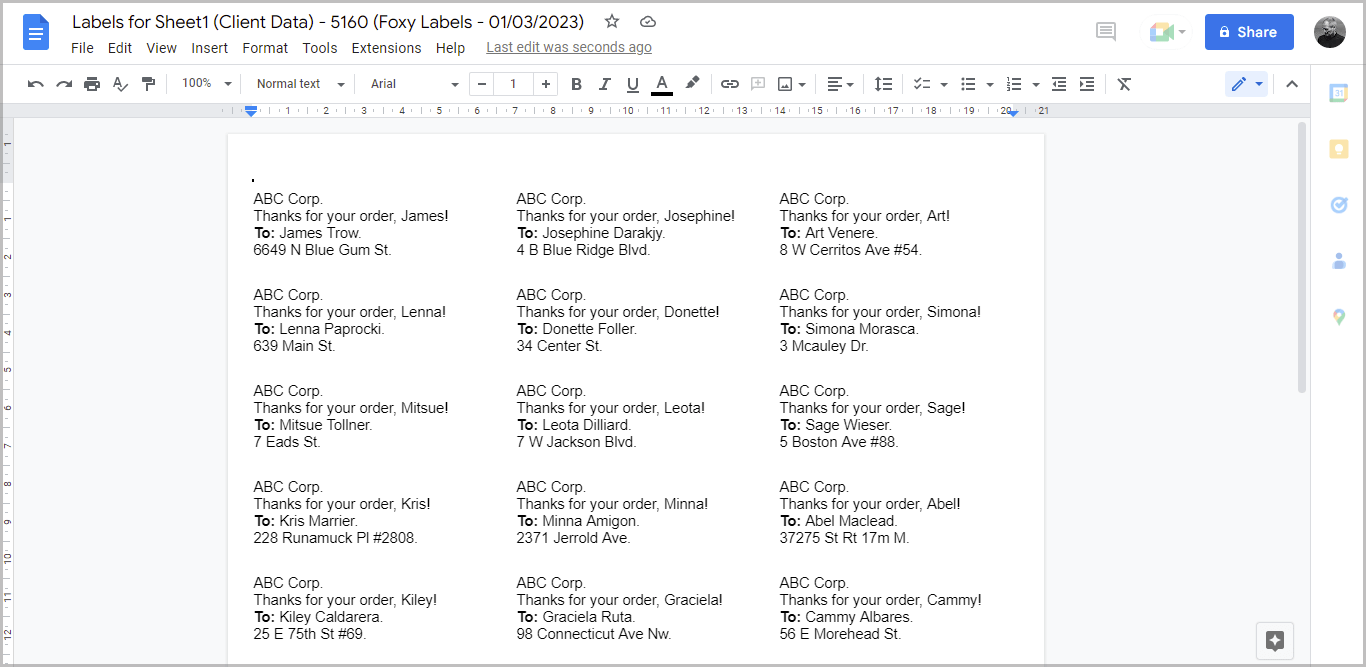
Click on the “Open” button on the pop-up to view the labels.
If you are unsatisfied with the labels, go back to Google Sheets and edit the design.
If satisfied, click on the “Printer” icon from the menu to print the labels.
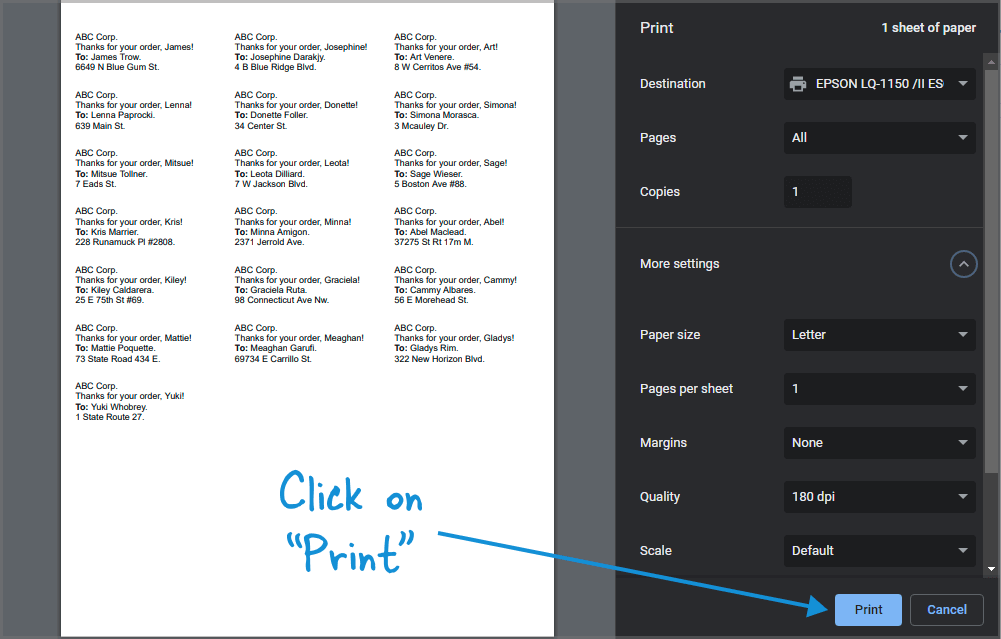
Before printing the labels, use “Letter” paper with “zero” margins.
It is best to print the first page of labels to ensure they fit neatly on the paper. After that, simply begin printing all of the pages.
FAQs
Can You Mail Merge in Google Sheets?
Yes, you can use the free “Foxy Labels” add-on to mail merge in Google Sheets.
How to Mail Merge From Google Sheets to Avery Labels?
Install the “Foxy Labels” add-on, choose the Avery label template, design the label, and print the labels.
How Do I Do a Mail Merge for Labels in Google Sheets?
You need to install the “Foxy Labels” add-on and then use the data in the spreadsheet.
How to Mail Merge Address Labels Google Sheets?
Install the “Foxy Labels” add-on > Choose an address label template > Design the template > Add the Merge fields > Print the address labels.