Want to know how to lock an image in Google Slides?
When creating a presentation, you might add images to a specific slide and want to prevent them from moving.
While Google Slides doesn’t have a built-in lock feature like MS PowerPoint, there’s a workaround to ensure the image stays in place.
In this article, you’ll learn how to lock an image in Google Slides.
Also read: (opens in new tab)
How to Add Your Bitmoji to Google Slides
How to Select Multiple Slides on Google Slides
How to Make Yourself Anonymous on Google Docs
How to Outline Text in Google Slides
How to Lock an Image in Google Slides?
Step 1: Open the slide
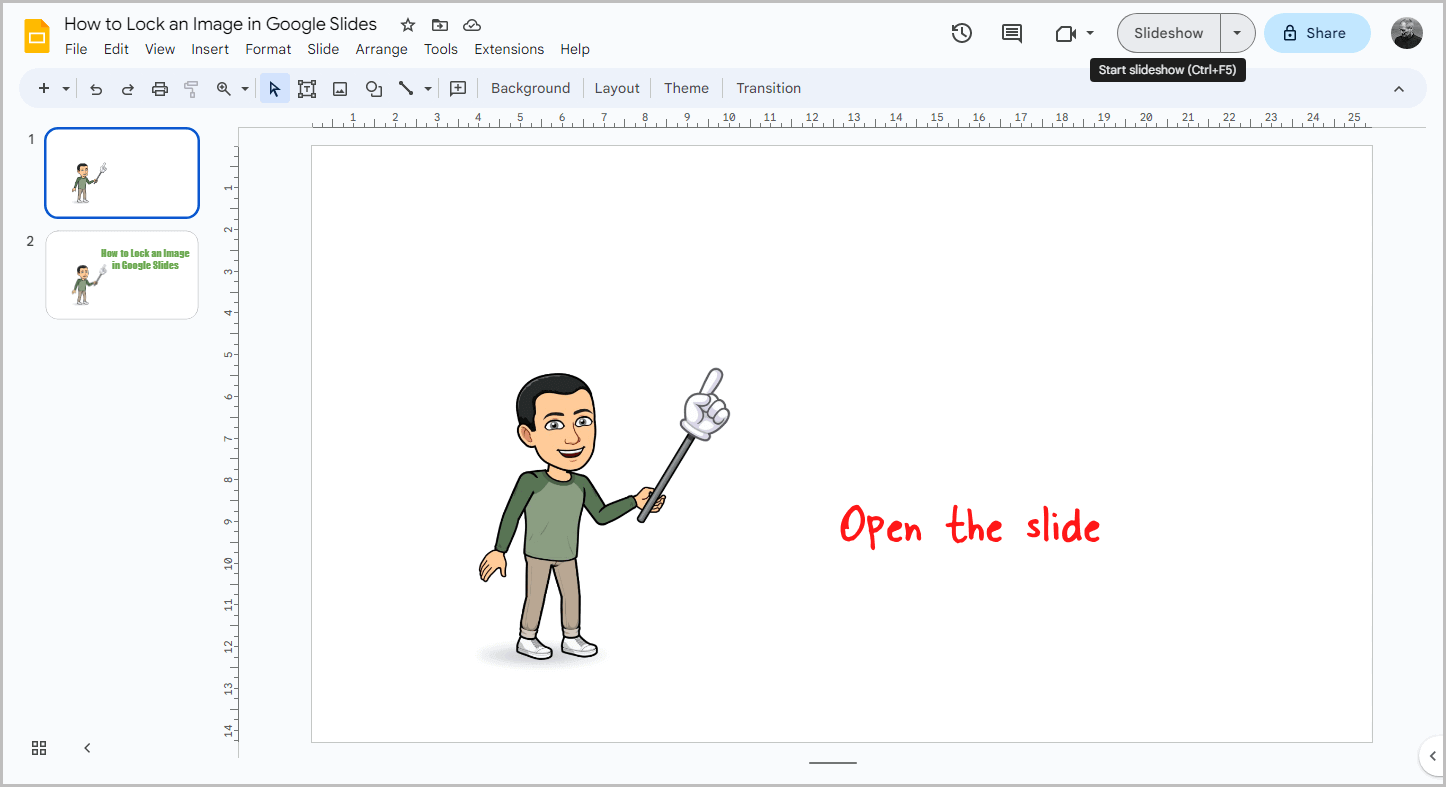
Begin by opening the specific slide where you want to apply the lock.
Since Google Slides lacks a native image lock option, you’ll need to employ a workaround.
Download the slide and set it as the background, ensuring the image remains locked in place.
From there, you can add text or opt to lock all objects on the slide, including text, images, shapes, and more.
To achieve this, download the slide, use it as the background, and then remove all other objects.
Step 2: Go to File > Download > PDF document
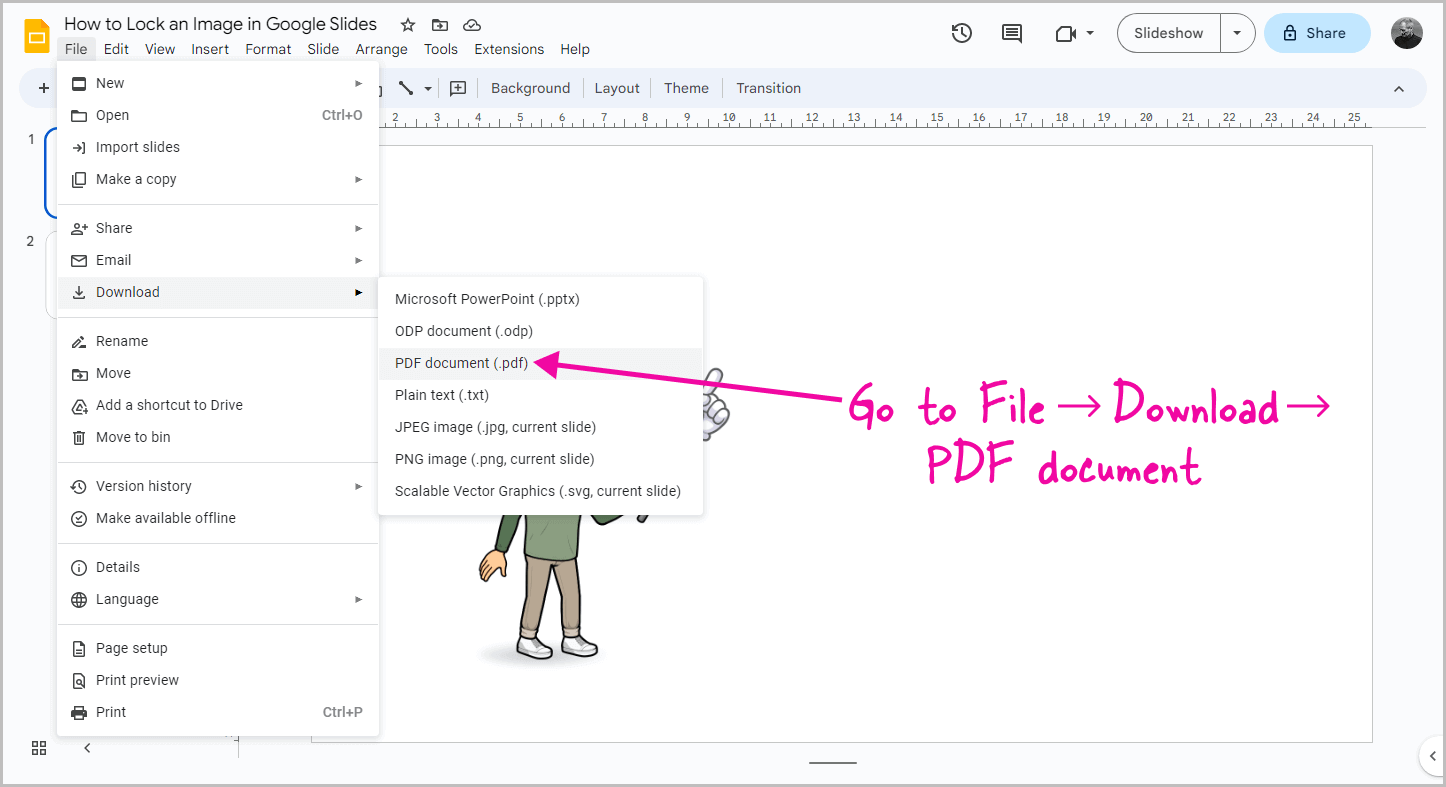
Once you have opened the slide, click on the “File” option in the top menu.
From there, select “Download,” and in the drop-down menu, choose “PDF document”.
You might wonder why not download the slide as a PNG or JPEG image.
The reason is simple: downloading as an image often results in poor quality, which can adversely affect the overall appearance of the slide.
The text and background image may appear blurry.
To ensure the sharpness and clarity of the objects, it is crucial to download the slide in PDF format.
Step 3: Convert the PDF to PNG
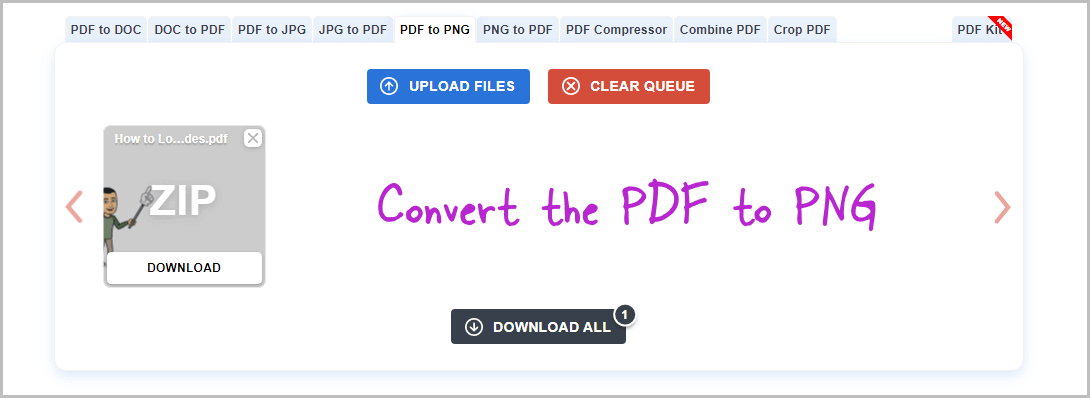
After selecting “PDF document” from the drop-down menu, the entire presentation will be downloaded, not just the specific slide.
However, this is not an issue since we can choose the desired slide image later.
Next, you need to convert the downloaded PDF file to PNG format in order to use it as a background in Google Slides.
To do this, you can search for a “Free PDF to PNG converter” tool on Google and select one that suits your preferences.
Personally, I recommend using this free tool: https://pdf2png.com/.
Once you’ve converted the file to PNG, extract the resulting zip file and choose the slide image that you wish to use.
Step 4: Right-click on the slide and choose “Change background”
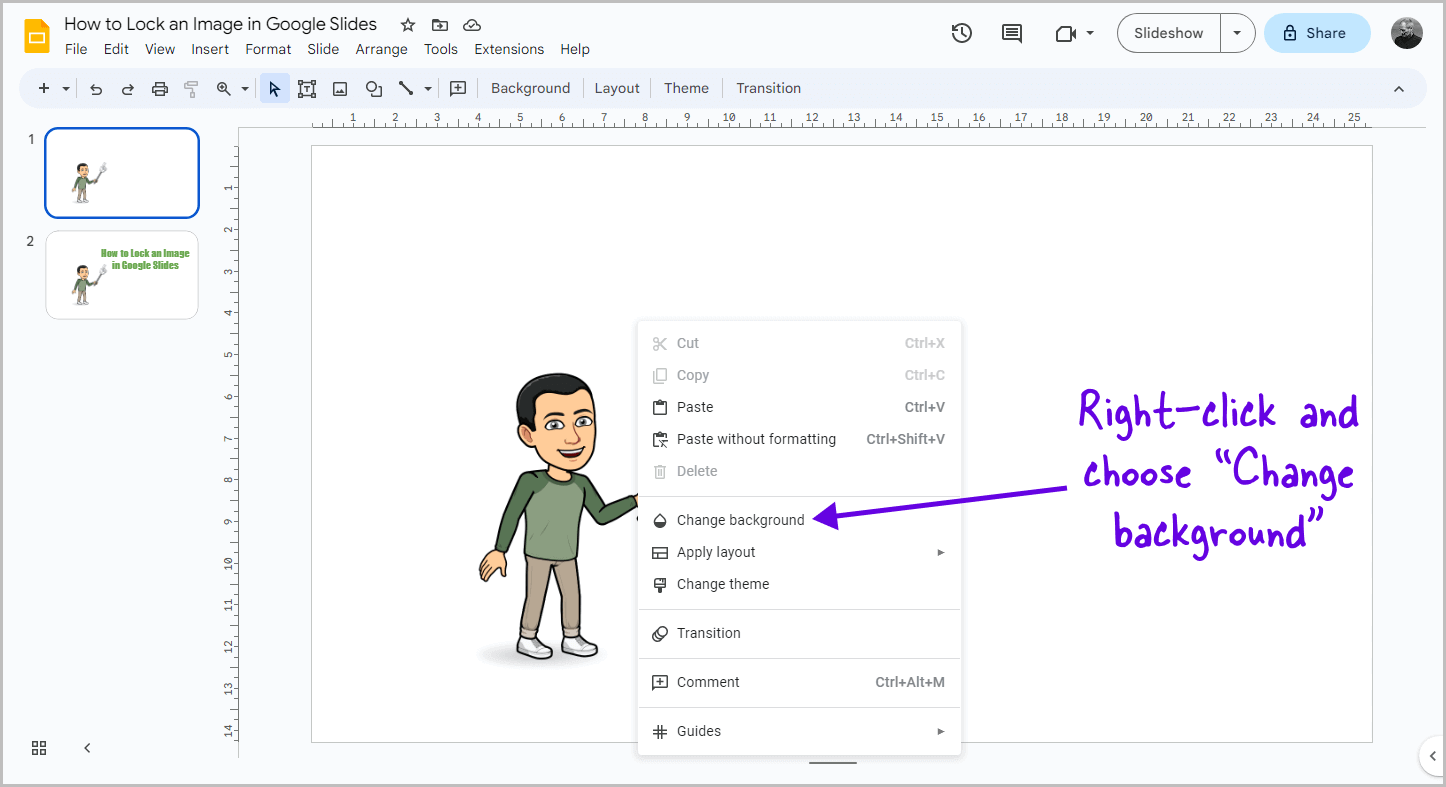
Now, return to Google Slides and navigate to the specific slide where you want to lock the image.
Right-click on the slide and choose the option “Change background”.
Step 5: Click “Choose image”
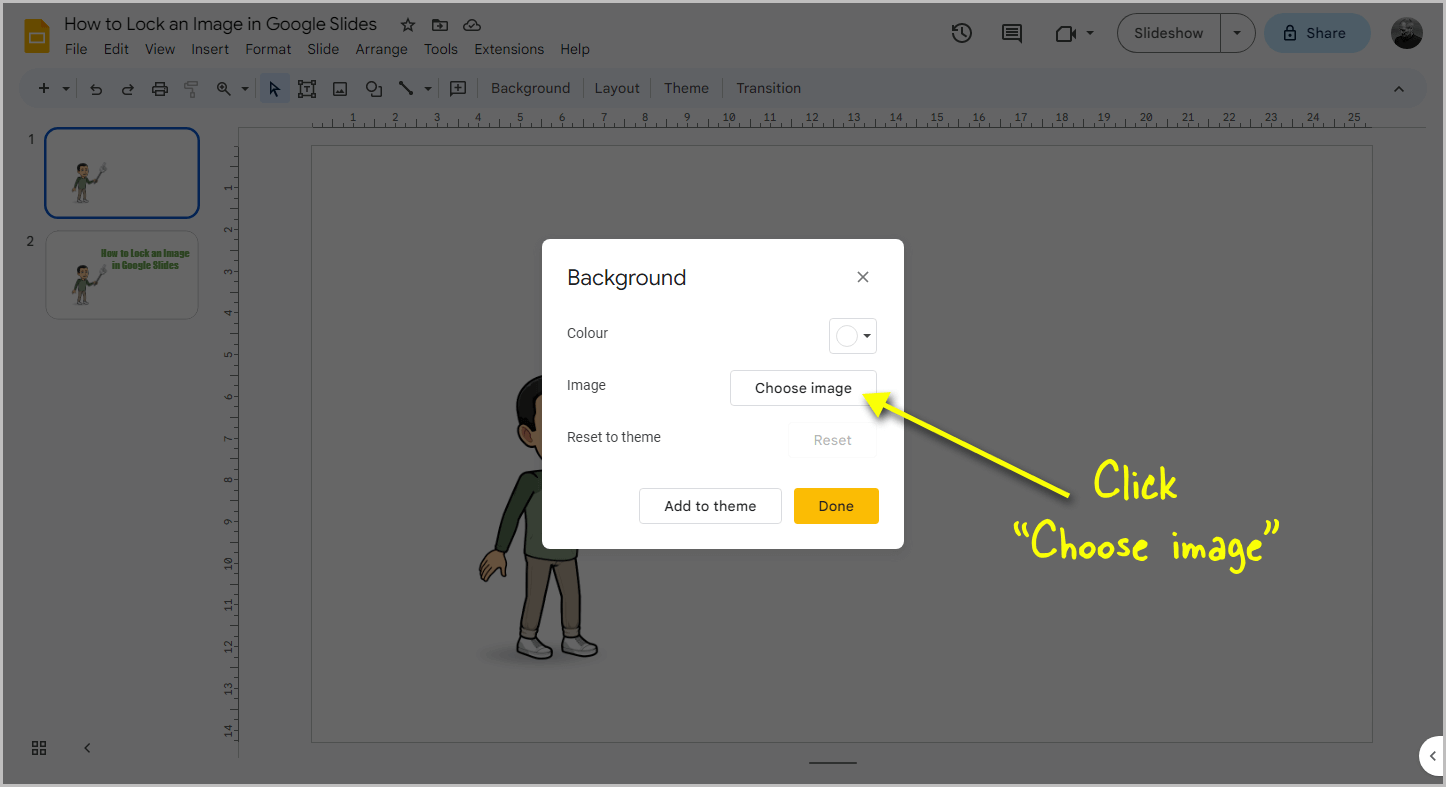
After selecting “Change background,” a pop-up window will appear.
In the pop-up, you will see the “Choose image” option. Proceed to the next step after clicking on it.
Step 6: Drag and drop the PNG image
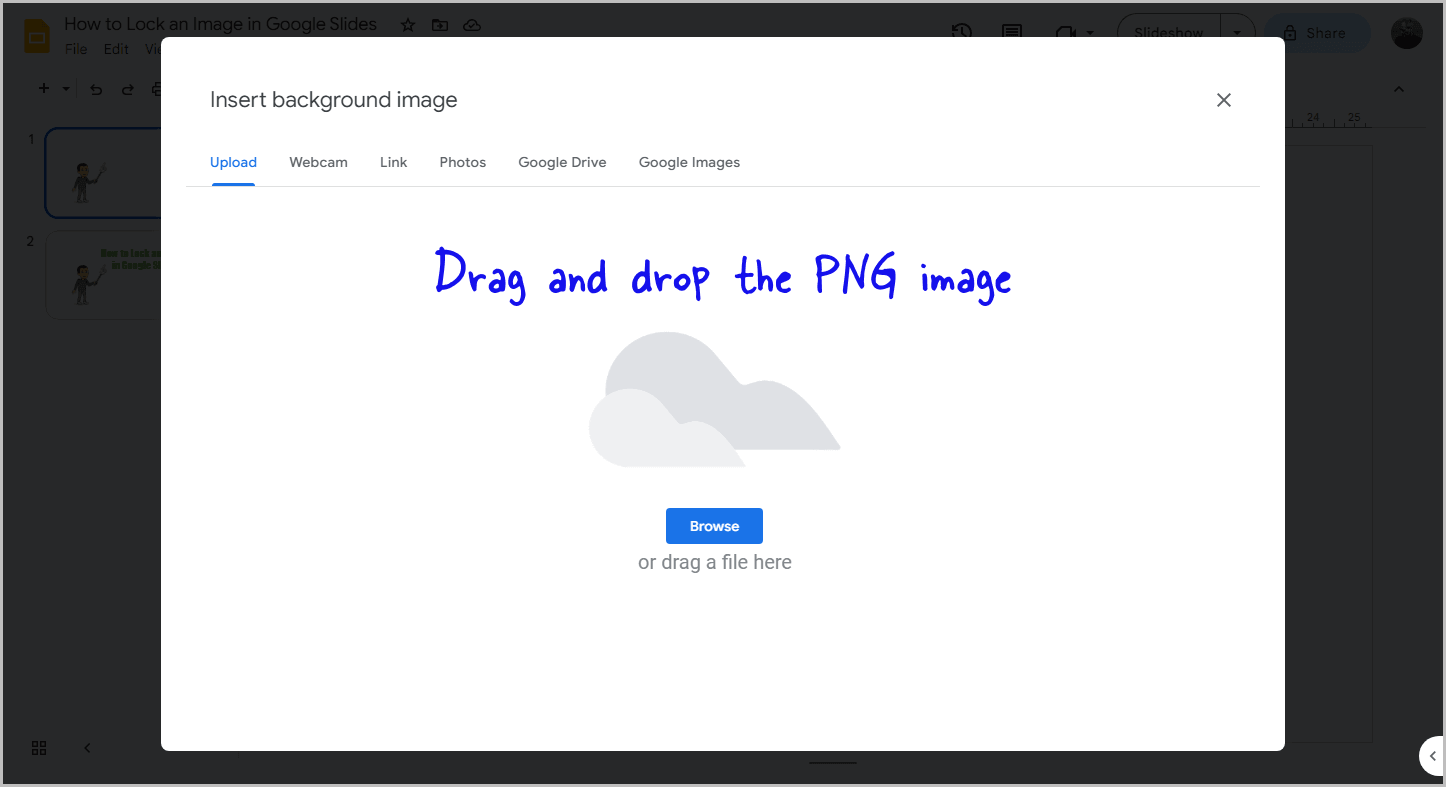
Next, you can simply drag and drop the slide image that you downloaded in Step 3 onto the pop-up window.
Step 7: Click “Done”
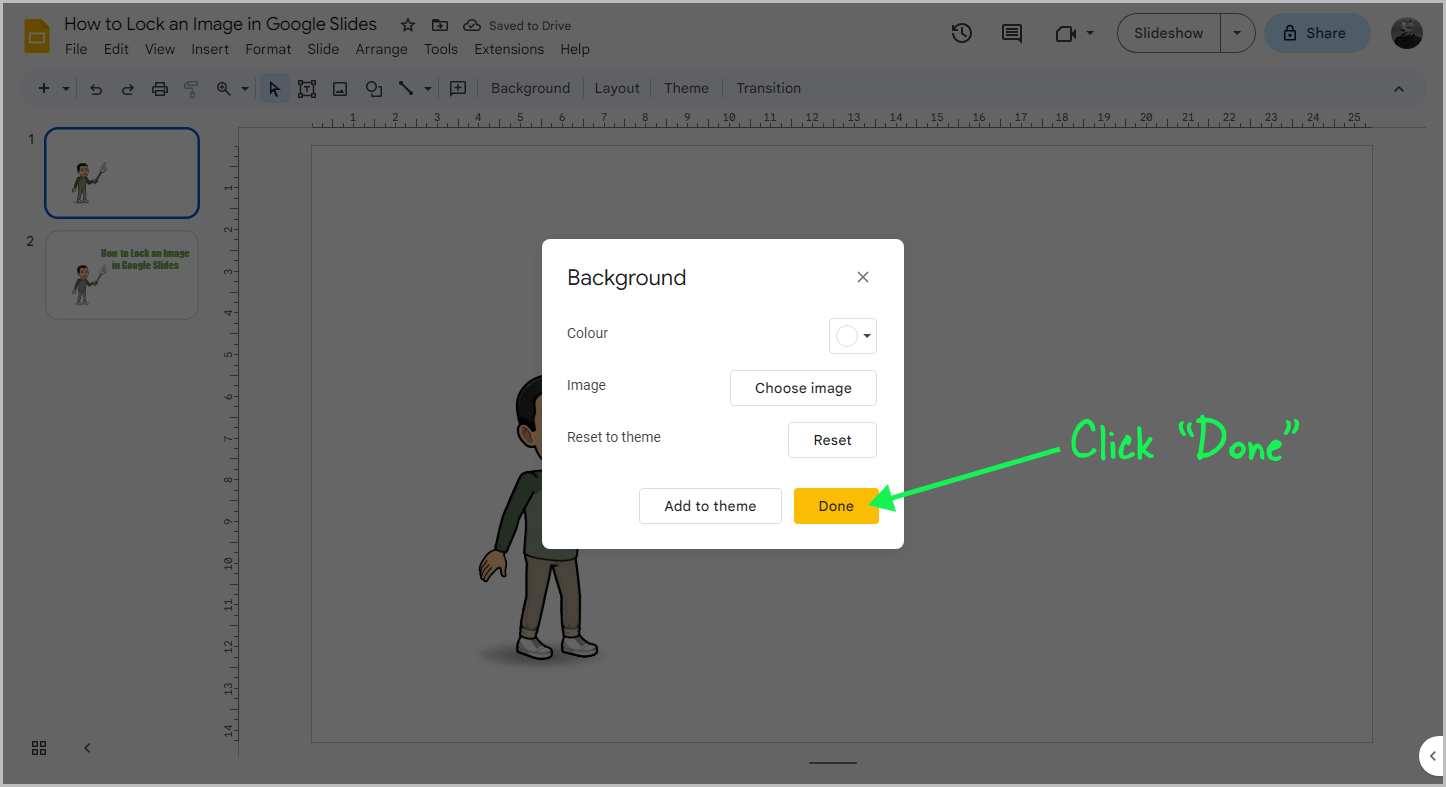
Finally, click on “Done” to complete the process.
The background will now be changed.
To prevent any overlapping, make sure to delete all the objects that were previously present in the background.
You will notice that the image and text will appear exactly as before, but now they are locked in place.
Since you downloaded the slide as a PDF and then converted it to PNG, the objects in the background will retain their crisp and sharp appearance.
If you had downloaded the slide directly as a PNG, the quality would have been poor, resulting in a less polished slide.
FAQs
Can You Lock Things in Place on Google Slides?
Yes, you can lock things in place on Google Slides by downloading the slide as a PDF, converting it to PNG, and setting it as the background.
Is There a Way to Lock an Image in Google Slides?
Yes, there is a workaround to lock an image in Google Slides. You can download the slide as a PDF, convert it to PNG, and set it as the background.
Can I Lock an Image in Google Slides?
Yes, you can lock an image in Google Slides by downloading the slide as a PDF, converting it to PNG, and setting it as the background.
Conclusion
Adding images to a specific slide in Google Slides is a great way to make your presentation more visually appealing.
However, you might want to prevent these images from moving around the slide.
While there’s no native lock feature in Google Slides, you can use a workaround to ensure the image stays in place.
Here’s a quick recap of the steps:
- Open the slide and download it as a PDF document.
- Convert the PDF file to PNG format using a third-party tool.
- Choose the slide image you want to use and set it as the background.
- Delete any objects that were previously present in the background.
By following these simple steps, you can lock an image in Google Slides and prevent it from moving around the slide. This will help you create a polished and professional-looking presentation.

