Do you want to know how to lock an image in Google Docs?
As we all know, when an image is inserted into a Google Docs document, it is initially placed where the cursor is located.
After that, you can move it around to the desired location.
However, once you have decided on the final position of the image and start adding other content, such as text, the image will follow the text and move away from its original position.
This can be frustrating, especially if you want to maintain a specific layout or arrangement of your document.
Fortunately, there is a way to lock the image in place, and it is a simple process that takes only a few steps.
By locking the image, you can ensure that it stays in the same position even when you add additional content or make changes to the document.
In this article, you’ll learn how to lock an image in Google Docs.
Also read: (opens in new tab)
How to Center an Image in Google Docs
How to Put Text Over an Image in Google Docs
Google Docs Unsupported Image Type
How to Make a Google Doc Look Like Old Paper
How to Lock an Image in Google Docs?
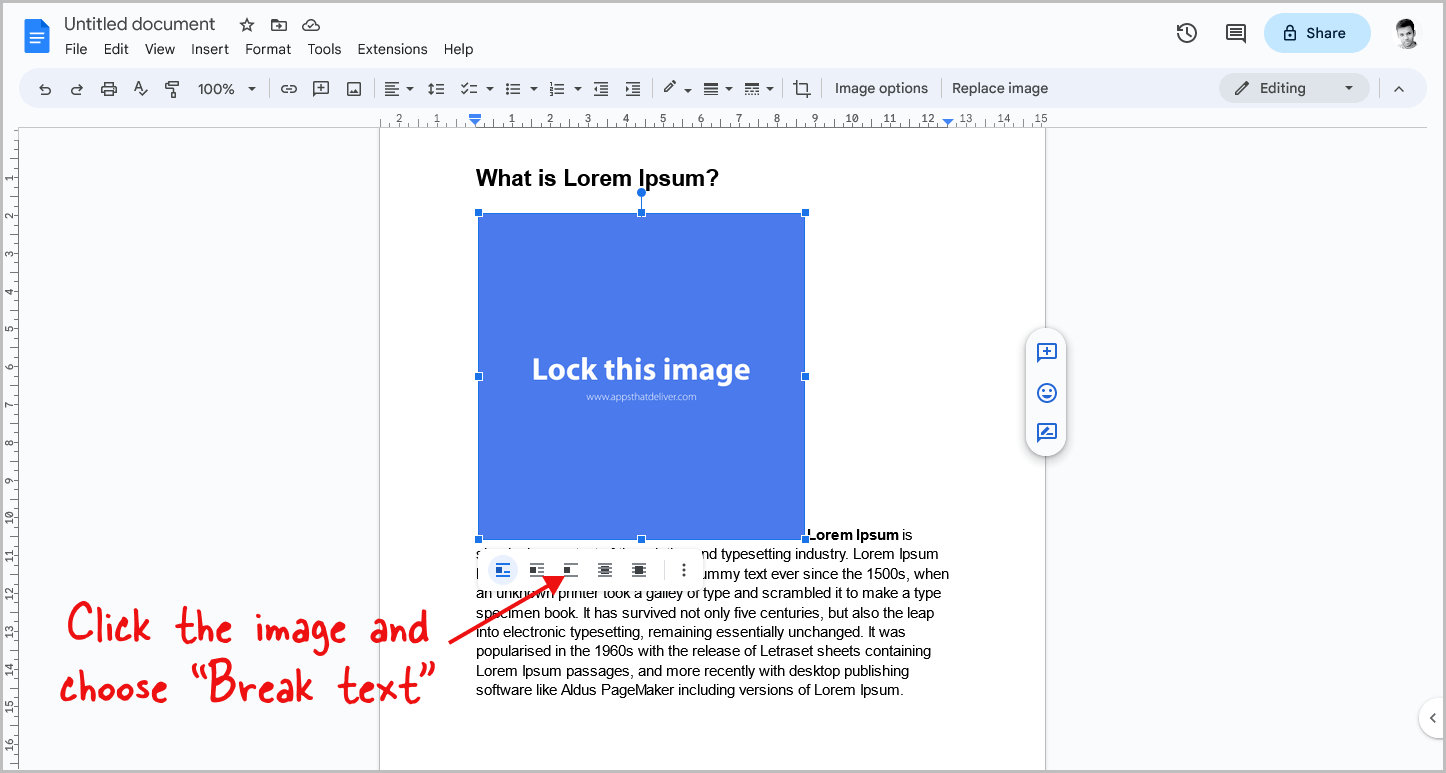
Step 1: Click the image and choose “Break text”

To start, click on the image to select it. Next, choose the “Break text” option from the image options panel located at the bottom of the image.
This panel is only visible when you click on the image.
It’s important to note that when you first insert the image, the “In line” option is selected.
However, with this option, you won’t be able to lock the image.
That’s where the “Break text” option comes in handy.
By selecting this option, we can lock the position of the image later on.
If you’ve already selected the “Break text” option or other options like Wrap text, Behind text, or In front of text, you can skip this step.
Just make sure you choose any option other than “In line” from the image options panel.
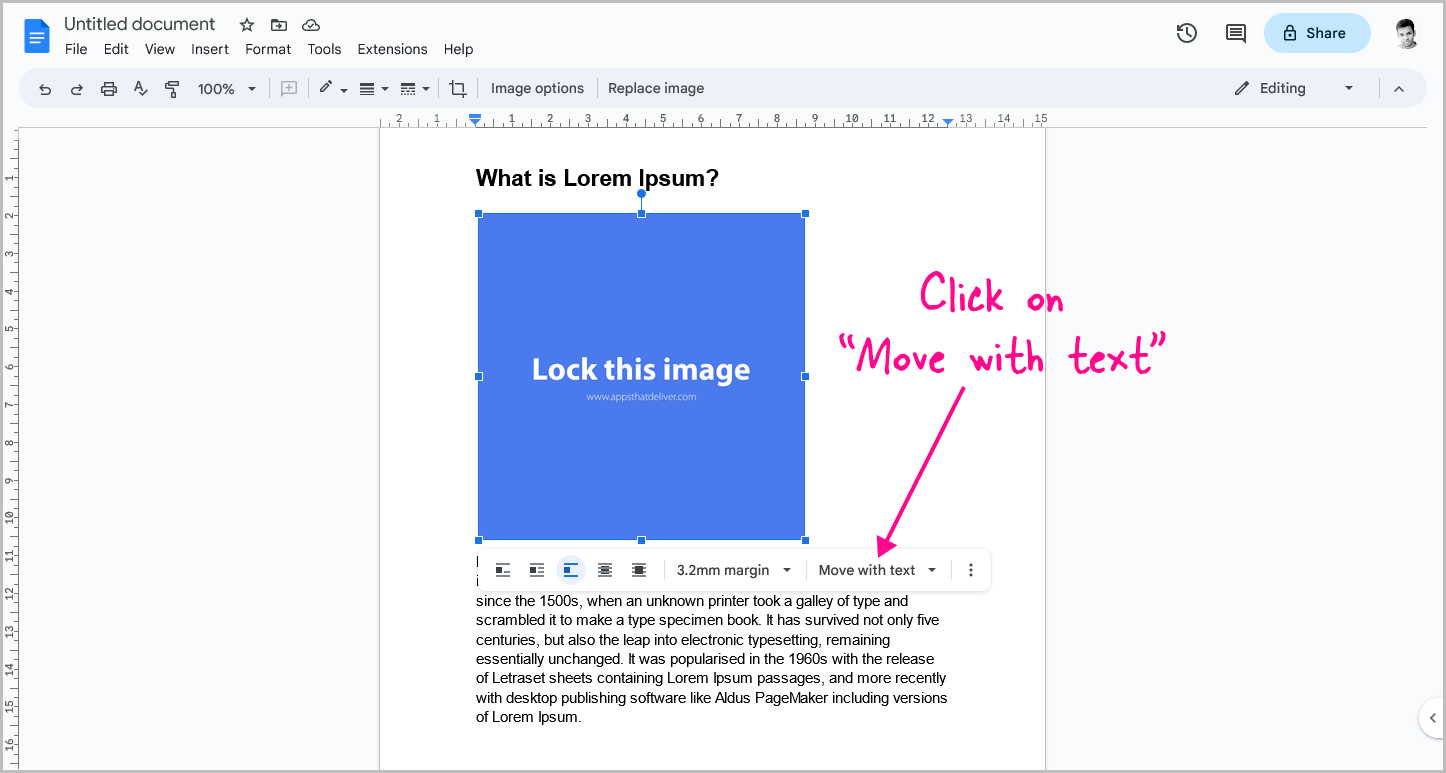
Step 2: Click on “Move with text”

After selecting the “Break text” or another option from the panel, the panel will expand and display additional options.
On the right side of the panel, you will find the “Move with text” option.
Click on this option, and then proceed to the next step.
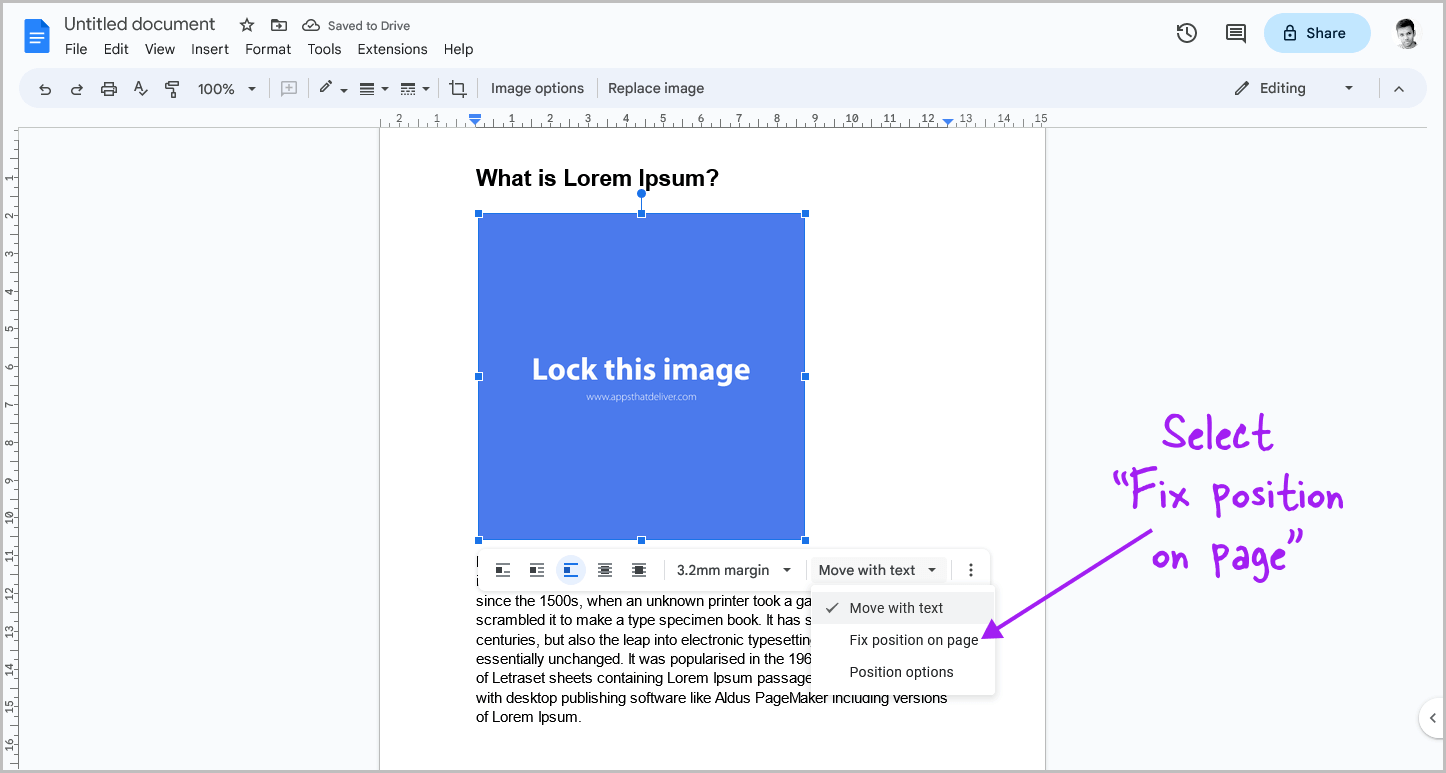
Step 3: Select “Fix position on page” from the drop-down menu

After clicking on the “Move with text” option, you will see a drop-down menu that includes “Move with text,” “Fix position on page,” and “Position options.”
Next, select “Fix position on page” from the drop-down menu.
This instructs Google Docs to keep the image in that position.
Once the image is fixed in place, you can add content to the document without worrying about the image moving.
However, if you need to reposition the image at any point, simply drag it to the desired position.
FAQs
Can I Lock an Image in Google Docs?
Yes, you can lock an image in Google Docs by selecting “Break text” and then “Fix position on page” from the image options panel.
How to Lock Images in Google Docs?
To lock images in Google Docs, select the image and choose “Break text” from the image options panel. Then, click on “Move with text” and select “Fix position on page” from the drop-down menu.
How Do I Lock an Image in Google Docs?
To lock an image in Google Docs, select the image, click “Break text” from the image options panel, then choose “Fix position on page” from the “Move with text” drop-down menu.
Conclusion
Locking an image in Google Docs is a simple process that takes only a few steps.
By following these steps, you can ensure that your images stay in the same position, even when you add additional content or make changes to the document.
Here’s a quick summary of the steps:
- Click the image and choose “Break text”
- Click on “Move with text”
- Select “Fix position on page” from the drop-down menu

