Do you want to know how to stop Chrome from suspending tabs?
Chrome has a useful feature called “Memory Saver” that’s enabled by default.
It works by temporarily suspending tabs that you’re not using so that the memory they were using can be used by the tabs you’re actively using.
This can be really helpful if your computer is running low on memory.
However, there may be times when you don’t want Chrome to pause your inactive tabs.
Is it possible to disable this feature?
Absolutely!
In this article, we’ll show you an easy way to stop Chrome from suspending tabs.
Also read: (opens in new tab)
Index Card Template Google Docs
How to Copy Text From a Picture
How to Switch Back to the Old Layout in Google Docs
How to Print Labels From Google Sheets for Free
How to Make Address Labels in Google Docs
How to Stop Chrome From Suspending Tabs?
Step 1: Open Chrome settings

To access Chrome settings, there are two simple methods you can use.
The first method is to click on the three vertical dots located at the top right corner of the browser window.
Once you click on the dots, a drop-down menu will appear. From the menu, select “Settings” to open the Chrome settings page.
Alternatively, you can directly access the Chrome settings by typing the following URL into the address bar: chrome://settings/.
Press Enter after entering the URL, and it will take you directly to the settings page.
Step 2: Navigate to “Performance” settings
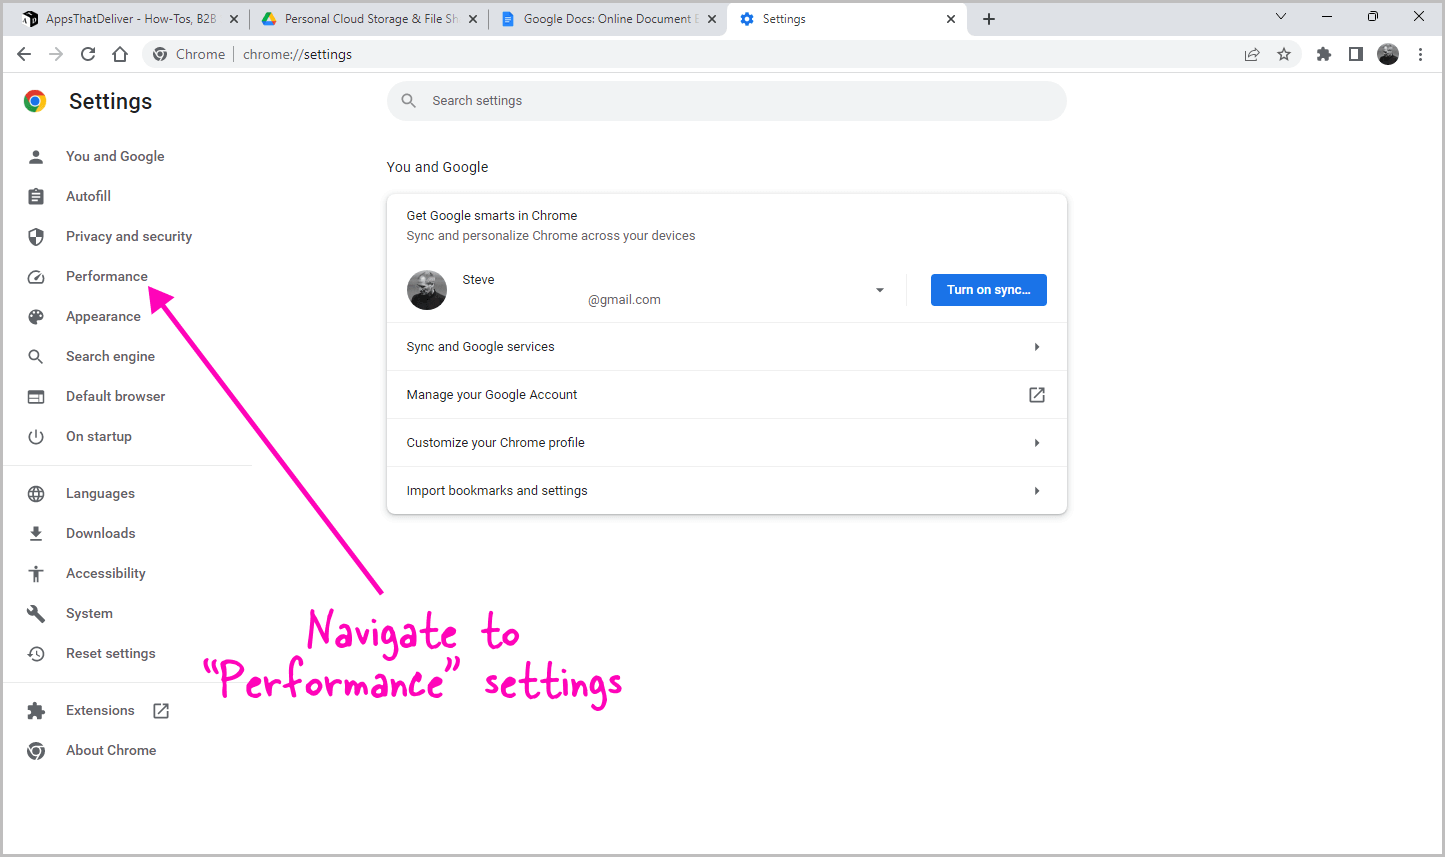
On the left panel of the Chrome settings page, you will find a list of available settings.
Locate and click on the “Performance” option from the list of options.
Once you’ve selected “Performance” settings, you can proceed to the next step.
Step 3: Turn off “Memory Saver”
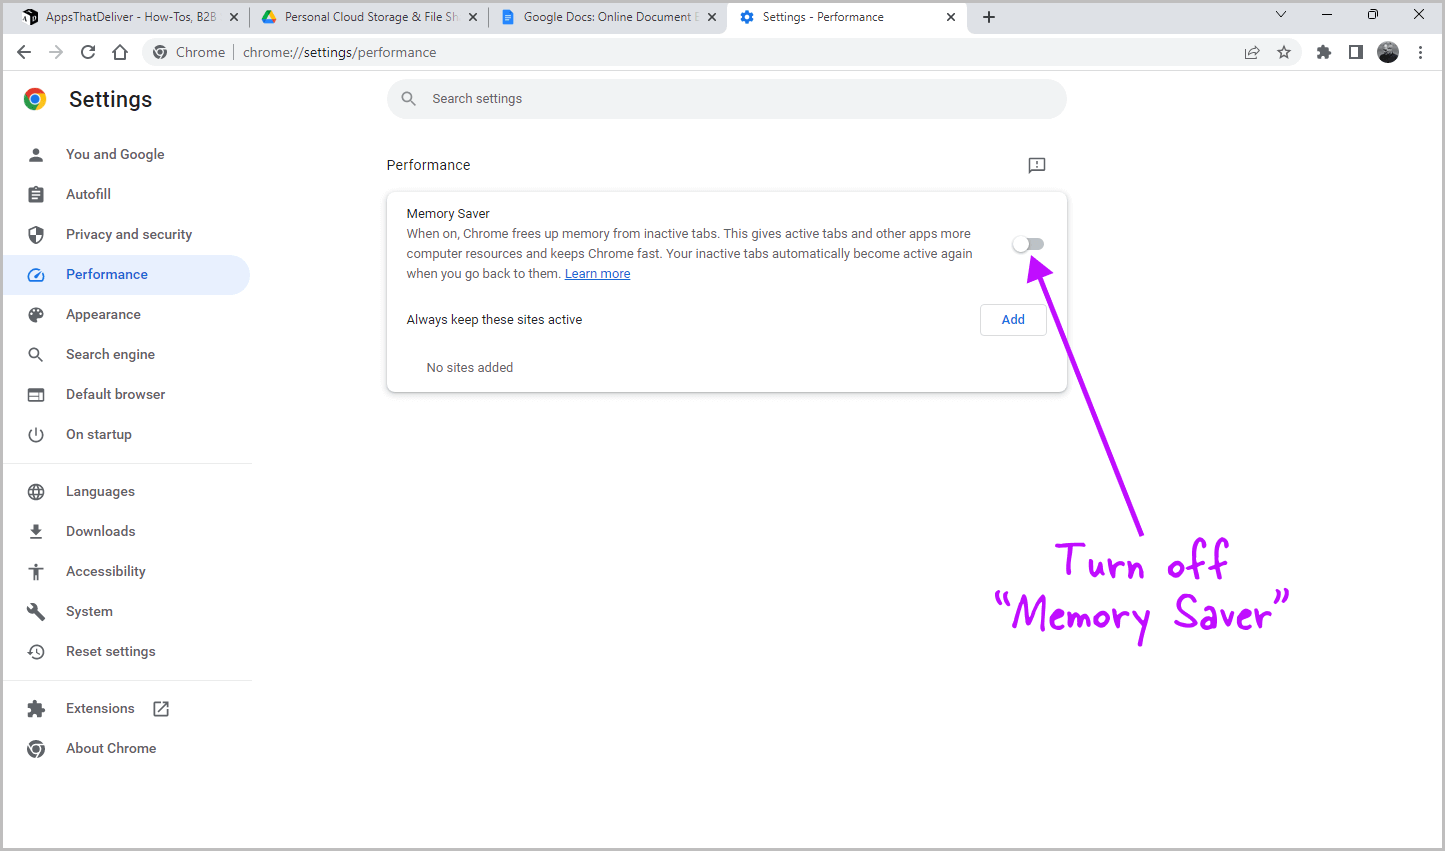
You will notice that the “Memory Saver” toggle is currently enabled, which is the default setting intended to enhance the performance of active tabs.
To disable the “Memory Saver” feature, simply click on the toggle switch.
However, if you are experiencing low memory issues, I suggest keeping this feature on and adding specific website URLs to a list called “Always keep these sites active.”
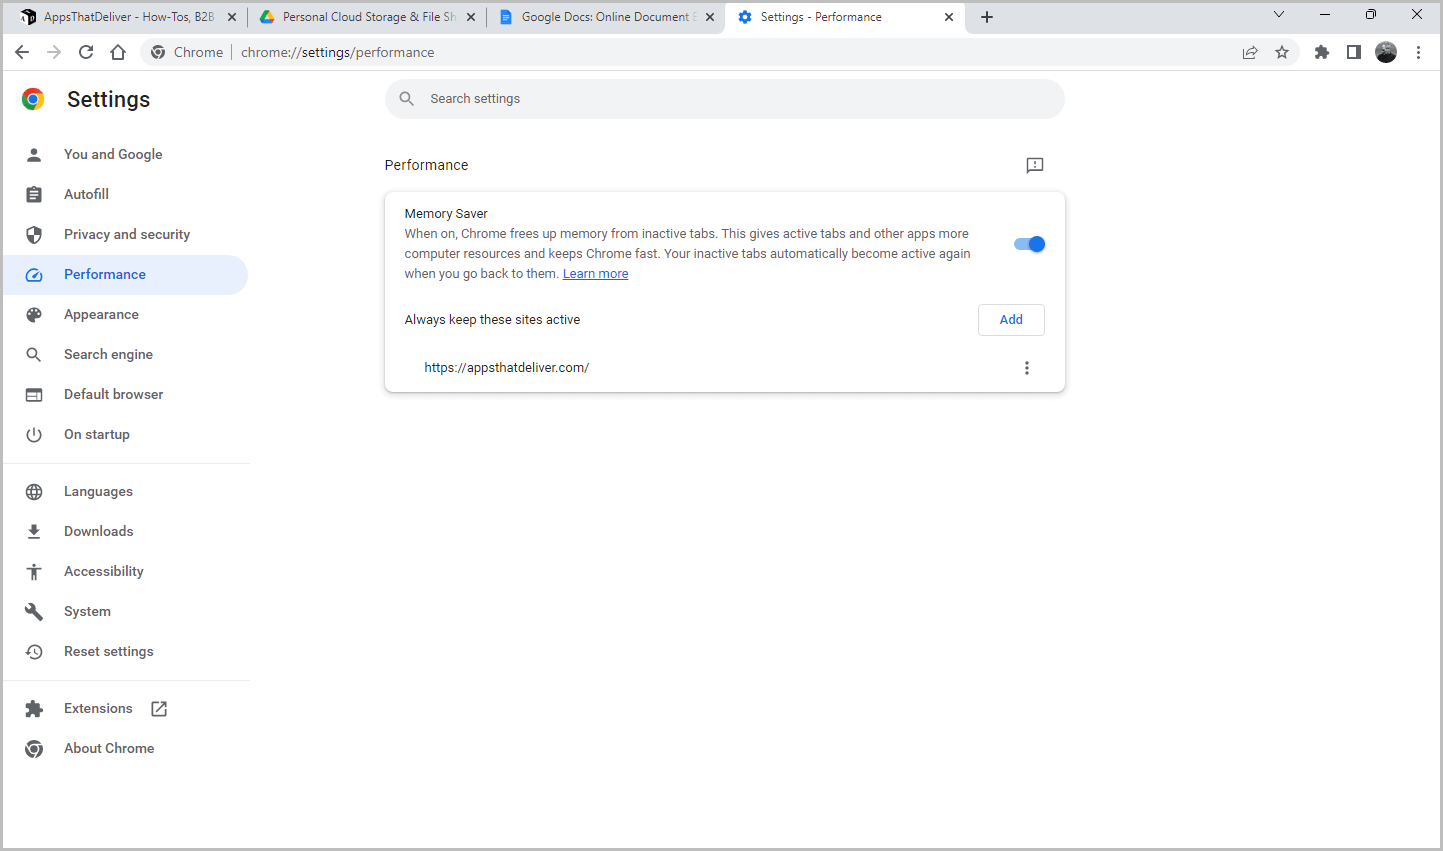
That way, those websites won’t be paused. After disabling the “Memory Saver” feature, your tabs will no longer be suspended.
If you continue to experience tab suspensions despite disabling the feature, you can follow the additional steps outlined below.
Step 4: Visit chrome://discards/ in your browser
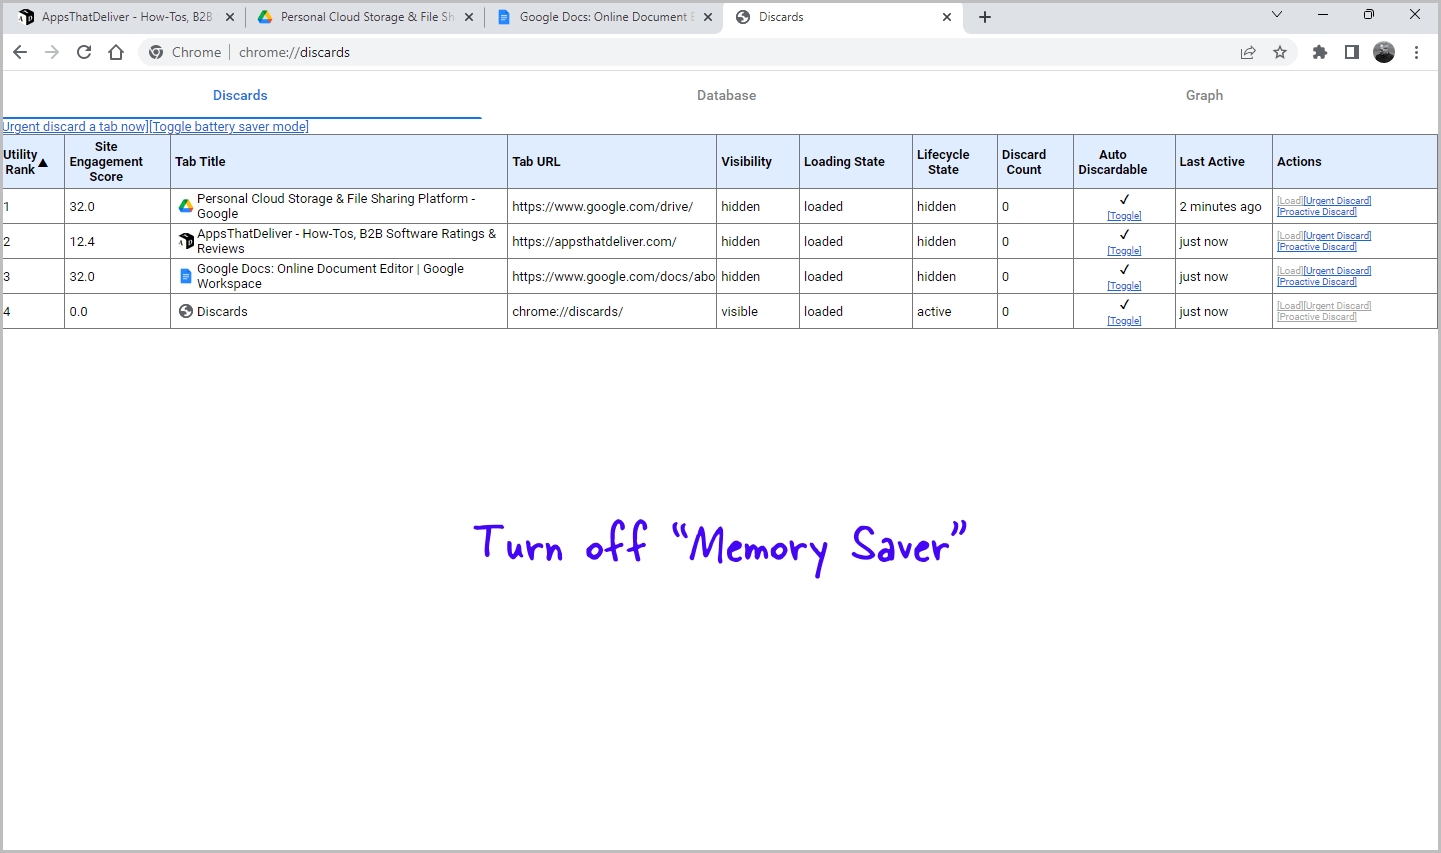
Now, open a new tab by clicking the “+” button located next to your existing tabs.
Then, paste the following link into the address bar of the new tab: chrome://discards/. After pasting the link, press the Enter key on your keyboard.
Step 5: Select the desired tab
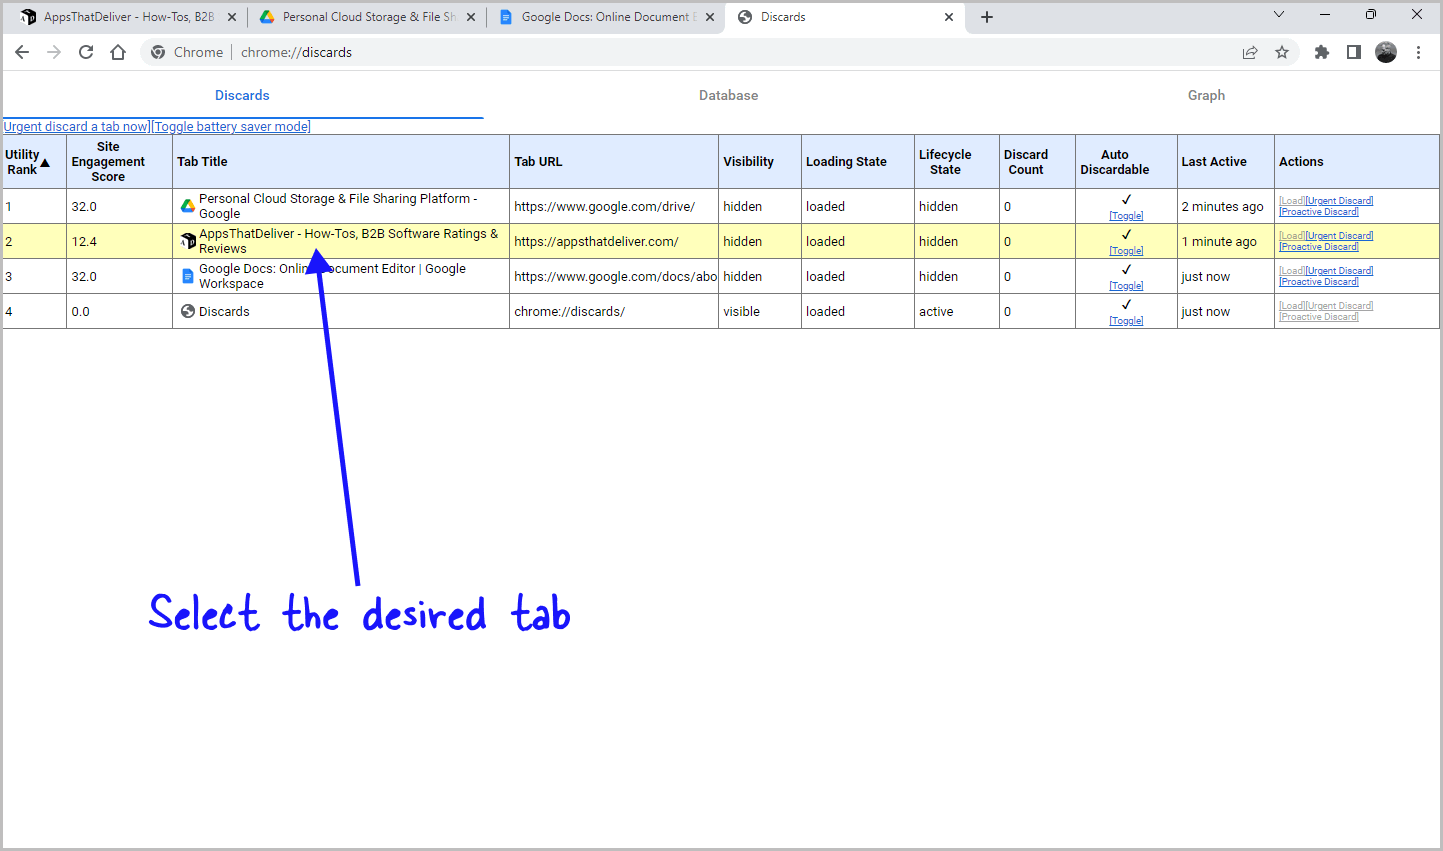
On the Chrome “Discards” page, you will find a table displaying different columns containing information about the active tabs, such as their URLs and headings.
To locate the specific tab that you wish to prevent Chrome from suspending, focus on the “Tab Title” column.
Go through the list and identify the tab you want to keep active without suspension.
Step 6: Click “Toggle” under the “Auto Discardable” column
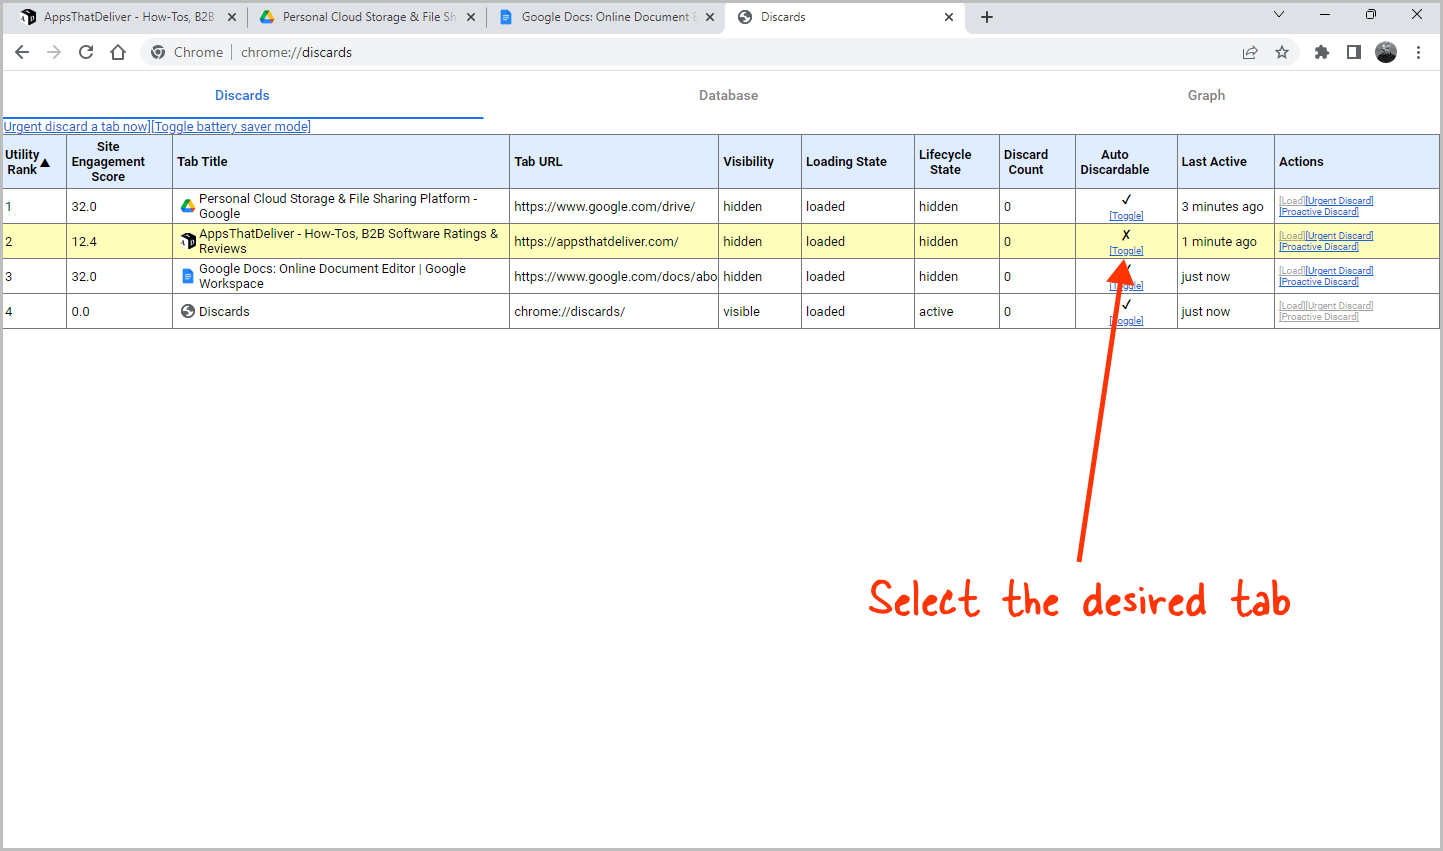
Once you have identified the tab that you want Chrome to avoid suspending, direct your attention to the “Auto Discardable” column.
Look for the corresponding tab and click on the word “Toggle”.
You should notice that the check mark changes to a cross mark after clicking on it.
By doing this, Chrome will no longer suspend the tab, even if you switch to a different tab.
FAQs
How do I stop Chrome from freezing tabs?
To stop Chrome from freezing tabs, go to Chrome settings, navigate to “Performance” settings, and disable “Memory Saver”.
How do I stop Chrome from timing out my tabs?
To stop Chrome from timing out tabs, disable the “Memory Saver” feature in Chrome settings under “Performance” settings.
How do I make Chrome tabs stay open?
To make Chrome tabs stay open, disable the “Memory Saver” feature by turning off the toggle in Chrome settings.
How do I stop automatic tab discards?
To stop automatic tab discards, disable the “Memory Saver” feature in Chrome settings and use the “Auto Discardable” column on the “chrome://discards/” page to prevent suspension of specific tabs.
Conclusion
In conclusion, Chrome’s “Memory Saver” feature can be helpful for optimizing system performance by suspending inactive tabs.
However, if you wish to keep all tabs active and prevent suspension, you can easily disable this feature.
If you want to prevent Chrome from suspending tabs, follow these simple steps:
- Open Chrome settings.
- Navigate to “Performance” settings.
- Disable “Memory Saver” feature.
- Add specific website URLs to “Always keep these sites active” list.
- Visit “chrome://discards/” to manage tab discarding behavior.
- Identify desired tab in “Tab Title” column.
- Click “Toggle” under “Auto Discardable” column.
By following these steps, you can ensure that Chrome does not suspend your desired tabs and keep them active for a smoother browsing experience.

