Do you want to add a table border to your Google Docs document, but only at the bottom?
By default, Google Docs tables have borders on all sides.
However, inserting a table with just the bottom border is possible.
With just a few clicks, you can easily add a bottom border to your table in Google Docs.
This article will show you how to add a bottom border to your table in Google Docs, step-by-step.
Also read: (opens in new tab)
Google Docs Table Alternating Colors
How to Make a Table Smaller in Google Docs
How to Copy a Table in Google Docs
How to Center a Table in Google Docs
How to Convert Table to Text in Google Docs
Google Docs Table Border Bottom Only
Step 1: Select all cells in the table
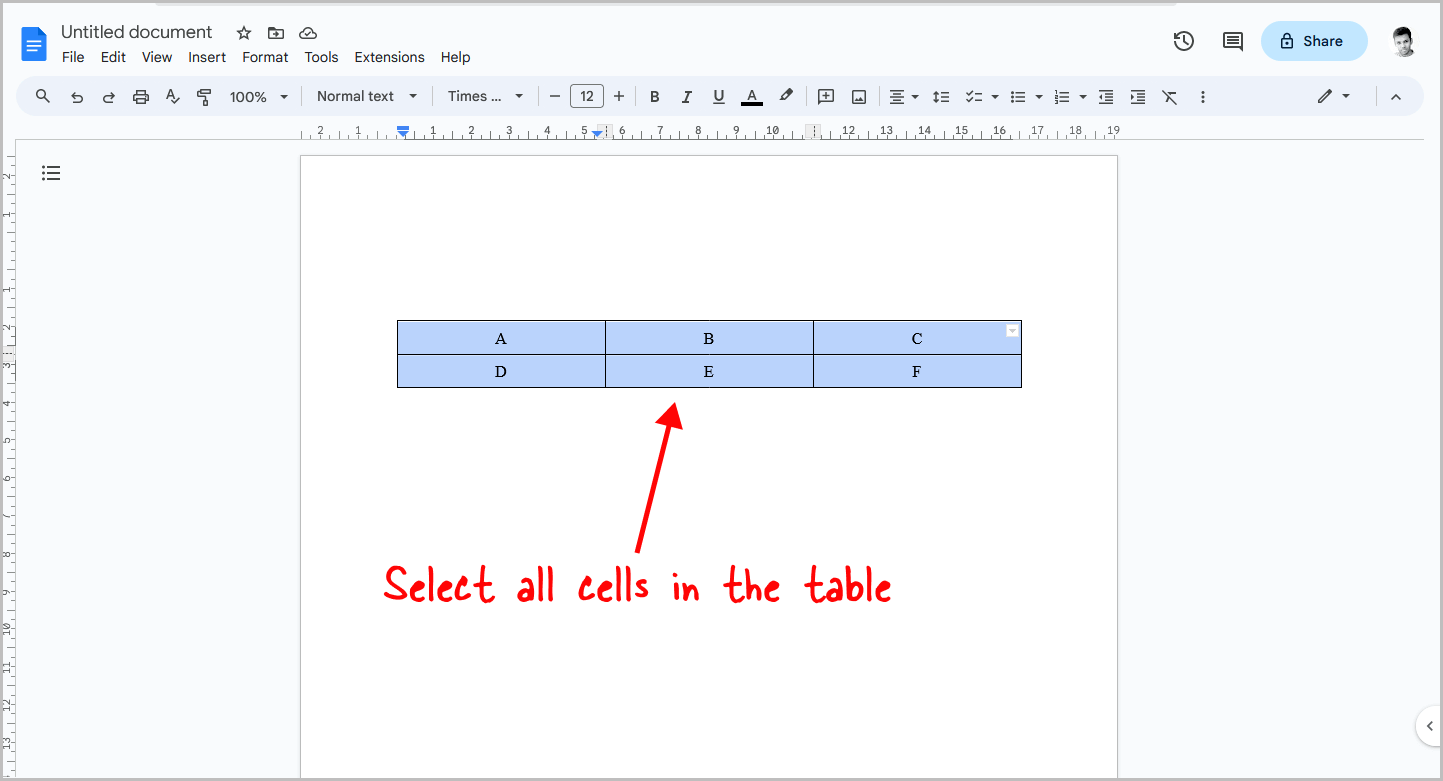
The first step is to select all cells in the table.
To do this, click inside the first cell of the table and then press and hold the left mouse button while dragging it to the last cell.
Select only the cells and not the lines above or below the table, or you won’t be able to proceed to the next step.
Refer to the screenshot above.
Step 2: Click on the small down arrow in the top right corner
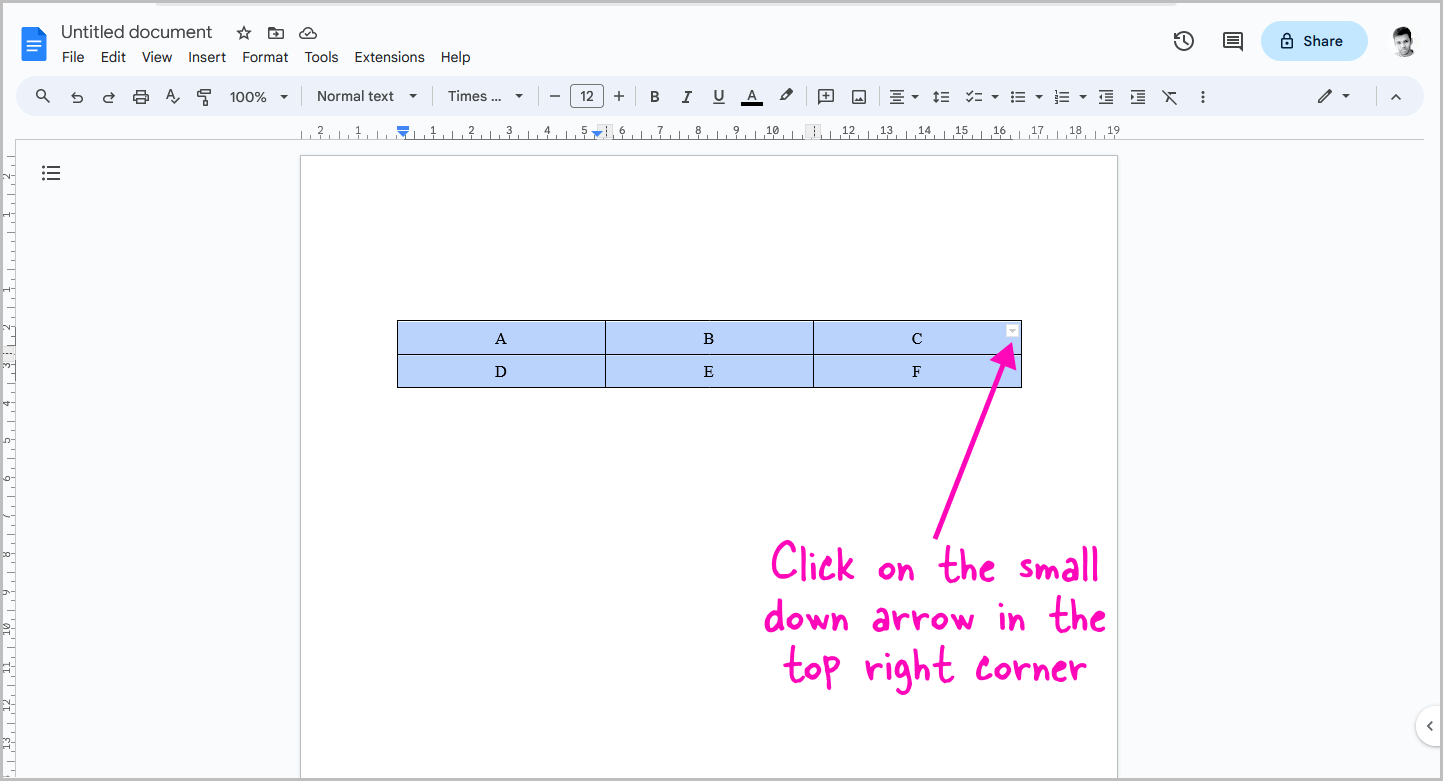
You will now see a small downward arrow in the top right corner of the table.
This arrow will only appear if you have correctly selected all the cells.
If you do not see the arrow, follow the first step correctly and then proceed to this step.
Once you see the arrow, click on it to view the table border options.
Step 3: Select “All borders”
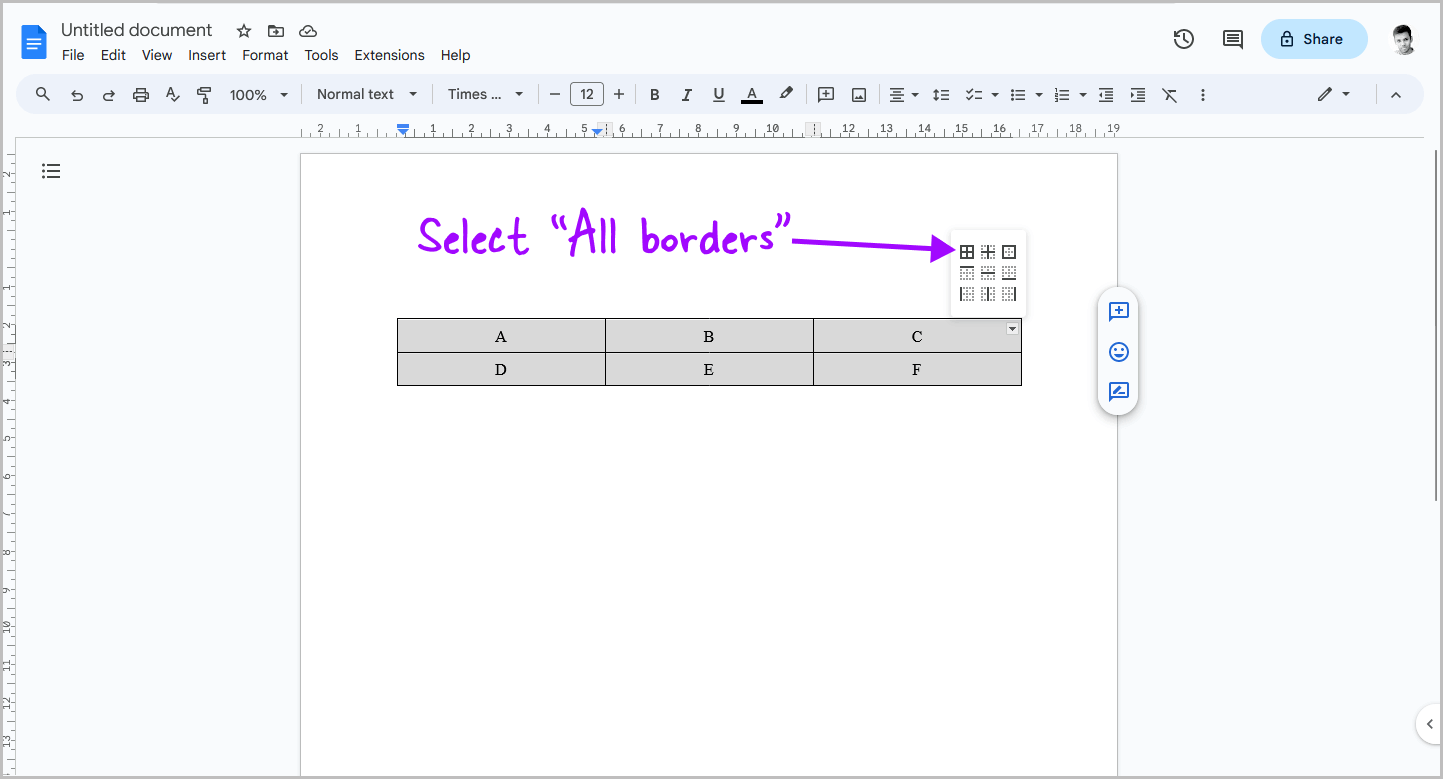
After clicking on the down arrow, you will see various border symbols.
Click on the first symbol where all the borders are bold (refer to the screenshot above).
Step 4: Click on “Border width” and select “0pt”
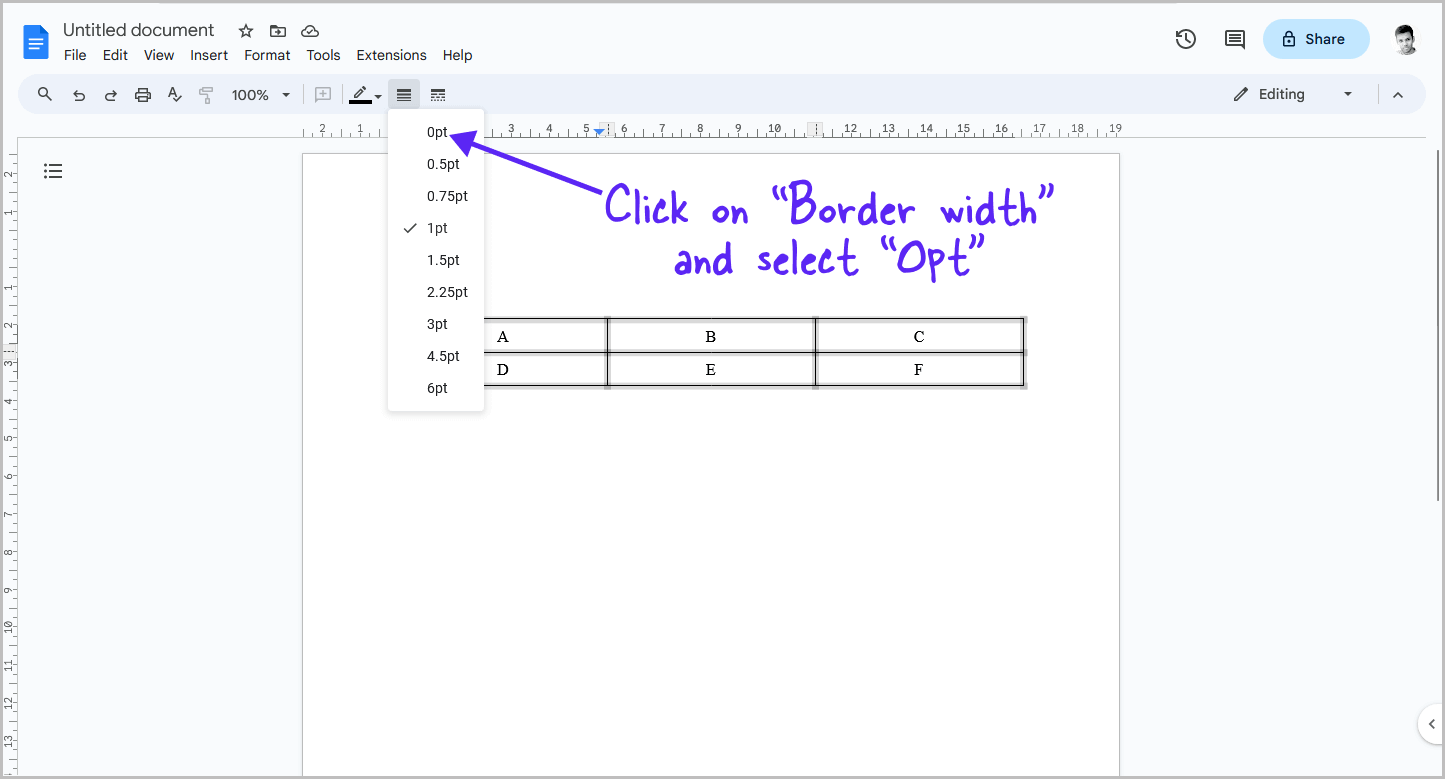
Once you have selected the “All borders” symbol, all borders of the table will be highlighted.
Next, click on the “Border width” tool from the toolbar and set the border width to “0pt”.
Step 5: Select all cells again and choose “Bottom border”
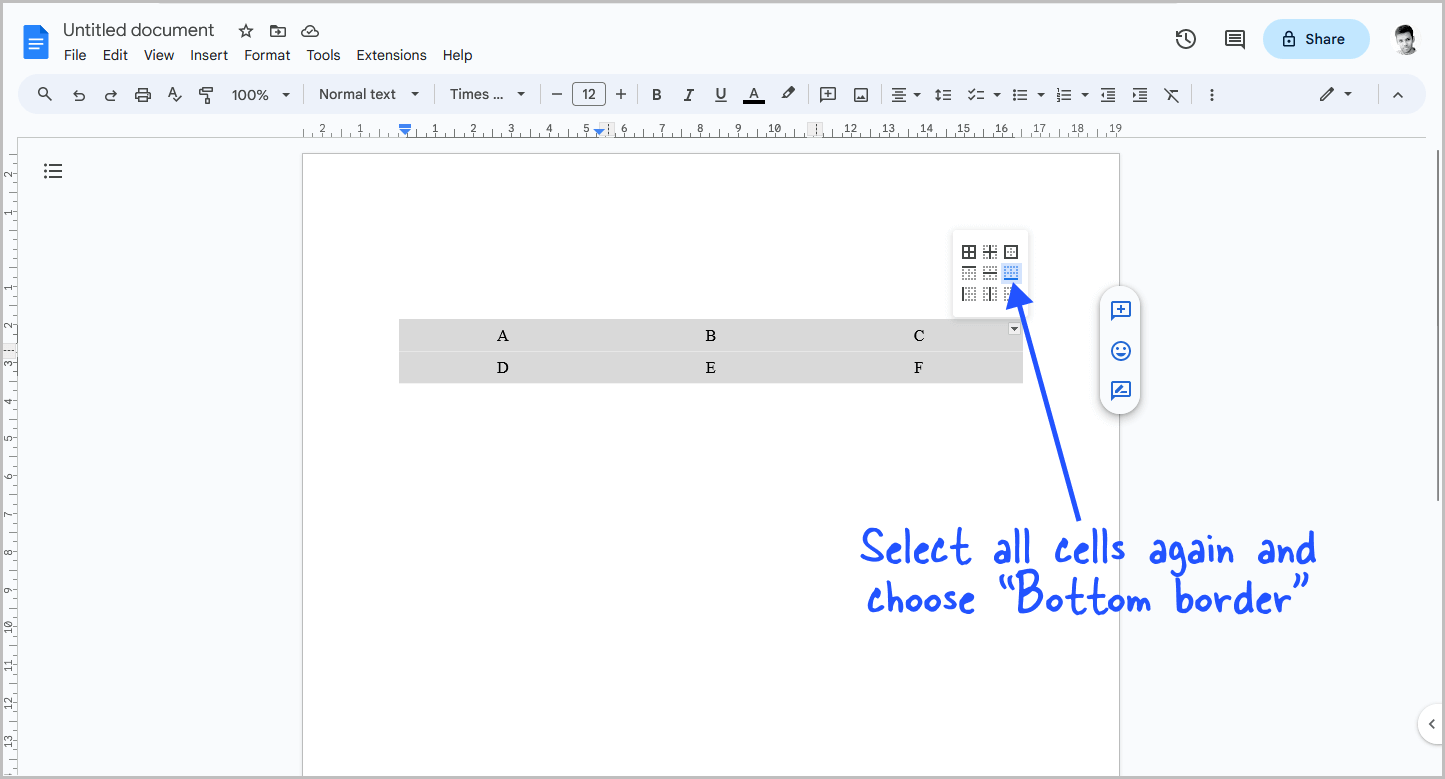
Click anywhere on the page.
You will notice that all the table borders have been removed.
Now, select only the bottom border by following these steps: first, select all the cells as you did in the first step, then click on the down arrow and choose “Bottom border” this time.
Step 6: Set the bottom border width to “1pt”
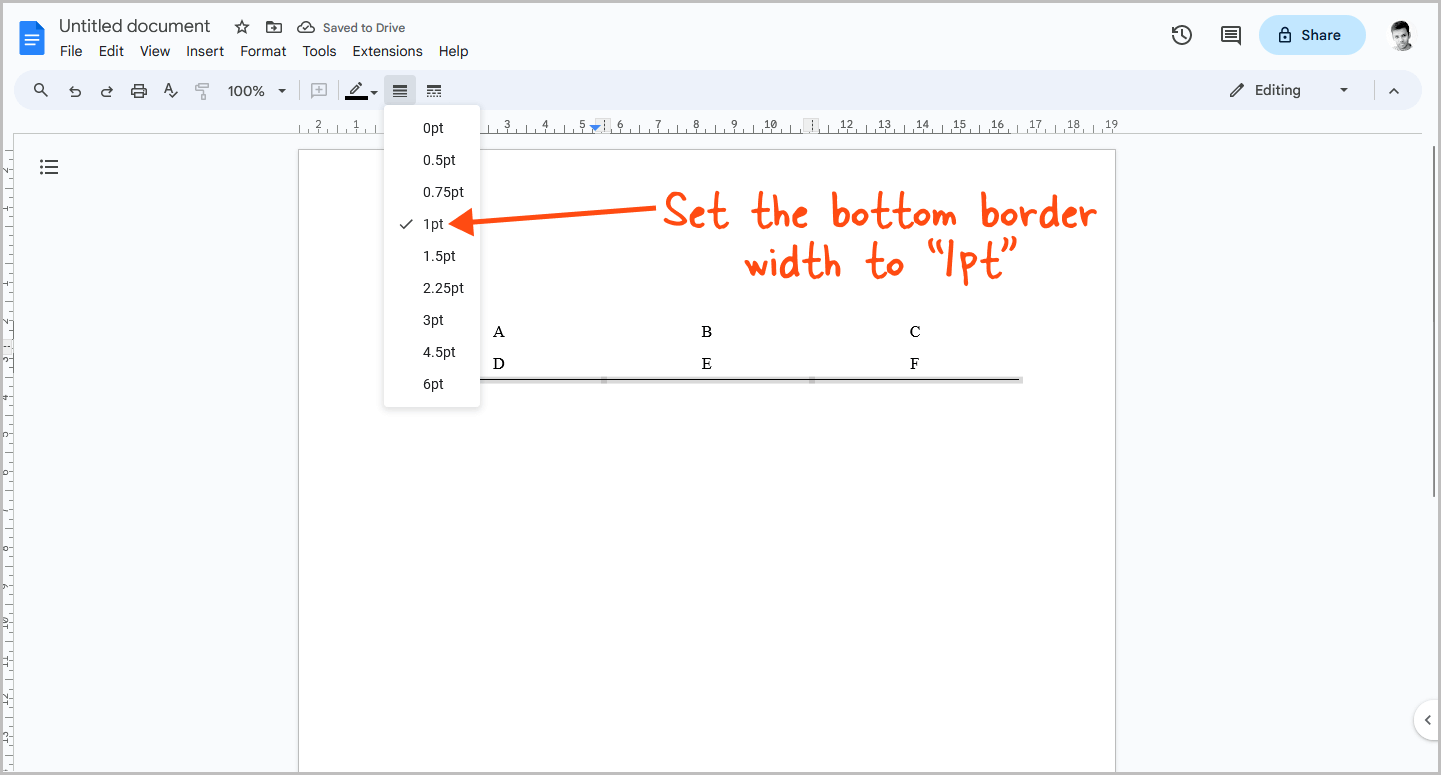
Once you have selected only the bottom border of the table, change its width to “1pt”.
To do this, click on the “Border width” tool, and choose the “1pt” option.
After clicking anywhere on the page, only the bottom border of the table will be visible.
If you wish to show the bottom border of the first row too, follow the same procedure and select the appropriate border from the drop-down menu.
Moreover, you can modify the color of any border in the table.
FAQs
How to border only bottom of table Google Docs?
To border only the bottom of the table in Google Docs, first, select all the borders and set the border width to “0pt”. Then, select only the bottom border of the table and set the border width to “1pt”.
Only color table bottom border Google Docs
To color only the bottom border of the table in Google Docs, select all the borders and set their color to “White”. Then select only the bottom border and set its color to a color of your choice.
How do I remove the top border in Google Docs?
To remove the top border in Google Docs, follow these steps:
- Select the text.
- Go to Format > Paragraph style > Borders and shading.
- Click on the top border icon.
- Set the border width to “0pt”.
- Click “Apply”.
Summary
Adding a bottom border to a table in Google Docs is a quick and easy process.
Here’s how to add only the bottom border to a table in Google Docs:
- Select all cells in the table.
- Click on the small down arrow in the top right corner.
- Select “All borders”.
- Click on “Border width” and select “0pt”.
- Select all cells again and choose “Bottom border”.
- Set the bottom border width to “1pt”.

