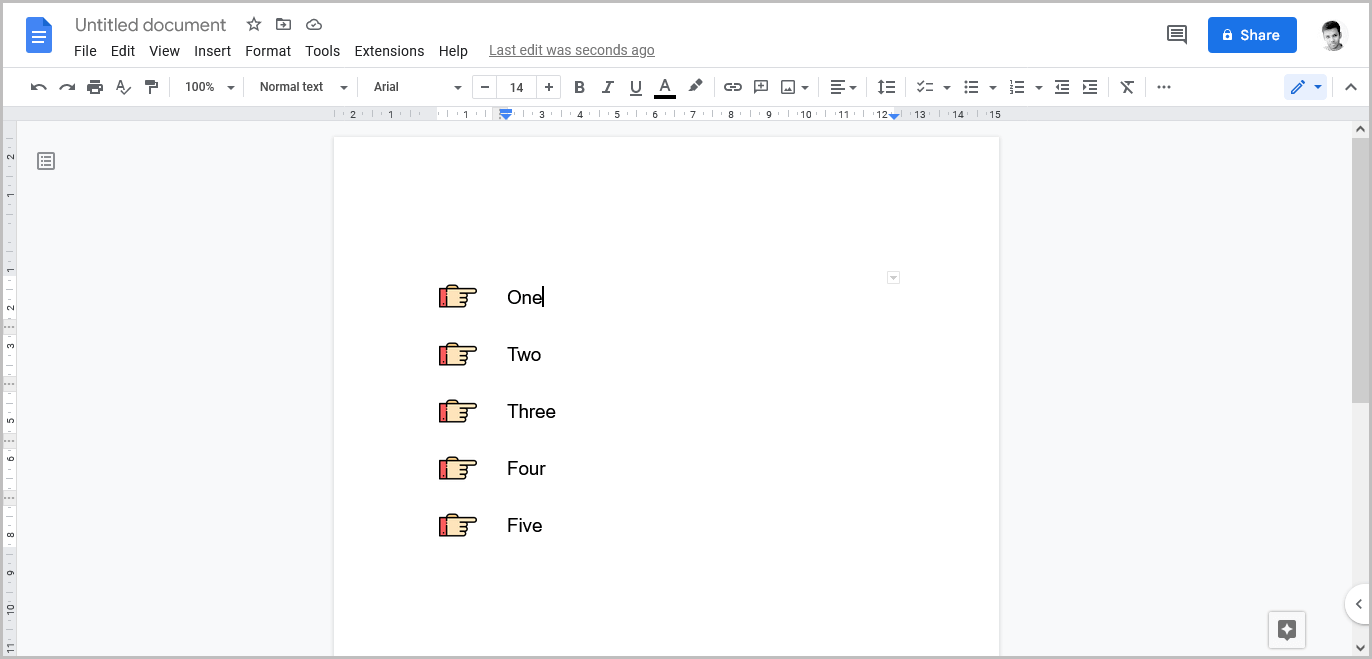
Bullets are an essential component of any well-organized document, but let’s be honest; they can be a bit boring.
Although Google Docs allows you to replace the bullets with icons from the “Special characters” library, they aren’t really appealing and are all in black and white.
The solution is straightforward: use pictures as bullet points!
Yes, you can use images as bullet points. You can additionally use your logo or a custom icon as your bullet in Google Docs.
In this blog post, you’ll learn how to use pictures as bullet points in Google Docs to make your documents stand out.
Let’s get started!
Also read: (opens in a new tab)
How to Make Bullet Points Smaller in Google Docs
How to Select Multiple Words in Google Docs
How to Insert Word Art in Google Docs
Google Docs Using a Picture as a Bullet Point
Here’s how to use a picture as a bullet point in Google Docs:
Step 1: Navigate to Insert > Table > Two-column table
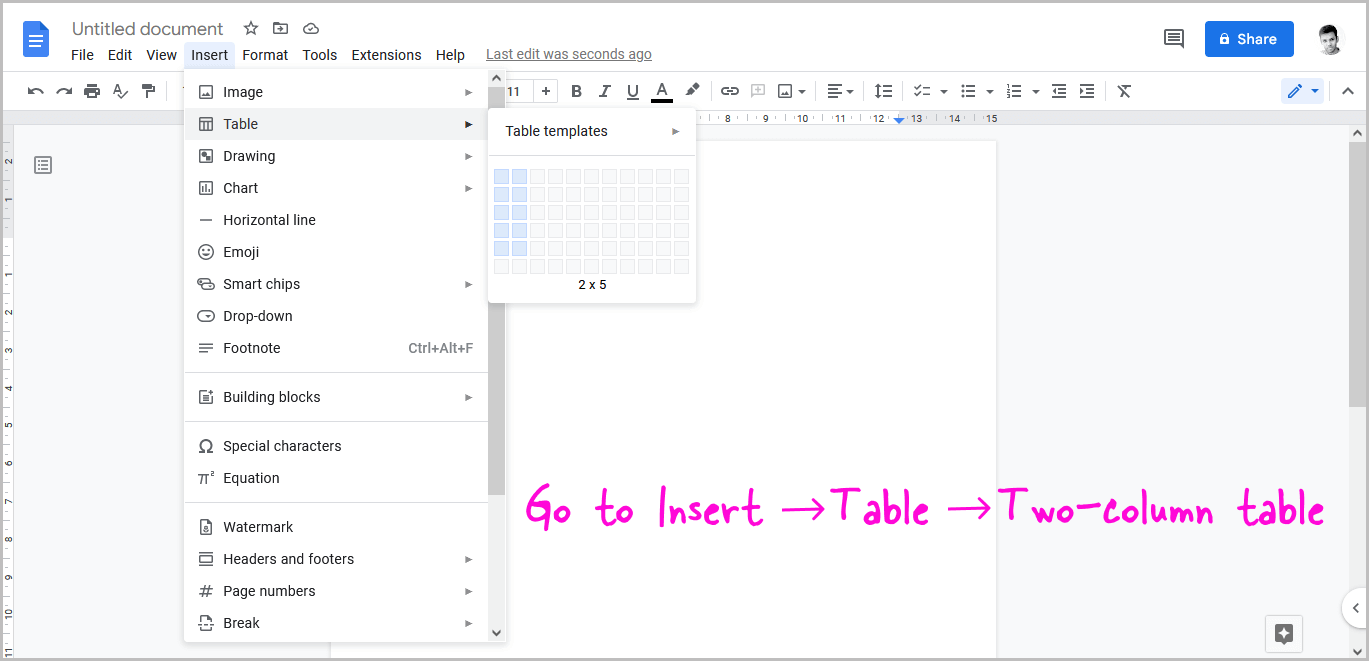
Because Google Docs does not allow the use of pictures as bullet points, we will create a two-column table instead. The pictures will be inserted into the first column, and the accompanying text will be placed in the second column.
To create a 2-column table, follow these steps:
- Go to Insert > Table.
- Select a 2-column table with the number of rows you need.
Align the location of the table accordingly, i.e. left, right, or center.
Step 2: Insert the picture in the first cell
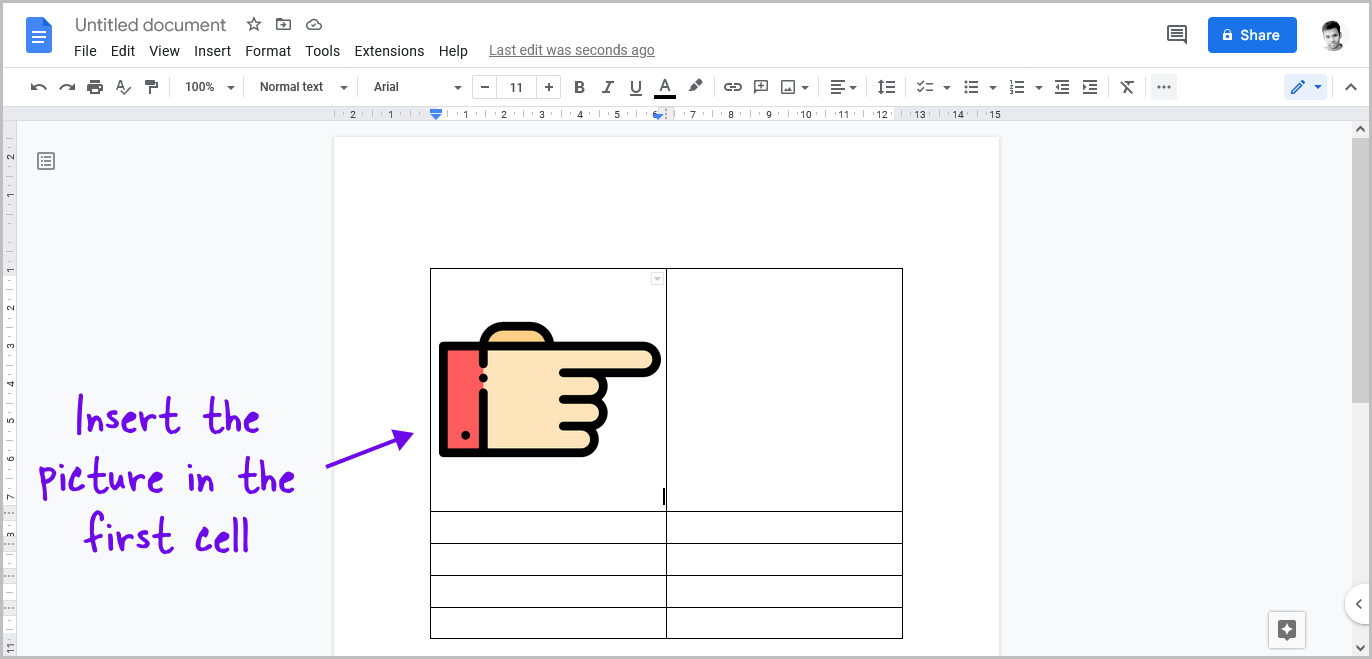
Now, bring the cursor into the first cell of the first column by clicking on it and then drag and drop the picture into it.
Step 3: Adjust the picture size
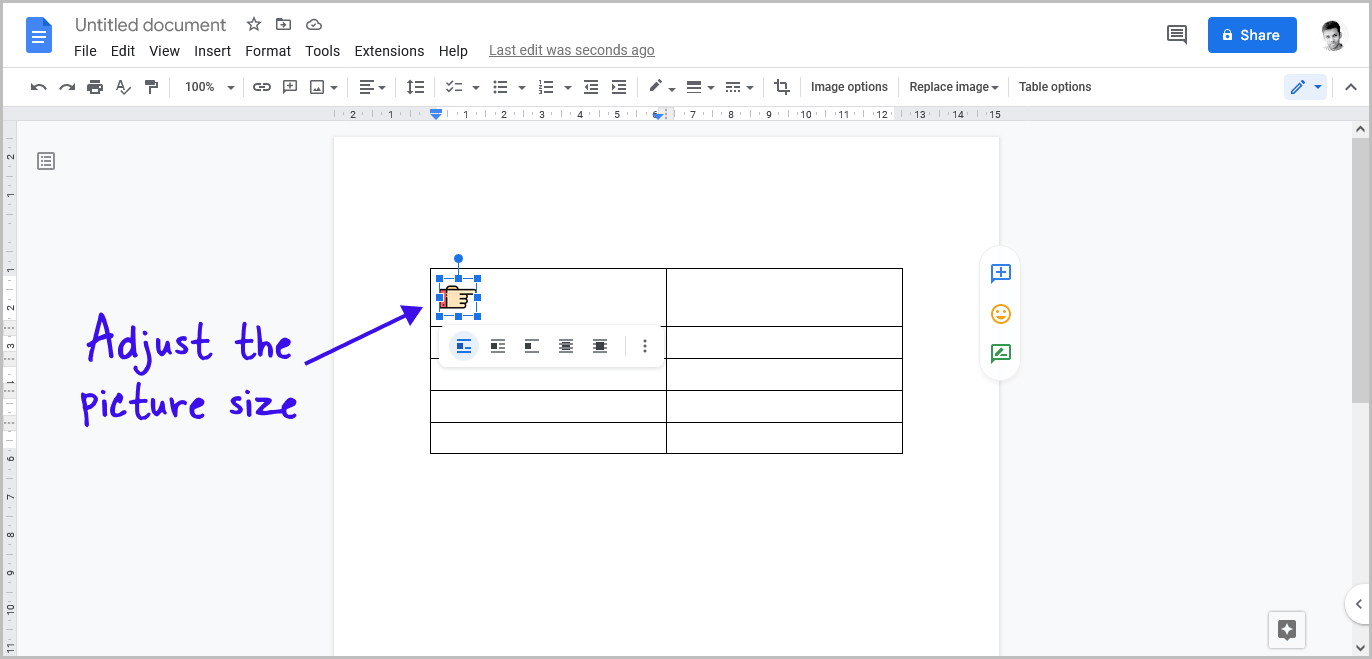
After inserting the picture, click on it and adjust the size according to your needs. Make sure not to make it too small or too big. Adjust the size until it suits the entire document.
Step 4: Copy the picture from the first cell and paste it into the first column’s cells
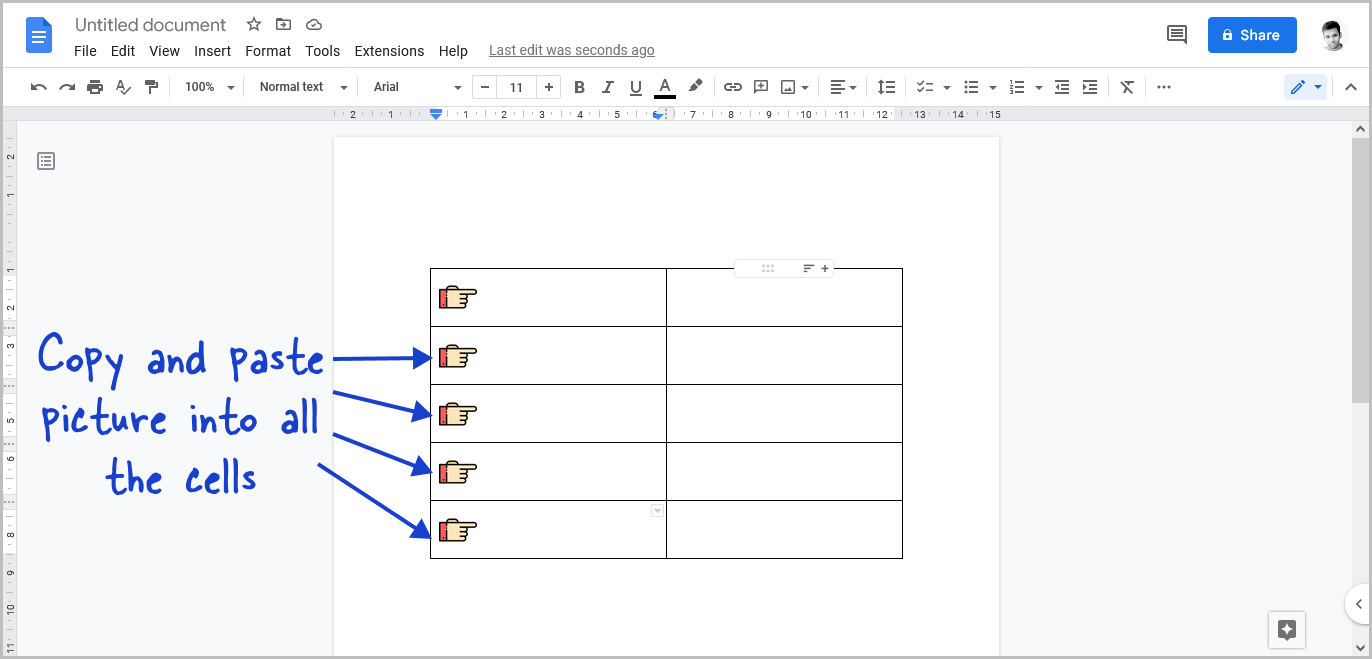
Once you have adjusted the size of the image, it is time to copy and paste it into all the cells of the first column.
To do this, click on the image, press Ctrl+C, click in the column where you want to paste the picture, and press Ctrl+V.
Repeat this step for every cell in the first column.
Step 5: Adjust the width of the first column
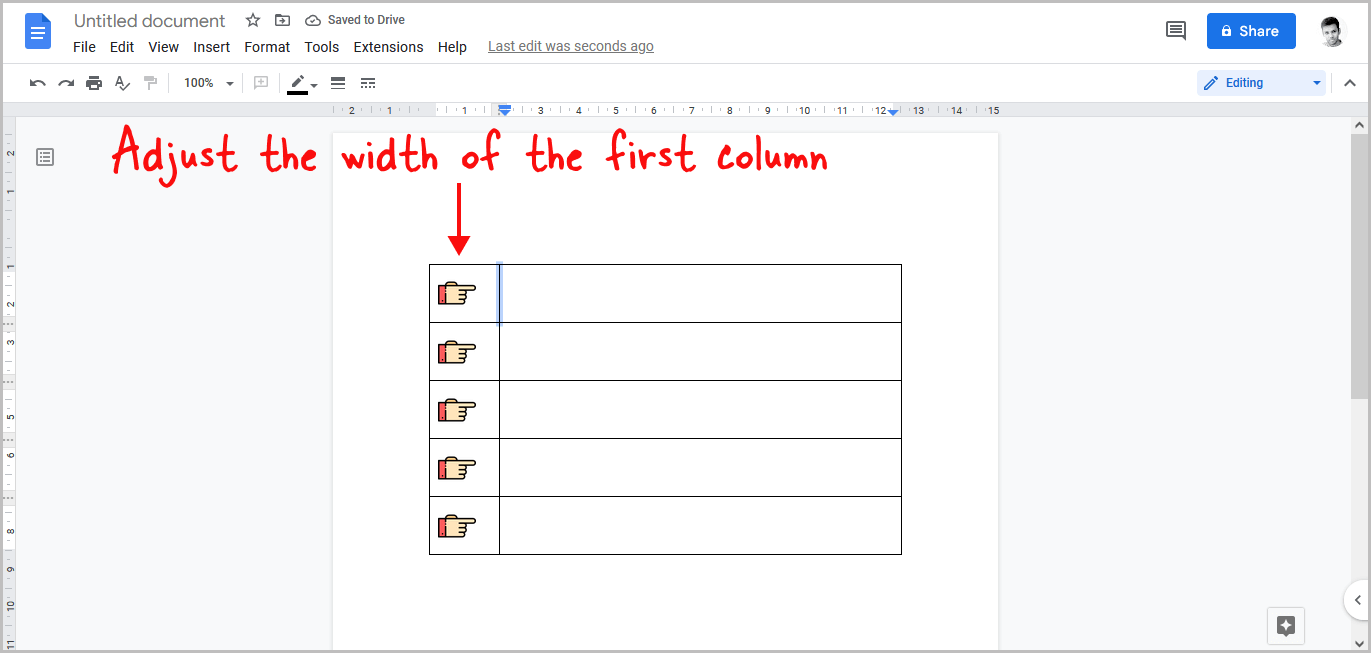
You will now see picture bullets in the first column. Now, adjust the size of the first column.
To do this, click on the vertical line between the table and drag it to the left side.
Step 6: Enter the points into the second column
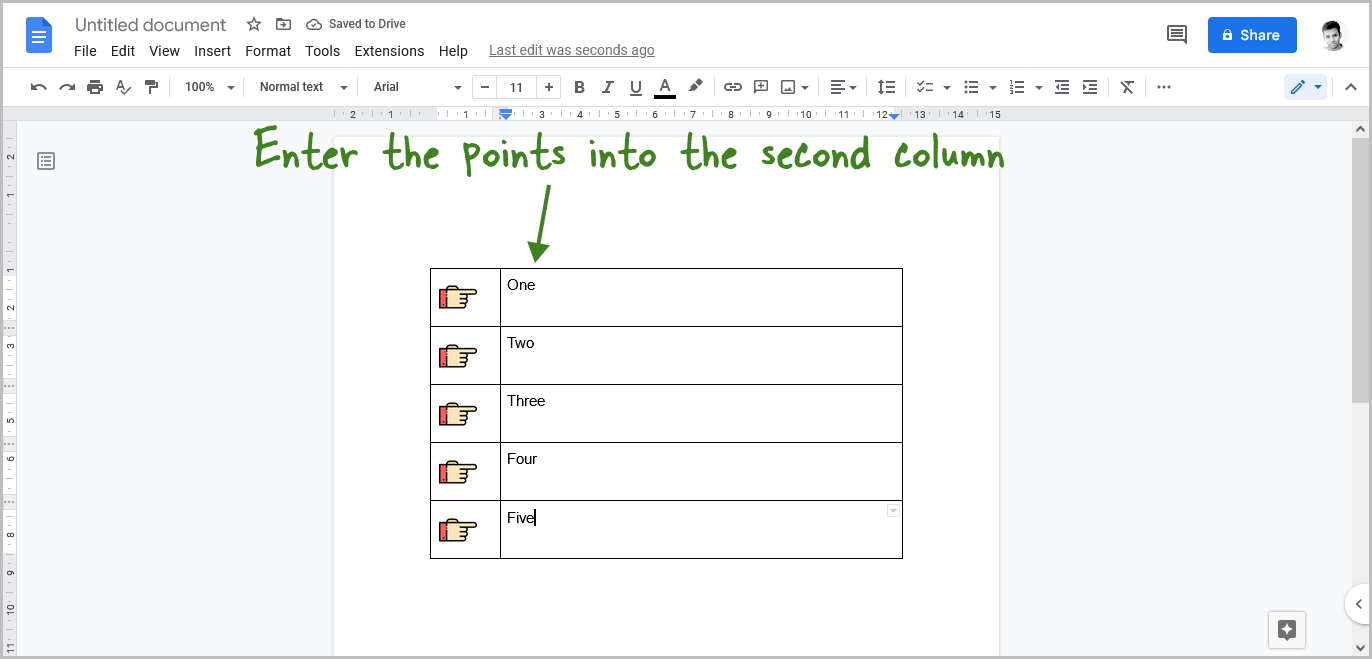
It is now time to enter the points into the second column. Click on the cell and start entering the points into the second column.
Step 7: Select the text from the second column and adjust the text size
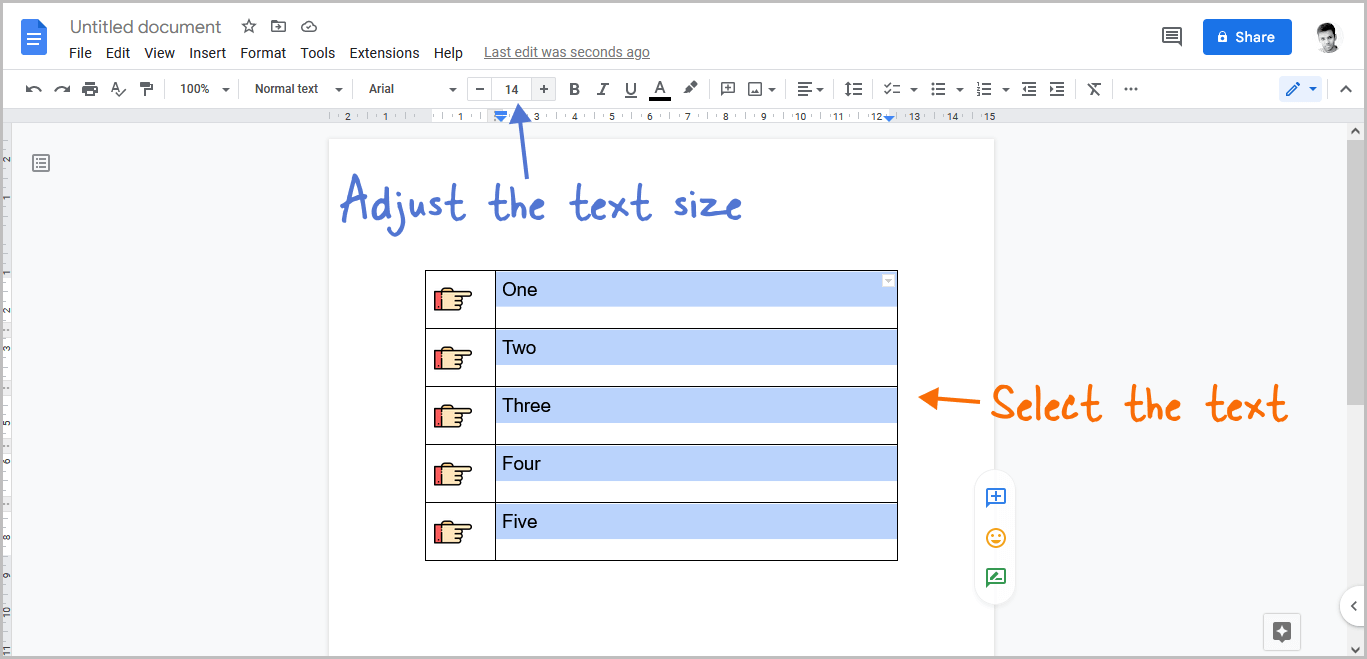
To adjust the text size of the entire second column, select all the text in that column after entering it. Then, use the size tool from the toolbar to increase or decrease the font size until it is at the desired level.
If you think the picture size is too big, you can adjust t the picture size as well so that the picture bullets match the text size.
Step 8: Select the text, then go to Format > Table > Table properties
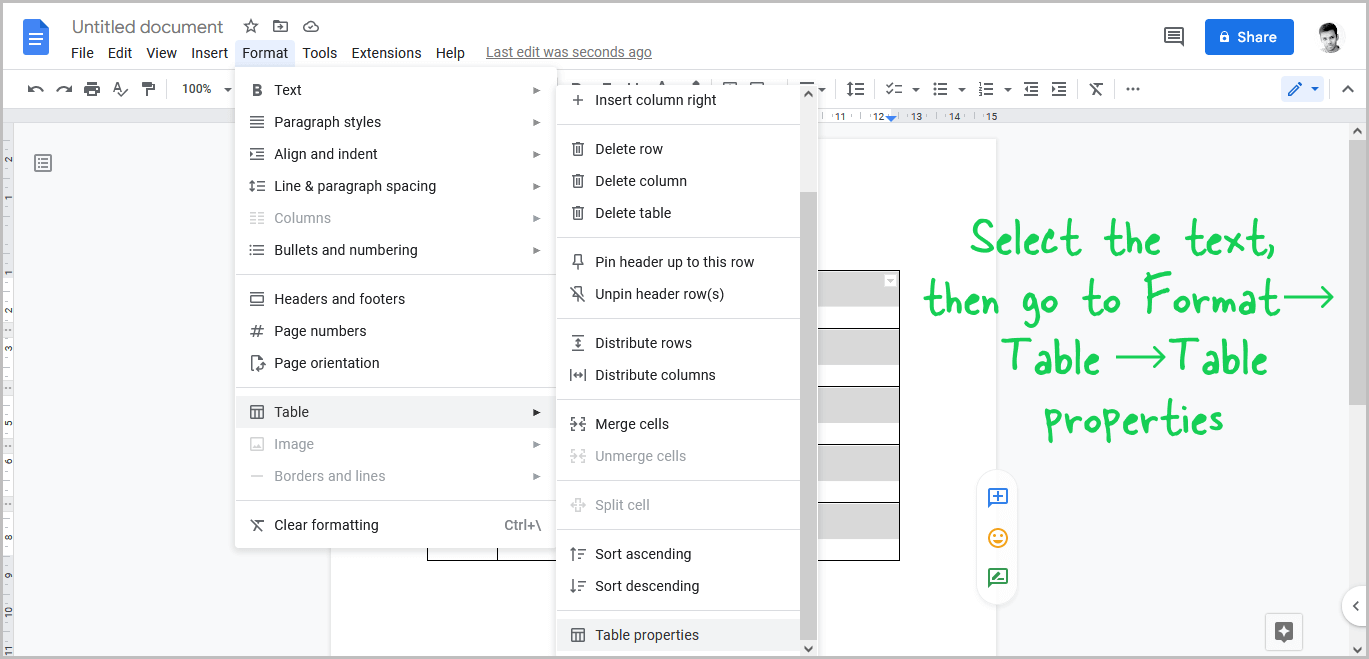
It is now time to align the text with the picture bullets.
To do so, select the text from the second column and then click the “Format” option from the toolbar, select “Table” and then “Table properties” from the drop-down menu.
Step 9: Set “Cell vertical alignment” as “Middle”
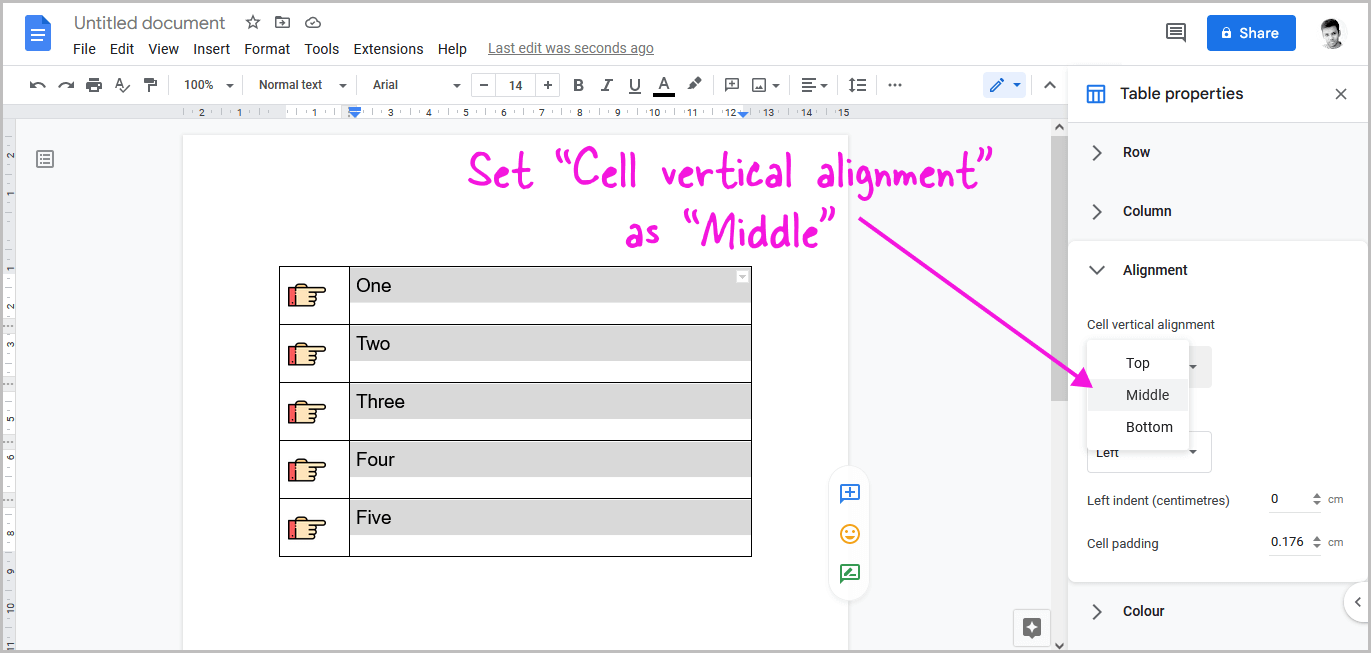
You may skip this step if your picture bullets and text are already aligned.
Now, select the “Alignment” setting from the sidebar and then click on the “Cell vertical alignment” option and select the “Middle” option from the drop-down menu.
Step 10: Set “Table border width” as “0pt”
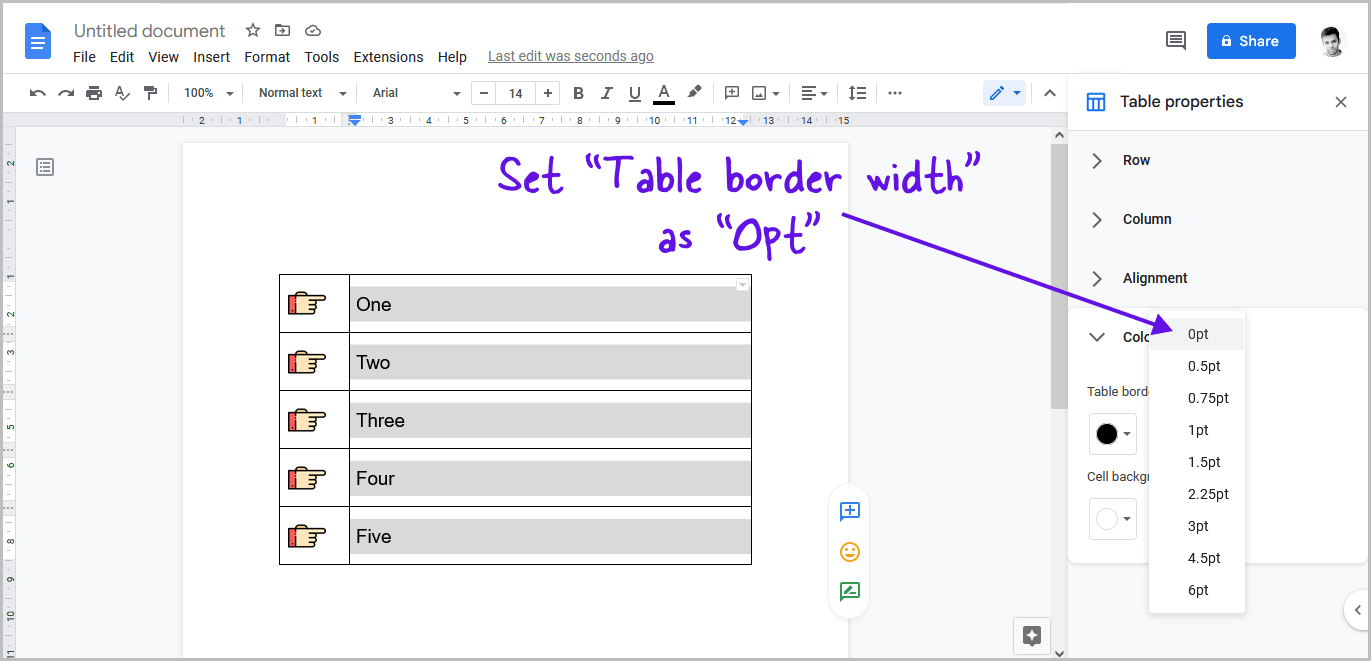
The final step is to remove the table border.
To do so, go to the sidebar’s “Colour” setting, click the “Table border width” menu, and then choose “0pt” from the list of options.
