If you love word art, you’re going to love Google Docs.
One of the most popular tools for creating and sharing documents on the internet is also perfect for adding some visual pizzazz to your text.
However, few users know how to insert word art in Google Docs because the “Word art” option is hidden from plain sight.
So whether you’re adding fancy-looking text to your document or just trying to make your letters pop, this guide will show you how to insert word art in Google Docs.
Also read:
How to Center an Image in Google Docs
How to Add Fonts to Google Docs
How to Share Multiple Google Docs at Once
How to Insert Word Art in Google Docs?
Step 1: Go to Insert > Drawing > New
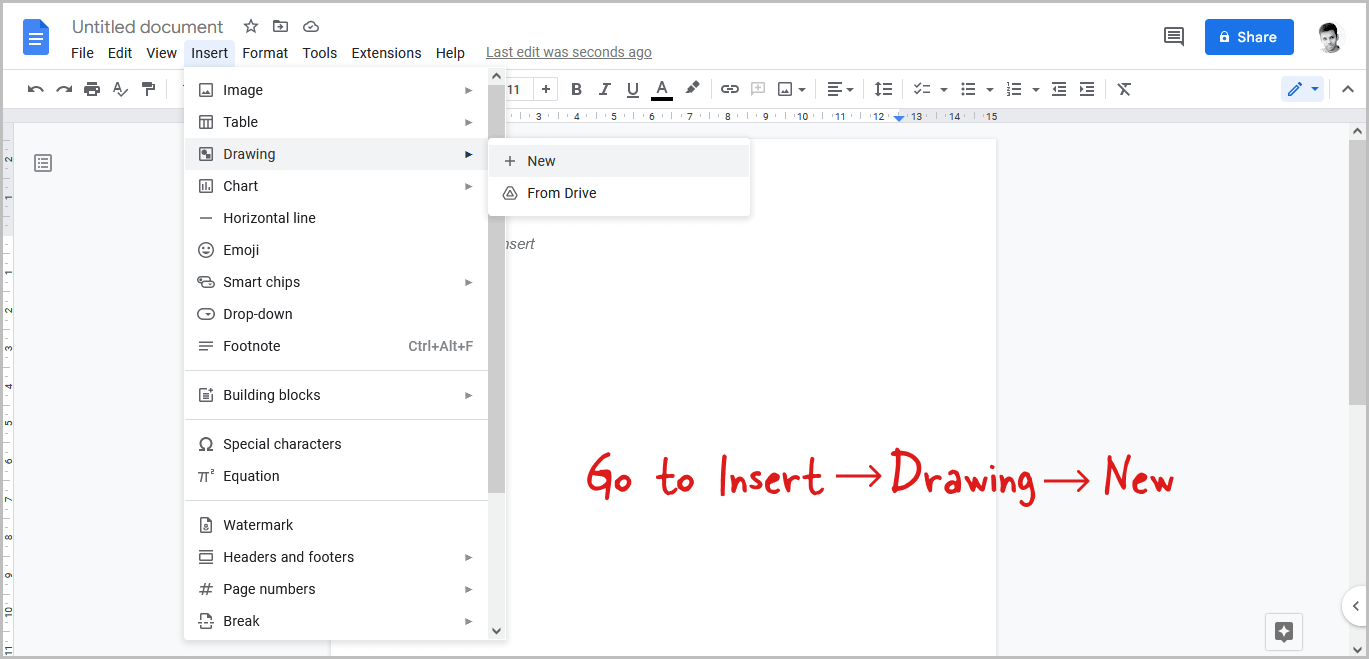
To begin, open the document and then click on the “Insert” option from the top menu.
After you click on the “Insert” option, you’ll see a drop-down menu with a list of options. Select “Drawing” from the drop-down menu.
Now, from the secondary drop-down option, choose “New”.
Step 2: Click on “Actions” and select “Word art”
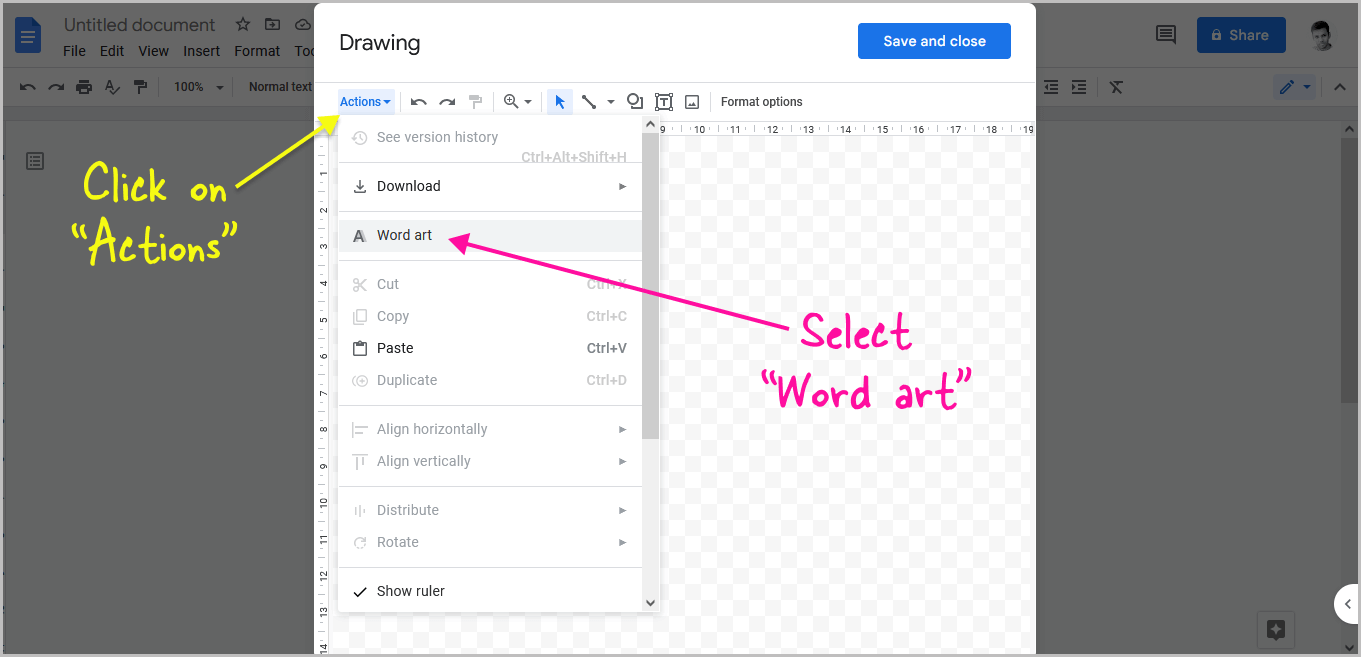
Now, on the toolbar’s extreme left, select the “Actions” option.
A drop-down menu with a list of options will appear. Choose “Word art” from the drop-down menu.
Step 3: Enter your text and press the “Enter” key
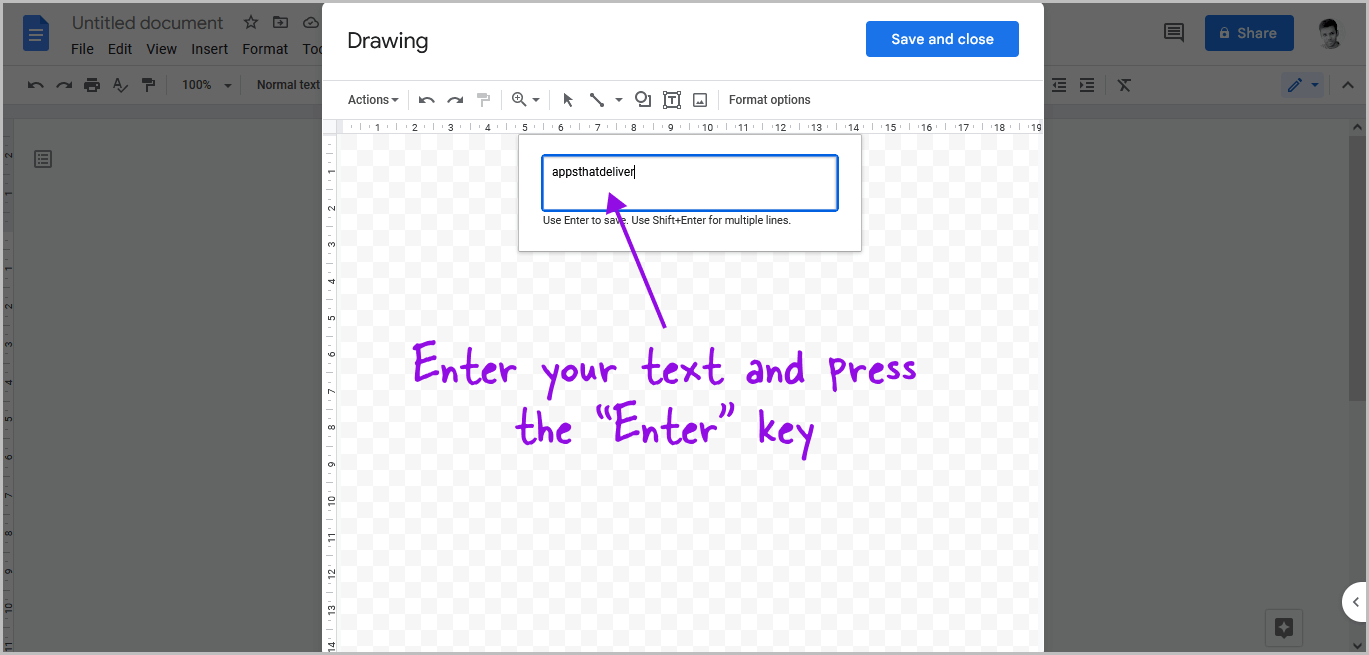
You’ll now see the text box where you can enter the text.
To jump to the next line in the text box, press Shift+Enter and then enter the text on the next line.
After entering text, simply press the enter key to add the text to the canvas so that we can customize it.
Step 4: Customize the text
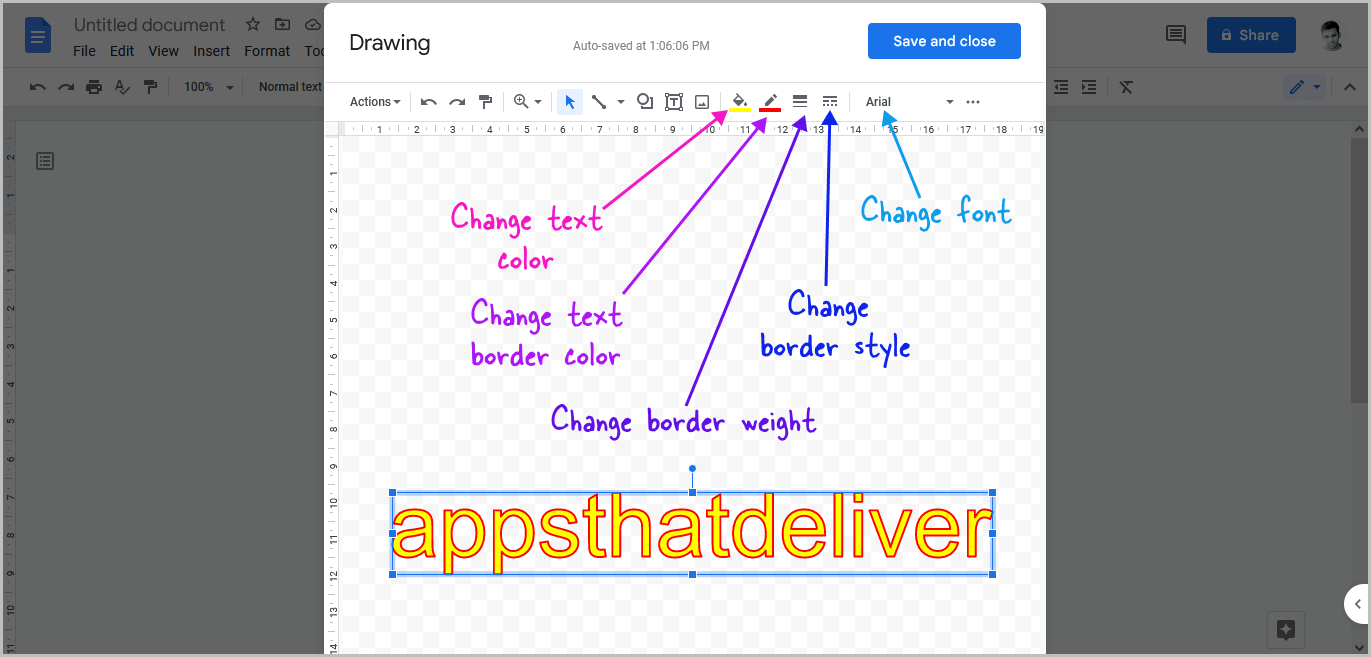
Customize the text to fit your needs.
You can modify the text color, border, border style, and font.
Don’t be worried about the text size at this point; we’ll modify it in step 8.
Step 5: Click on “Save and close”
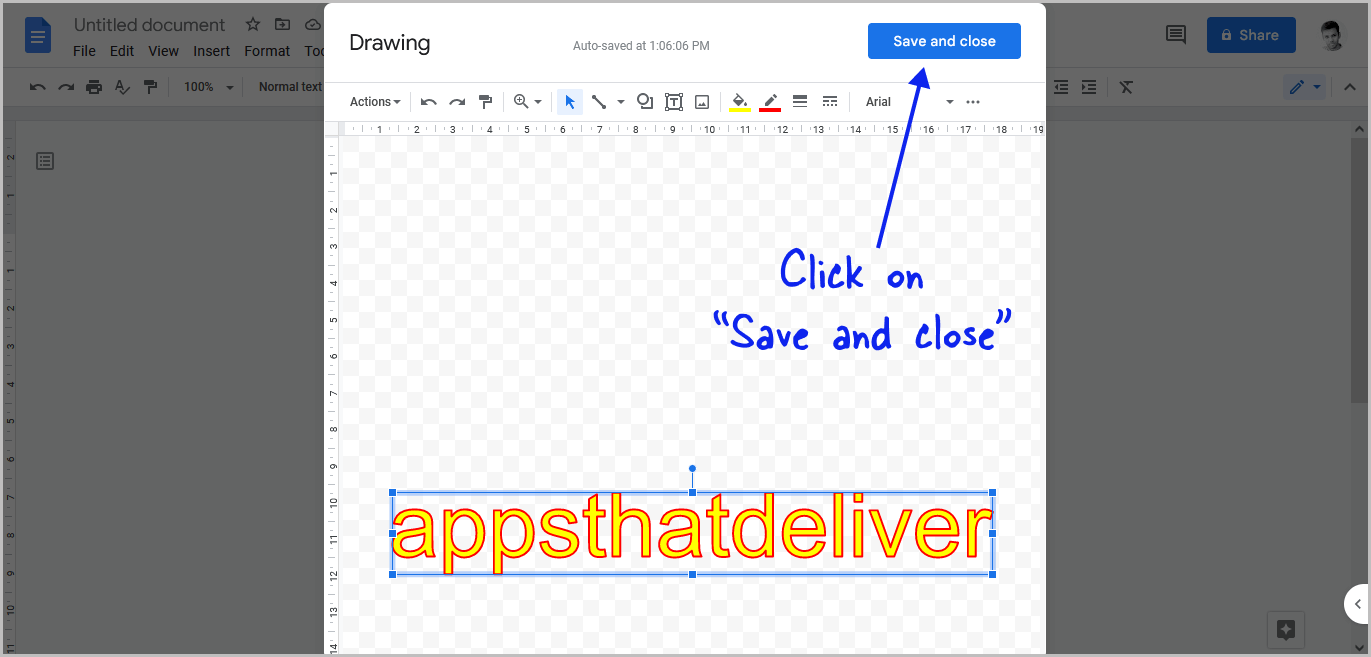
When you’ve finished customizing the text, click the “Save and close” button in the upper right corner of the pop-up to add the word art to your document.
Step 6: Click on the word art and then select “Behind the text”
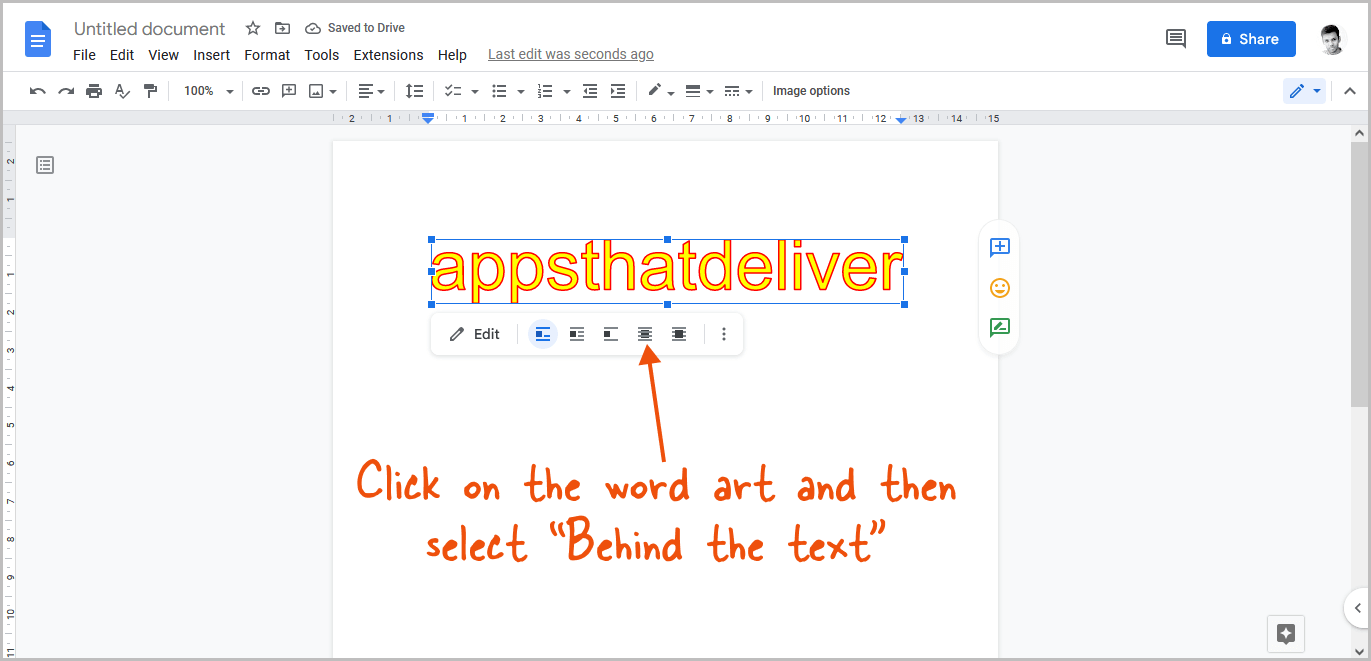
The word art in your document cannot be moved. You will need to take a few more steps to do so.
Now, click on the word art and then select the “Behind the text” option from the menu below it.
Step 7: Click on “Move with text” and then select “Fix position on page”
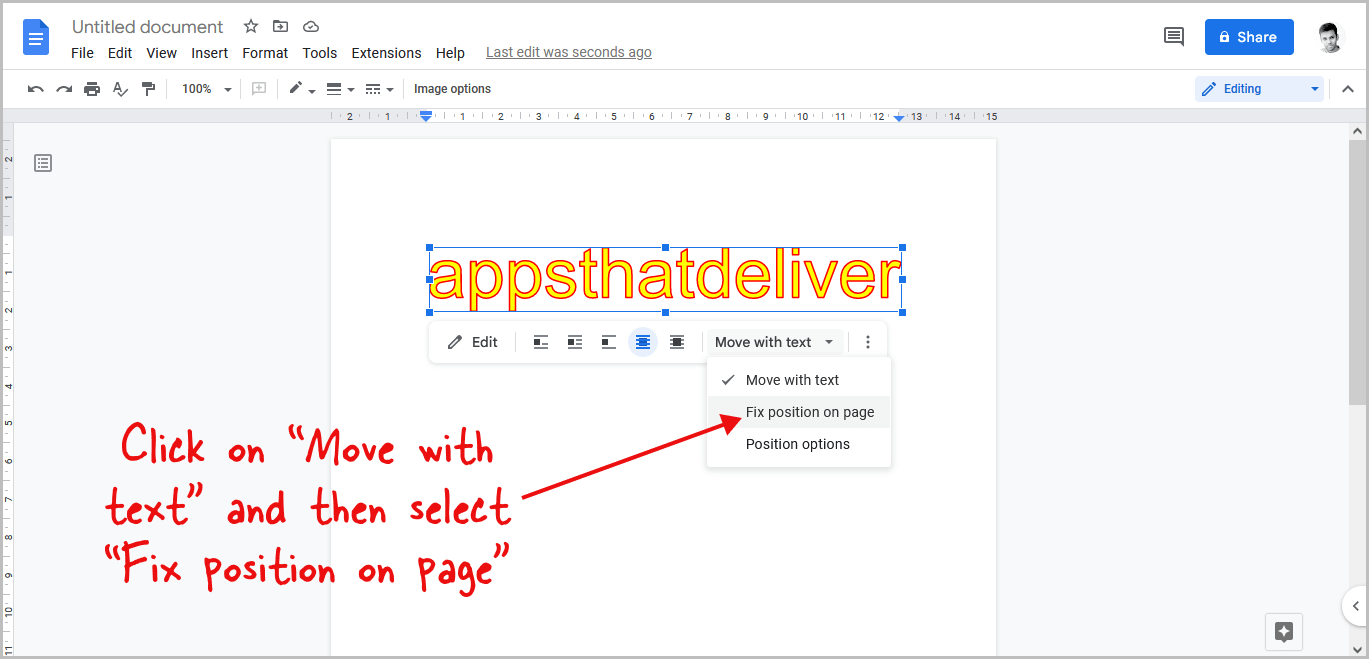
Click on the “Move with text” option from the menu and then select the “Fix position on page” from the drop-down menu.
Step 8: Adjust the size and the location of the word art
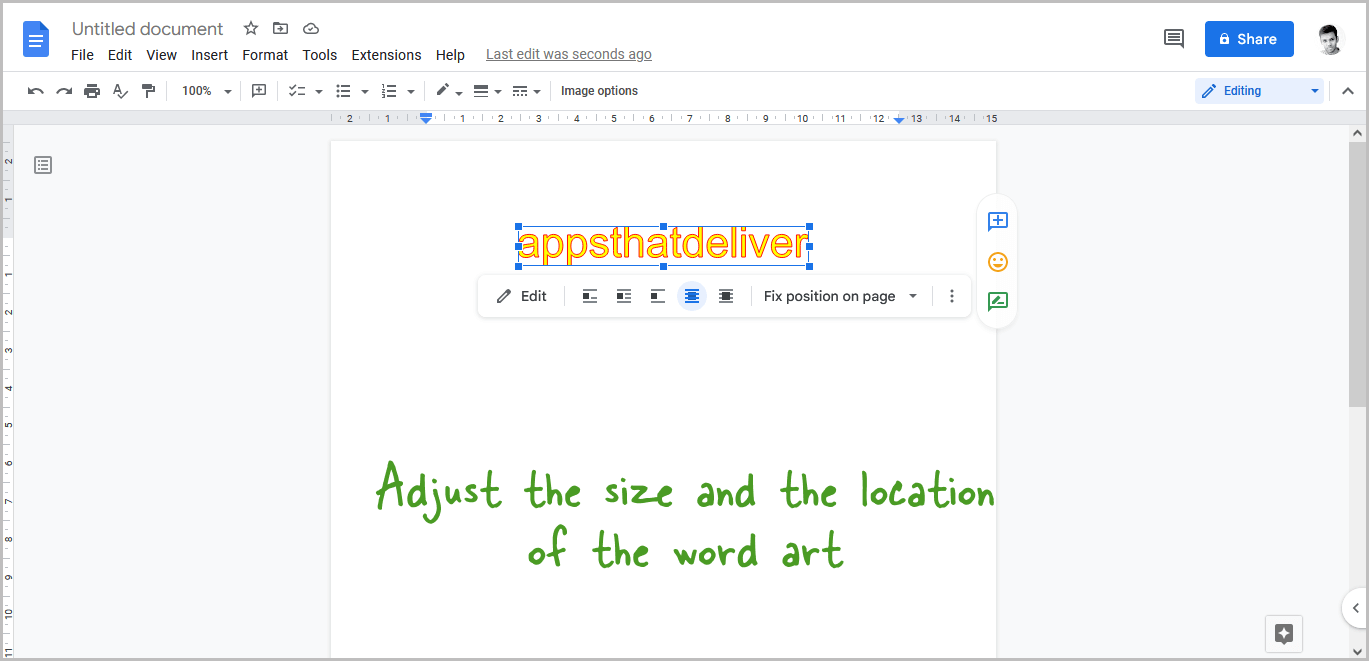
You can now drag the word art to any location in your document. You can also adjust the word art size.
FAQs
Does Google Docs Have Word Art?
Yes.
How to Add Word Art in Google Docs?
Here’s how to add word art in Google Docs:
- Go to Insert > Drawing > New
- Click on “Actions” and select “Word art”
- Enter your text and press the “Enter” key
- Customize the text
- Click on “Save and close”
- Click on the text and then select “Behind the text”
- Click on “Move with text” and then select “Fix position on page”
- Adjust the size and the location of the word art
How to Do Word Art in Google Docs?
To do word art in Google Docs, go to Insert > Drawing > New > Actions > Word art > Enter text > Save and close.
Can You Use Word Art in Google Docs?
Yes, you can use Word art in Google Docs.
How Do You Use Word Art in Google Docs?
To use word art in Google Docs, follow these easy steps:
- Go to Insert > Drawing > New
- Click on “Actions” and select “Word art”
- Enter your text and press the “Enter” key
- Customize the text
- Click on “Save and close”
- Click on the text and then select “Behind the text”
- Click on “Move with text” and then select “Fix position on page”
- Adjust the size and the location of the word art
Is there Word Art in Google Docs?
Yes, Google Docs does have Word Art. To use Word Art in Google Docs, go to Insert > Drawing > New > Actions > Word Art > Enter text > Save and close.

