Would you like to know how to put tables side by side in Google Docs?
Tables are a great way to organize and present data in your Google Docs document.
However, sometimes you may need to compare data in two tables side-by-side.
Unfortunately, Google Docs does not have a built-in feature for doing this.
Fortunately, there is a simple workaround!
In this tutorial, you will learn how to put tables side-by-side in Google Docs, step-by-step.
Also read: (opens in new tab)
How to Wrap Text Around a Table in Google Docs
Google Docs Table Border Bottom Only
Google Docs Table Alternating Colors
How to Make a Table Smaller in Google Docs
How to Copy a Table in Google Docs
How to Center a Table in Google Docs
How to Put Tables Side by Side in Google Docs
To put tables side by side in Google Docs, insert a 2×1 table, add your tables to each cell, and hide the outer table by setting its border width to 0pt in the Table Properties menu.
Step 1: Go to Insert > Table

The first step is to open the Google Docs document where you want to insert the tables.
Next, click on the “Insert” option from the top menu.
You’ll see a drop-down menu; select the “Table” option and proceed to the next step.
Step 2: In the Table size dialog box, select a “2×1” table
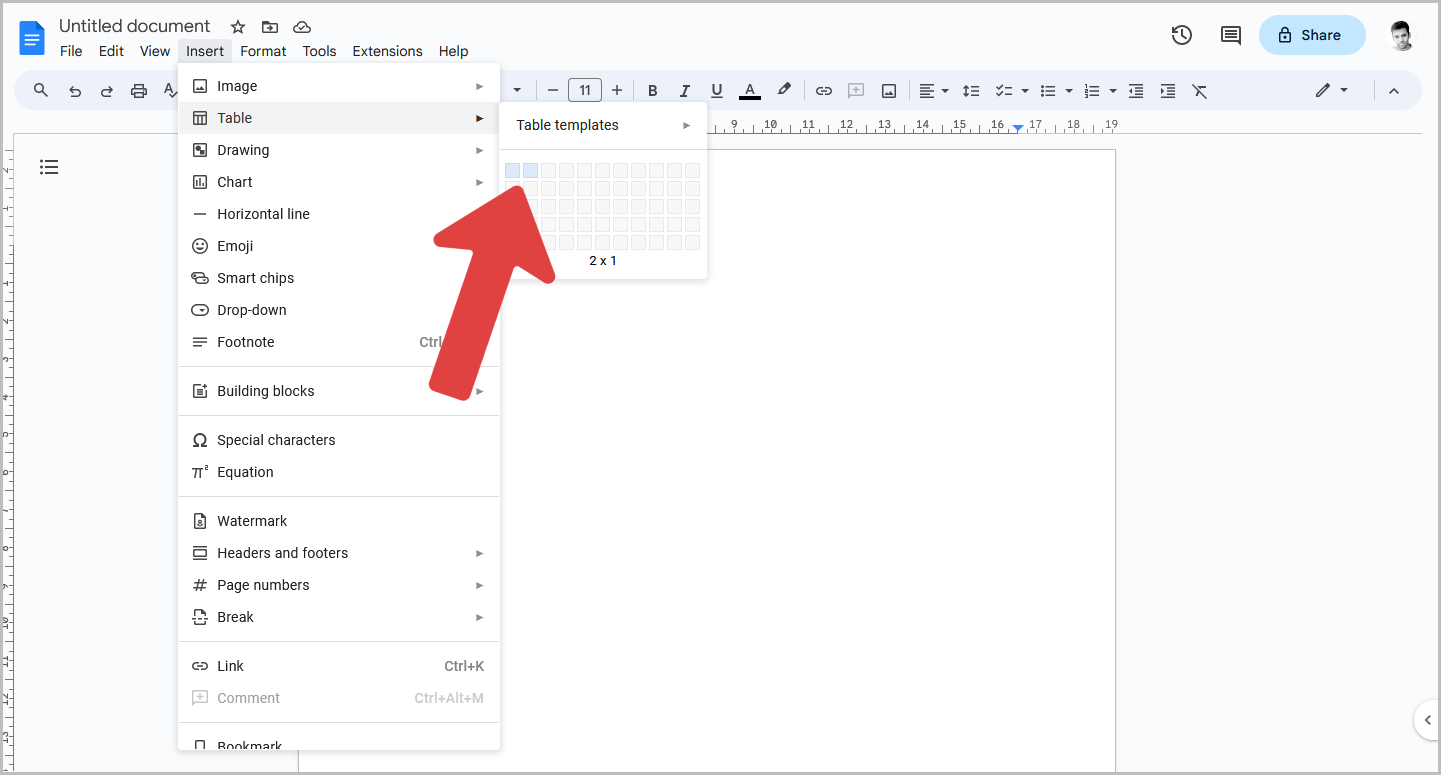
After selecting the “Table” option, a Table Size dialog box will appear where you can select the desired size.
Choose a 2×1 table, meaning a table with two columns and one row.
In this tutorial, I will show you how to put two tables side by side.
That’s why I chose a 2×1 table.
If you want to insert three tables side by side, you will need to create a 3×1 table.
Step 3: Click inside the first cell and insert your first table
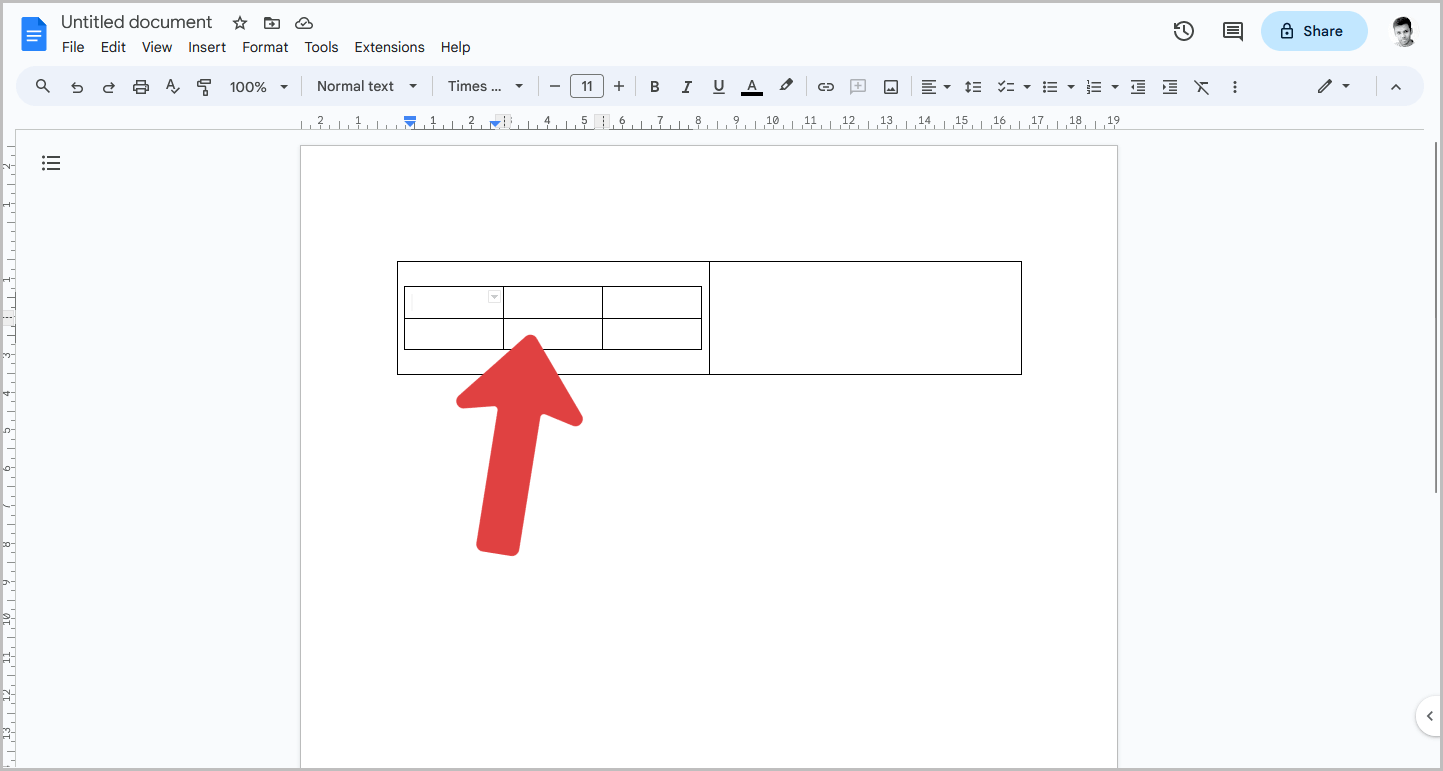
You will now see a 2×1 table in your document.
Click inside the first cell of the table to begin working inside that cell.
After clicking, go to Insert > Table and choose the desired size for your new table.
Step 4: Click inside the second cell and insert your second table
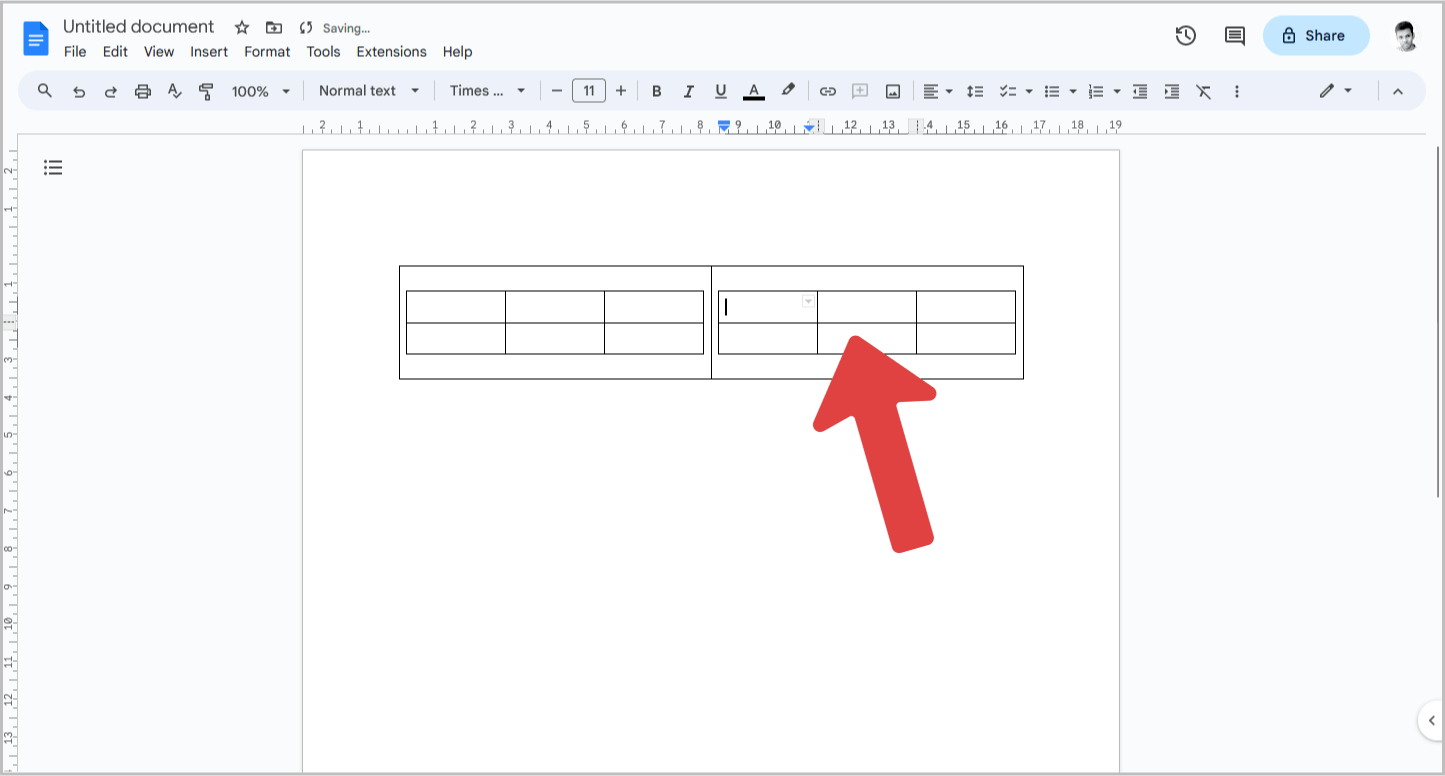
Now that you have inserted the first table, it is time to insert the second table in the second cell by following the same steps.
Once you have inserted the table, proceed to the next step.
Step 5: Right-click the outer table and select “Table properties”
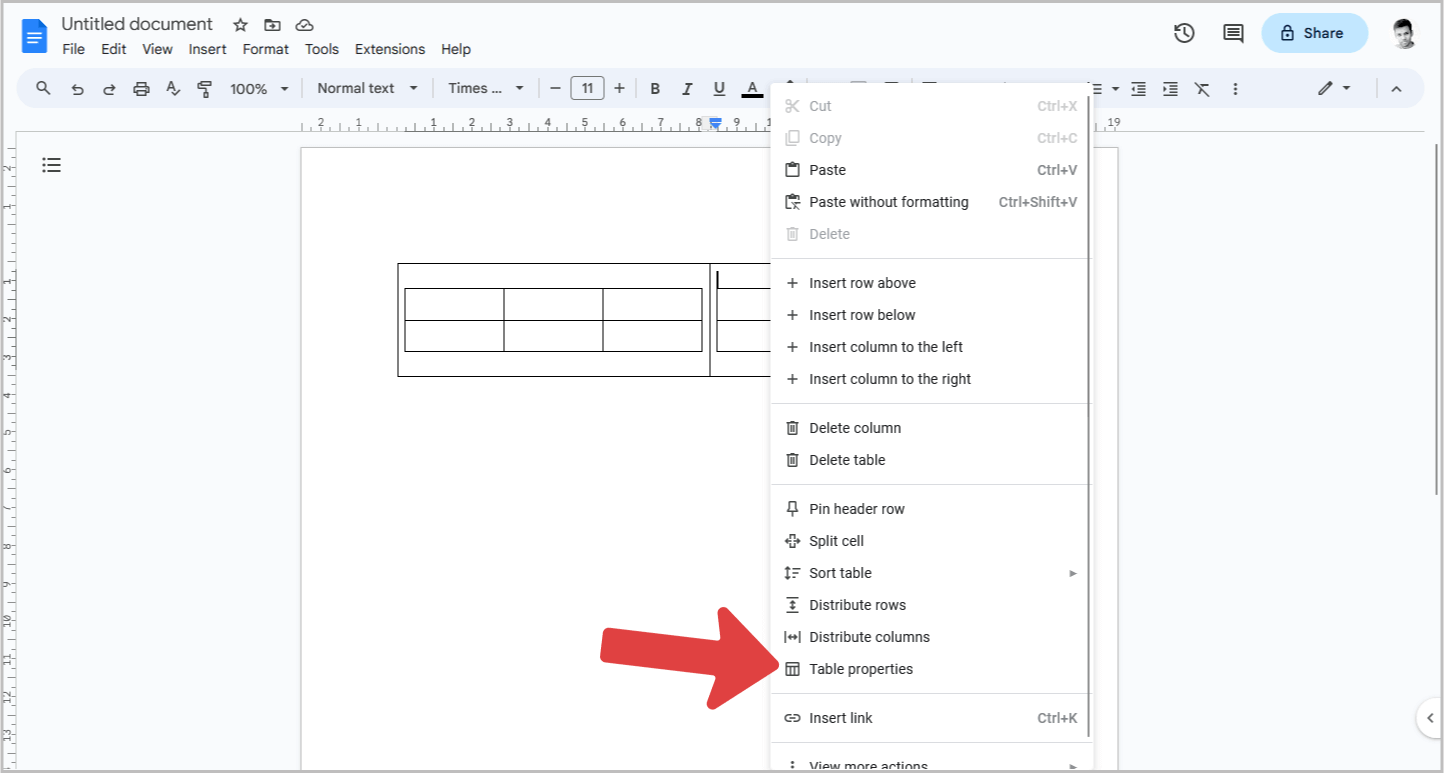
In these three steps, we will explain how to remove the outer table.
First, right-click on the outer table to view the context menu.
Then, select the “Table properties” option from the context menu.
Step 6: Select “Color” settings
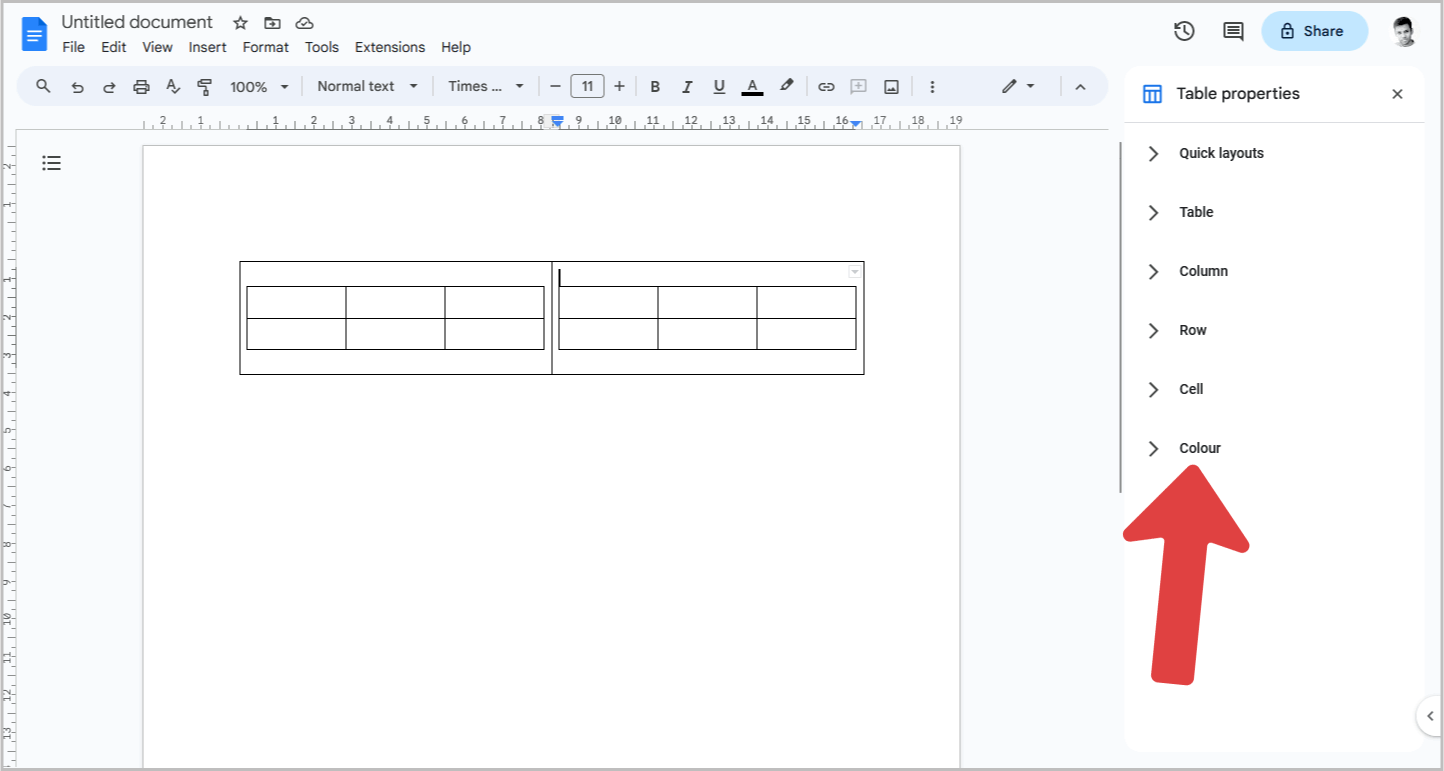
You will now see the Table Properties panel on the right side of the page.
This panel contains various settings.
Click on the “Color” settings in the panel and proceed to the next step.
Step 7: Set the “Table border width” to “0pt”
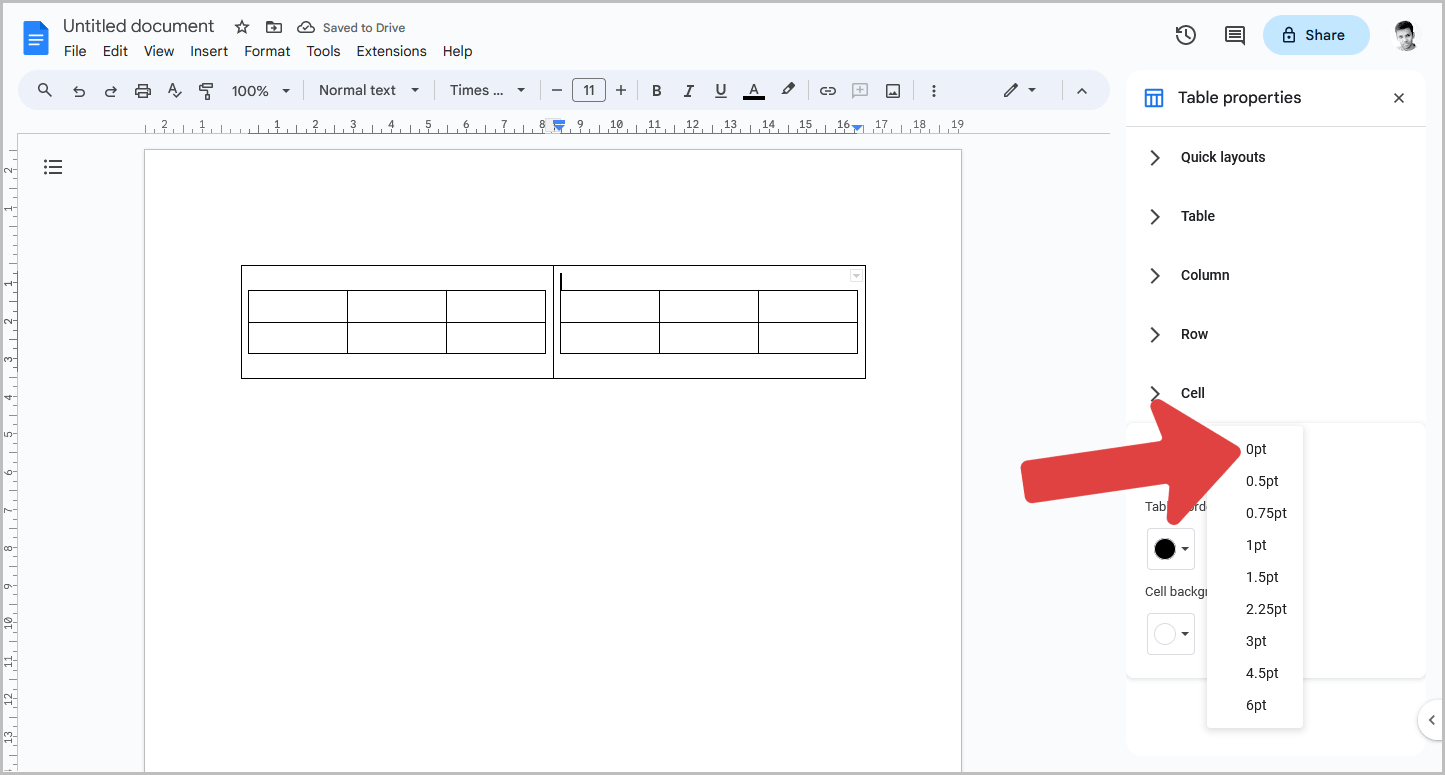
In the “Color” settings, the border color is set to “Black” by default, the table border width is set to “1pt”, and the cell background color is set to “White”.
To make the outer table invisible, click on the “Table border width” menu and select “0pt” from the list.
Instead of making the border width “0pt”, you can also change the border color to match your document’s background color.
For instance, if your document’s default background color is white, you can make the border color of the outer table white to make it invisible.
You can now enter data into your tables.
FAQs
How do I put two tables side by side?
Open Google Docs, insert a 2×1 table, and place tables in each cell. Adjust table settings to hide the outer table. Now, your tables are side by side.
How do you put two tables together on Google Docs?
Combine two tables by creating a 2×1 table, inserting each table in cells, and making the outer table invisible.
How to put 3 tables side by side in Google Docs?
Arrange three tables side by side by creating a 3×1 table, inserting tables in cells, and hiding the outer table.
Summary
Putting tables side by side in Google Docs can be a helpful tool when you need to organize your data.
Here’s how to put tables side by side in Google Docs:
- Go to Insert > Table and select a 2×1 table
- Click inside the first cell and insert your first table
- Click inside the second cell and insert your second table
- Right-click the outer table and select “Table properties”
- Select “Color” settings
- Set the table border width to “0pt”

