Are you tired of your text getting cut off by tables in Google Docs?
With this easy tutorial, you can learn how to wrap text around tables in Google Docs.
In just a few simple steps, you can have your text flowing smoothly around your tables, making your documents look more professional and polished.
In this tutorial, you’ll learn how to wrap text around a table in Google Docs, step-by-step.
Also read: (opens in new tab)
Google Docs Table Border Bottom Only
Google Docs Table Alternating Colors
How to Make a Table Smaller in Google Docs
How to Center a Table in Google Docs
How to Convert Table to Text in Google Docs
How to Wrap Text Around a Table in Google Docs
To wrap text around a table in Google Docs, first copy the table. Then, paste it into the Drawing canvas and click “Save and Close”. Next, select the table and choose “Wrap Text”. Finally, drag it to the desired location.
Step 1: Copy the table
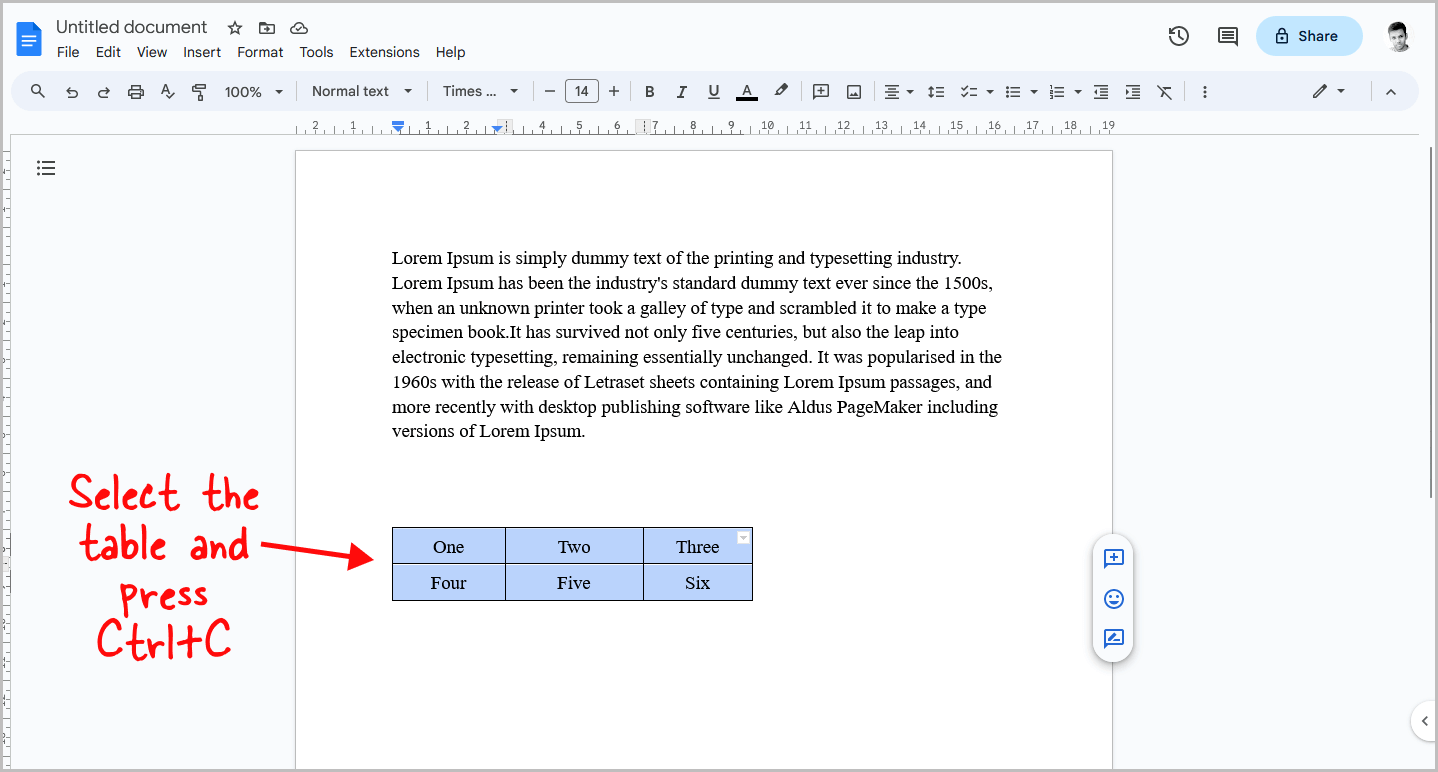
The first step is to copy the table.
To do this, select the entire table with your mouse and press Ctrl+C to copy it to the clipboard.
If you have not already created a table, go to Insert > Table and create a table below the paragraph.
Once you have created the table, proceed to the next step.
Step 2: Place the cursor where you want to insert the table
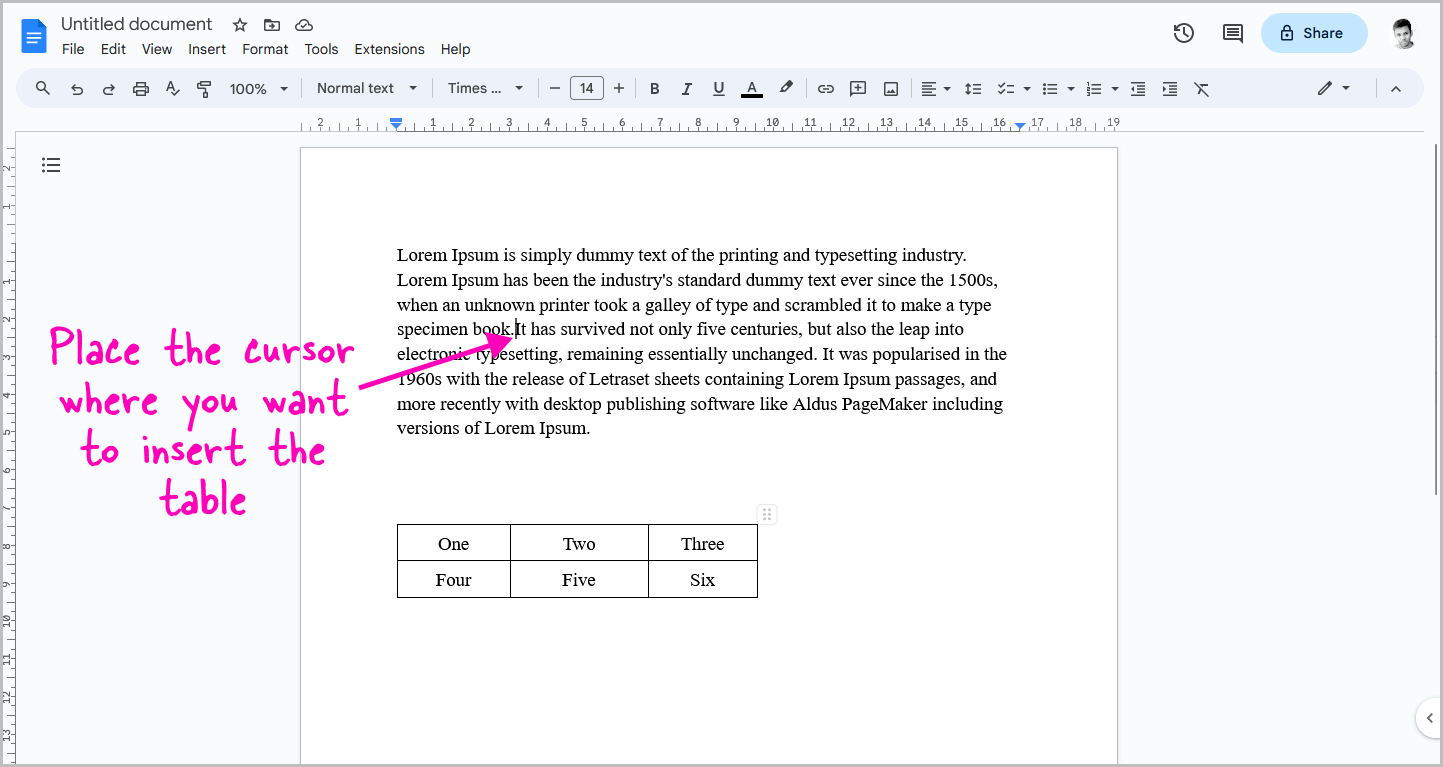
Now, place the cursor where you want to insert the table.
Don’t paste the table yet.
We need to follow some additional steps in order to wrap the text around the table.
For now, simply place the cursor where you wish to insert the table.
Step 3: Go to Insert > Drawing > New
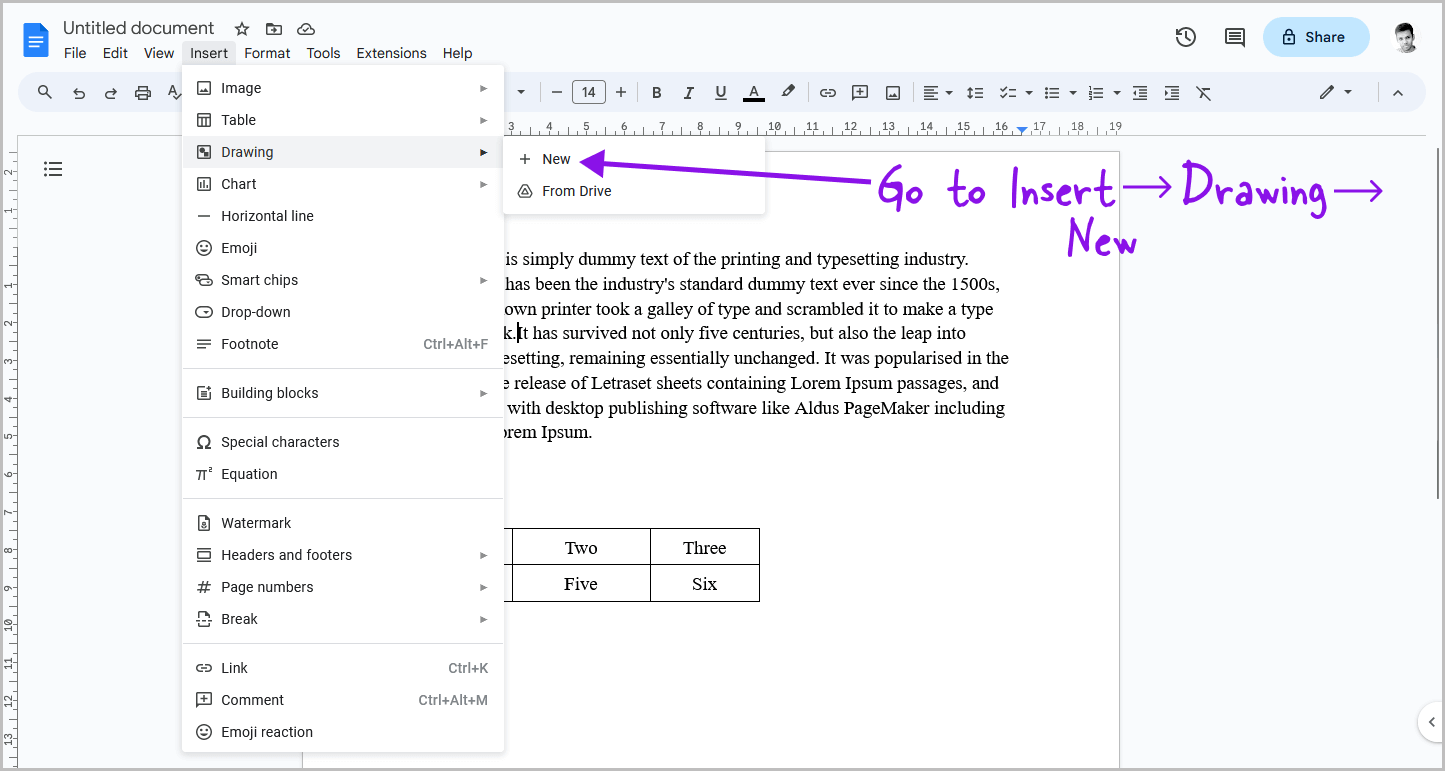
After copying the table and placing the cursor at the right spot, click on the “Insert” option from the top menu and select “Drawing”.
From there, select the “New” option.
Step 4: Paste the table and click on “Save and close”
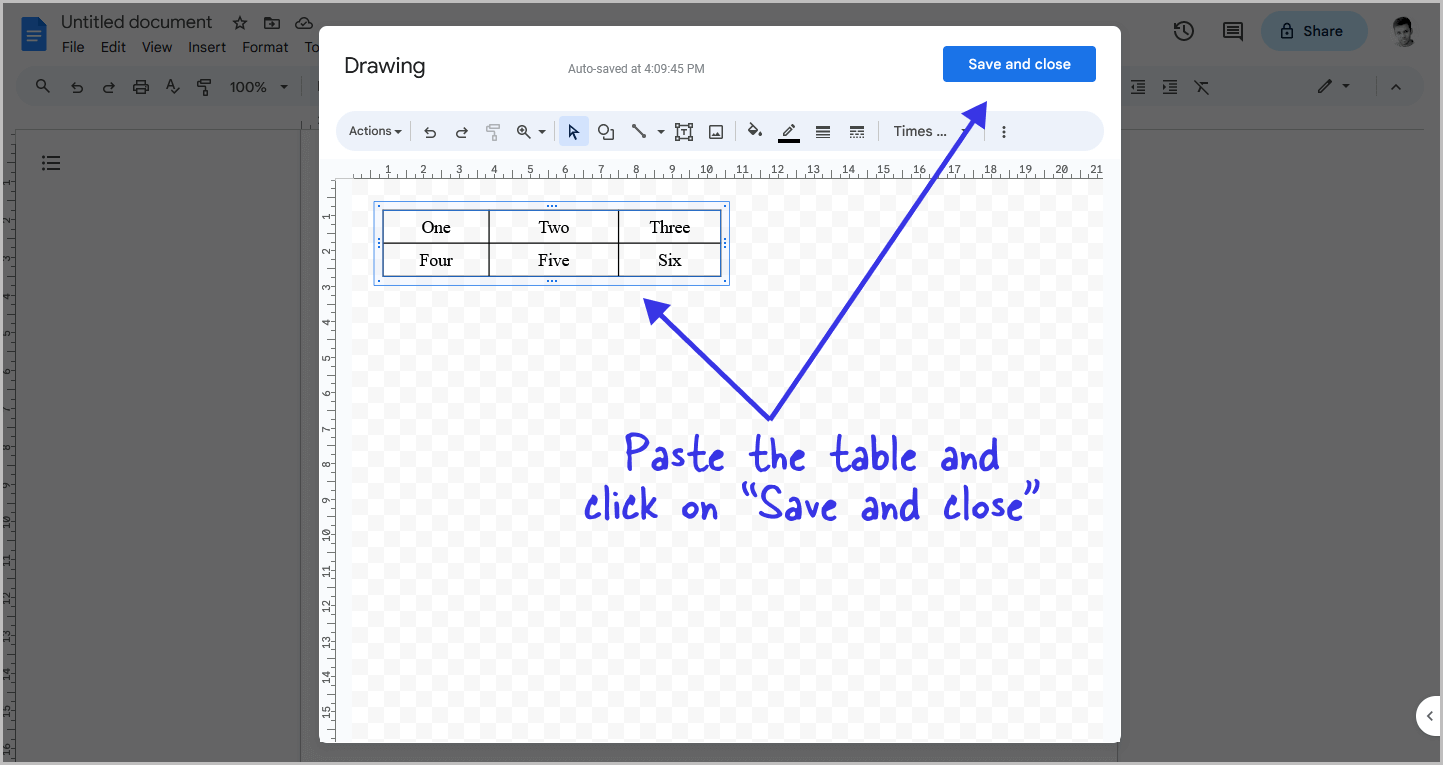
You will now see the drawing canvas.
Press Ctrl+V to paste the copied table onto the canvas.
Next, click on the “Save and close” button to exit the drawing canvas and insert the table into the document.
The table will be inserted at the location where you placed the cursor in Step 2.
Step 5: Click on the table and select “Wrap text”
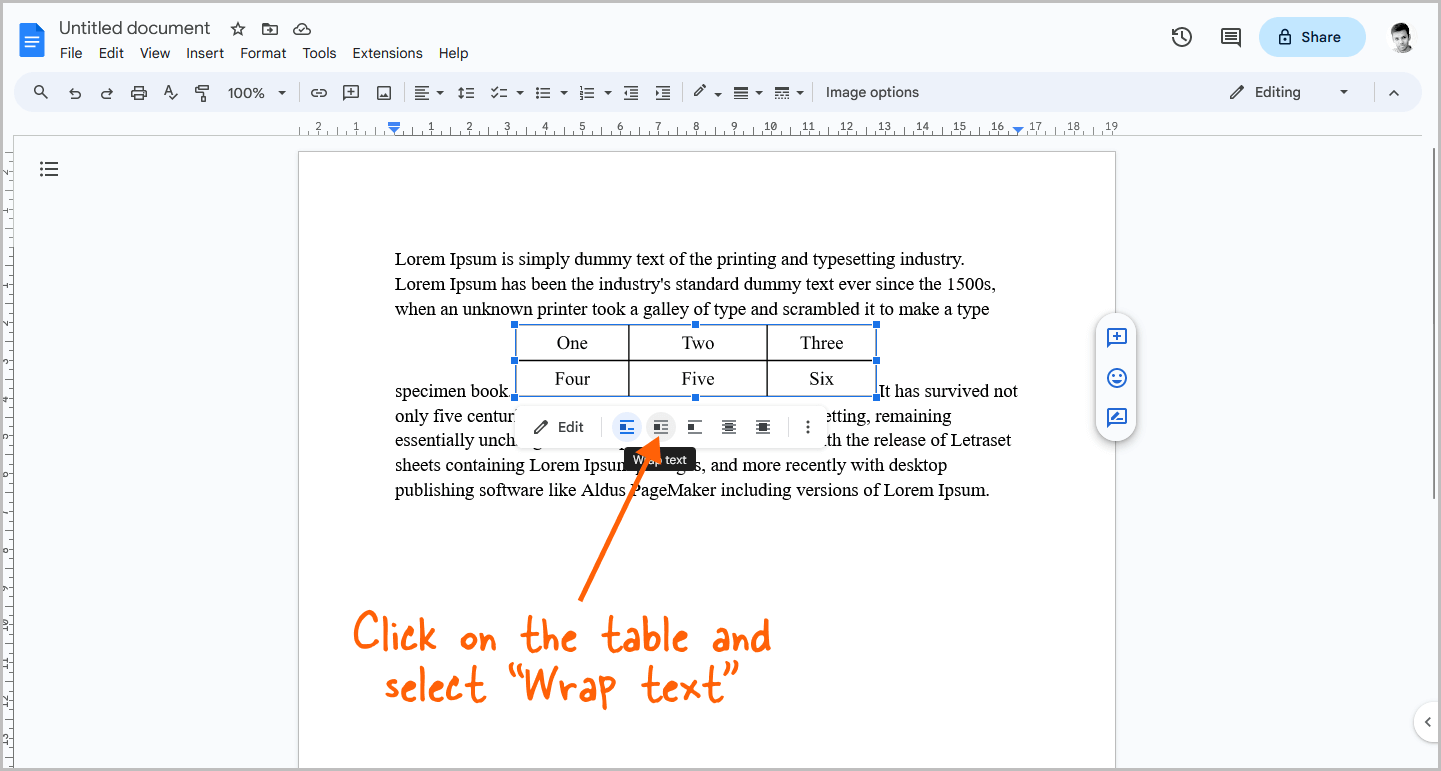
Click on the table to select it. A small panel will appear just below the table.
Finally, click on the “Wrap text” symbol to wrap the text around the table.
Step 6: Customize the table and text as desired
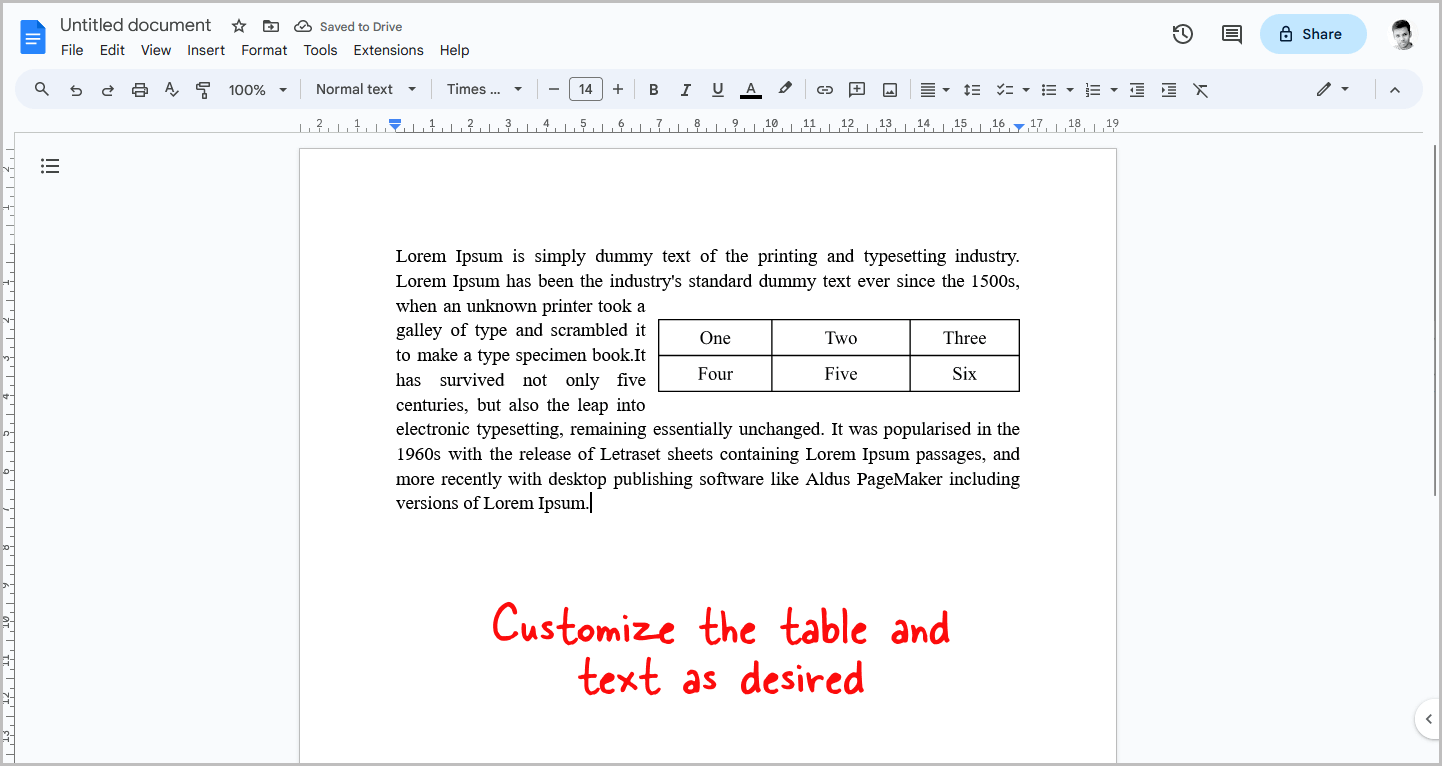
To give your document a more professional and polished look, you can take some additional steps.
Here are some tips:
- Adjust the margins of the table by selecting the table and then choosing the desired margin size from the image panel.
- Customize the location of the table by clicking on it and dragging it to the desired location.
- Select the entire paragraph and click on the “Justify” option to align the text properly.
Summary
By following these simple steps, you can easily wrap text around a table in Google Docs.
Here’s how to wrap text around a table in Google Docs:
- Copy the table
- Place the cursor where you want to insert the table
- Go to Insert > Drawing > New
- Paste the table and click on “Save and close”
- Click on the table and select “Wrap text”
- Customize the table and text as desired

