Are you having trouble figuring out how to save changes in Google Docs?
If you’re used to working with MS Word, you’re probably familiar with the process of pressing Ctrl+S or clicking on the “Save” icon whenever you make changes to your document.
While Google Docs is also a word processor, it doesn’t have a visible “Save” button, which can be confusing for some users.
So, how do you save changes in Google Docs?
In this article, you will learn how to save changes in Google Docs.
Also read: (opens in new tab)
How to Switch Back to the Old Layout in Google Docs
How to Share Multiple Google Docs at Once
How to Hide Version History in Google Docs
If You Remove Access From Google Doc Are They Notified?
How to Save Changes in Google Docs?
Since Google Docs is an online word processor, all the changes you make to your document are automatically saved to the cloud. This means that there is no need to manually save the document, as the changes are saved automatically.
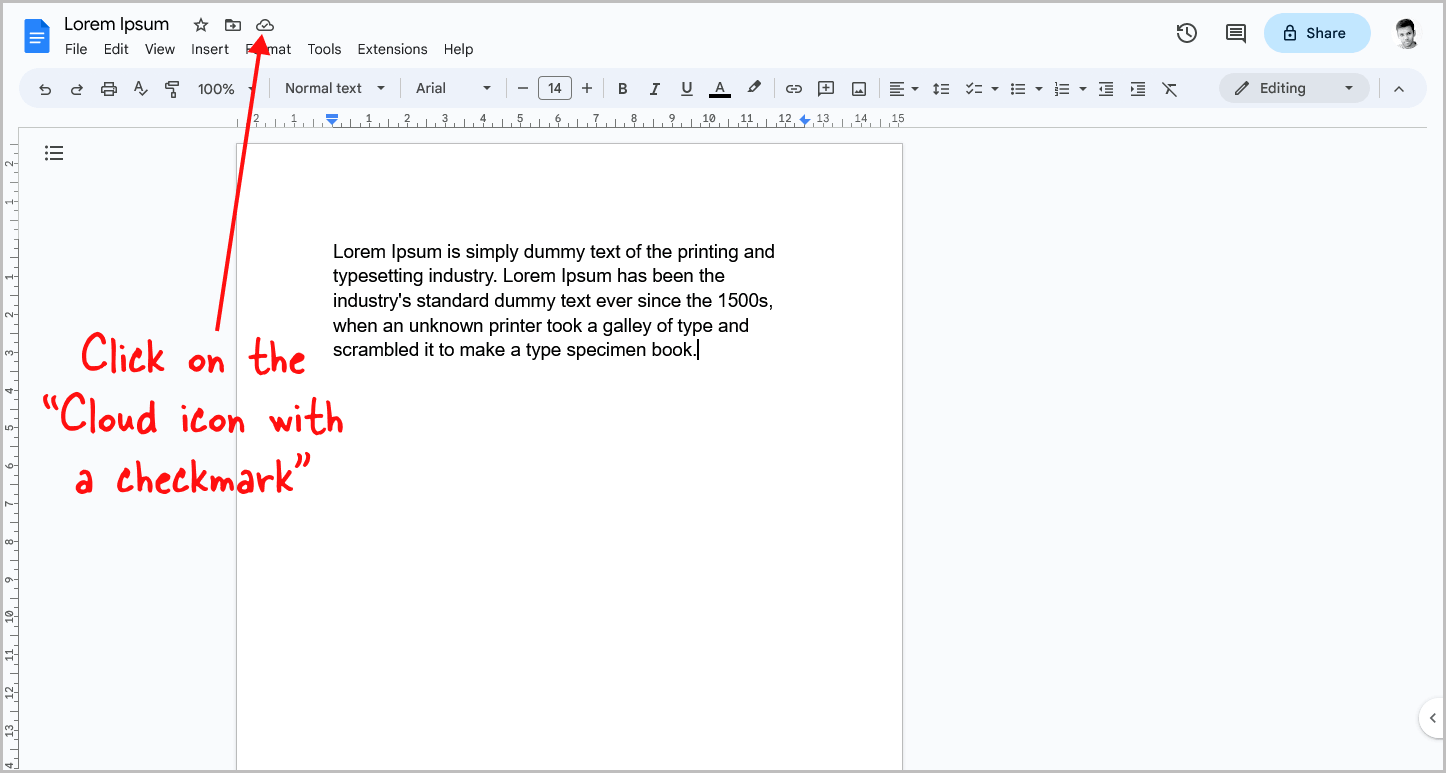
To check if the changes have been saved, simply open the document and click on the “Cloud icon with a checkmark” located next to the name of the document.
If the changes are not saved, it may be because you have enabled the offline mode in Google Docs.
When the offline mode is enabled, all the changes are saved locally on your machine.
If you have shared the document with someone else, those changes will not reflect on their version of the document since you are offline.
To remove the offline mode, you need to connect to the internet so that the changes in the document can be saved in the cloud.
If you are already connected to the internet and want to disable the offline mode, follow these steps:
Step 1: Go to docs.google.com
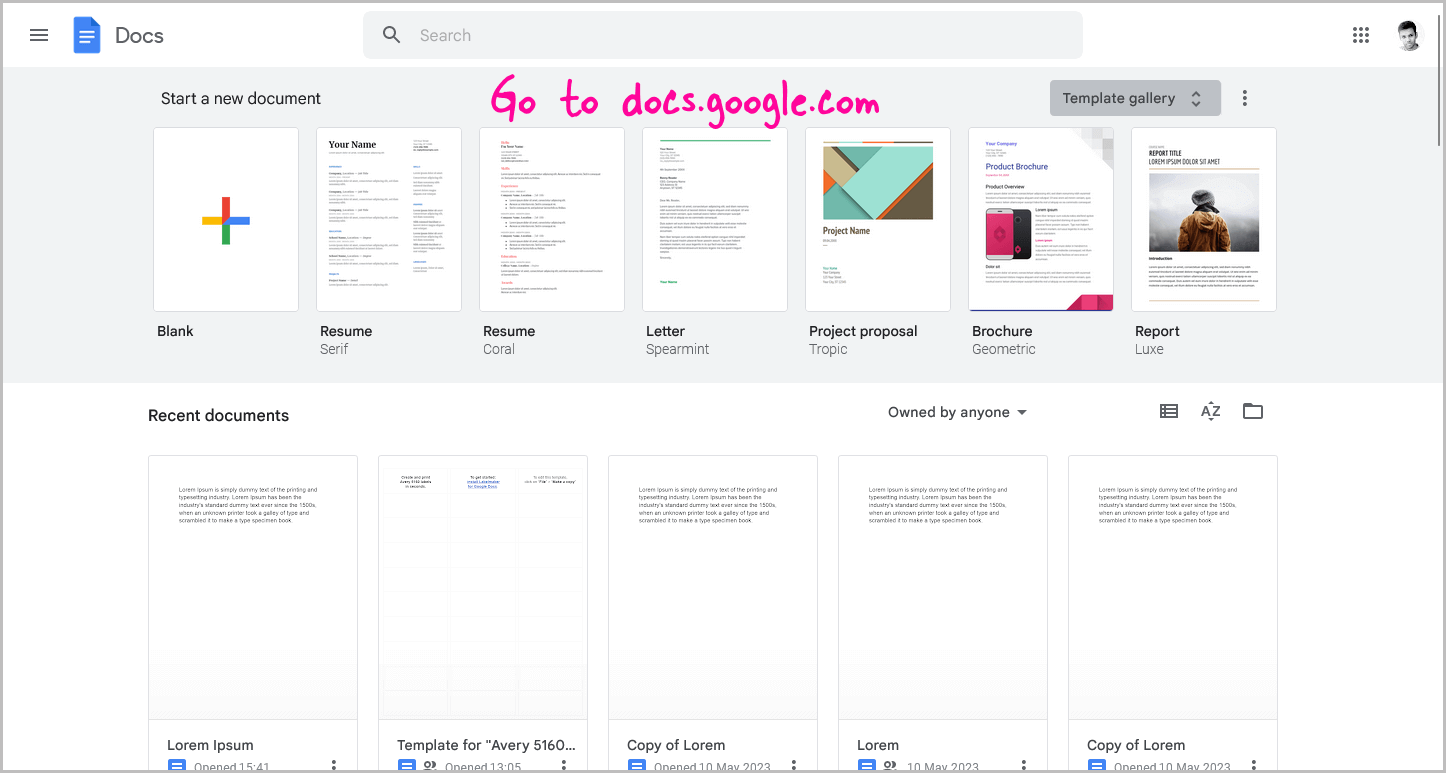
One of the first things you will need to do in order to access your Google Docs is to navigate to the homepage.
To do so, simply type in the following URL: docs.google.com.
Once you have arrived at the homepage, you will be prompted to sign in to your account.
After successfully logging in, you will be directed to your personal Google Docs homepage where all of your saved documents can be found.
Step 2: Click on the “Menu” icon on the top left
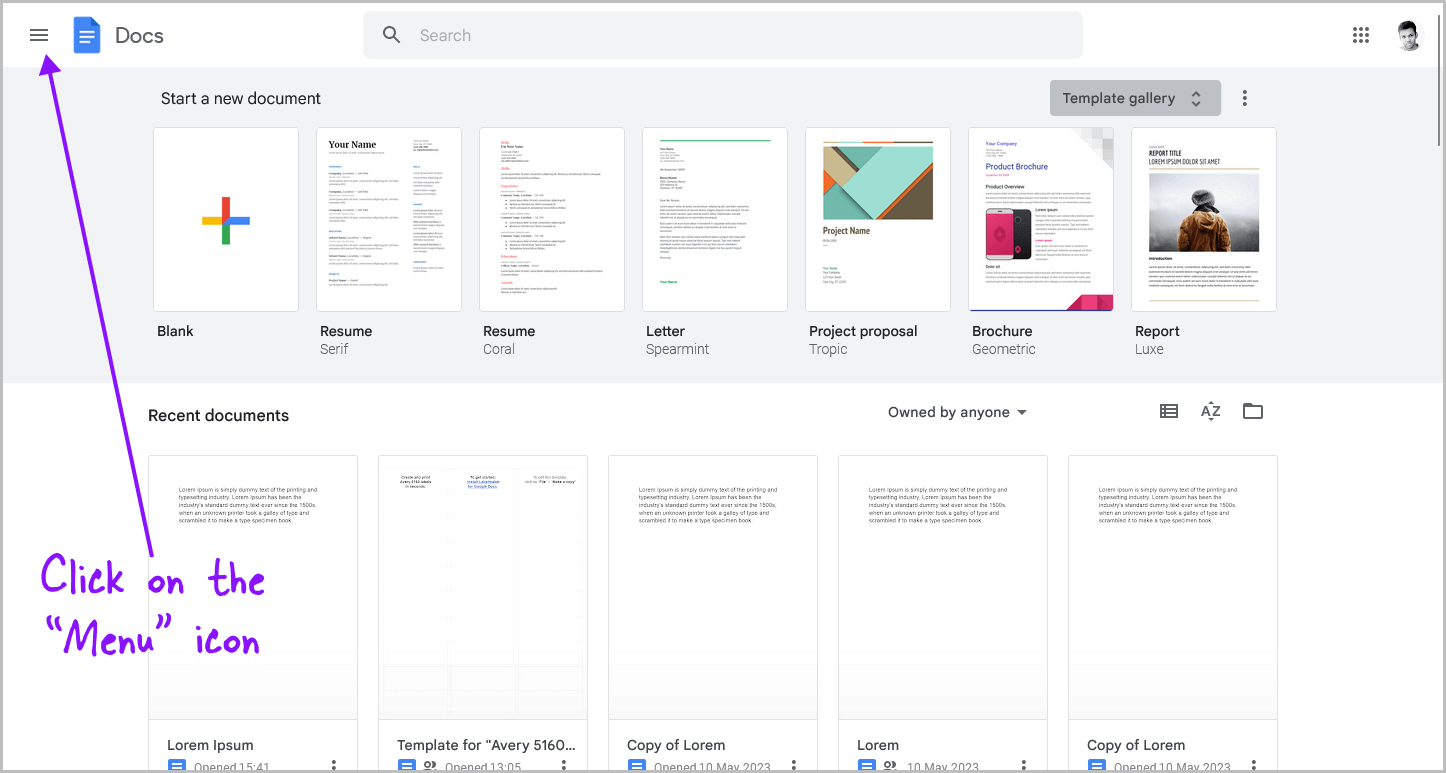
When you open Google Docs, you will see the Google Docs logo in the top left corner.
To the left of the logo is a menu icon with three horizontal lines.
Click on this icon and proceed to the next step.
Step 3: Select “Settings”
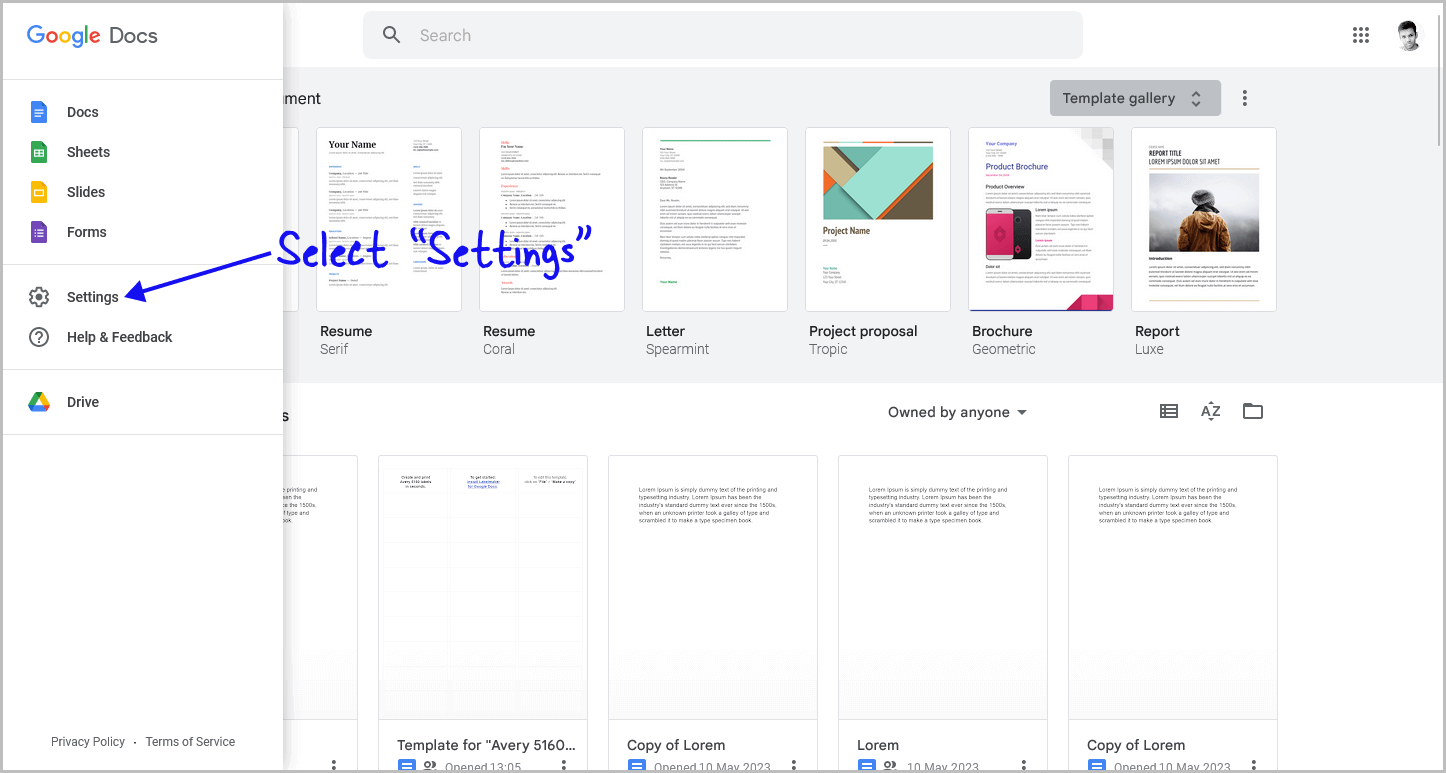
In this menu, you’ll see options such as Docs, Sheets, Slides, Forms, Settings, Help & Privacy, and Drive.
From the list of options, select “Settings”.
Step 4: Disable the “Offline” toggle switch and press “OK”
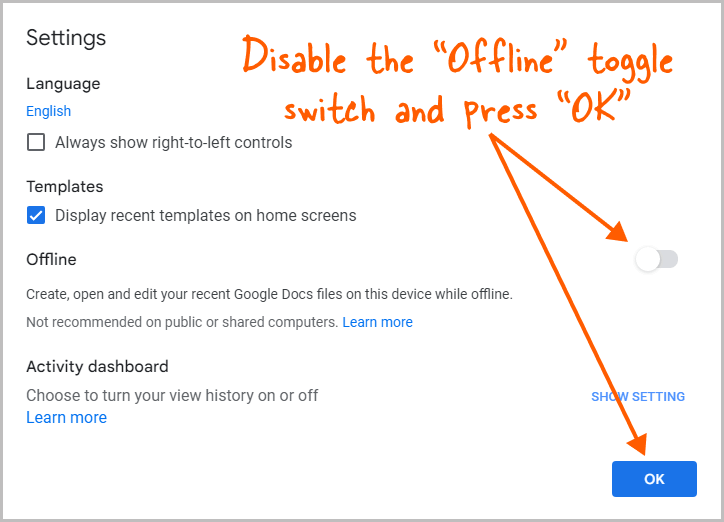
You will now be presented with the “Settings” pop-up.
Next to the “Offline” title, you will notice that the toggle switch is currently enabled.
To disable it, simply click on the toggle switch, and then press the “OK” button.
Once you have completed this step, proceed to open the document.
All of the changes you make will now be saved to the cloud automatically.
This means that the next time you open the document, you will be able to see that all of your changes have been saved.
How to Save Changes in Google Sheets/Google Docs
When you are online, Google automatically saves changes in Google Sheets and Google Docs. However, if you are in “Offline” mode, you need to disable the option so that changes are automatically saved to the cloud.
Conclusion
In conclusion, saving changes in Google Docs is an automatic process that does not require a visible “Save” button.
However, enabling the offline mode can cause changes to be saved locally on your device, preventing them from syncing to the cloud and affecting shared documents.
To disable the offline mode, simply follow these steps:
- Go to docs.google.com
- Click on the “Menu” icon on the top left
- Select “Settings”
- Disable the “Offline” toggle switch and press “OK”
Once you have completed these steps, all changes made to your document will be saved to the cloud automatically.

