If you wish to type a special symbol like an arrow in Google Docs, you cannot use your keyboard’s arrow keys.
The arrow keys are used to simply move around your document.
So how do you type an arrow in Google Docs?
In this tutorial, I’ll show you how to type an arrow in Google Docs in four simple steps. I’ll also include a set of keyboard shortcuts for inserting arrows into your document.
Related: How to Put an Arrow Over a Letter in Google Docs
How to Type an Arrow in Google Docs?
Step 1: Click on the “Insert” option from the top menu
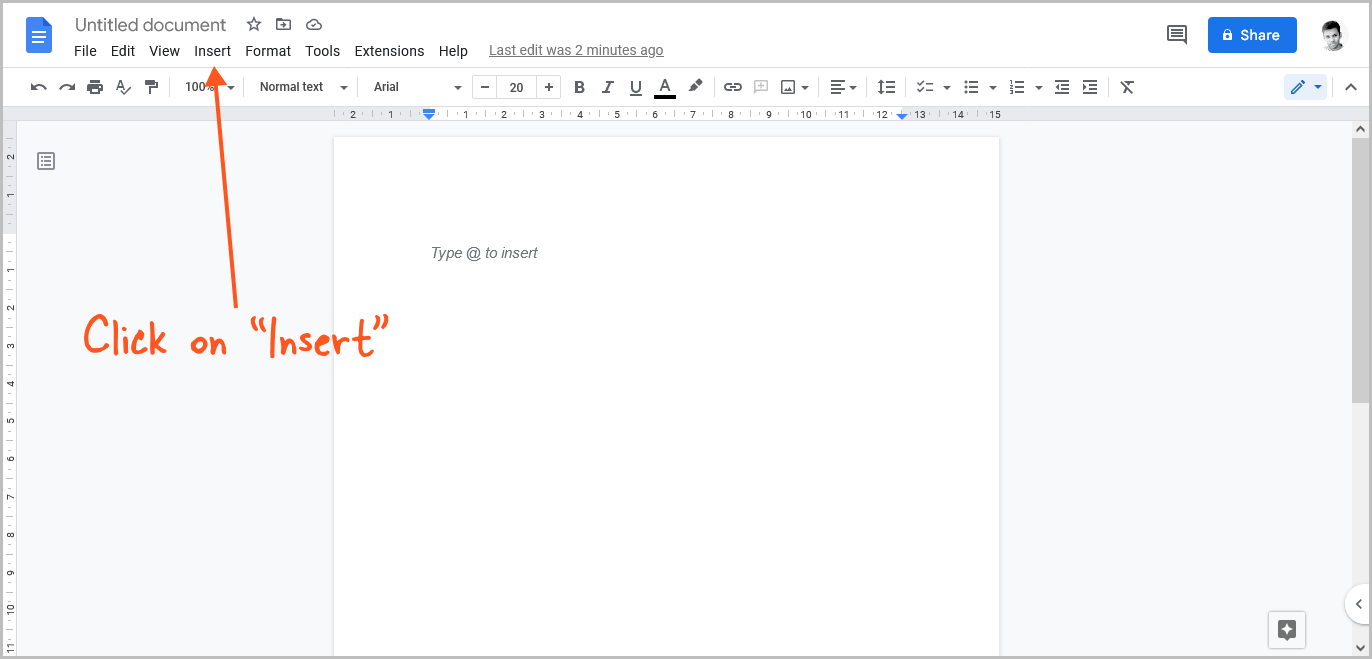
The first step is to open the document and bring the pointer to the spot where you wish to insert the arrow.
Now, from the top menu, select the “Insert” option.
Step 2: Select “Special characters”
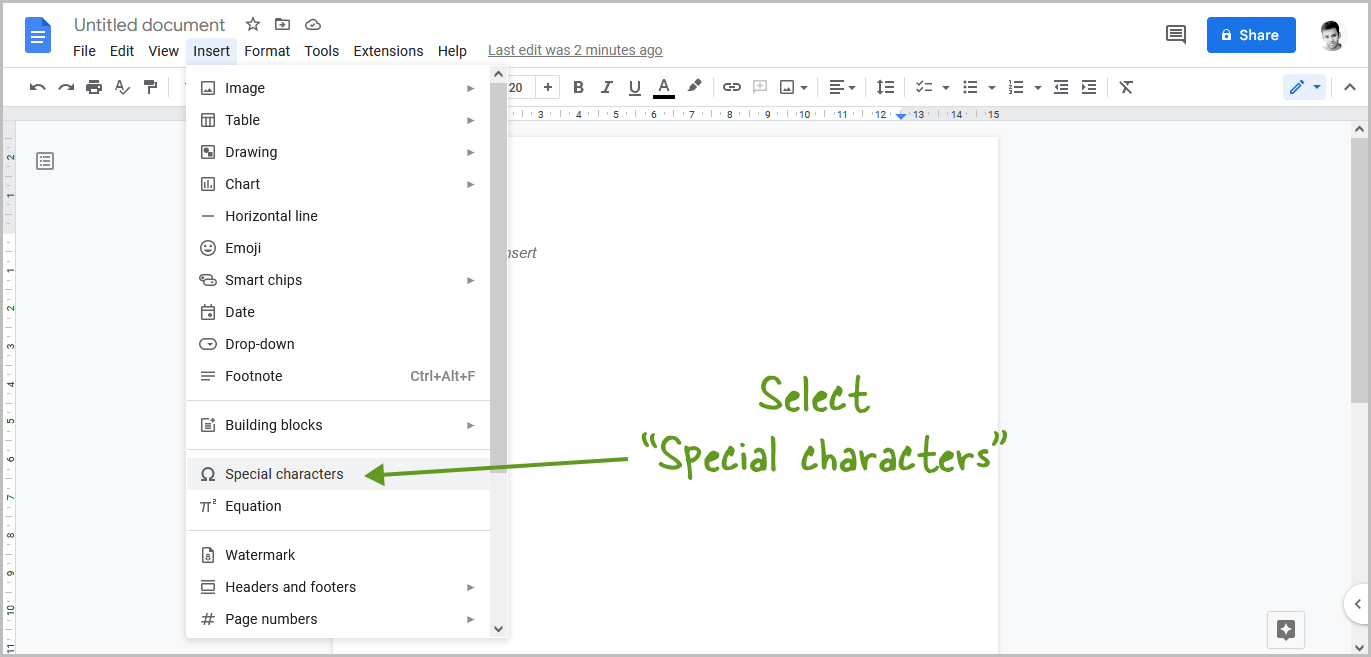
Select “Special characters” from the list of options.
Step 3: Type “Arrow” into the search bar
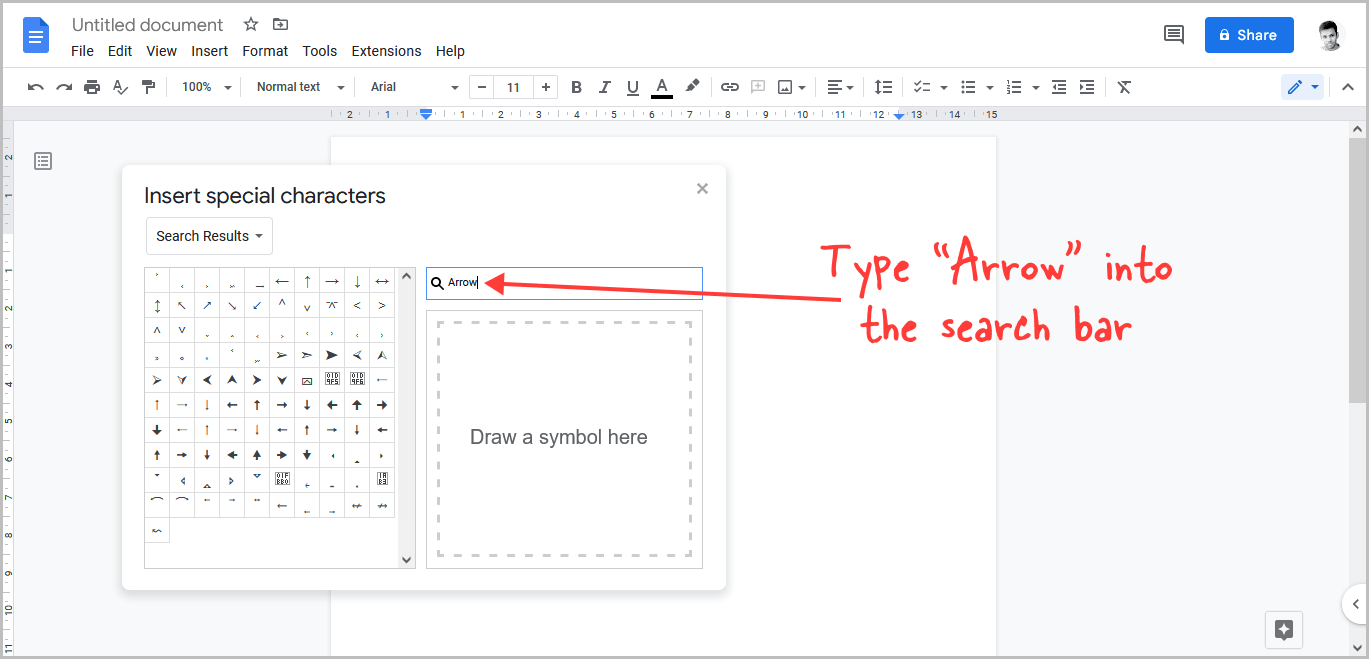
Now, enter the text “Arrow” into the search bar.
Step 4: Choose your preferred arrow style
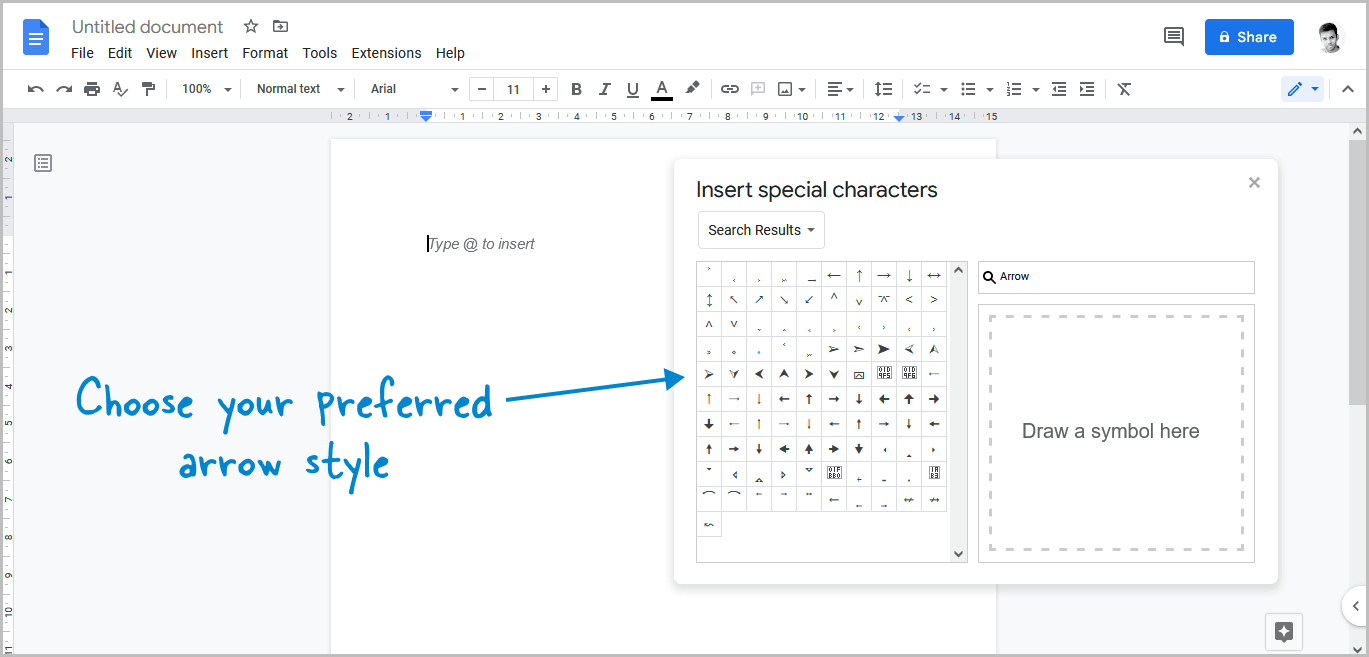
You’ll see various arrow types on the left side of the pop-up.
To insert the desired arrow type, click on it.
Using a keyboard shortcut
You can also use keyboard shortcuts to type basic arrows in your document. Simply hold down the “Alt” key while entering the code.
| Arrow | Shortcut |
| ↑ | Alt+24 |
| ↓ | Alt+25 |
| → | Alt+26 |
| ← | Alt+27 |
For example, if you want to insert an up arrow, just press and hold the “Alt” key on your keyboard and then enter the number “24”.
Using the Drawing Tool
Step 1: Go to Insert > Drawing > New
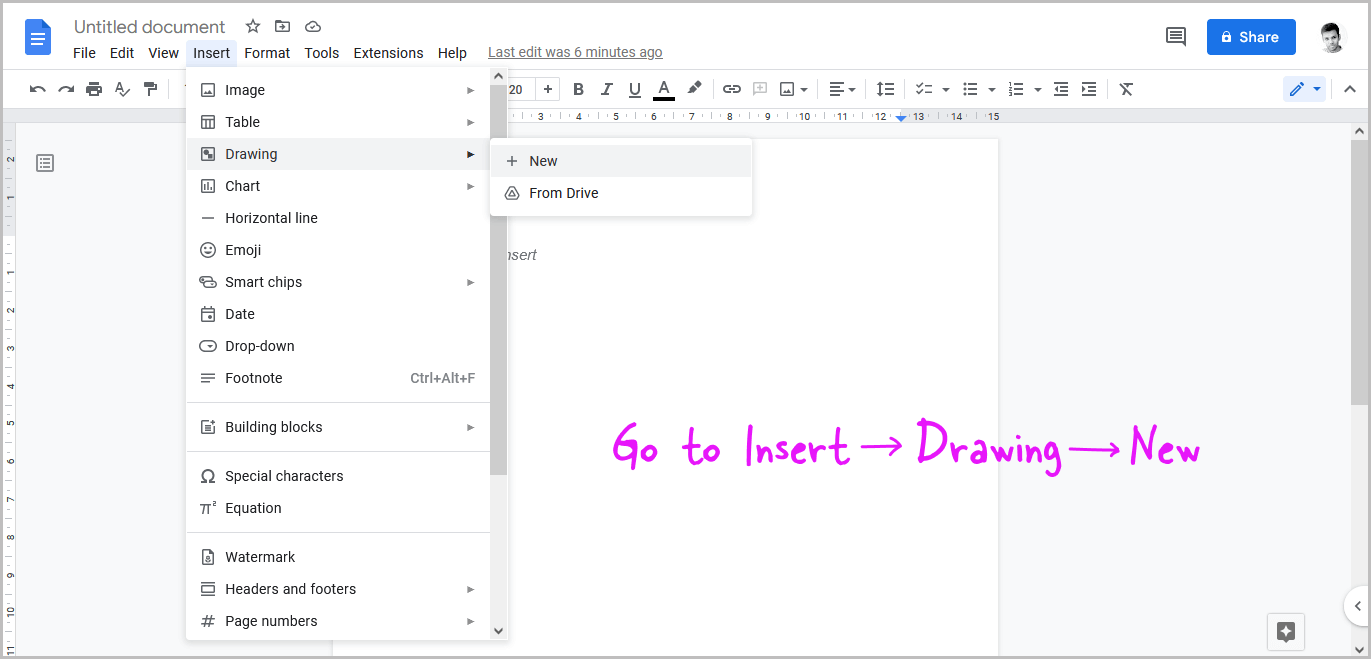
To insert an arrow in Google Docs using the Drawing tool, click on the “Insert” option from the top menu and then select “Drawing” from the menu and lastly, select “New”.
Step 2: Click on “Shape” from the toolbar
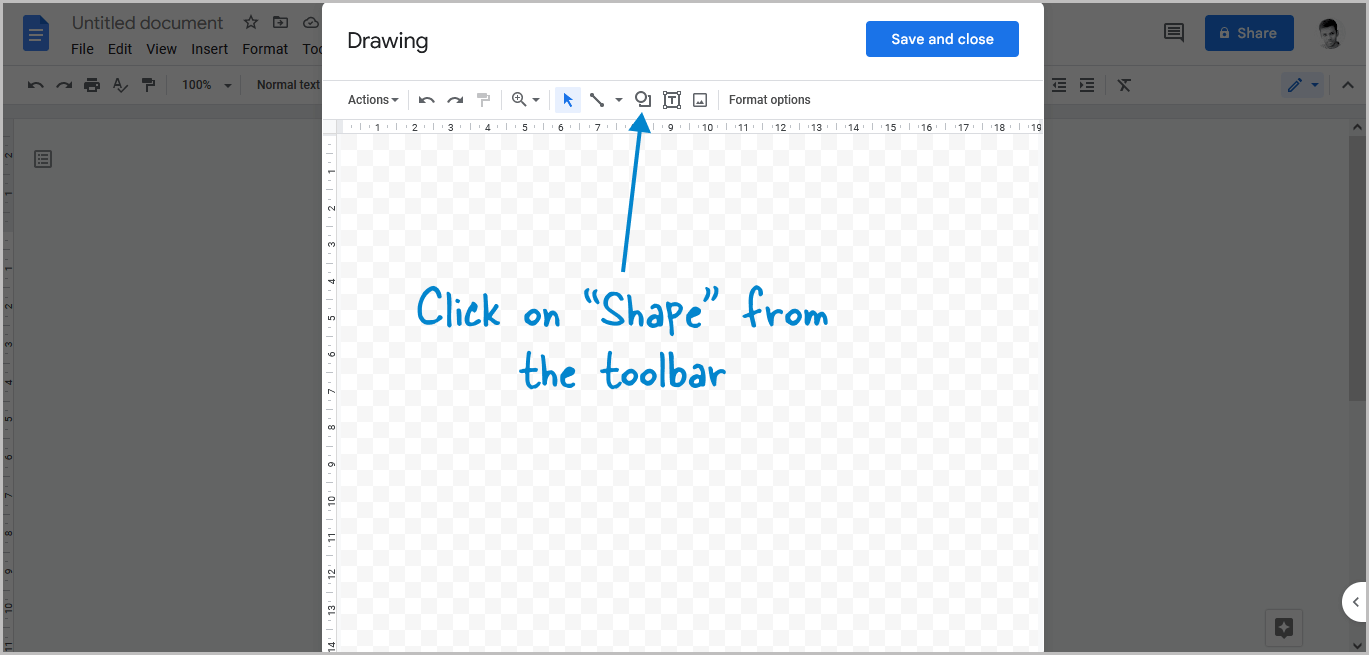
The drawing window will now appear with a toolbar at the top.
This toolbar has a variety of tools.
From the toolbar, select the “Shape” tool.
Step 3: Select “Arrows”
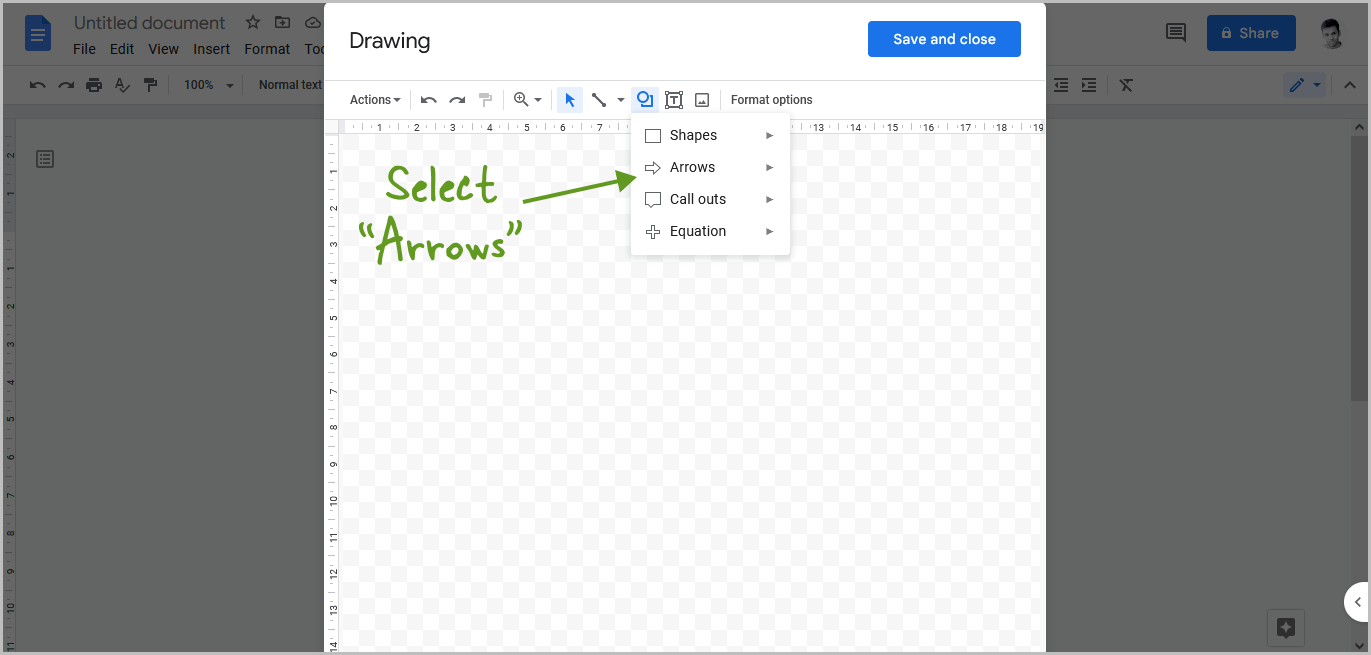
The “Shapes” menu contains a variety of options.
Choose the “Arrows” option from the drop-down menu.
Step 4: Choose an arrow style
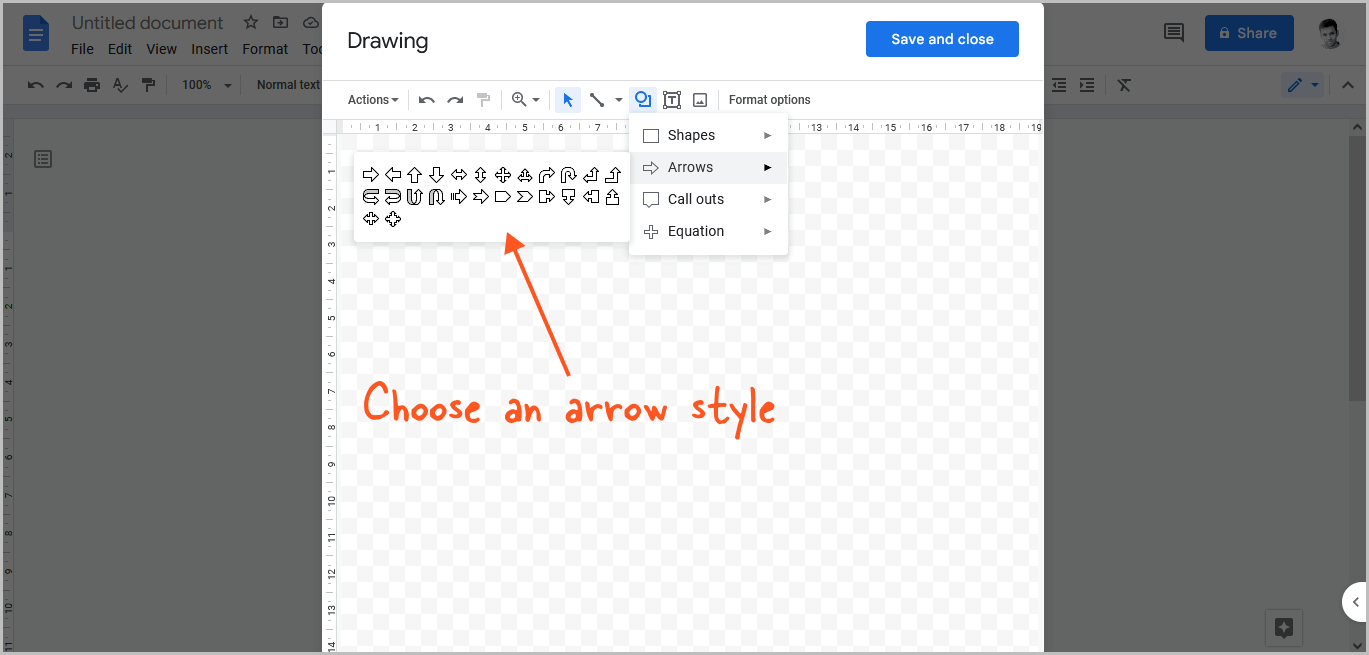
You’ll find many arrow styles under the “Arrows” menu.
Choose your favorite arrow style from the options.
Step 5: Draw the arrow
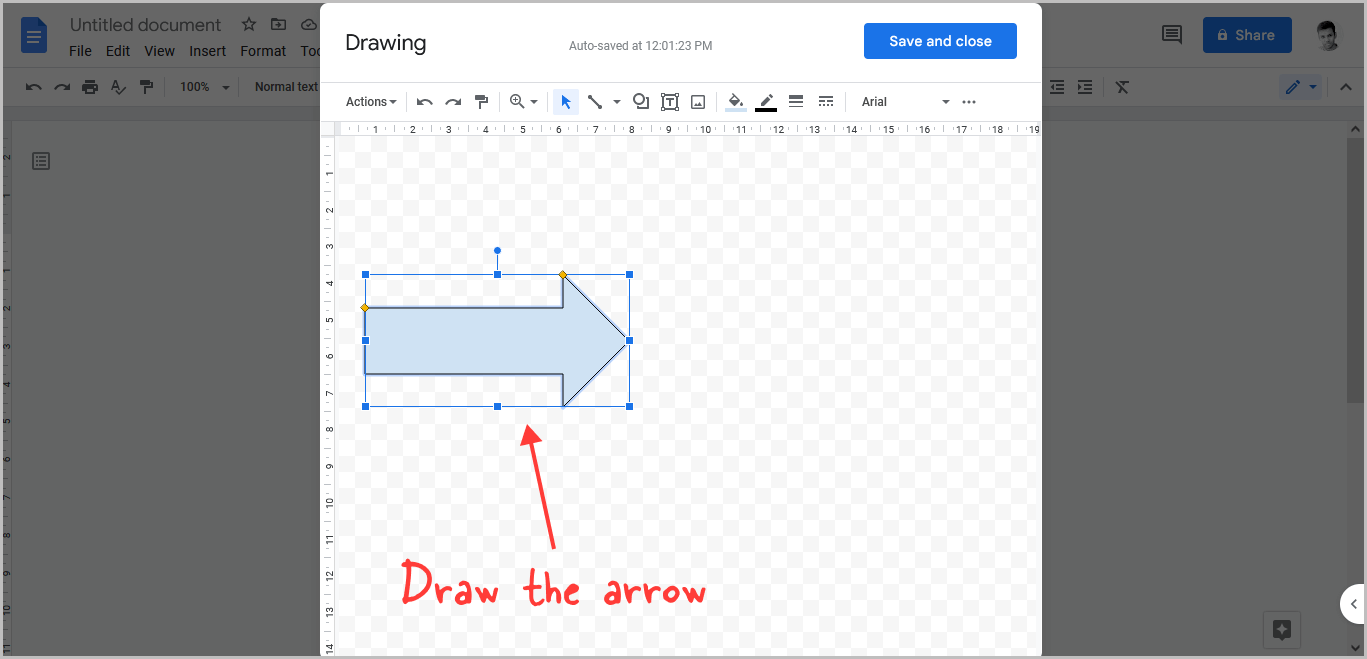
After you’ve selected the arrow, use your mouse to draw it on the canvas.
Don’t worry about the arrow’s size or color now; we’ll adjust them in the next step.
Step 6: Customize the arrow
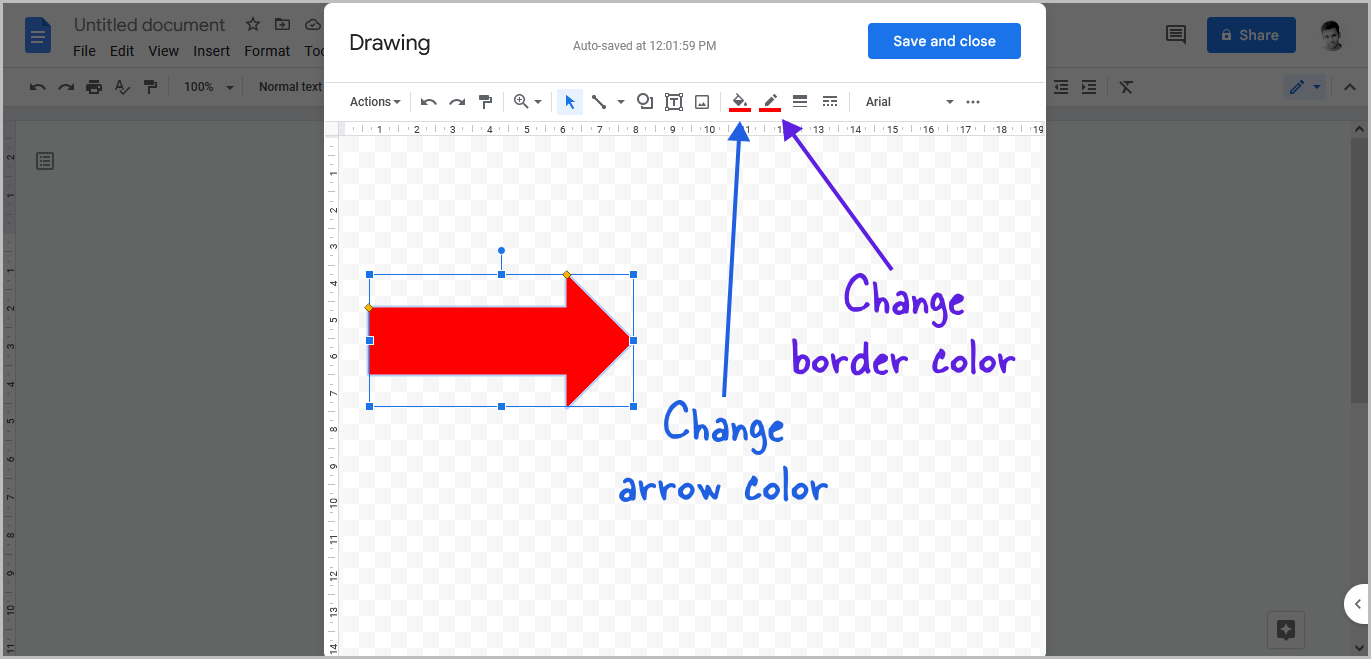
Change the color of the arrow now.
Click the arrow, then select “Fill color” from the toolbar and choose a color of your choice.
You may also change the width and color of the border.
If you don’t want a border, simply make the border the same color as the arrow.
Step 7: Click on “Save and close”
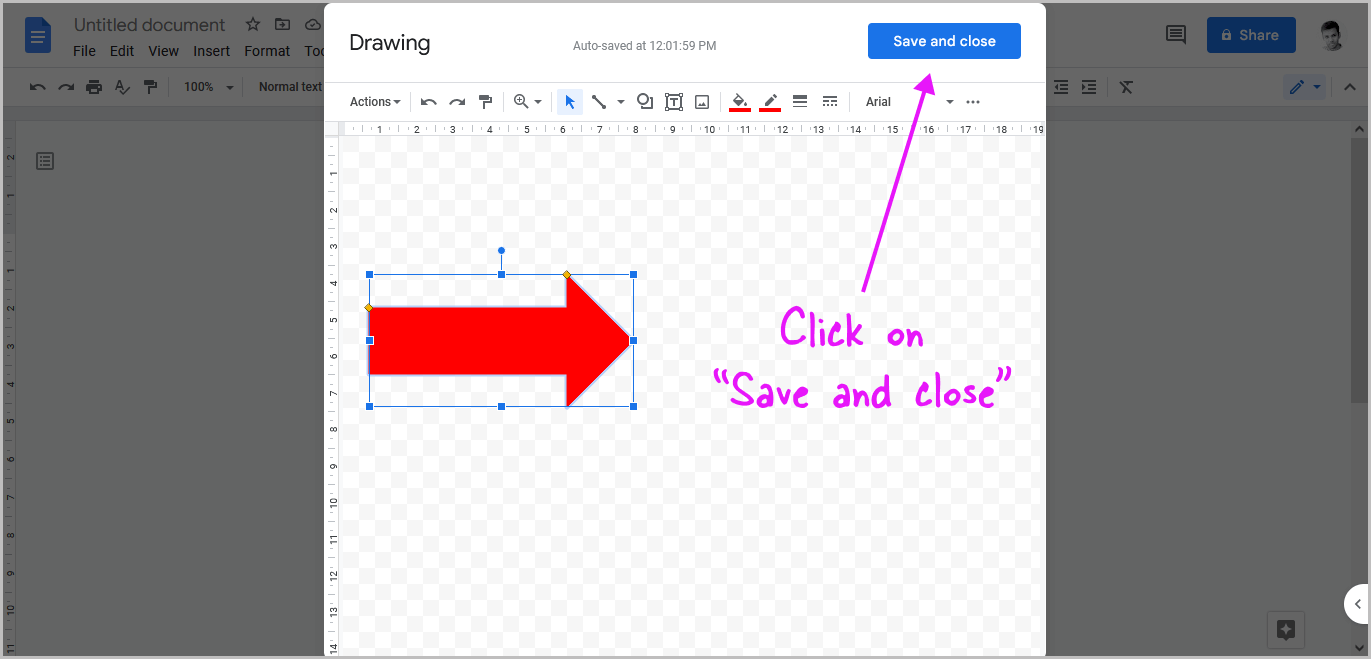
After editing the arrow, click “Save and close” to insert it into the document.
Step 8: Adjust the position of the arrow
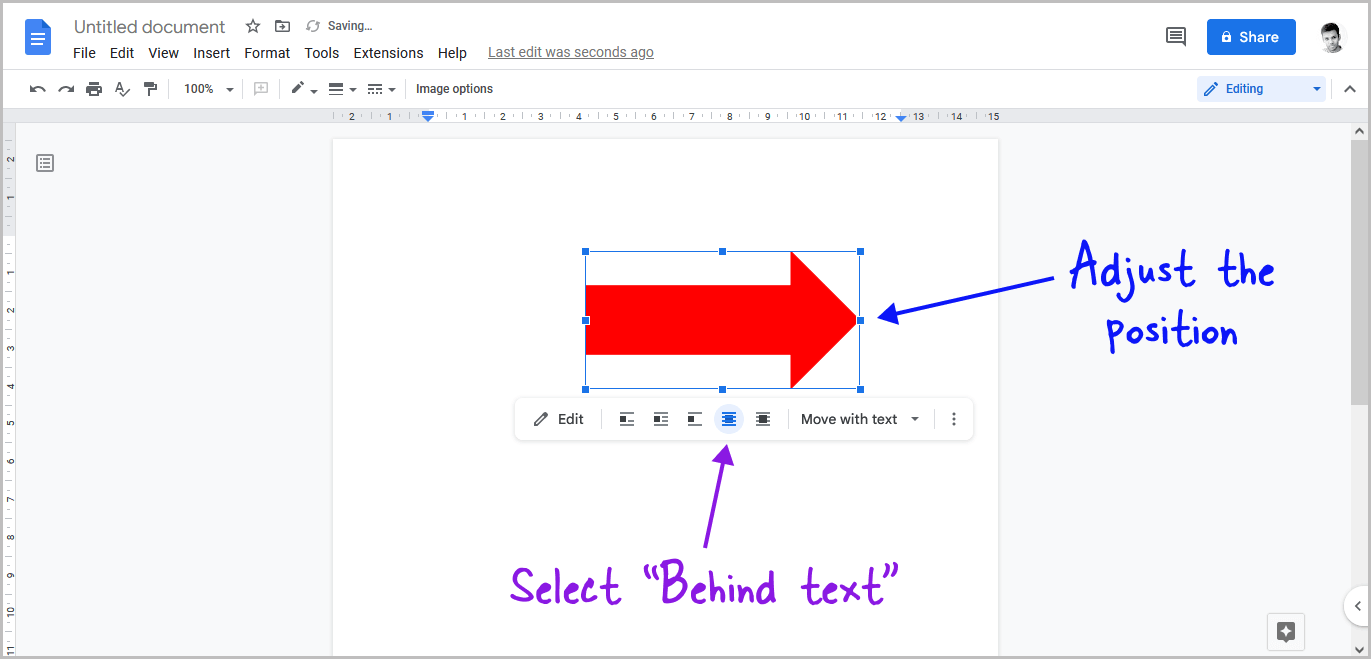
Now, click on the arrow, select “Behind text” from the menu, and then drag the arrow to the desired location.
Also read:
How to Highlight All Periods in Google Docs
How to Do Squared on Google Docs
How to Make Bullet Points Smaller in Google Docs

