Are you looking to insert a tick box symbol in Google Docs?
If so, you may have tried using the checkmark list from the toolbar to insert the tick box symbol.
However, this is not the correct approach. Google Docs has a “Special characters” library that contain a wide variety of symbols that you can use in your document for free.
In this article, we will guide you through the process of inserting a tick box symbol in Google Docs using this library.
You will also learn how to customize the symbol to fit the style of your document.
Also read: (opens in new tab)
How to Switch Back to the Old Layout in Google Docs
Using a Picture as a Bullet Point in Google Docs
How to Insert Word Art in Google Docs
How to Make a Matrix in Google Docs
Insert Tick Box Symbol in Google Docs
Step 1: Go to Insert > Special Characters

We’ll be accessing the “Special Characters” library in Google Docs to search for the tick box symbol and then insert it into our document.
Finally, we’ll customize it.
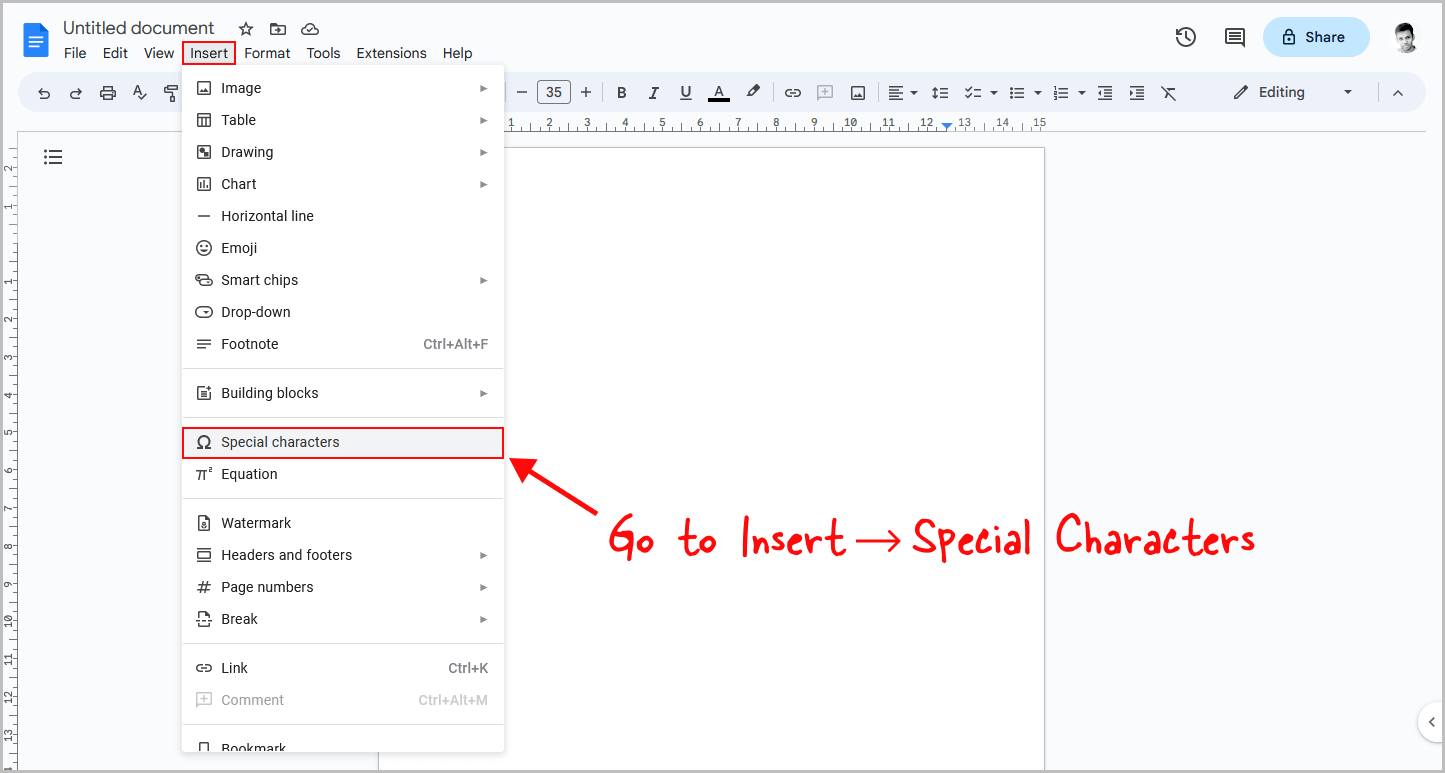
To begin, open the “Special Characters” library in Google Docs.
To do so, select the “Insert” option from the top menu, and then select the “Special Characters” option from the drop-down menu.
Step 2: Enter “Check” in the search box

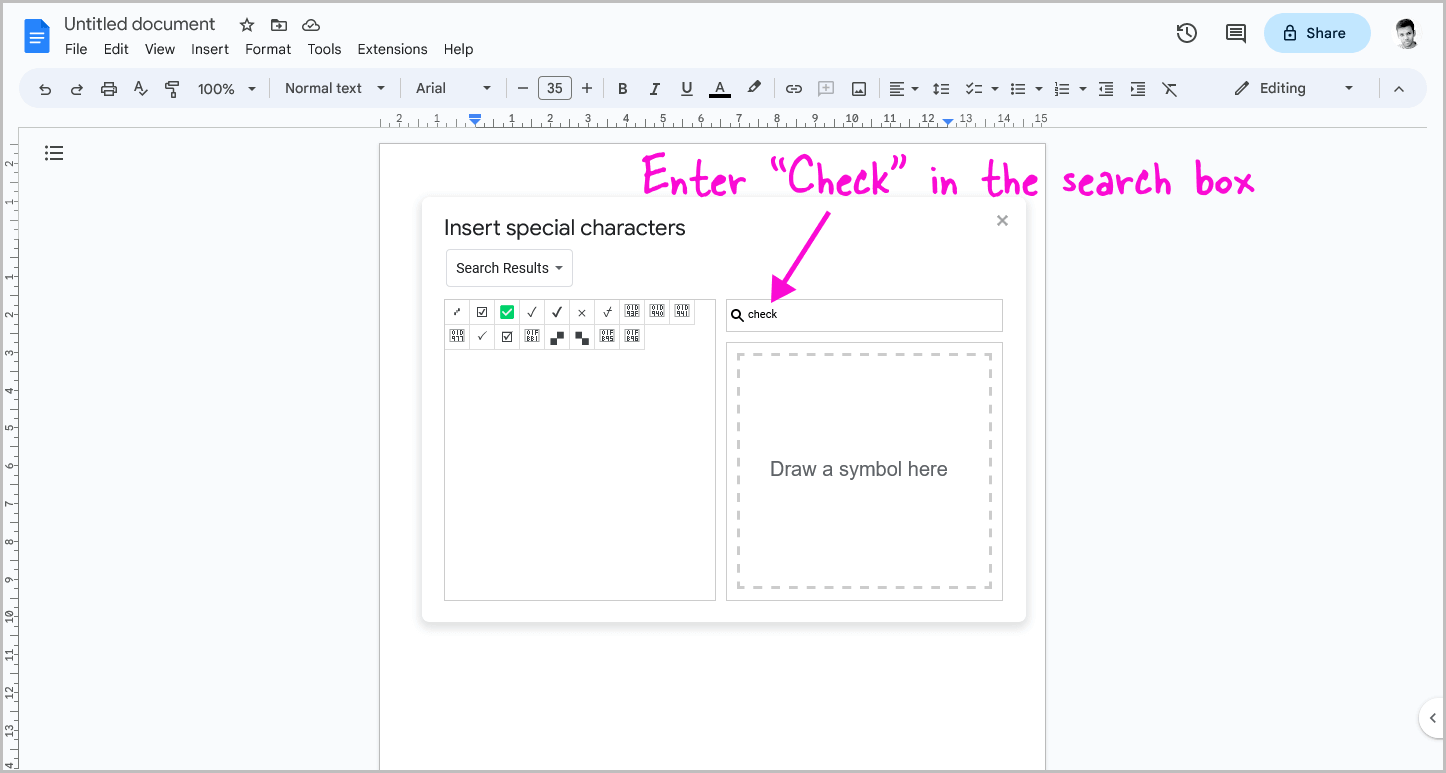
You will now see a pop-up window that displays a variety of commonly used special characters and is equipped with a search box to help you locate a specific symbol.
If you are not sure what a symbol is called, you can even use the drawing box to sketch out the symbol and allow Google Docs to search for it on your behalf.
Now, simply type the word “Check” into the search box and wait for Google Docs to display a list of available tick box symbols.
Step 3: Select the tick box

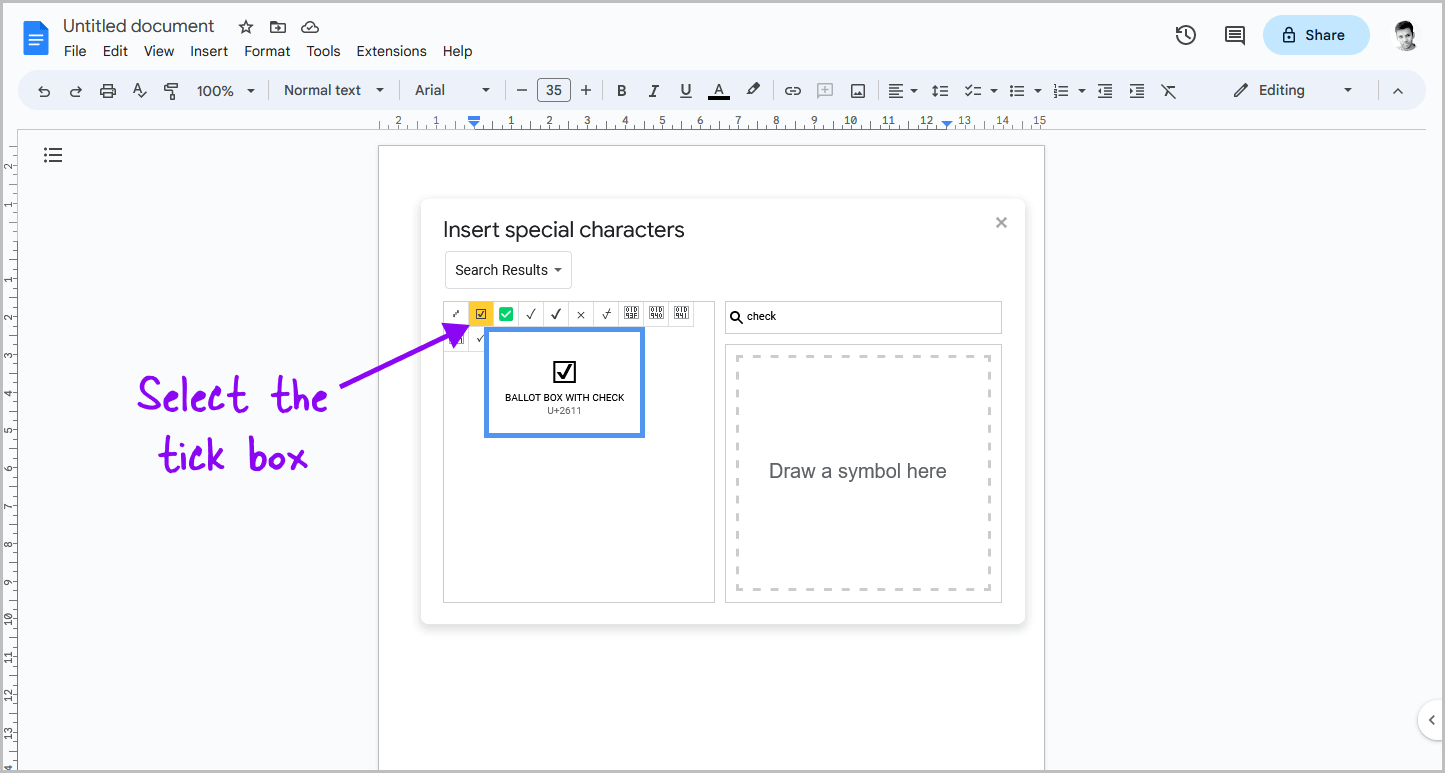
Now, you’ll be able to see the results on the left side of the window.
In that area, you’ll notice several check marks, but since we’re looking for a tick box, you’ll encounter three options: a normal tick box, a tick box with a bold outline, and a white tick with a green outline.
You can select the option that best suits your needs; however, I would recommend the normal tick box since it can be customized later on to fit your specific requirements.
In order to insert the tick box into your document, simply click on the tick box from the search results.
Step 4: Customize the tick box

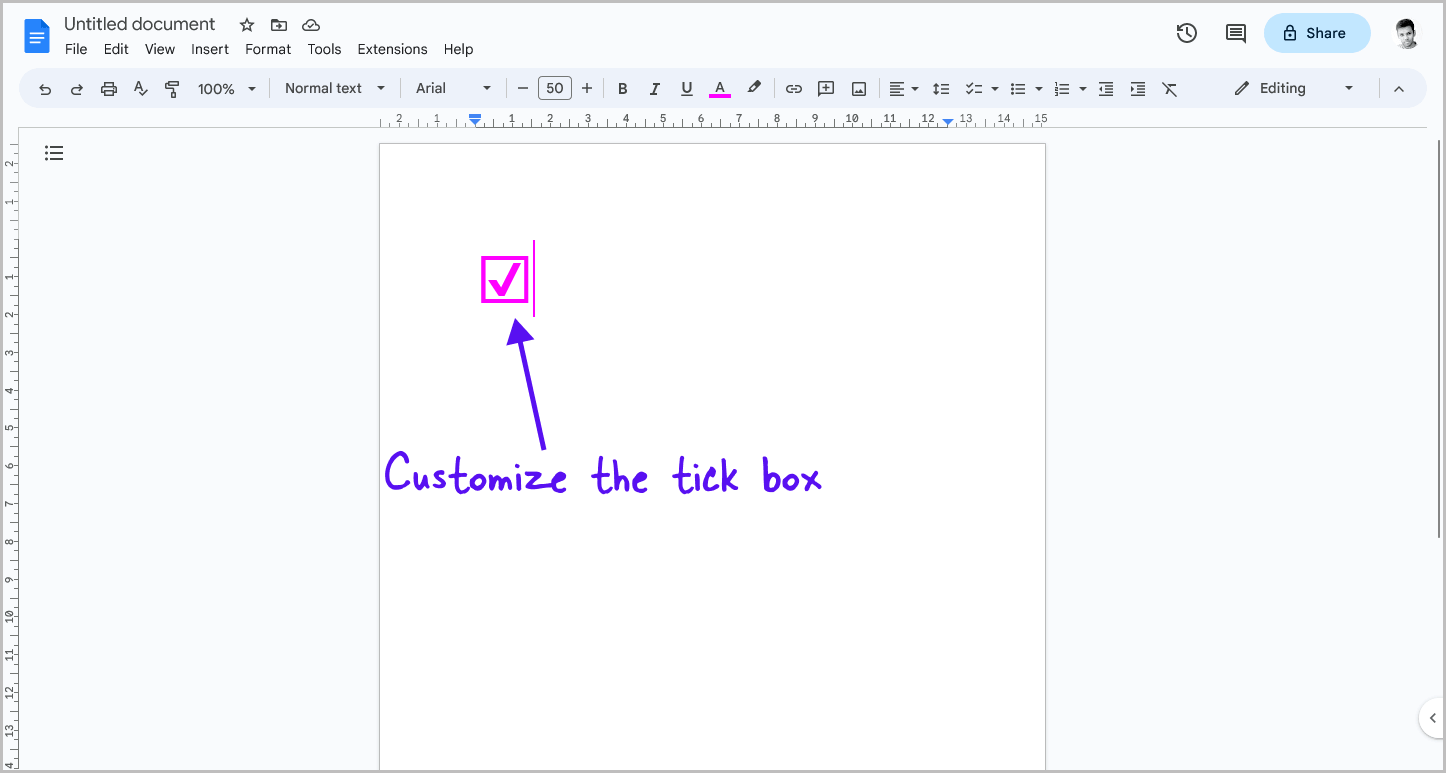
After inserting the tick box, it is time to customize it to suit the style of the document.
This is an optional step and you can totally skip this step if you are happy with the inserted tick box.
However, if you want to customize it, there are several ways to do so.
Firstly, I would suggest you to close the “Special Characters” window after inserting the tick box.
This will give you a better view of the document and make it easier to work with.
You can then start customizing the tick box to your liking.
For example, you can select the tick box and adjust the symbol size using the text size tool from the toolbar.
You can also change the color of the tick box to better match the color scheme of the document.
Additionally, you can make the tick box bold or italicized to make it stand out or even highlight it to draw attention.
Conclusion
In conclusion, inserting a tick box symbol in Google Docs is a simple process that can be accomplished using the “Special Characters” library.
By following the steps outlined in this article, you can insert a tick box symbol into your document and even customize it to fit the style of your document.
So, the next time you need to insert a tick box symbol in Google Docs, remember to use the “Special Characters” library and customize it to fit your needs.

