Do you want to learn how to insert SVG images into Google Slides?
There are two ways to insert images in Google Slides: dragging and dropping the image directly into the slide, or importing it from a URL or from your Google Drive.
Both methods work for all types of images, except SVG.
When you try to directly drag and drop an SVG image onto the slide, you’ll receive an “Unsupported image type” error message.
Additionally, if you try to upload the image to your Google Drive and then import it, you’ll notice that the SVG format is not supported on Google Slides.
Fortunately, there is a way to insert an SVG image in Google Slides.
This tutorial will guide you through six easy steps on how to do so.
Also read: (opens in new tab)
How to Blur an Image in Google Slides
Crop Video in Google Slides
Google Slides Supported Image Formats
Google Slides Error Rendering Shape
SVG in Google Slides
Step 1: Create a new folder on Google Drive and upload the SVG image to it
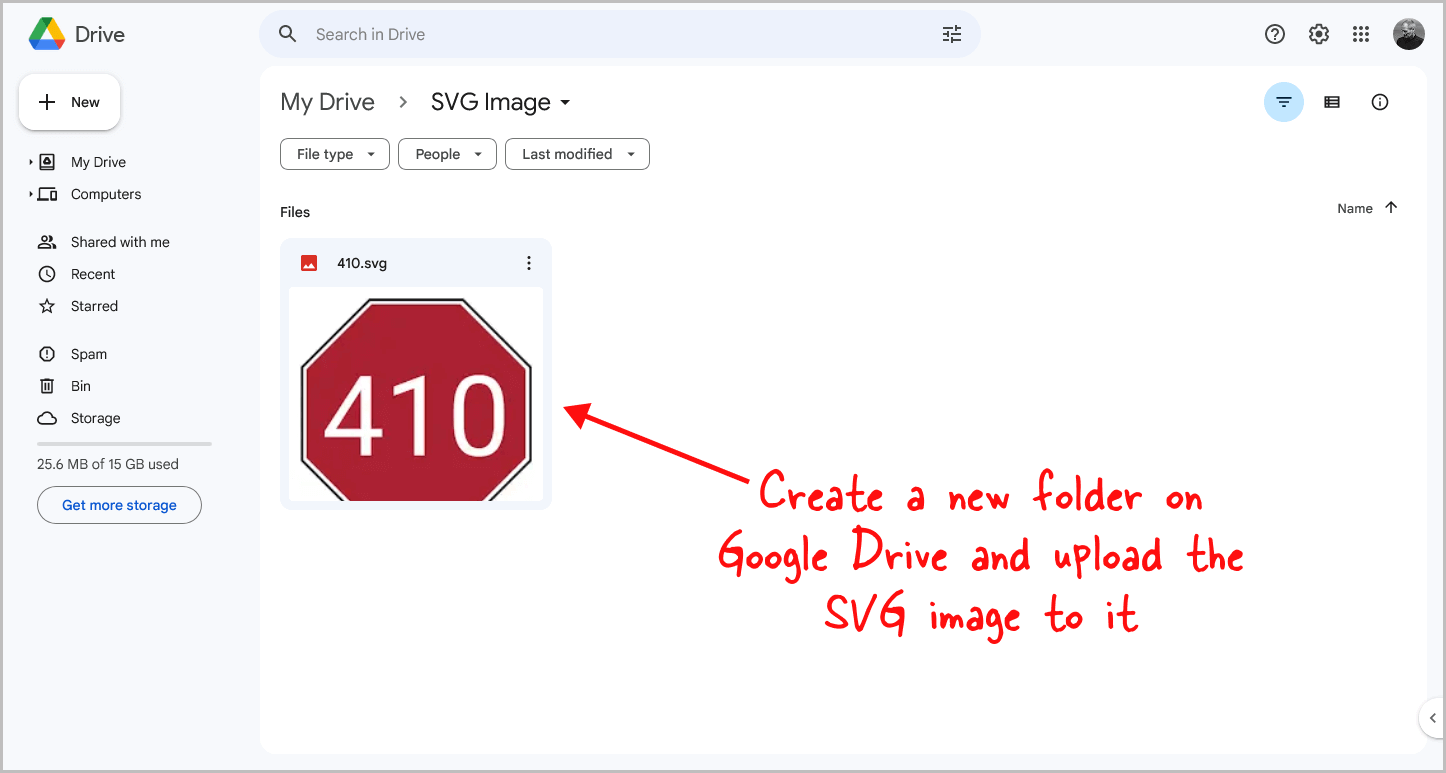
The first step is to create a separate folder in Google Drive and upload the SVG file into it.
This is important because the converted file (in the following steps) will be saved to this folder.
Step 2: Right-click on the file, select “Open with” and choose “CloudConvert”
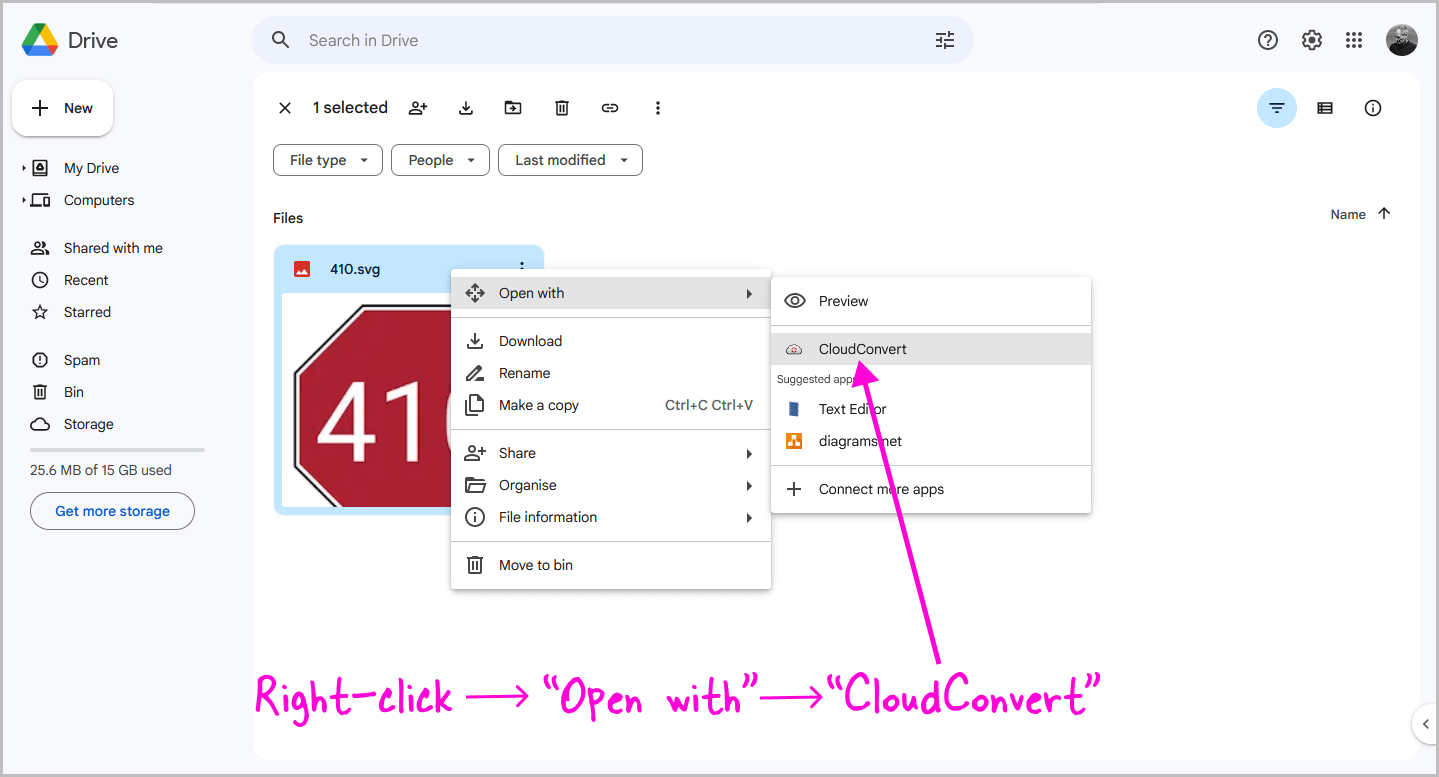
After uploading the SVG file, right-click on it, and select “Open with” from the context menu.
From the drop-down menu, choose “CloudConvert”.
Step 3: Select your Google Account and click “Allow”

CloudConvert requires access to your Google Drive in order to access the SVG image and save the converted file to your Google Drive folder.
To grant access, select your Google Account from the list and then click “Allow”.
Finally, proceed to the next step.
Step 4: Choose “EMF” in the “Convert to” menu
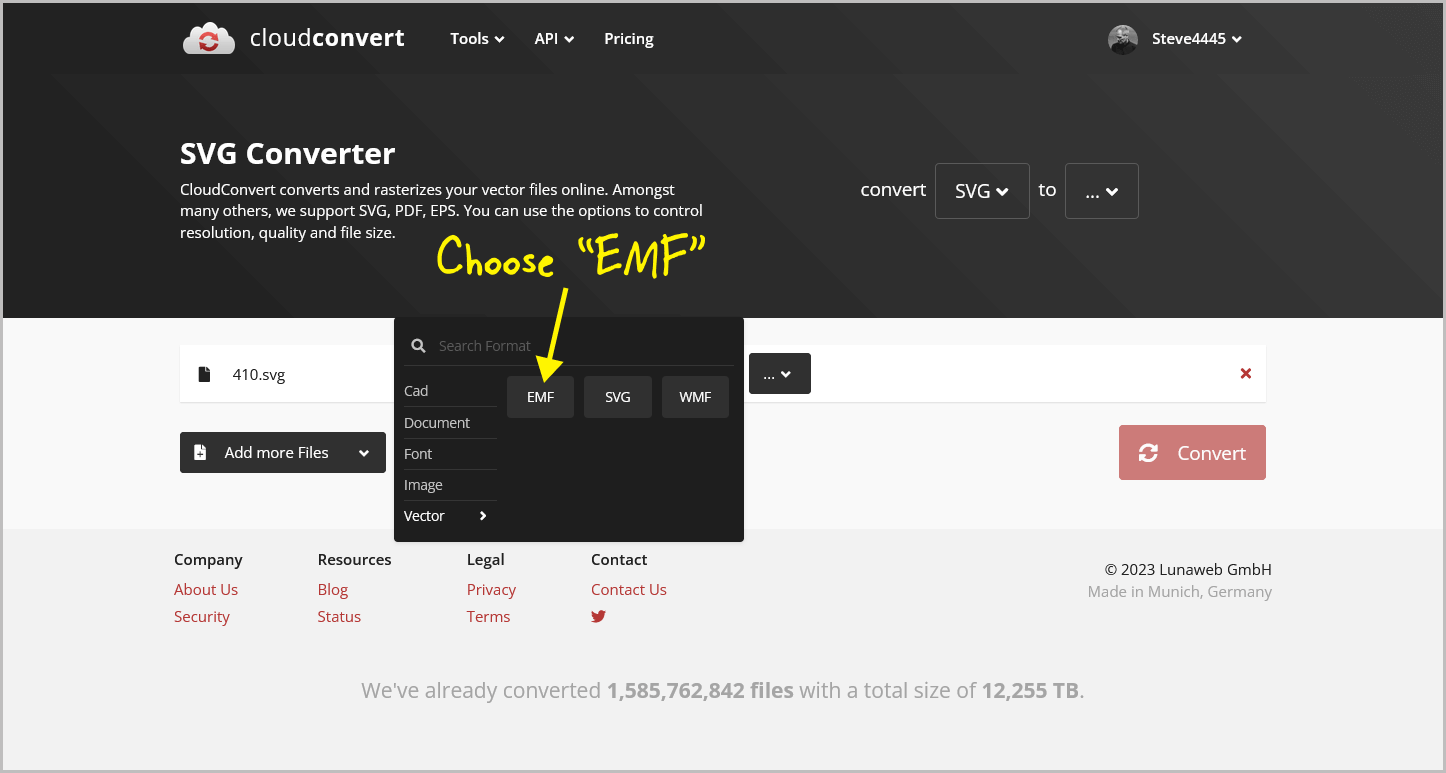
You should now see that the SVG file from Google Drive is already selected, and you need to choose the output format.
To do this, click on the “Convert to” menu and select the “EMF” format.
If you don’t see the EMF format, simply enter “EMF” into the search box and select the format.
Step 5: Check the “Save output files to Google Drive” box
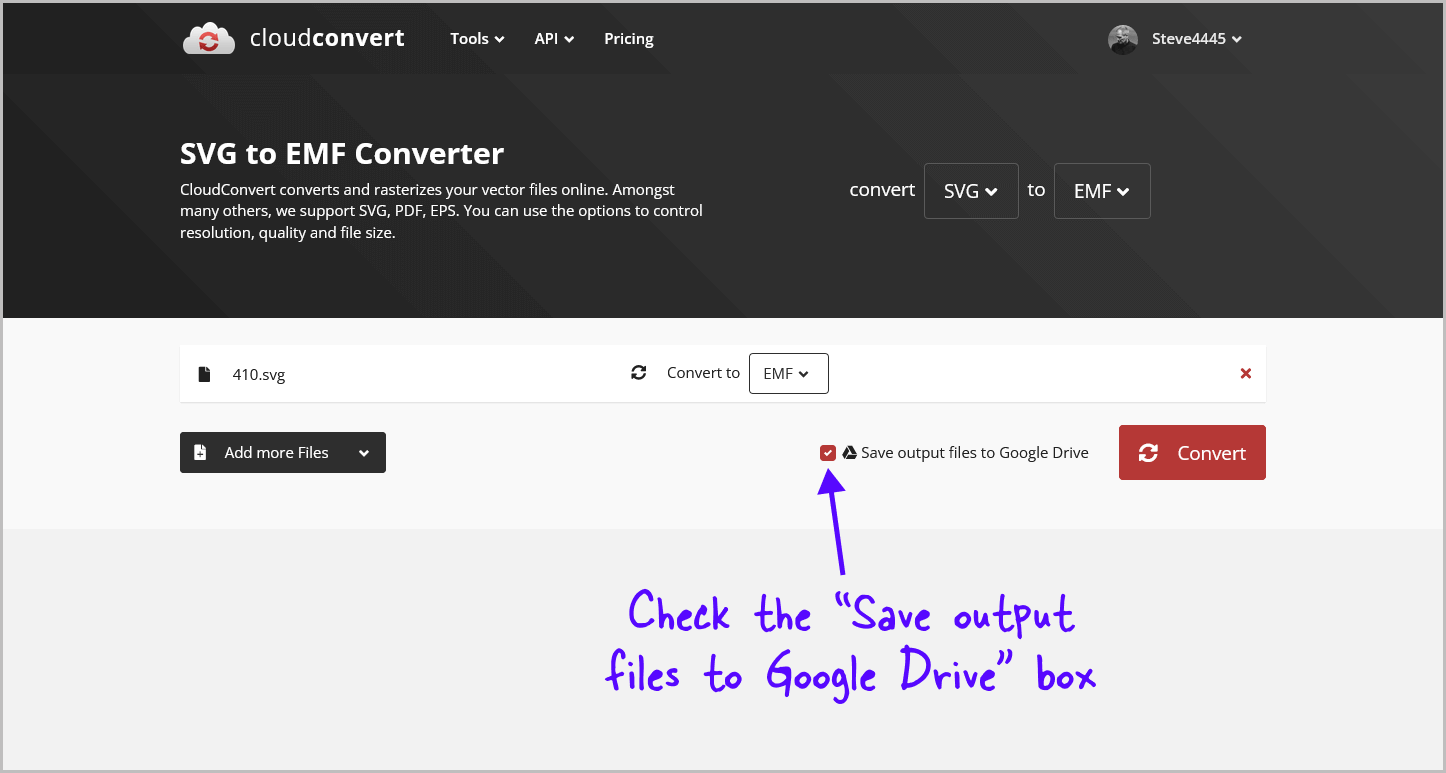
Make sure to select the small “Save output files to Google Drive” checkbox located next to the “Convert” button.
Doing so will automatically save the output to the designated folder on your Google Drive.
Step 6: Click the “Convert” button
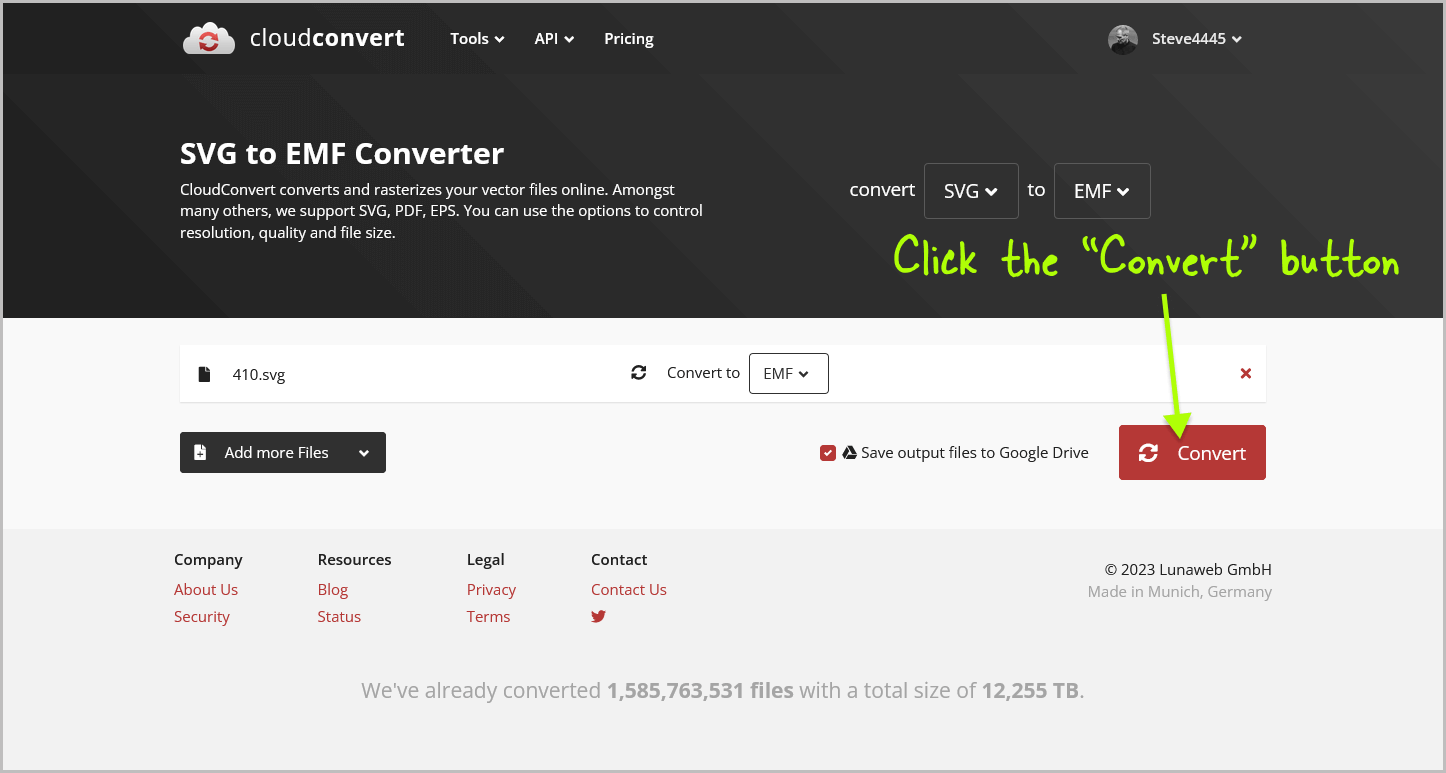
Click the “Convert” button to start the conversion.
The converted file will automatically be saved in the same folder as the SVG file.
Step 7: Right-click on the EMF file, select “Open with” and choose “Google Drawings”
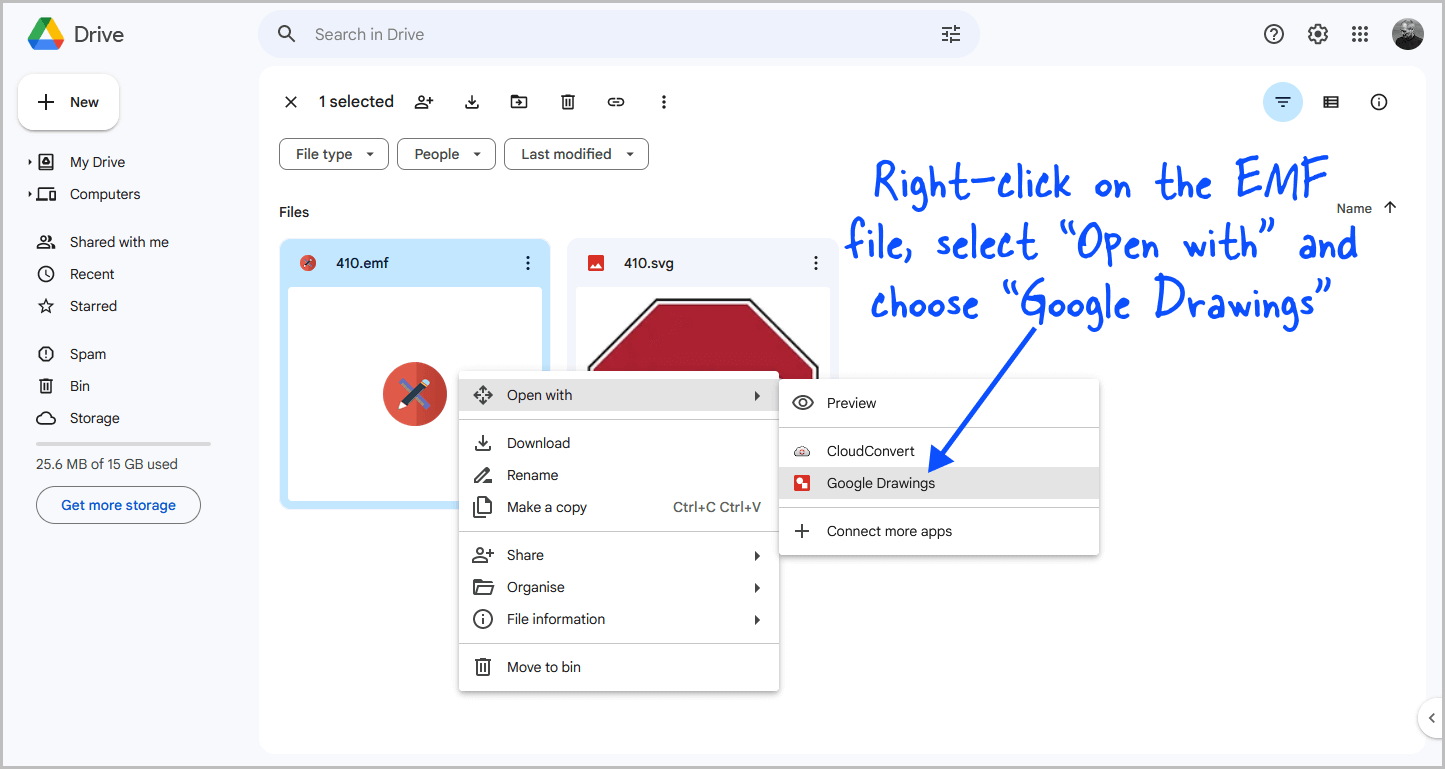
Once the file has been converted, return to the folder in Google Drive.
You should see the converted file in the folder.
Right-click on the EMF file, then select “Open with” and choose “Google Drawings” from the drop-down menu.
Step 8: Click on the image and press Ctrl+C
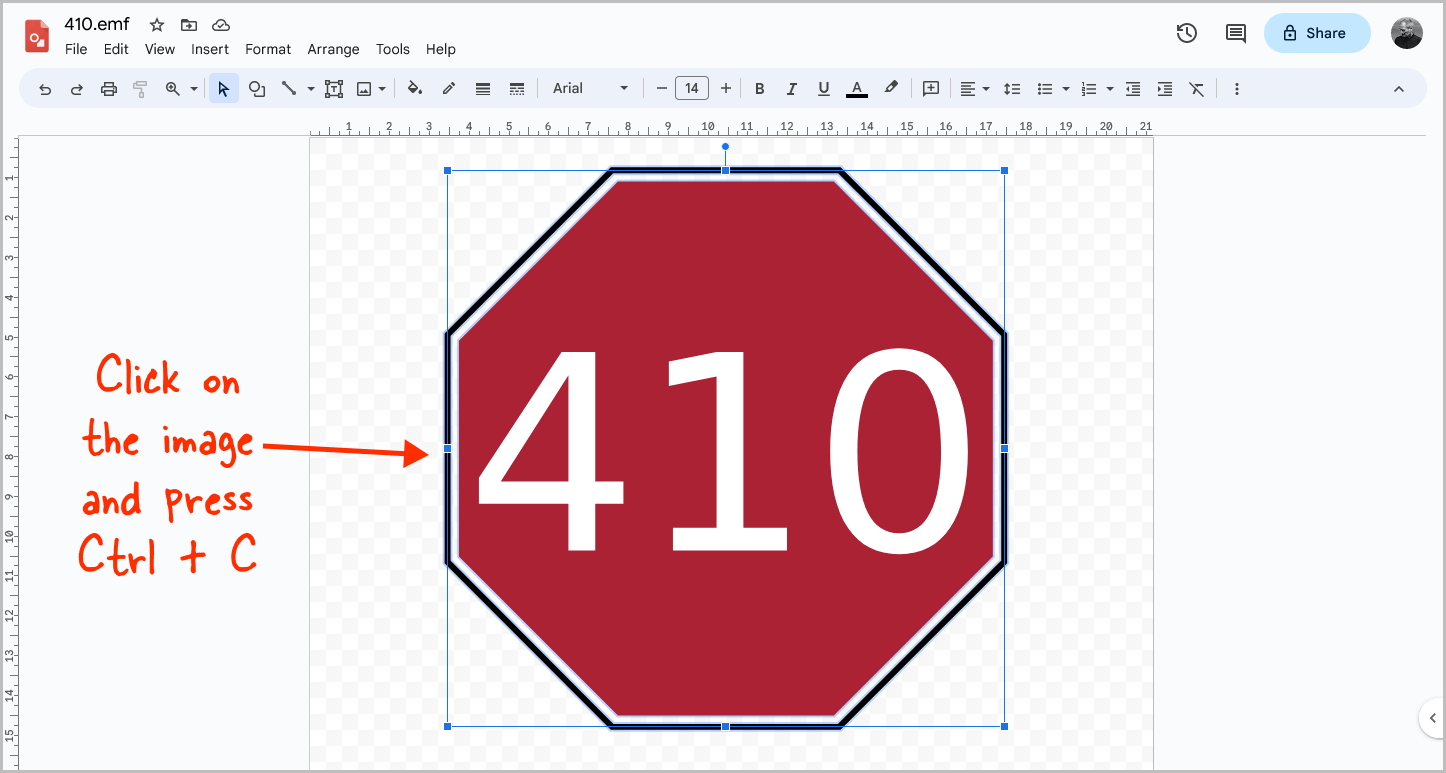
The image will now open in Google Drawings.
Click on the image to select it, and then press Ctrl+C to copy the image to your clipboard.
Step 9: Open Slides and press Ctrl+V to paste the image
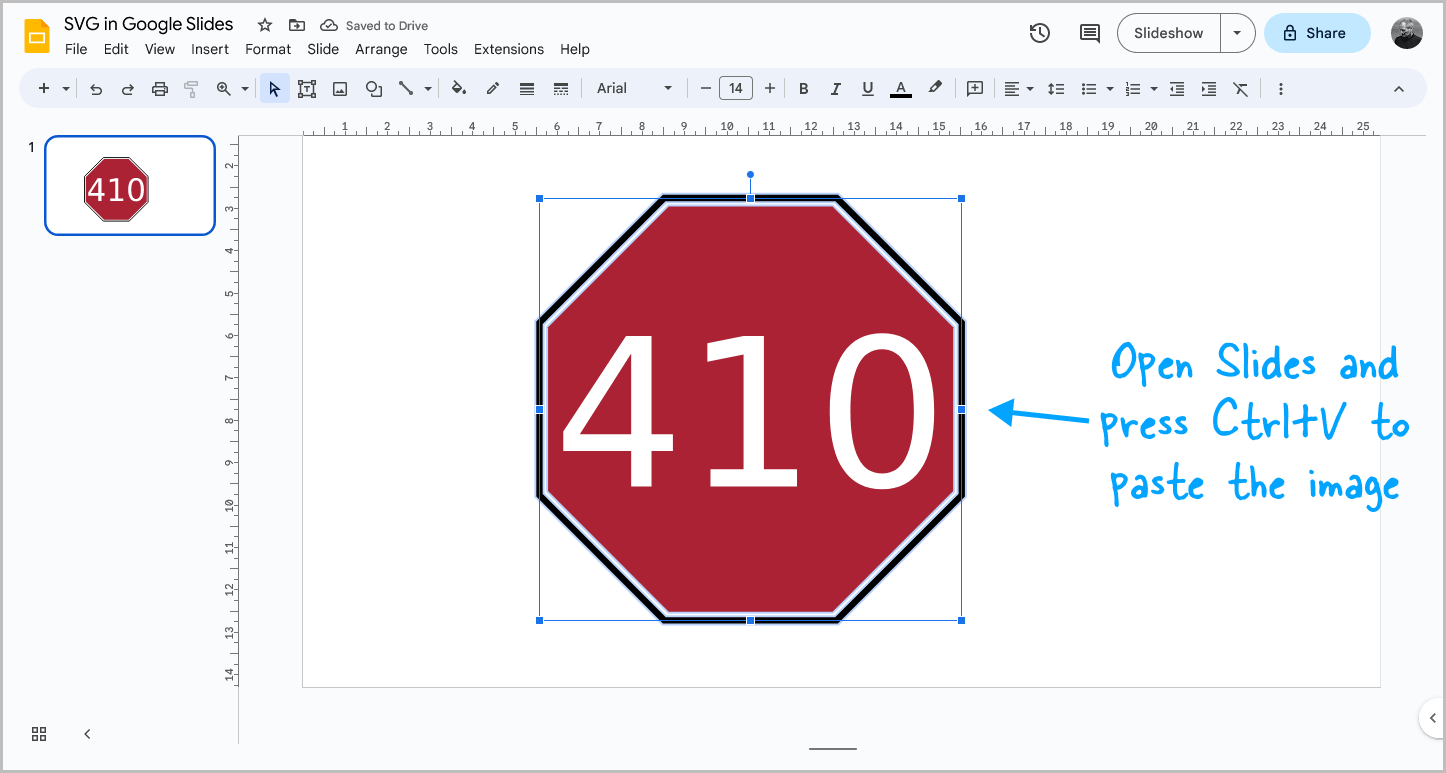
Go to Google Slides and scroll to the slide where you want to insert the image.
Then, press Ctrl+V to paste the image onto the slide.
This will insert the SVG vector into your slide.
FAQs
Can you use SVG file Google Slides?
Yes, it is possible to add vector images to Google Slides by converting SVG images to EMF format using CloudConvert and then importing them into Google Drawings to copy and paste them into your slides.
Import SVG in Google Slides
You cannot import SVG directly into Google Slides. Instead, you must first upload the image to Google Drive. After uploading, use the tool to convert it to EMF format. Then, open it in Google Drawings and copy and paste the image into Google Slides.
Can you add vector images to Google Slides?
To add vector images on Google Slides, upload the image to Google Drive, convert it to EMF format, open it in Google Drawings, and copy-paste it to Google Slides.
Summary
Adding SVG images to a Google Slides presentation can be a bit tricky. However, by following these simple steps, you can easily insert your SVG images into your slides.
Here’s how to insert SVG in Google Slides:
- Create a new folder on Google Drive and upload the SVG image to it.
- Right-click on the file, select “Open with” and choose “CloudConvert”.
- Select your Google Account and click “Allow”.
- Choose “EMF” in the “Convert to” menu.
- Check the “Save output files to Google Drive” box.
- Click the “Convert” button.
- Right-click on the EMF file, select “Open with” and choose “Google Drawings”.
- Click on the image and press Ctrl+C.
- Open Slides and press Ctrl+V to paste the image.

