Looking to center your text in a Google Docs document?
If you’re creating a title page or cover page for your document, centering your text is likely to be a requirement.
While there is a “Center align” tool in the toolbar that allows you to horizontally align your text, vertically centering it on the page is a bit more challenging.
There’s no built-in feature within Google Docs to help you achieve this, but there is a simple workaround that can be used to get the desired result.
In this article, you’ll learn how to center text in Google Docs, step-by-step.
By following these steps, you’ll be able to make sure that your text is perfectly centered on the page, both horizontally and vertically.
Also read: (opens in new tab)
How to Center an Image in Google Docs
How to Bold Multiple Words in Google Docs
How to Rearrange Pages in Google Docs
Using a Picture as a Bullet Point in Google Docs
How to Center Text in Google Docs?
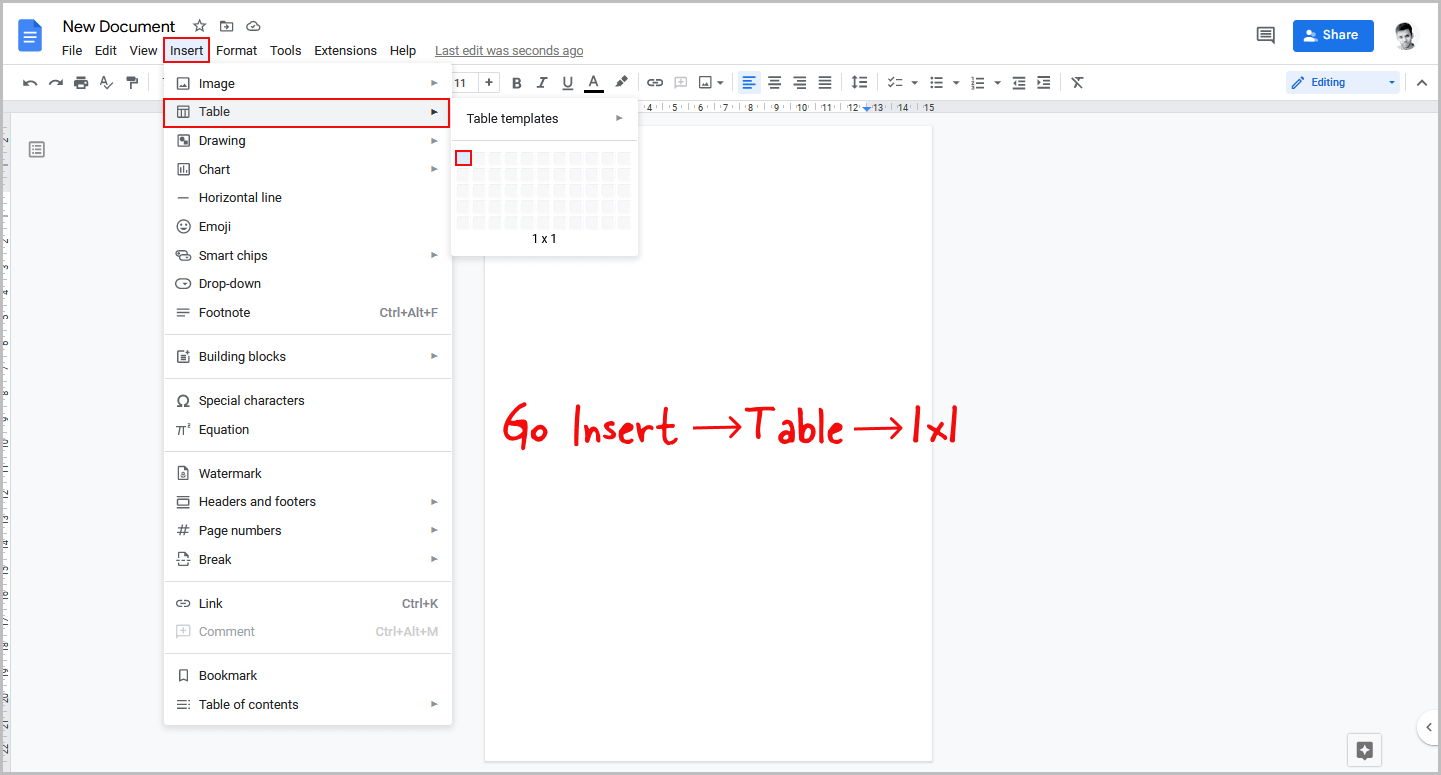
Step 1: Go Insert > Table > 1×1
To make sure that your text is properly aligned in the middle of the page in Google Docs, we’ll be making use of a simple but effective trick that involves creating a table and inserting the text within it.
This method allows you to have more control over the placement of your text and ensures that it is centered on the page.
To get started, simply click on the “Insert” option located in the top menu of your Google Docs document.
From there, select “Table” from the drop-down menu and choose a 1×1 table.
Step 2: Enter your text
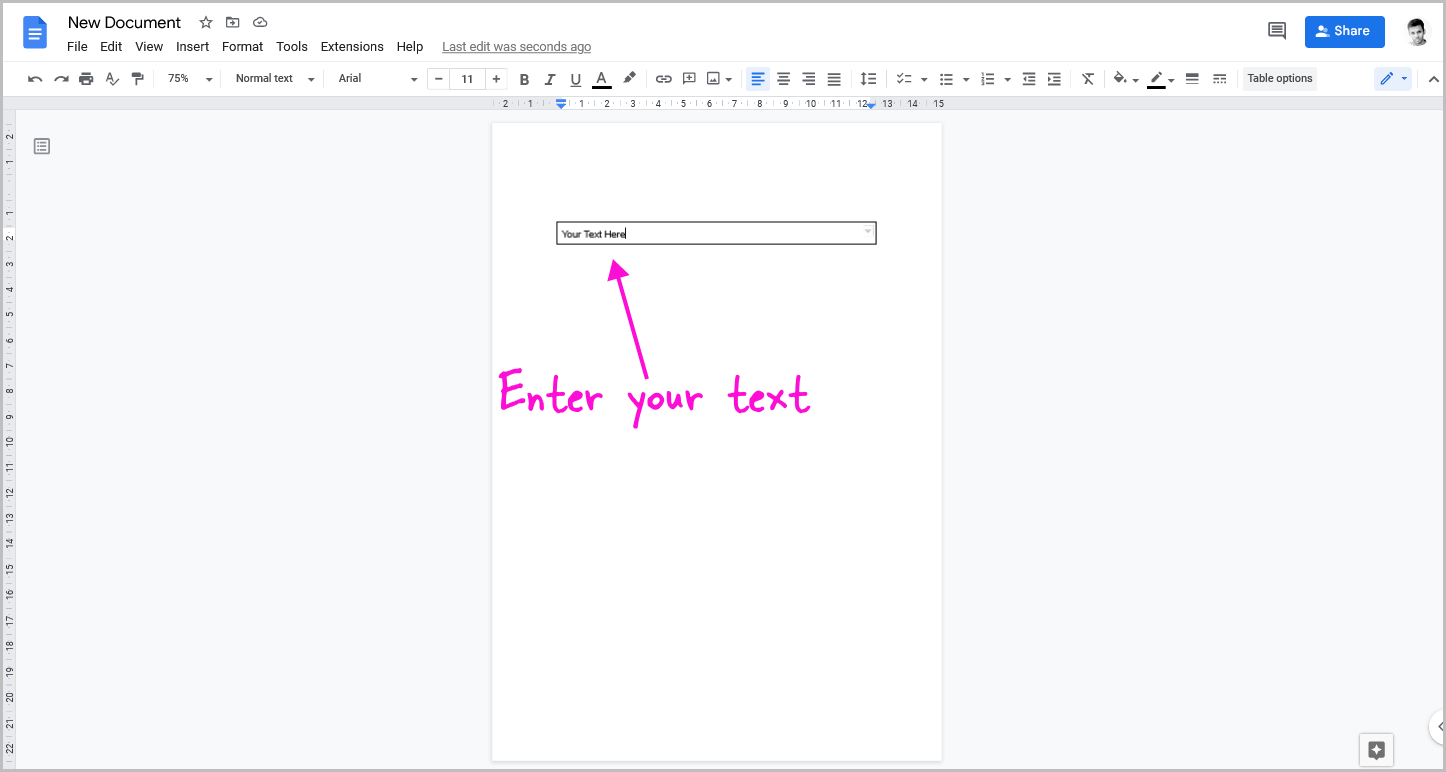
After inserting the table, click inside the table and start entering your text.
Remember to adjust the text size and font as necessary.
Step 3: Center align the text
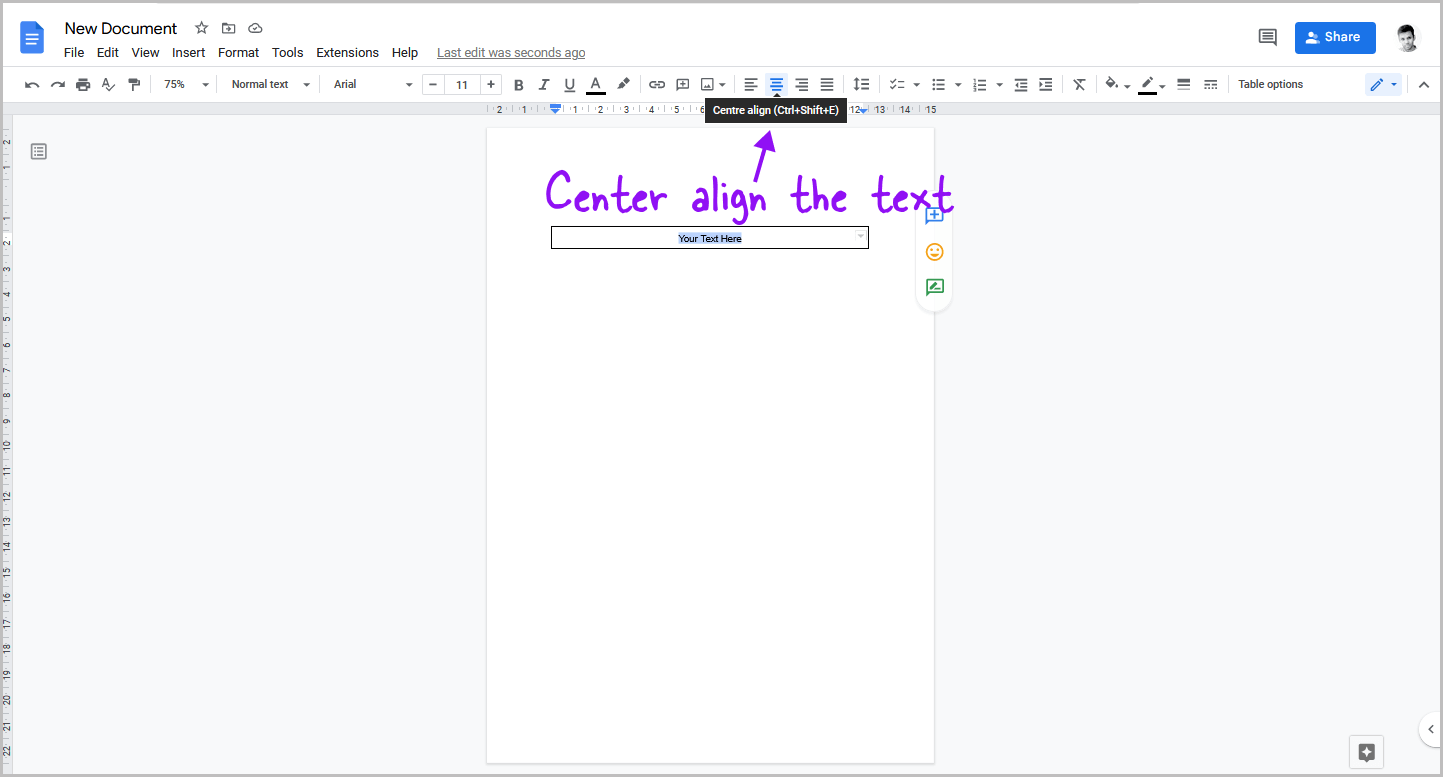
Now, select the text by clicking and dragging the cursor over it.
Then, click on the “Align” tool from the toolbar and select “Center” from the drop-down menu.
Alternatively, you can select the text and press “Ctrl+Shift+E” on your keyboard.
This will align the text horizontally. In the next steps, we will align the text vertically.
Step 4: Extend the table to the bottom of the page
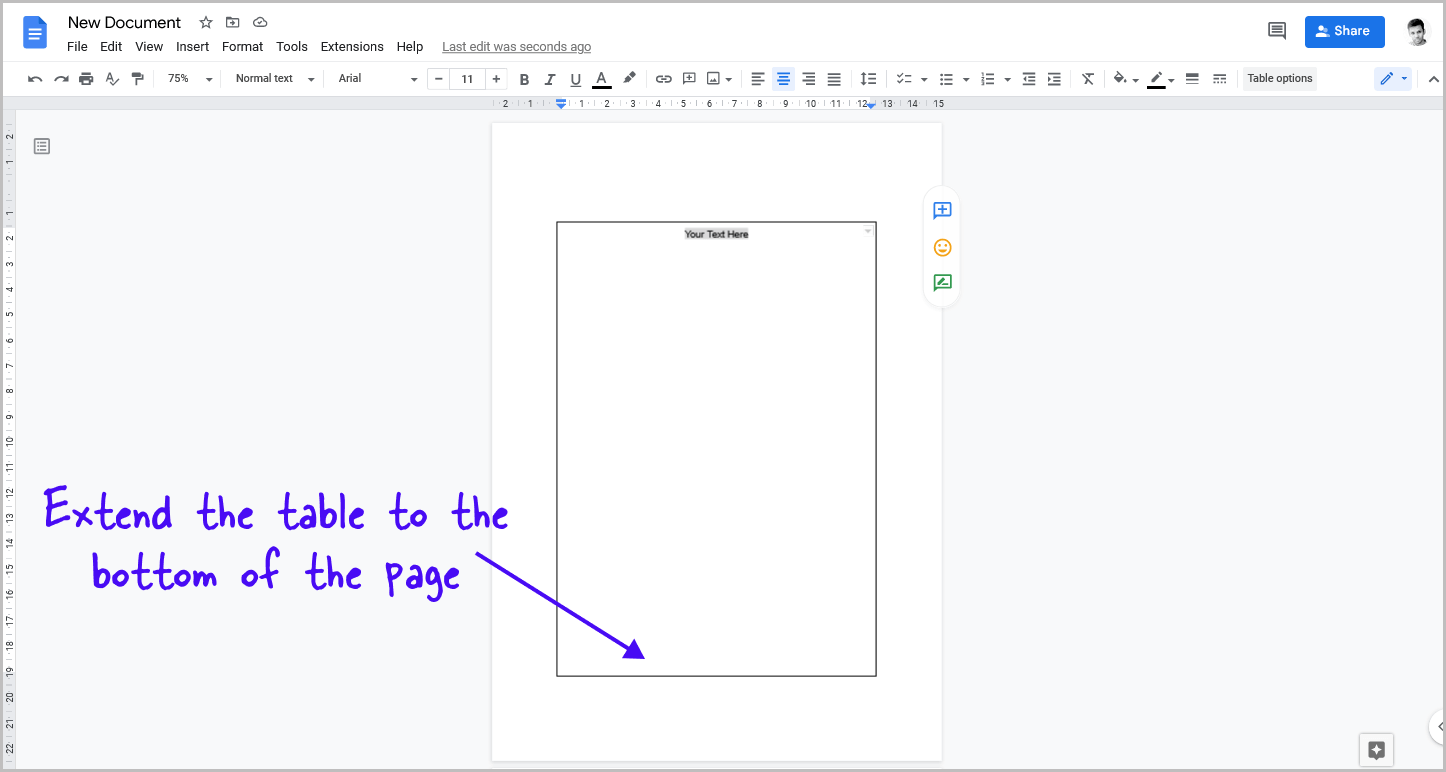
To extend the table, click on the bottom border of the table and drag it downwards to the bottom of the page.
Be careful not to overextend it, as this will cause the table to extend to the second page and misalign your text.
To get an idea of how much to extend the table, look at the gap above the table and try to keep the same gap below the table.
Step 5: Go to Format > Table > Table properties
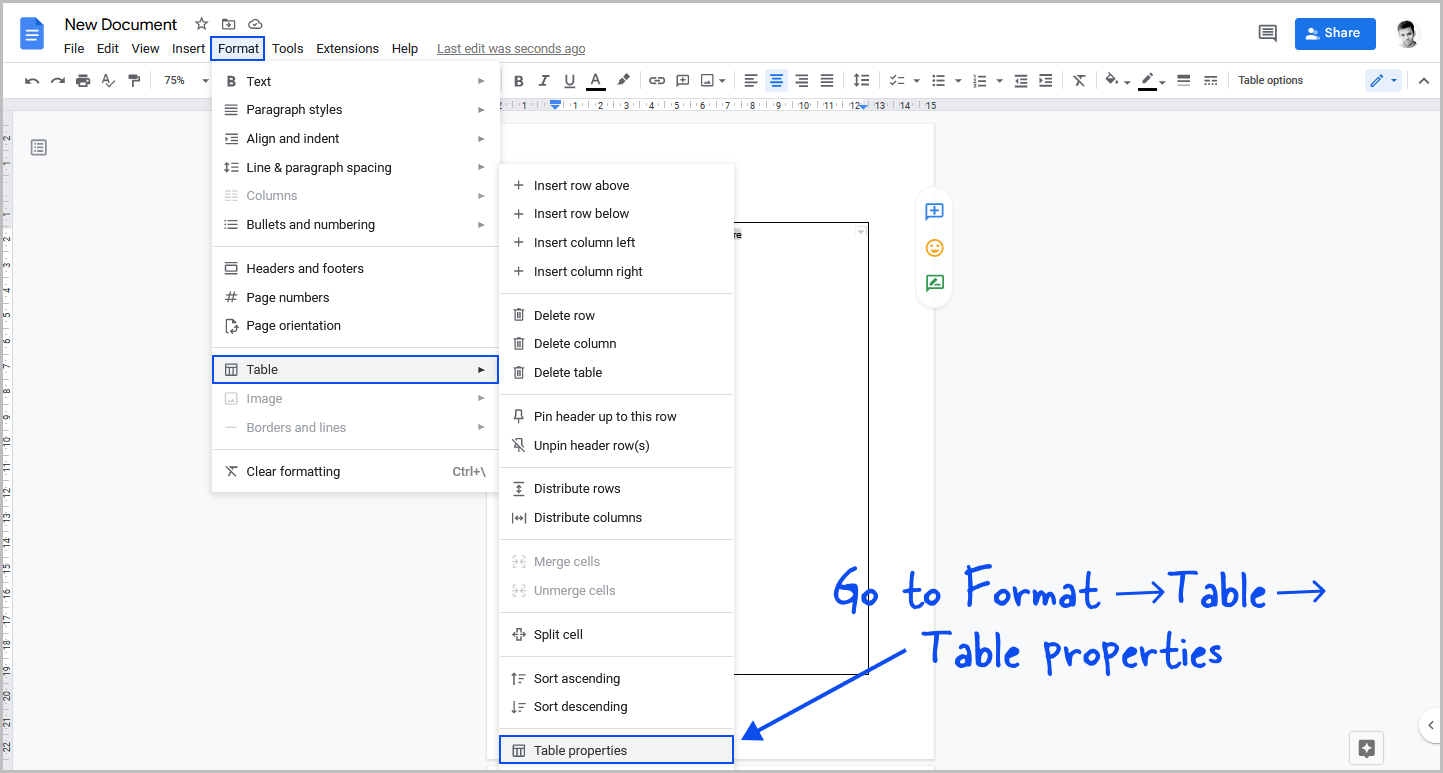
Now, click on the “Format” option in the toolbar.
Then, select “Table” from the drop-down menu.
If the “Table” option is greyed out, it’s likely because you haven’t clicked inside the table.
If that’s the case, click inside the table and try again.
After selecting the “Table” option, you’ll see a secondary drop-down menu.
From there, select “Table properties” .
Step 6: Select “Middle” and “Center” in the “Alignment” setting
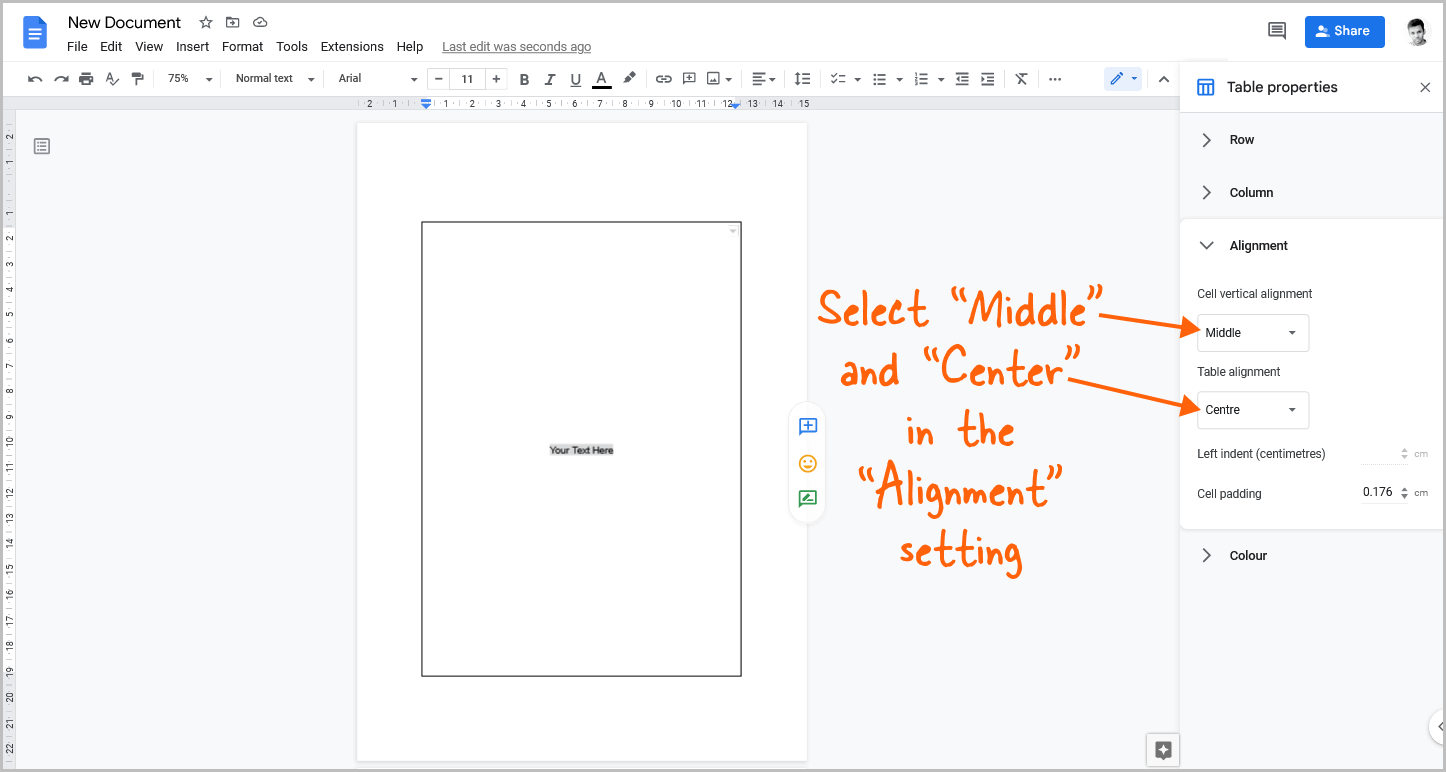
You’ll now see the “Table properties” panel on the right side of the page.
Now, click on the “Alignment” setting from the “Table properties” panel.
This will lead you to a sub-menu that contains two options: Cell vertical alignment and Table alignment.
In order to adjust the alignment of the cells within the table, click on the “Cell vertical alignment” drop-down menu and select the “Middle” option from the list of available choices.
To customize the alignment of a table, click on the “Table alignment” drop-down menu.
Here, you’ll find a variety of options to choose from, including “Left,” “Right,” and “Center.”
For our purposes, select the “Center” option to ensure that your table is perfectly aligned.
Step 7: Change the table border width to “0pt”
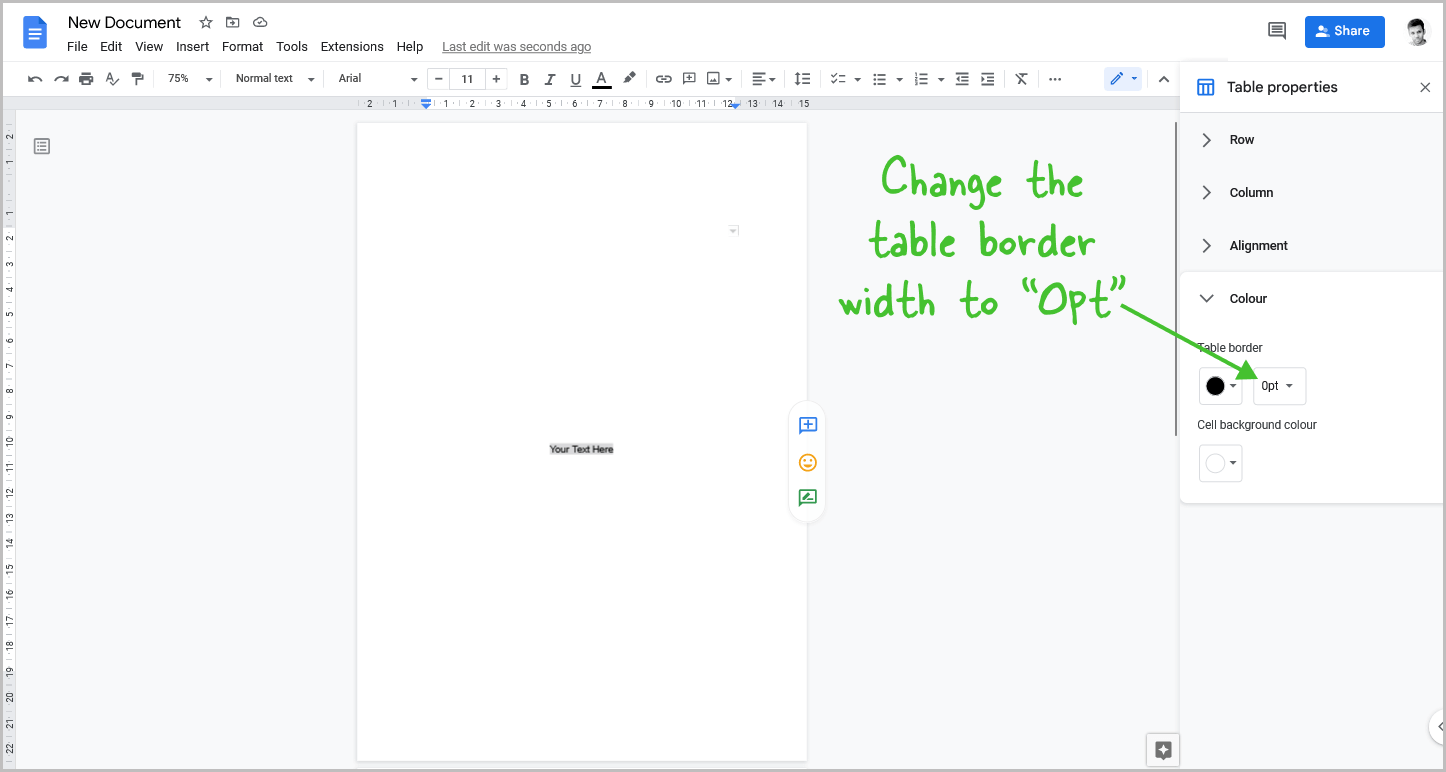
We have successfully centered the text both vertically and horizontally in Google Docs.
However, you may still see the table border.
To get rid of it, choose “Color” from the “Table properties” panel and then click on the “Table border width” drop-down menu.
The default border width is 1pt. To completely remove the table border, select “0pt” from the drop-down menu.
FAQs
How to Put Text in Middle of Page Google Docs?
To put text in the middle of the page in Google Docs, you can create a 1×1 table and insert the text within it. Then, extend the table to the bottom of the page and adjust the vertical alignment to “Middle” in the table properties panel. Finally, change the table border width to “0pt” to remove the border.
How to Center Text in Middle of Page Google Docs?
To center text in the middle of the page in Google Docs, insert the text in a 1×1 table, extend the table to the bottom of the page, and adjust the vertical alignment to “Middle” in the table properties panel. Remove the table border by setting the border width to “0pt”.
How to Center Text Vertically and Horizontally in Google Docs?
To center text both vertically and horizontally in Google Docs, follow these steps:
- Create a 1×1 table.
- Insert the text within the table.
- Extend the table to the bottom of the page.
- Adjust the vertical alignment to “Middle” in the table properties panel.
- Change the table border width to “0pt” to remove the border.
How to Center Text in Google Docs Vertically?
To center-align text and extend it to the bottom of the page, follow these steps:
- Insert a 1×1 table and enter your text into it.
- Center-align the text and extend the table to the bottom of the page.
- Go to “Table Properties” and align the text to the middle of the page.
- Lastly, remove the table border.
Conclusion
In conclusion, while there is no built-in feature within Google Docs to vertically center your text, you can use the method described in this article to achieve the desired result.
By creating a 1×1 table, inserting your text within it, and adjusting the vertical alignment in the table properties panel, you can ensure that your text is both horizontally and vertically centered on the page.
Remember to also remove the table border by setting the border width to “0pt” to achieve the cleanest look.

