Do you want to learn how to bring an image to the front in Google Docs?
When you insert an image in a document in Google Docs, the image might end up behind the text.
In such cases, it can be challenging to make the image easily visible.
However, you can bring the image to the front by using the “Text wrapping” feature in “Image options”.
This tutorial explains how to bring an image to the front in Google Docs in four easy steps.
Must read: (opens in new tab)
How to Select Multiple Images in Google Docs
How to Lock an Image in Google Docs
How to Put Text Over an Image in Google Docs
Google Docs Unsupported Image Type
How to Center an Image in Google Docs
Step #1. Click on the image
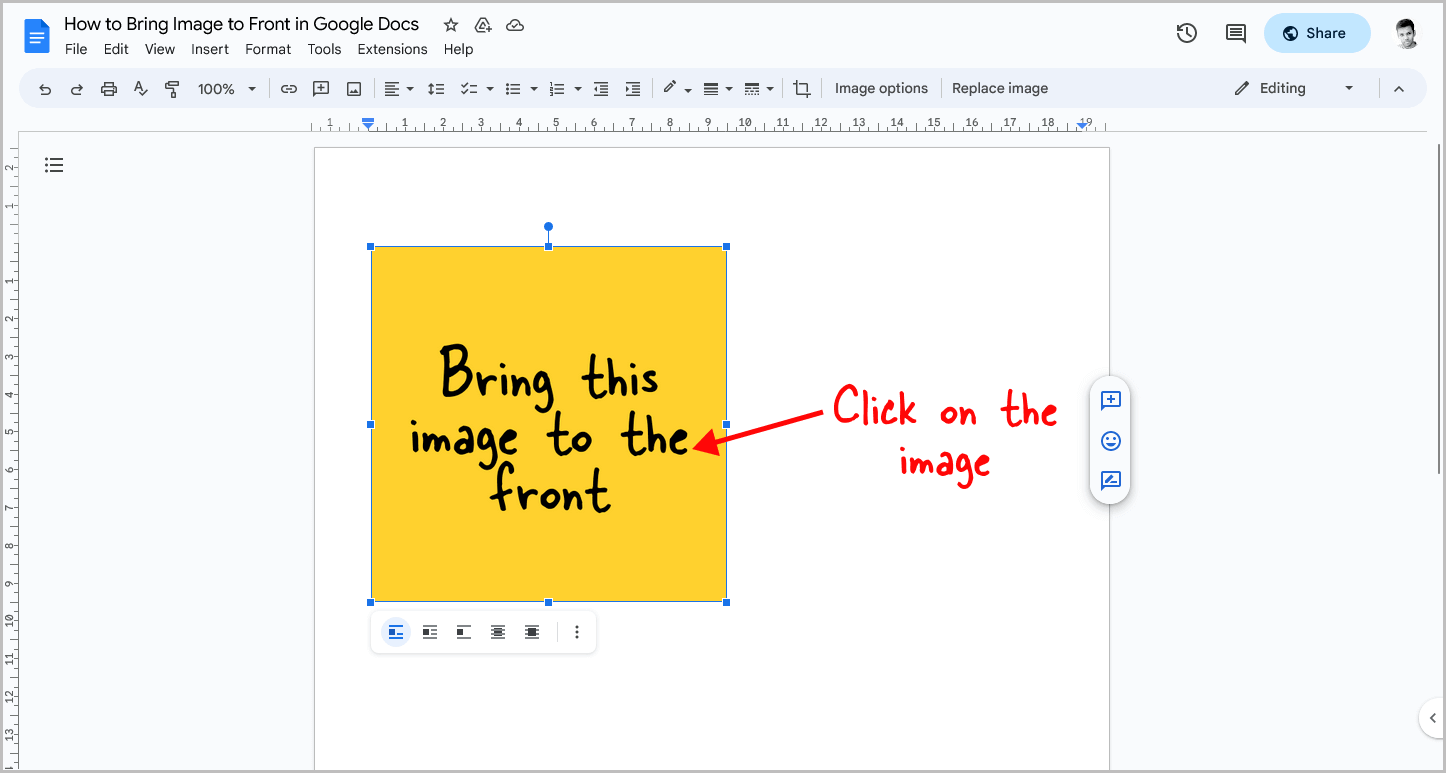
The first step is to click on the image that you want to bring to the front so that you can see the image options of the selected image.
Step #2. Click on the three dots and select “All image options”
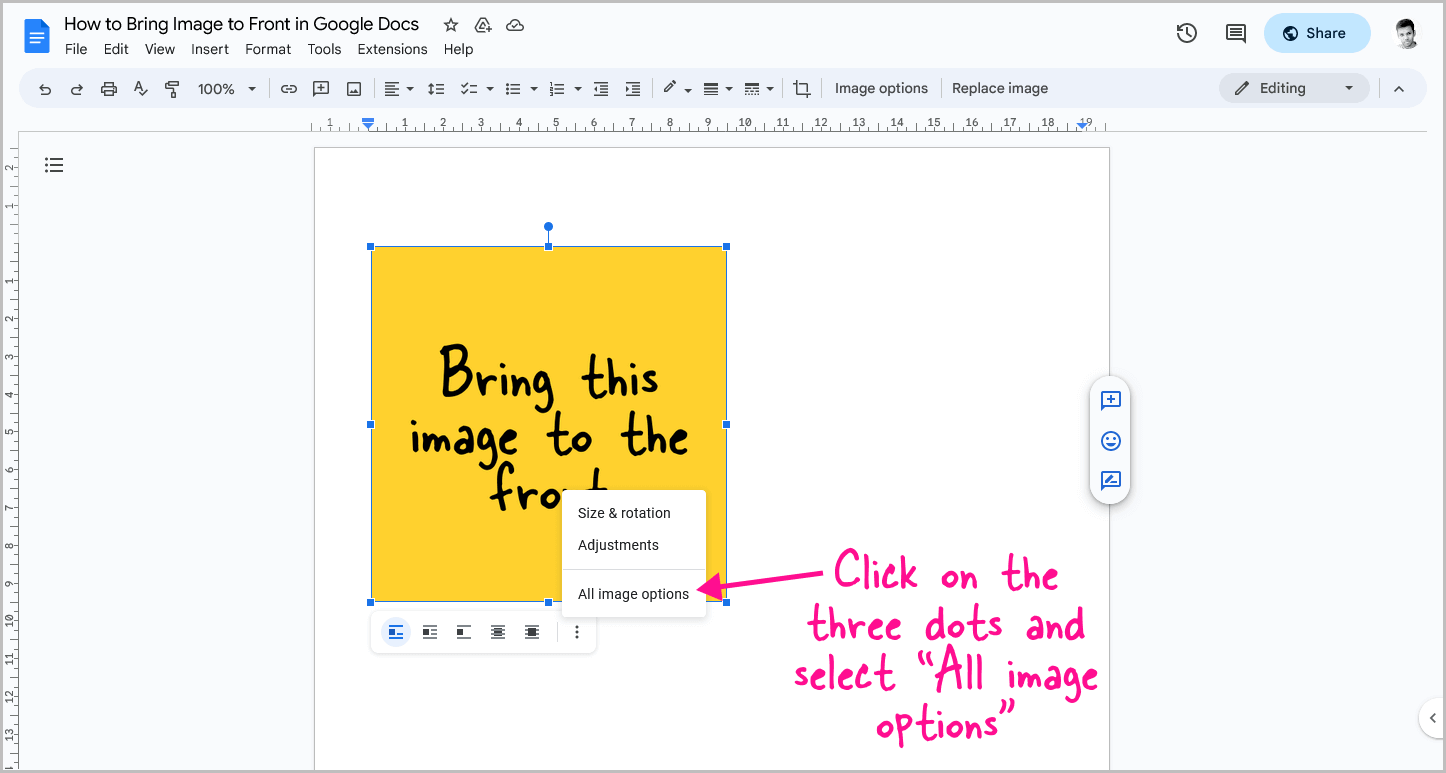
After clicking on the image, a small panel with image options will appear below it.
At the end of this panel, you will see three dots.
Click on these dots and select “All image options” from the drop-down menu.
Step #3. Click on the “Text wrapping” option
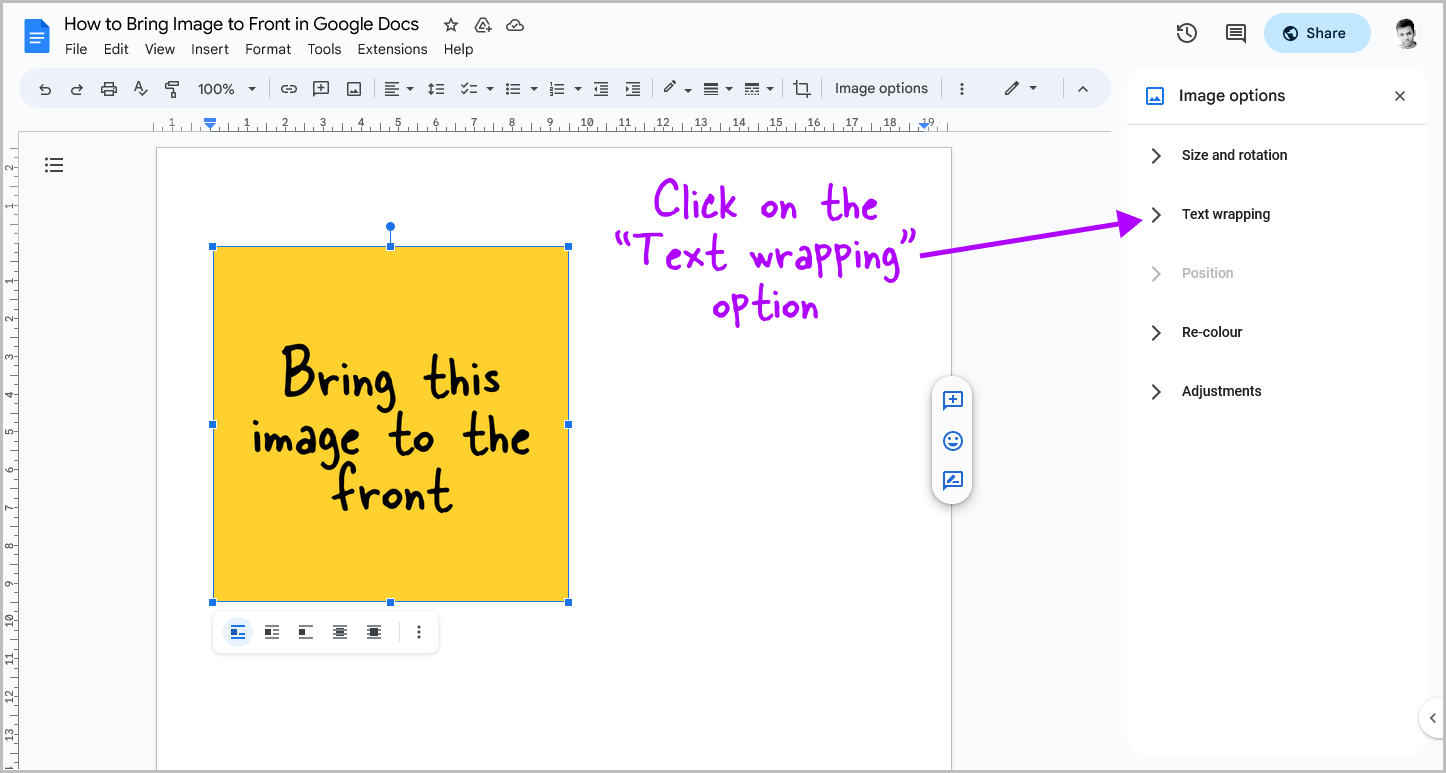
You will now see the “Image options” panel on the right side of the document.
This panel includes options such as Size and Rotation, Text Wrapping, Position, Recolor, and Adjustments.
Select the “Text wrapping” option from the panel and proceed to the next step.
Step #4. Select the “In front of text” style
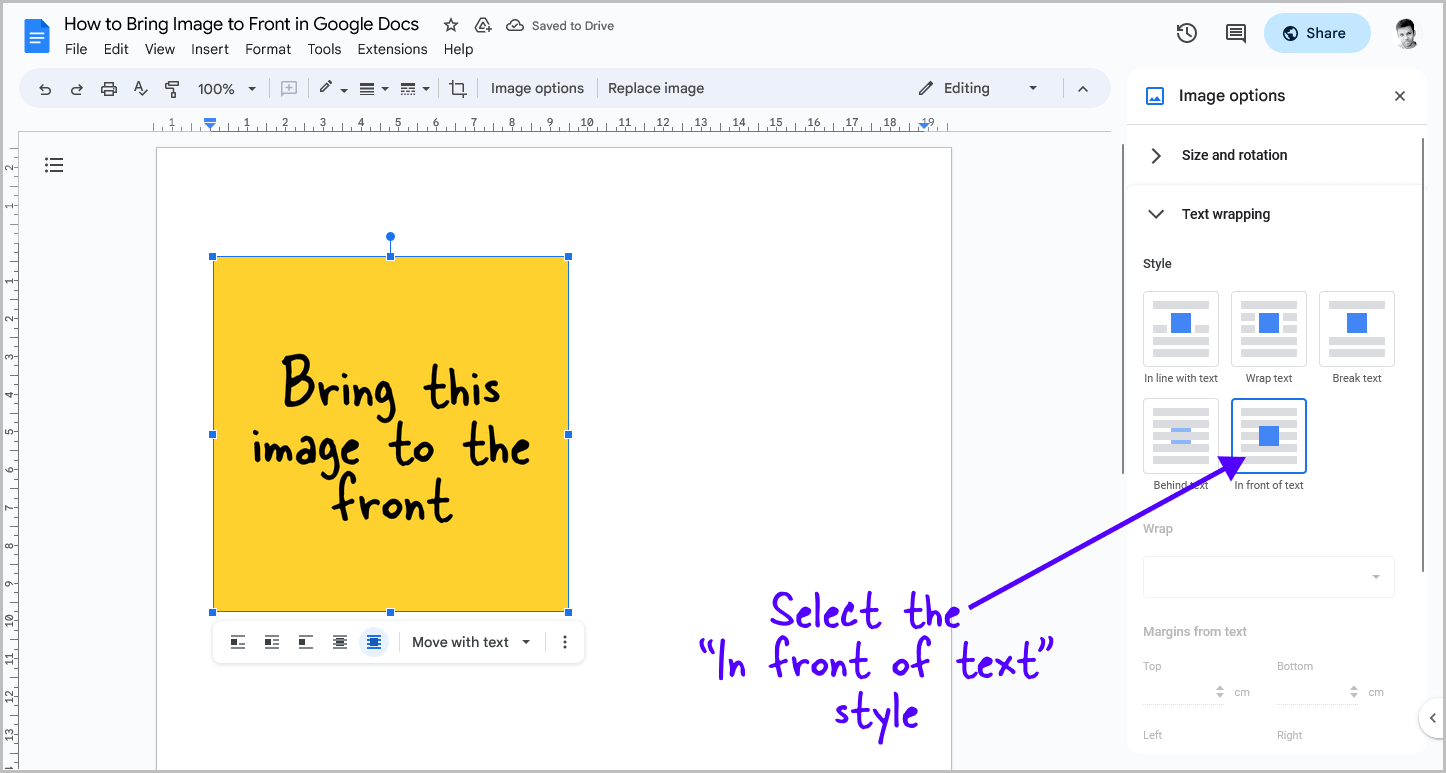
Here, you can choose from various styles.
However, to bring the image to the front, select the “In front of text” style.
This will position the image in front of all other elements.
Step #5. Drag the image to adjust its position
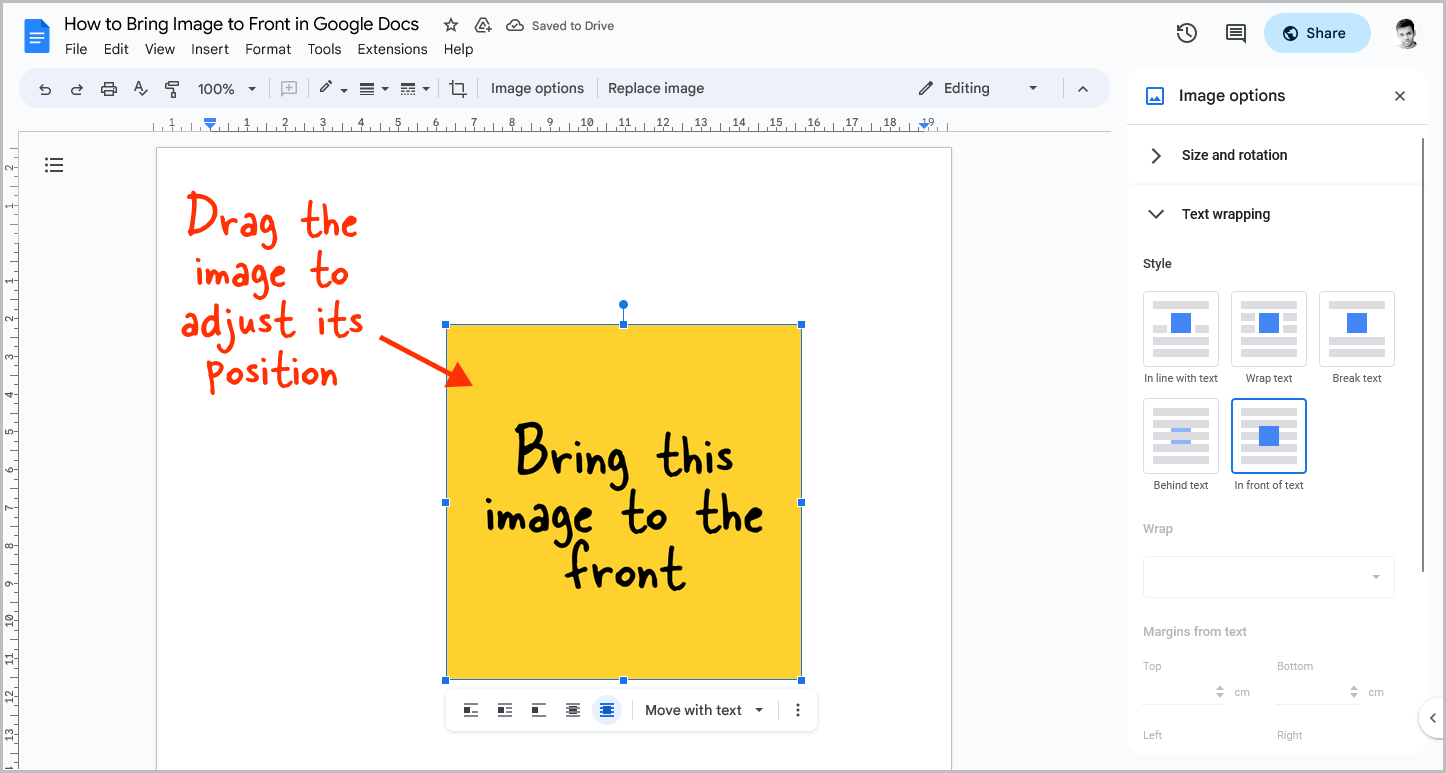
Finally, it is time to position the image in the correct location within the document.
To do so, simply drag the image to the desired location.
Additionally, if you want the image to remain in that position permanently, click on the image and then click on the “Move with Text” option from the small panel below the image.
Finally, select the “Fix position on page” option from the drop-down menu.
FAQs
How do you put a picture in front of text in Google Docs?
To put an image in front of text in Google Docs, click on the image and then select the “In front of text” icon from the small panel below the image.
How do you put a picture in front of another picture on Google Docs?
To add two images in Google Docs, follow these steps:
- First, drag and drop the first image into the document.
- Click on the image and then select the “Behind text” icon from the small panel below the image.
- Next, add the second image to the document.
- Click on the second image and select the “In front of text” icon.
How to put text in front of image in Google Docs?
To put text in front of an image in Google Docs, simply drag and drop the image into your document. Then, click on the image and select the “Behind text” icon from the small panel located below the image.
Summary
Bringing an image to the front in Google Docs is a simple process of using the “Text wrapping” feature in “Image options”.
Here’s how to bring an image to the front in Google Docs:
- Click on the image
- Click on the three dots and select “All image options”
- Click on the “Text wrapping” option
- Select the “In front of text” style
- Drag the image to adjust its position

