Are you wondering how to circle a word in Google Docs?
In this tutorial, you’ll learn how to circle a word in Google Docs, step-by-step.
The following steps apply to the Google Docs web app.
Also read (opens in a new tab):
15 Best Aesthetic Fonts on Google Docs & Google Slides
How to Center Text in Middle of Page Google Docs
How to Make a Google Doc Look Like Old Paper
How to Make Four Columns in Google Docs
How to Switch Back to the Old Layout in Google Docs
How to Circle a Word in Google Docs
Circling a word in your documents is a great way to highlight an important word or draw attention to it.
Although you can add a highlight color to the word, circling is a more traditional way, just like you would highlight an important word in a book by circling it or underlining it.
While you can underline a word in Google Docs directly, you cannot circle it as there is no specific tool in Google Docs to directly circle a word.
However, there is a workaround!
In Google Docs, you can use the Drawing tool to draw a circle of any color and drag it on top of the desired word.
Follow these steps to circle a word in Google Docs:
Step 1: Open your Google Docs document
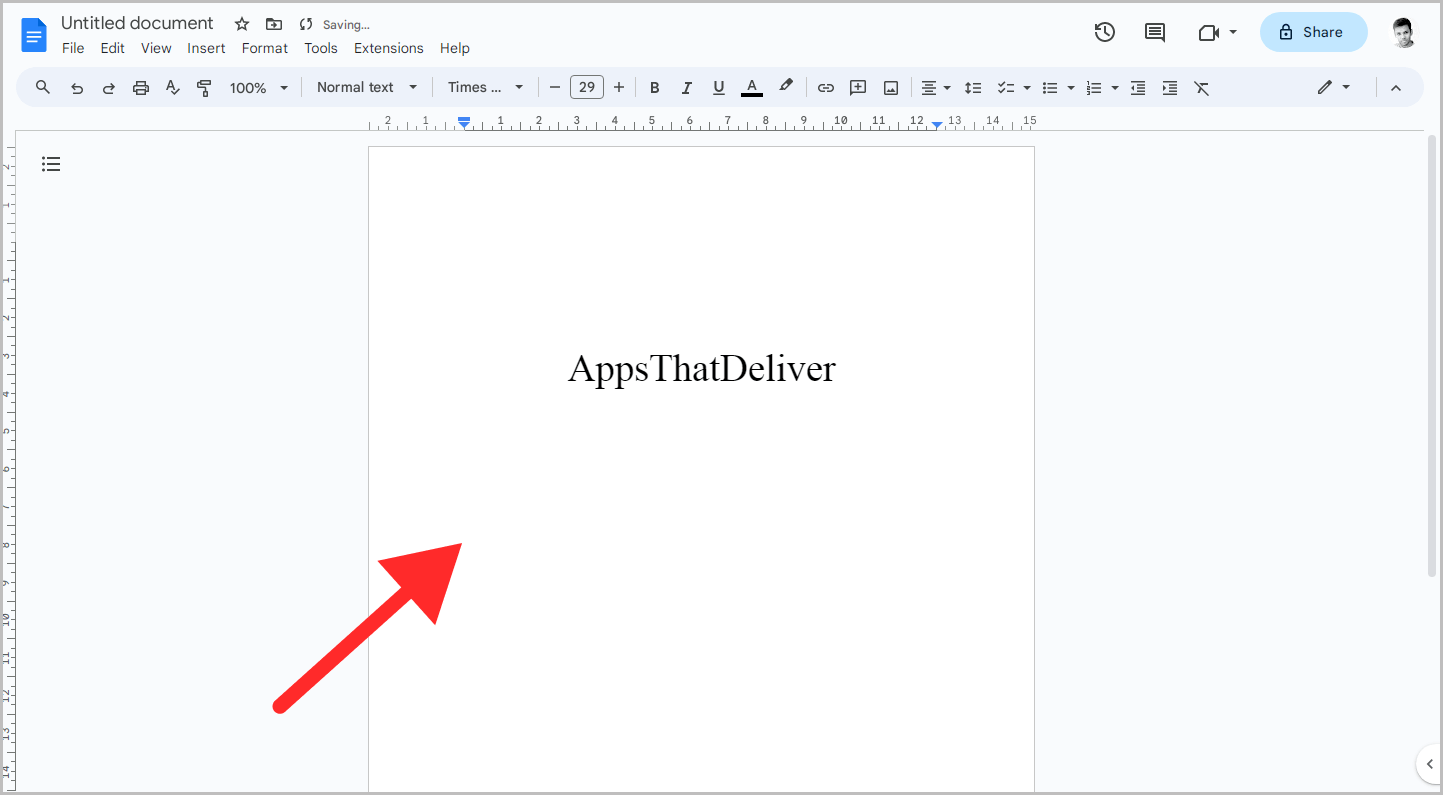
The first step is to open the Google Docs document containing the word that you want to highlight. After you open the document, simply proceed to the next step.
Step 2: Go to Insert > Drawing > New
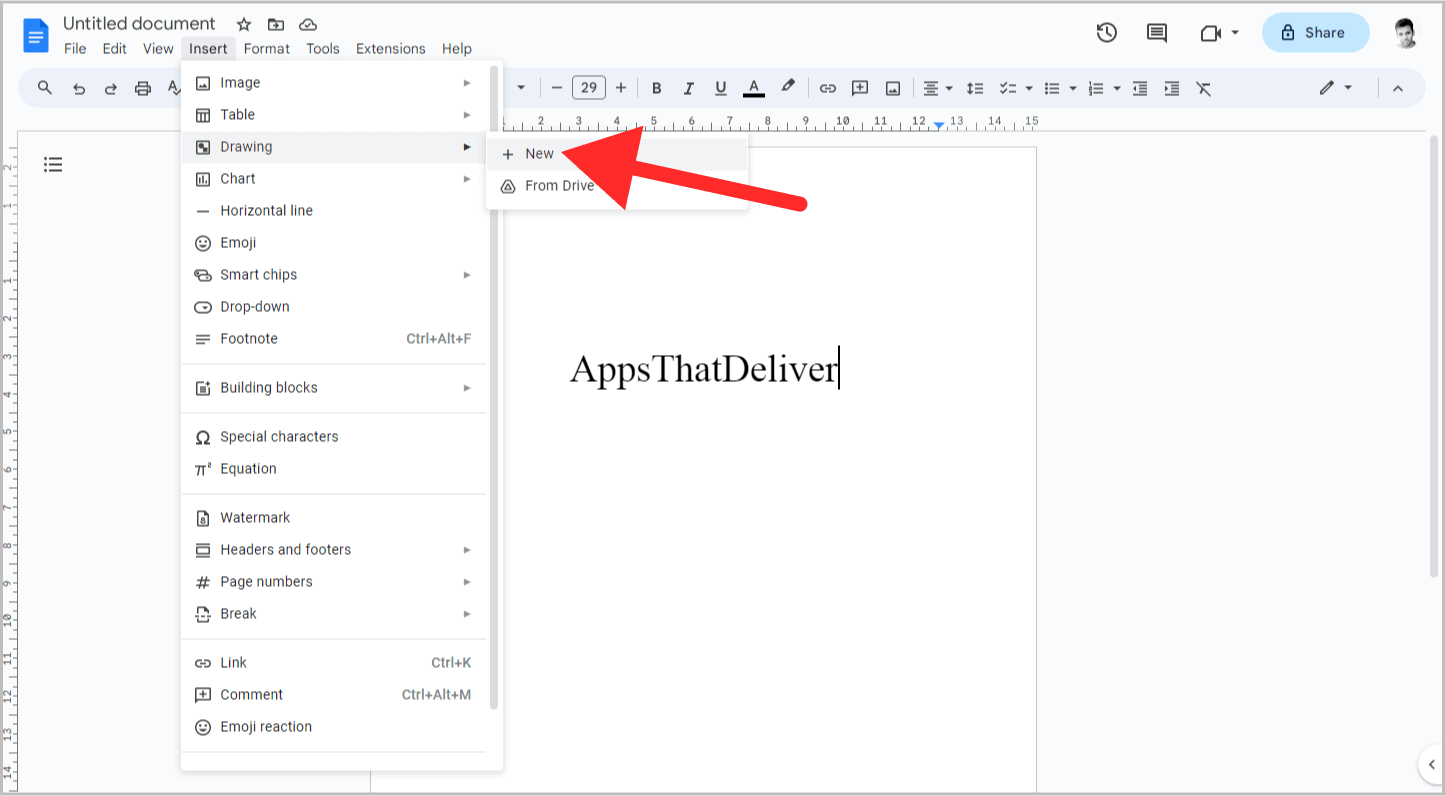
Now, click on the “Insert” option from the top menu.
From the list of options, hover your cursor over the “Drawing” option to view the secondary menu.
From this menu, select the “New” option to create a new Drawing canvas.
Step 3: Draw an oval: Click “Shape” > Shapes > Oval, then draw
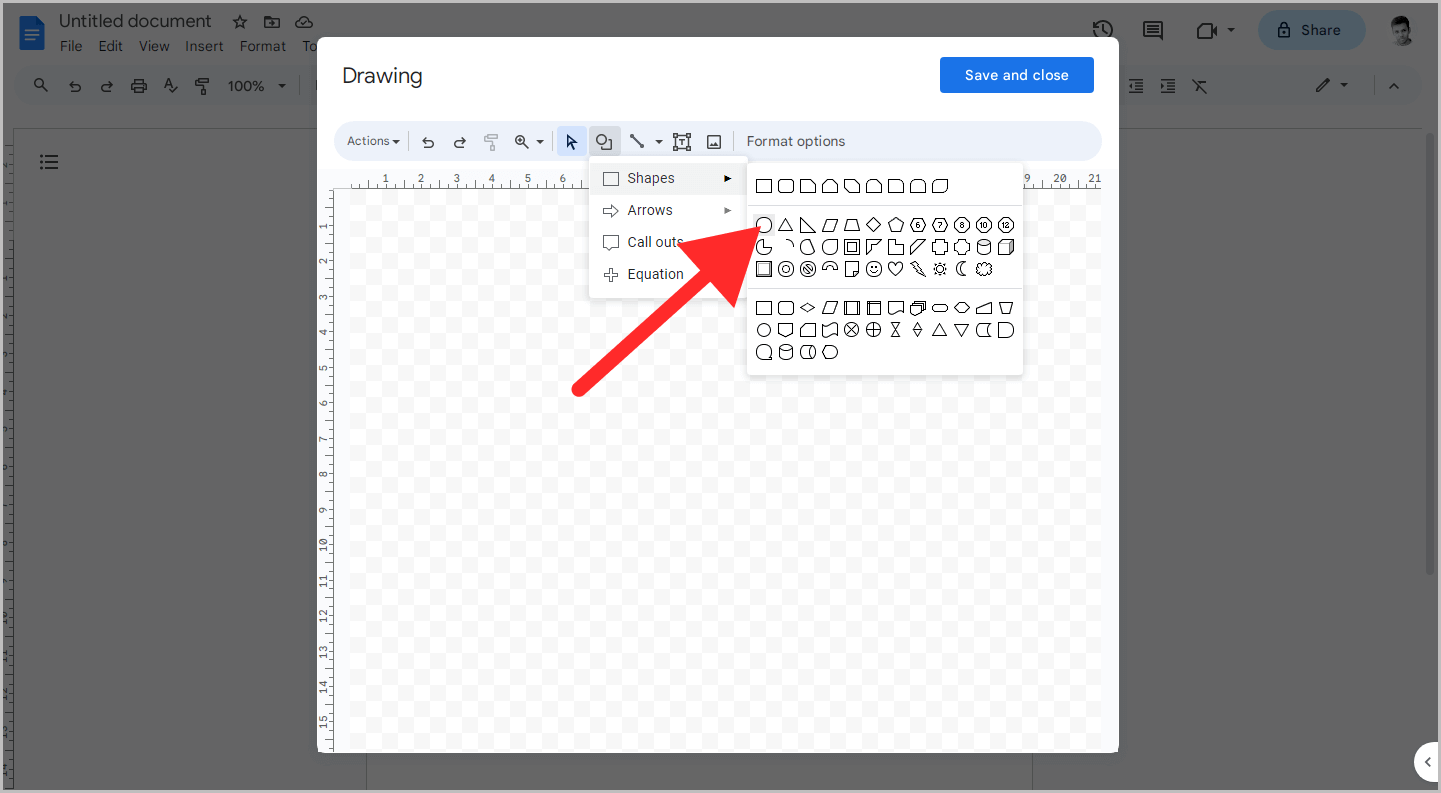
We’ll be drawing an oval on the drawing canvas.
To do so, click on the “Shapes” tool from the toolbar and then navigate to Shapes > Oval.
After you select the “Oval” shape, click on the canvas and drag to draw an oval shape.
Hold the “Ctrl” key while dragging to draw a perfect circle.
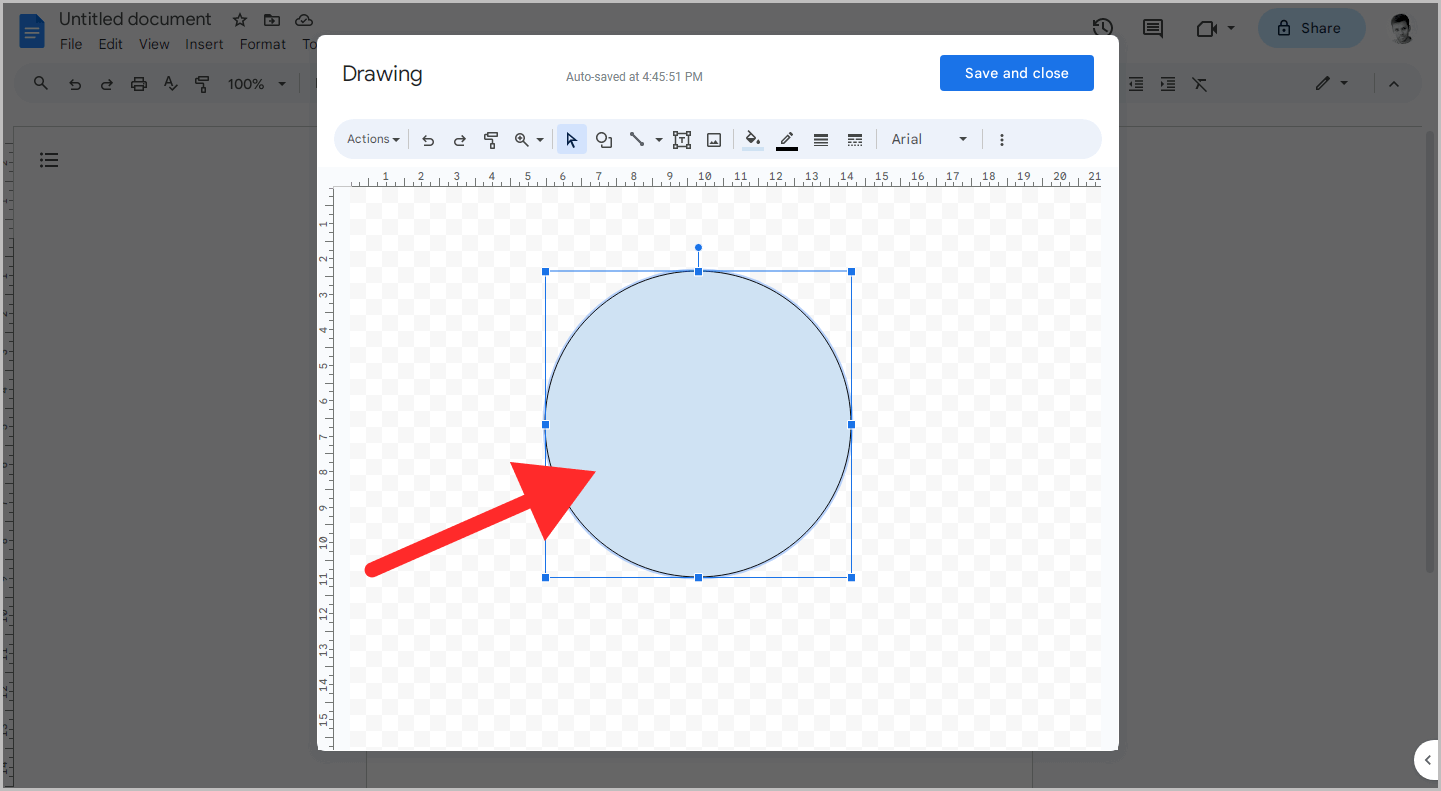
Step 4: Set transparency: Make the oval fill color transparent
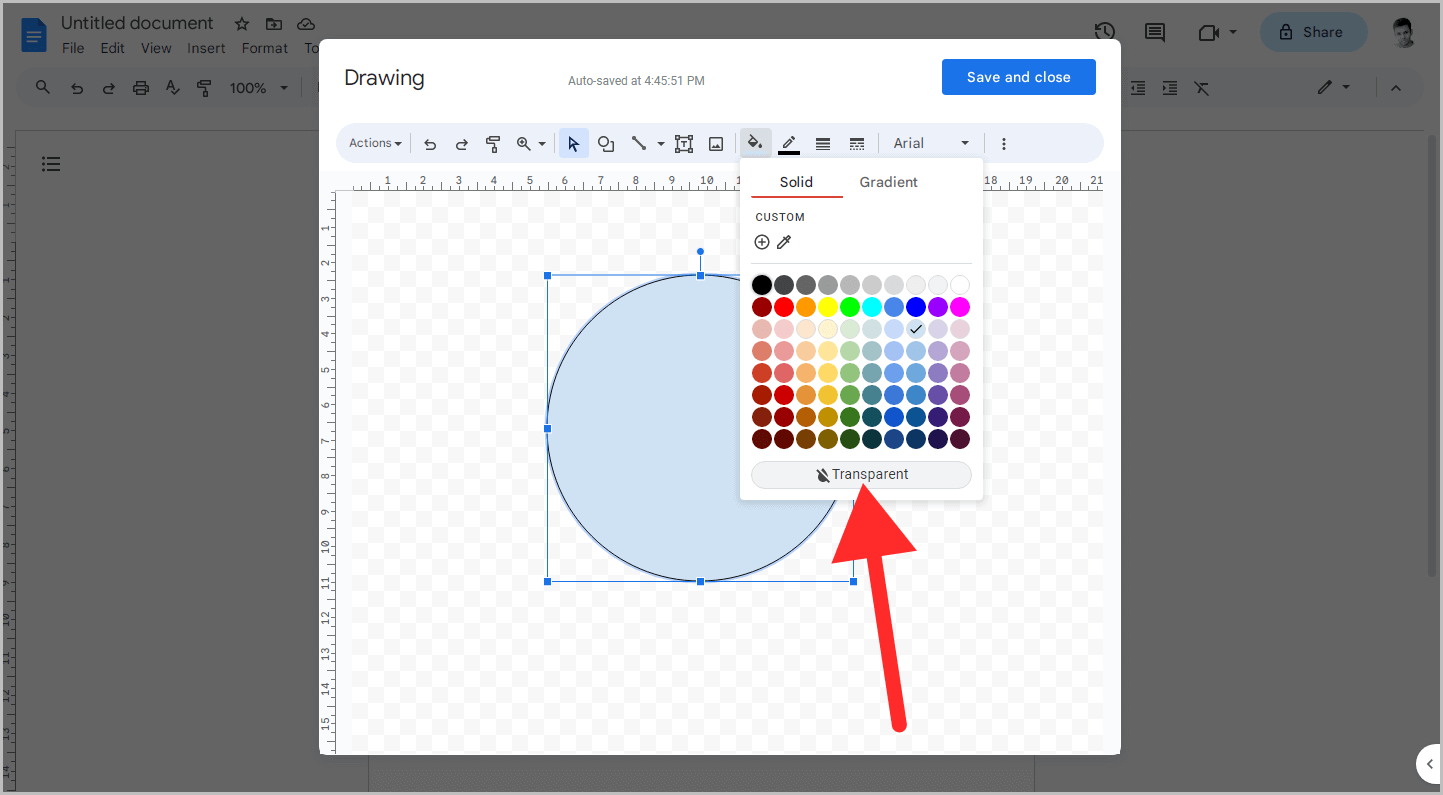
It is now time to change the fill and border color of the circle.
To begin, click on the “Fill color” tool from the toolbar, and then click on the “Transparent” button to make the circle transparent.
Now, proceed to the next step.
Step 5: Style the border: Choose a color and thickness
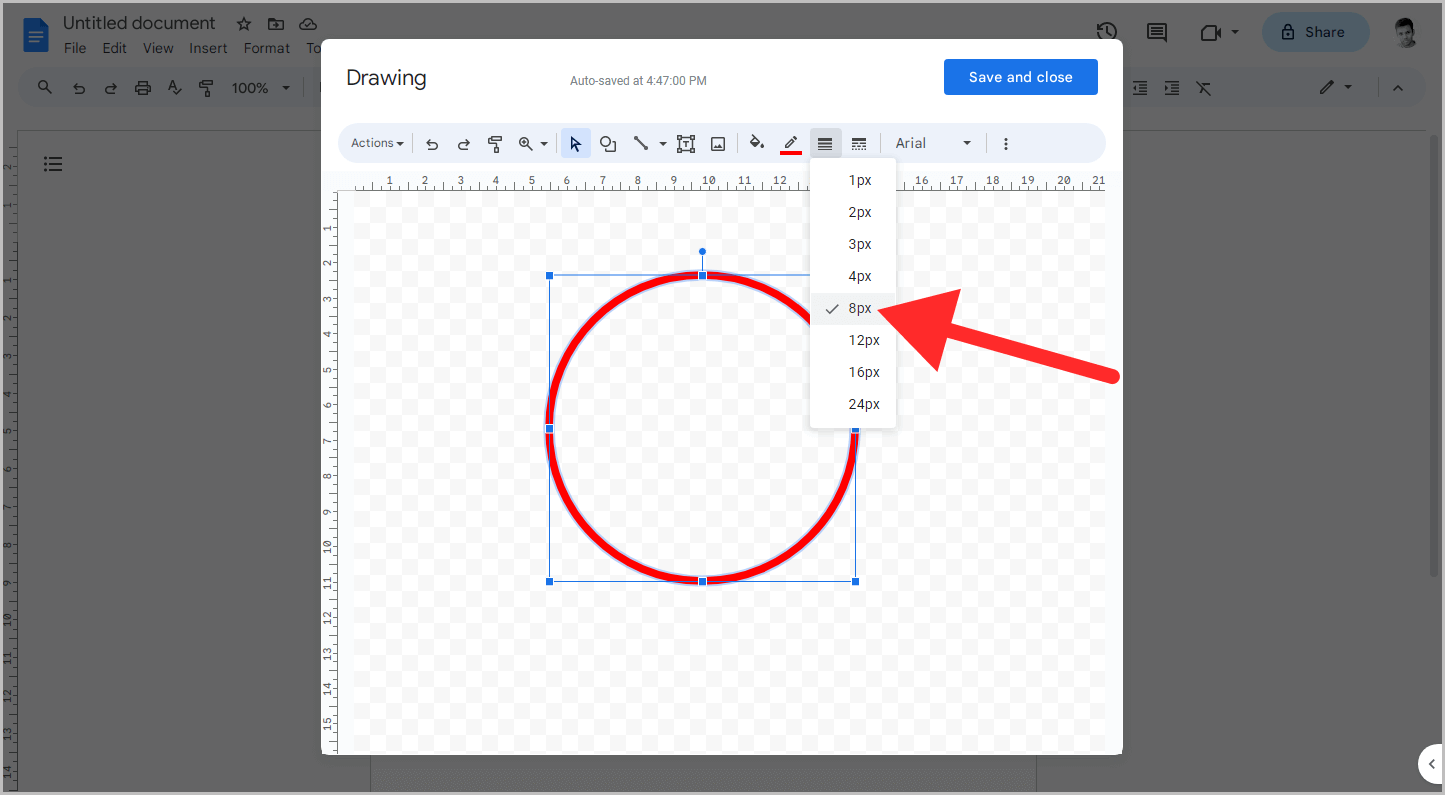
Now, click on the circle to select it and then click on the “Border weight” tool from the toolbar.
You’ll see different border weights in the menu.
Choose the desired thickness for your circle.
Don’t worry too much about the thickness of the border; you can change it later.
For now, keep it at 8 pt.
Now, click on the “Border color” tool and choose a color for your circle.
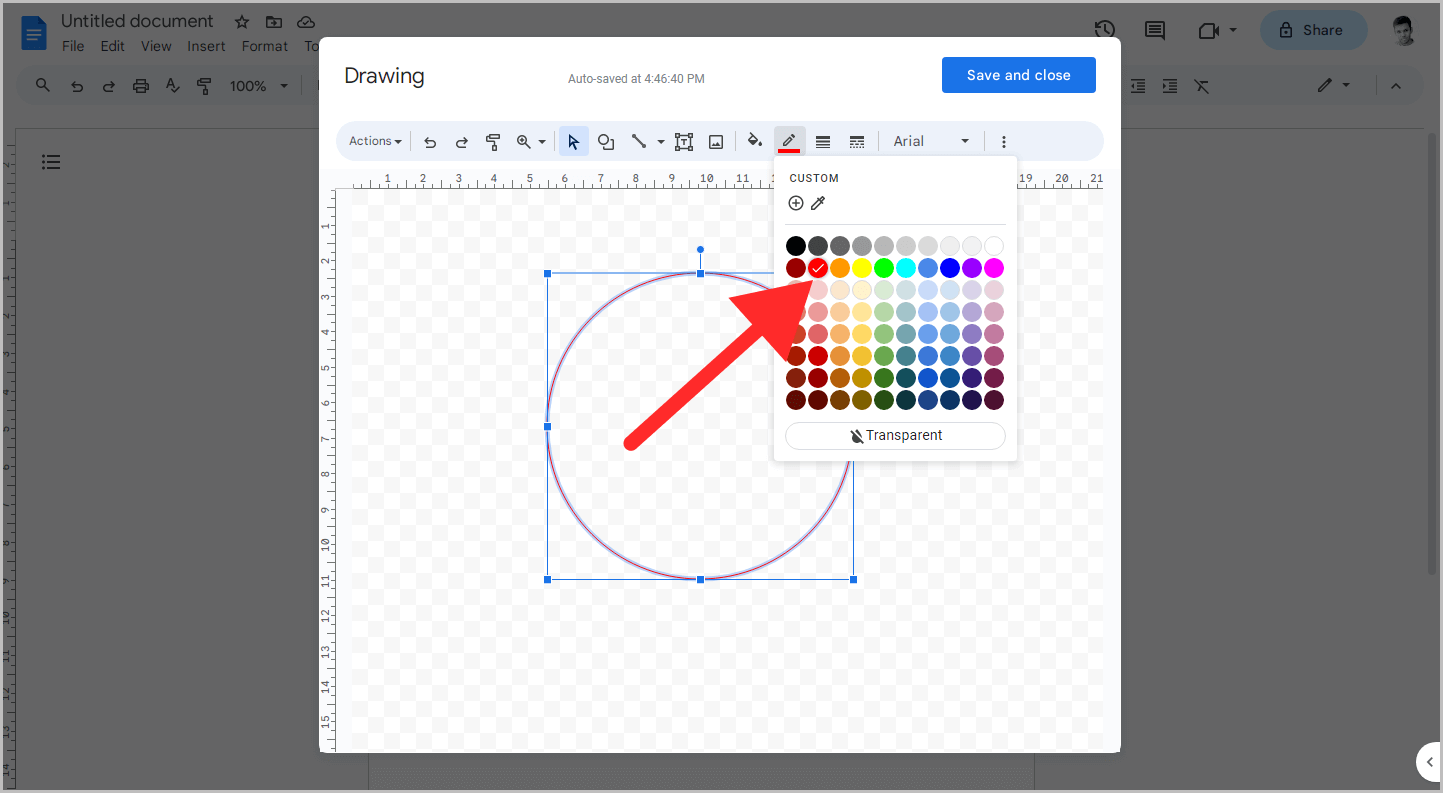
Step 6: Save and close the drawing
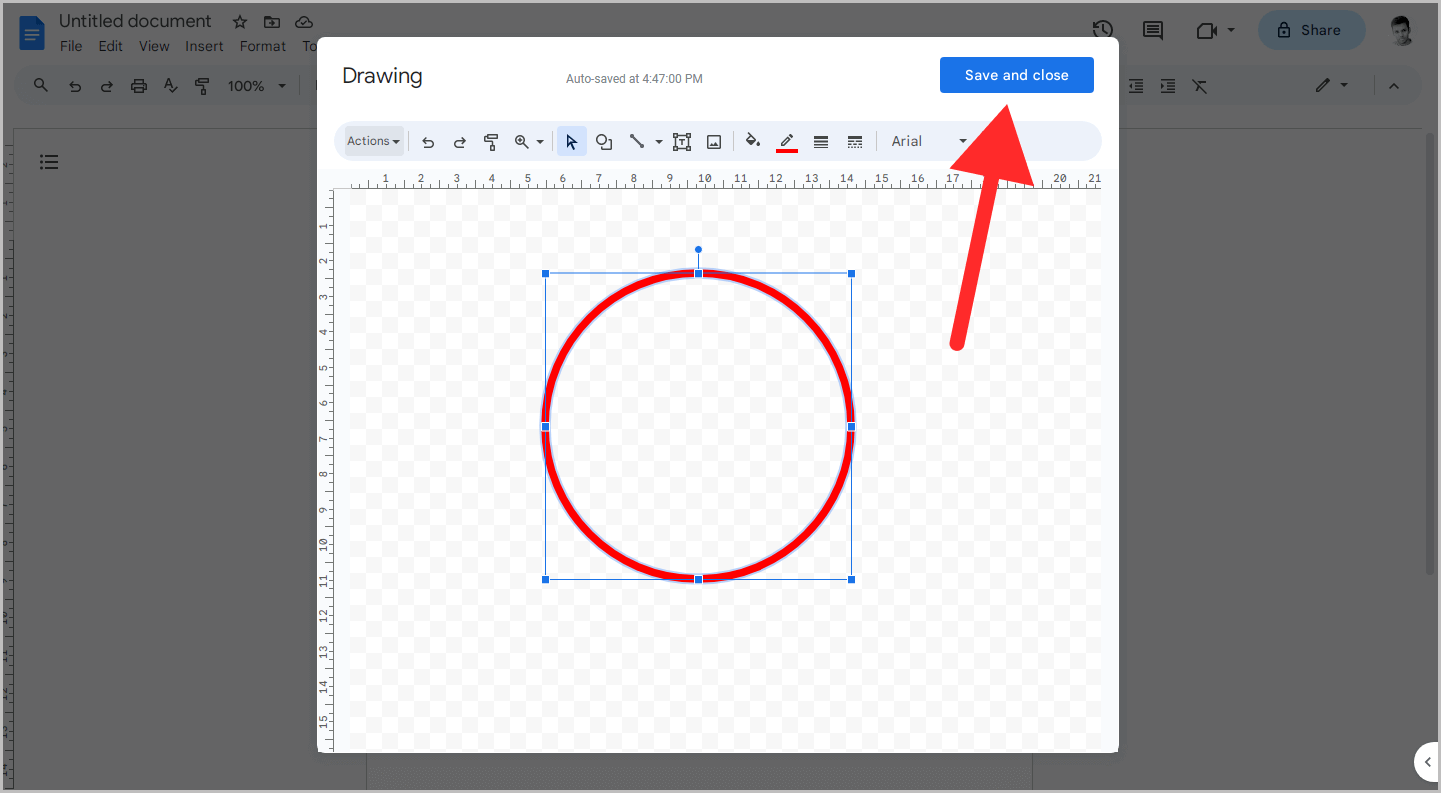
Click on the “Save and close” button located in the top right corner.
This will close the drawing canvas and insert the circle into your document.
Step 7: Position the circle: Click “In front of text” and drag the circle over the word, adjusting its size as needed
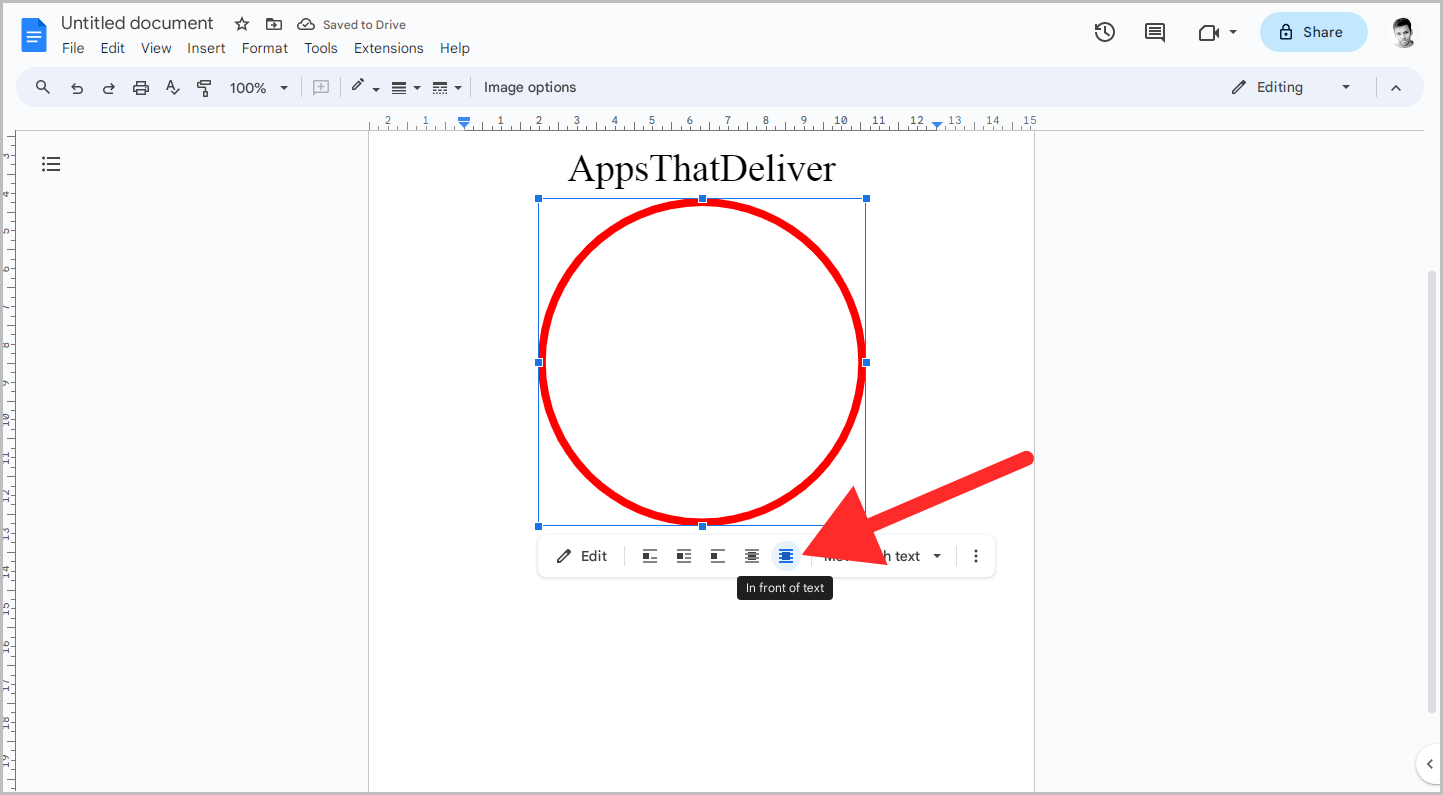
In this step, you’ll be positioning the circle on the word.
To begin, click on the circle and then select the “In front of text” wrap option from the small panel below the image.
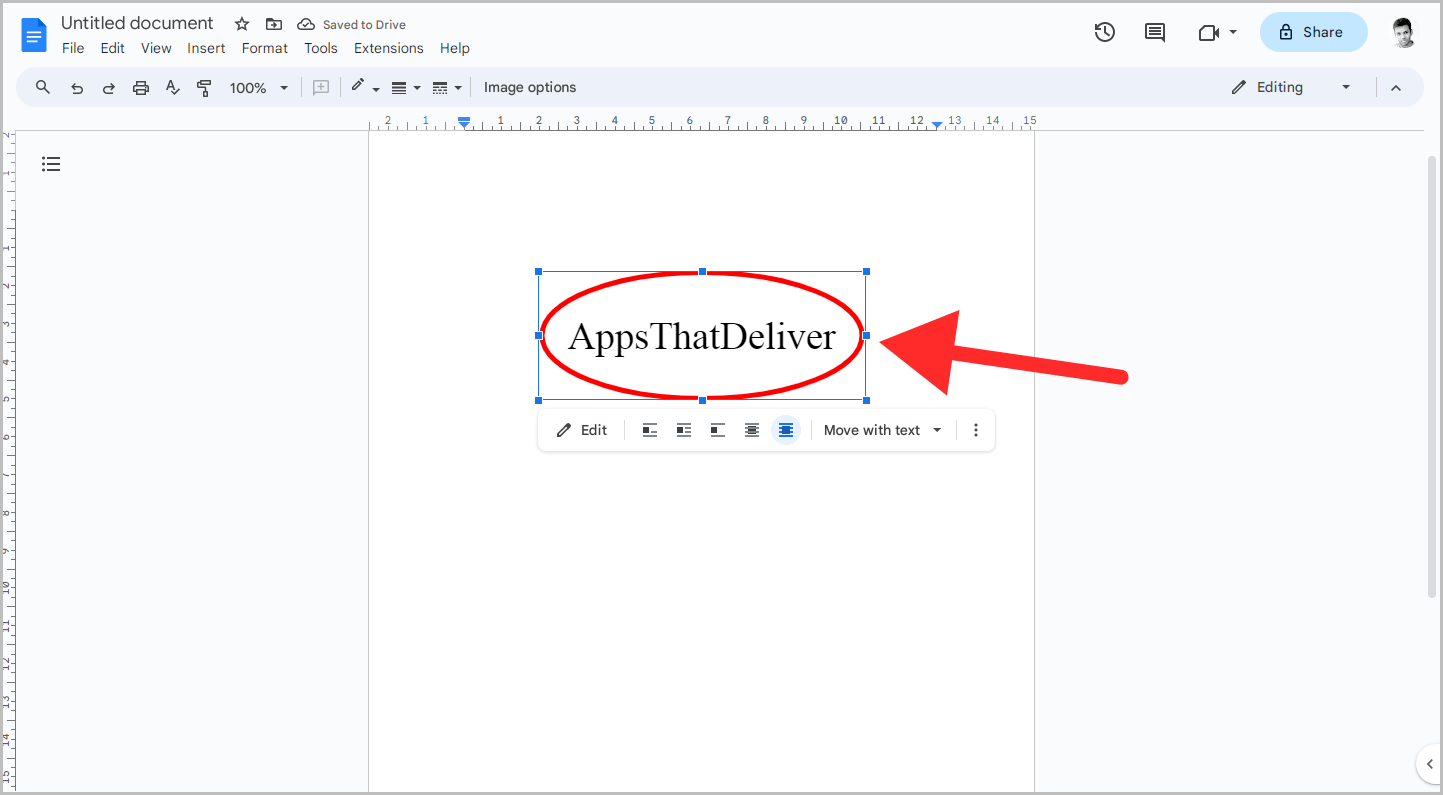
Now, drag the circle image above the desired word. Adjust the size accordingly.
If you need to readjust the circle thickness, double-click on the circle image to open the drawing canvas and adjust the weight accordingly.
FAQs
How to draw a circle around a word in Google Docs?
To draw a circle around a word in Google Docs, simply use the drawing tool to draw a circle and then drag it over the word.
How to put shapes over text in Google Docs?
You need to use the Drawing tool in Google Docs. Simply go to Insert > Drawing > New and click on the “Shapes” option. Now, choose a shape of your choice and draw it. Finally, drag it over the desired text.

