Google Docs offers a variety of features, including the ability to add custom colors to your document.
You can customize the color of any element in the document, even the background color.
However, if you select a custom color and then choose a primary color from the color palette, you may find the custom color remains visible below the palette.
This can be frustrating, especially when sharing the document with others.
Fortunately, there is an easy way to delete custom colors in Google Docs.
In this article, you’ll learn how to delete custom colors in Google Docs, step-by-step.
Also read: (opens in a new tab)
How to Rearrange Pages in Google Docs
Using a Picture as a Bullet Point in Google Docs
How to Insert Word Art in Google Docs
How to Share Multiple Google Docs at Once
How to Delete Custom Colors in Google Docs?
Step 1: Replace custom colors with primary colors in the document

In order to remove custom colors from the palette, there are a few steps that you can take.
While there is no direct way to do this, there is a workaround that involves copying the content from the document and pasting it into a new, fresh document.
However, the custom colors will still be visible if you directly paste the document.
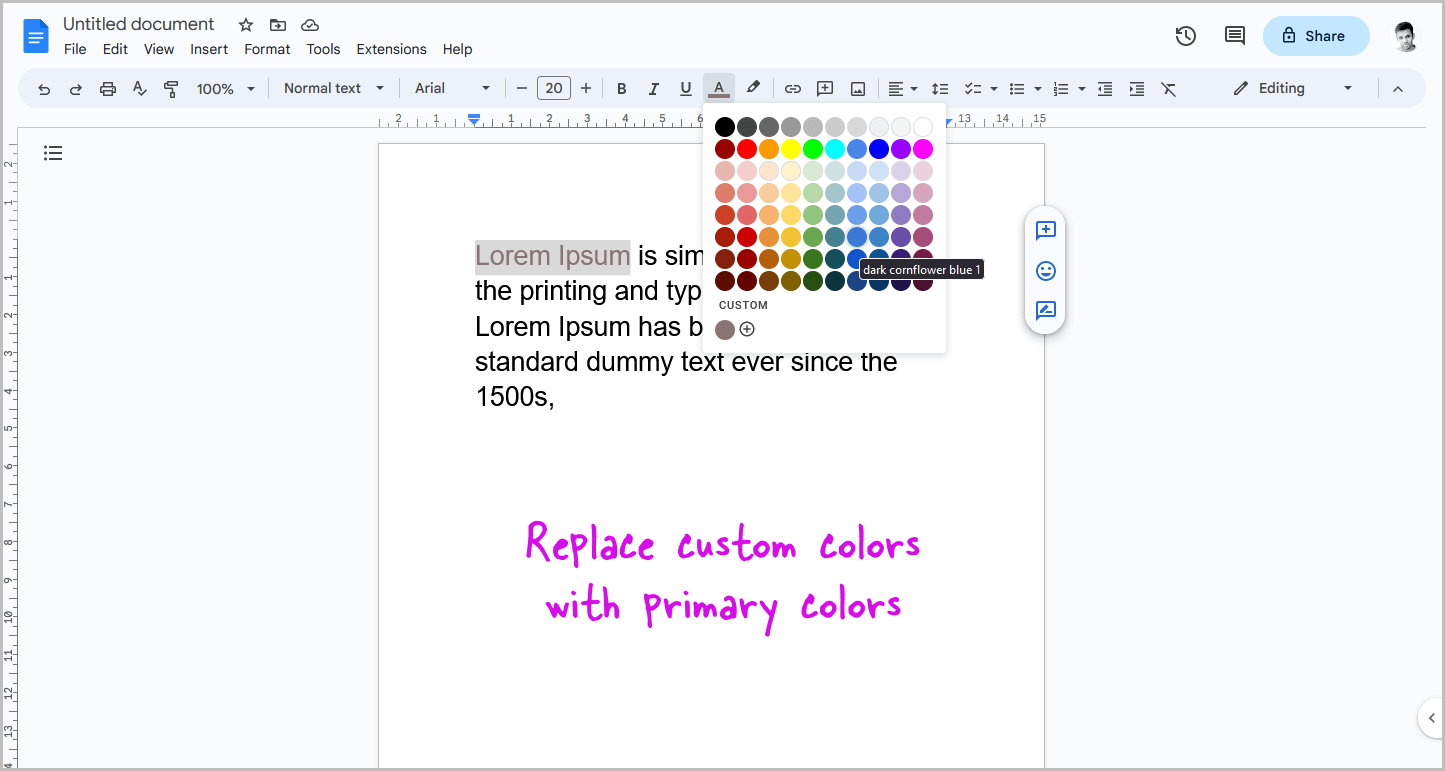
To remove them, select the element with the custom color and replace it with a primary color from the palette.
For instance, if you used a custom color for your text, select the text, click on the “Text color” tool from the toolbar, and choose a primary color from the color palette.
Step 2: Press Ctrl+A and then Ctrl+C

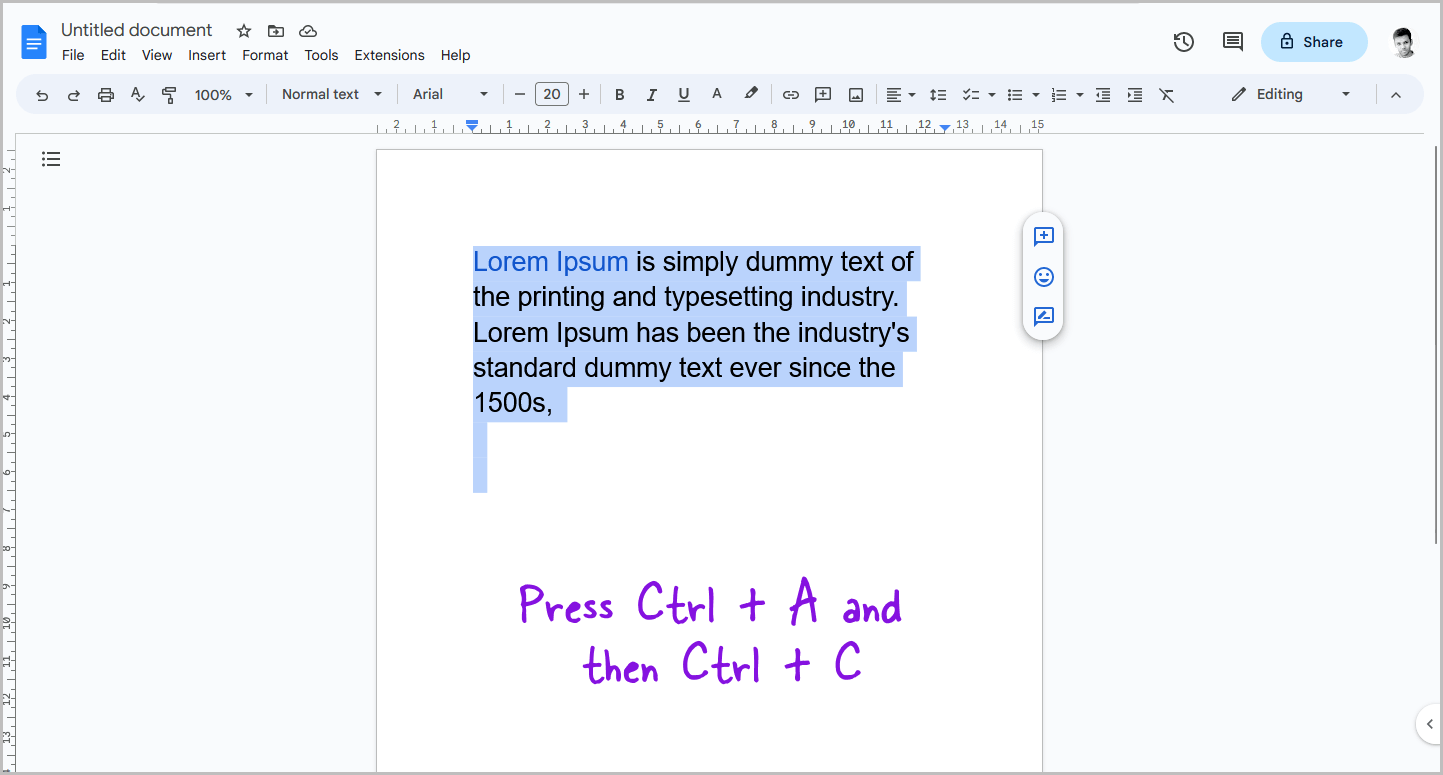
After replacing the colors, press Ctrl+A to select all the content in the document.
Alternatively, you can manually select the content using your mouse, but using Ctrl+A ensures that all the content is selected.
Then, press Ctrl+C to copy the selected content to your clipboard.
This will allow you to paste the content anywhere you need to.
Step 3: Go to File > New > Document

Once you have copied the content to your clipboard, it is time to create a new document.
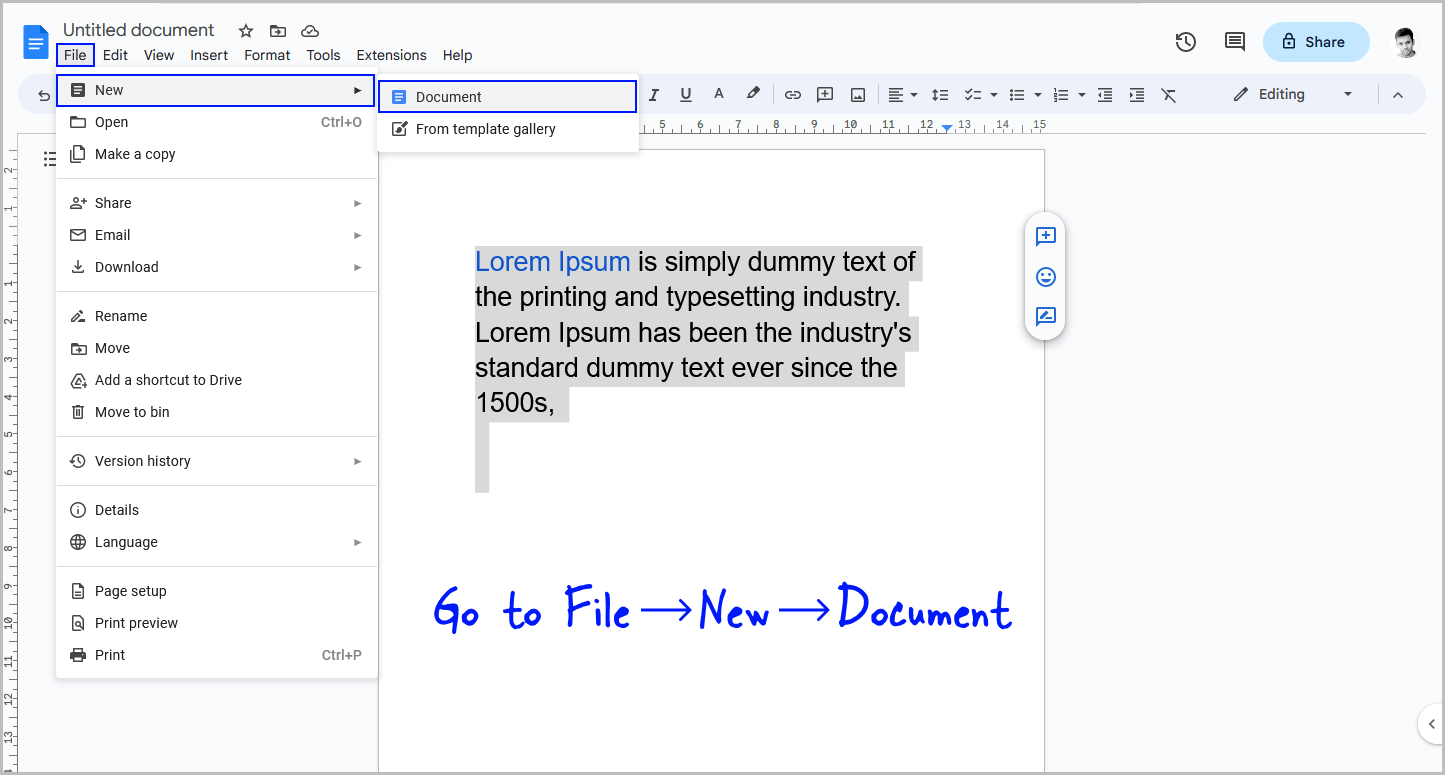
To do this, click on the “File” option in the top menu, select “New” from the drop-down menu, and then select “Document” from the secondary drop-down menu.
This will open a new document file in a new tab.
Step 4: Press Ctrl+V

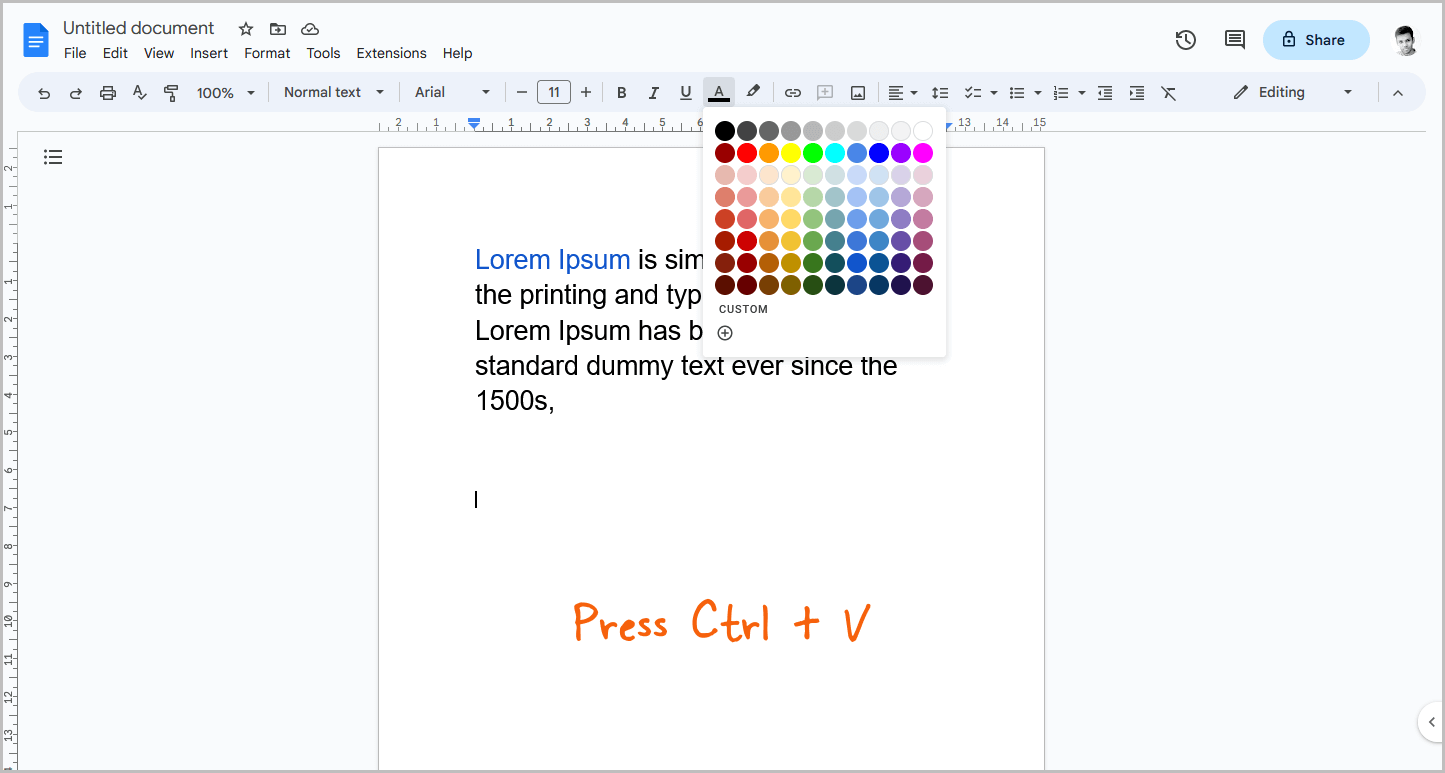
After opening the new document, simply press Ctrl+V to paste the copied content from step 2.
This will create an exact copy of the original document.
When you open the color palette, you will notice that it does not contain any custom colors.
If your copy looks different from the original document, go back to your original document and click on File > Make a copy.
Then, rename your copy and click on the “Make a copy” button.
This will create an exact copy of the document, and the custom colors from the palette will also be removed.
FAQs
Can You Delete Custom Colors in Google Docs?
Yes, you can delete custom colors in Google Docs by replacing the custom colors with primary colors in the document, copying the content, creating a new document, and then pasting the content into the new document.
How to Remove Custom Colors From Google Docs?
To remove custom colors from Google Docs, you need to replace the custom colors with primary colors in the document, copy the content, create a new document, and then paste the content into the new document.
How to Delete Custom Highlight Colors in Google Docs?
Replace the custom highlight color with a primary color from the color palette. Then, copy all the content and paste it into a new document.
Conclusion
In conclusion, while it may be frustrating to have custom colors persist in your Google Docs, it is possible to remove them by following the steps outlined in this article.
By replacing custom colors with primary colors and copying the content to a new document, you can ensure that your document looks the way you want it to, without any unwanted colors cluttering up your palette.

