Do you want to insert HEIC into your Google Docs document, but you’re not sure how to do it?
If you’ve tried to drag and drop the file into the document, you may have received an error message saying “Unsupported image type” .
You’re not alone! Many people have struggled with this same issue.
The truth is, Google Docs supports most popular image types such as .jpg, .jpeg, .png, .bmp, .webp, .gif, .tiff, and even .pdf, but unfortunately, HEIC isn’t one of them.
However, there is a workaround!
Some people convert their HEIC images to a supported image type such as .jpg or .png.
While this is a nice workaround, it isn’t always the best solution.
What if you want to upload the image in its original HEIC format?
Fortunately, there is an easy way to upload HEIC images into your document without having to convert them to another format.
In this article, you’ll learn step-by-step how to insert HEIC images into your Google Docs document.
Also read: (opens in new tab)
How to Put Text Over an Image in Google Docs
How to Center an Image in Google Docs
Using a Picture as a Bullet Point in Google Docs
How to Copy Text From a Picture
How to Insert HEIC Into Google Docs?
Step 1: Upload the HEIC image to Google Drive
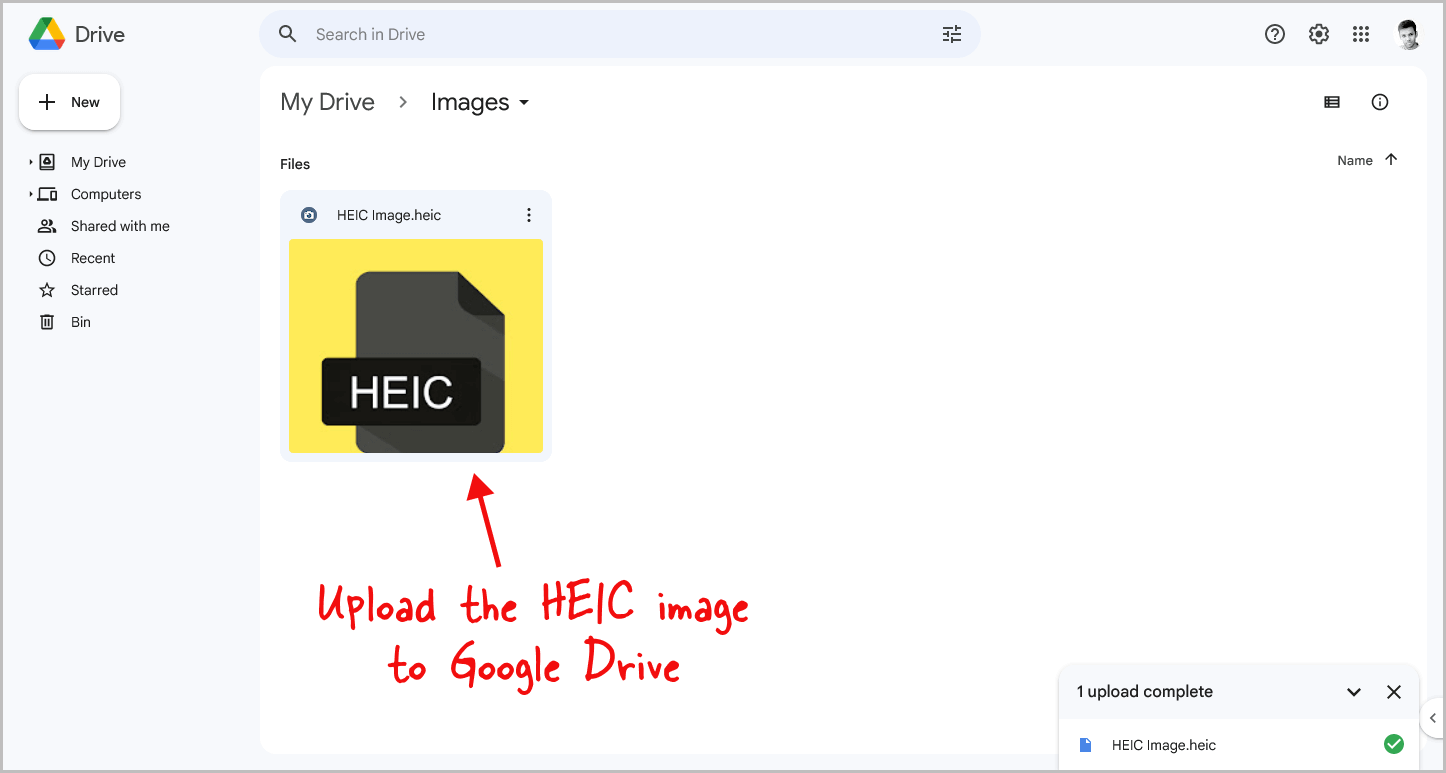
As Google Docs does not support HEIC image types, we will need to upload them to Google Drive first and then insert them into the document.
Firstly, navigate to drive.google.com, where you should ensure that you are logged in to the same account that you are using for Docs.
Once you have done this, you should upload the image(s) to Google Drive.
When you have uploaded the image(s), you can proceed to the next step.
Step 2: Click “Insert” in Google Docs
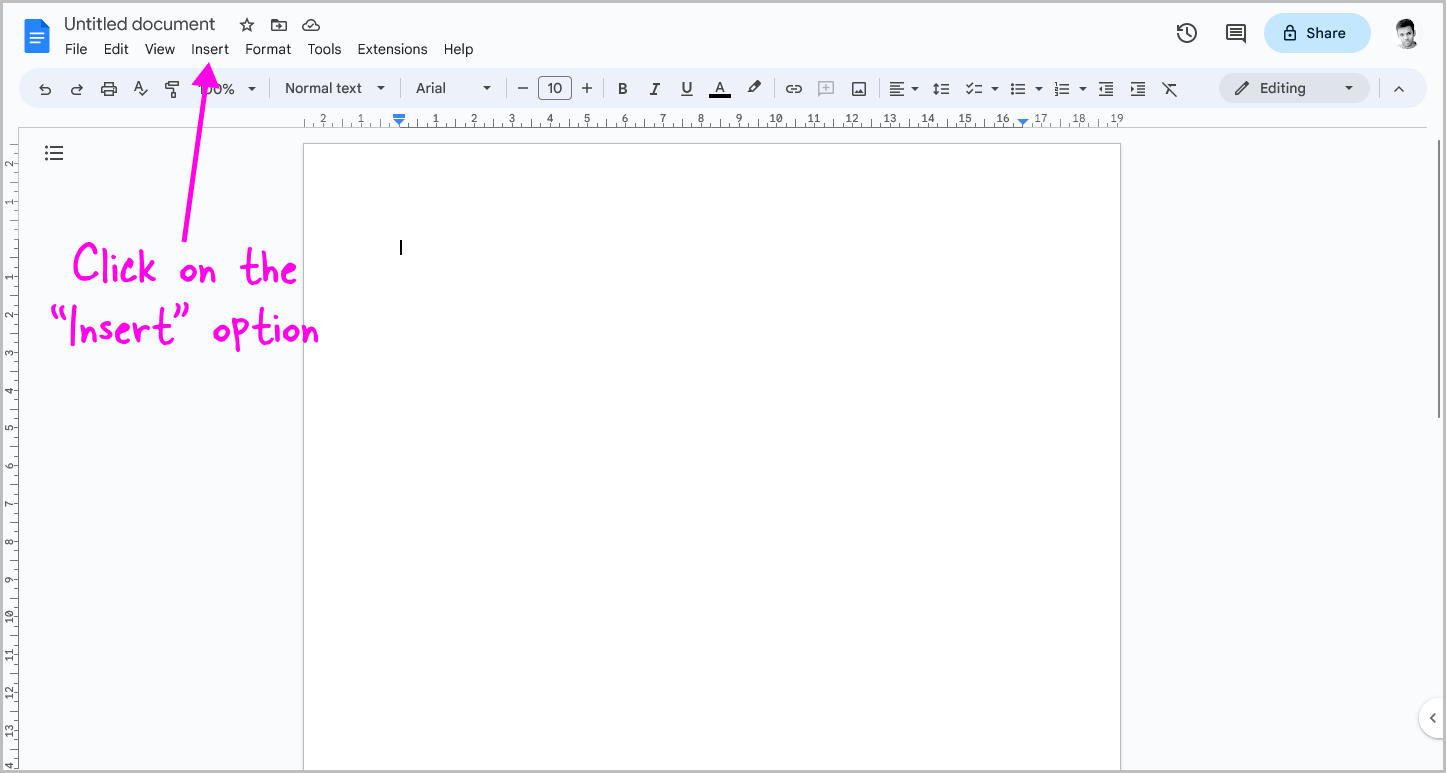
After uploading the image, go to docs.google.com and open the document where you want to insert the image.
Make sure you are logged in to the same account as your Google Drive.
Once you have opened the document, click on the “Insert” option from the top menu.
Step 3: Select “Image” and then “Drive”
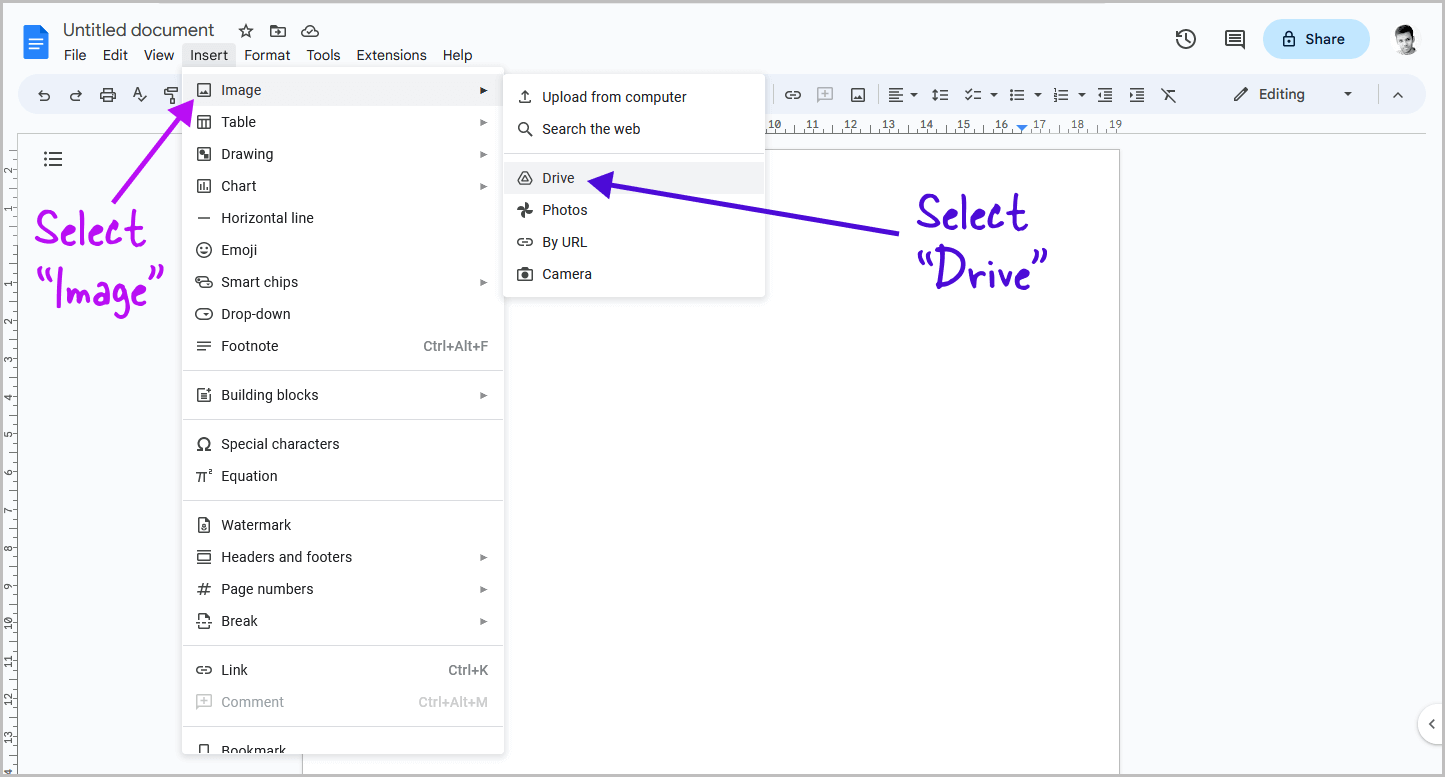
After clicking on the “Insert” option, select “Image” from the drop-down menu.
You will then see the option to insert images.
Select “Drive” from the secondary drop-down menu and proceed to the next step.
Step 4: Choose the HEIC image
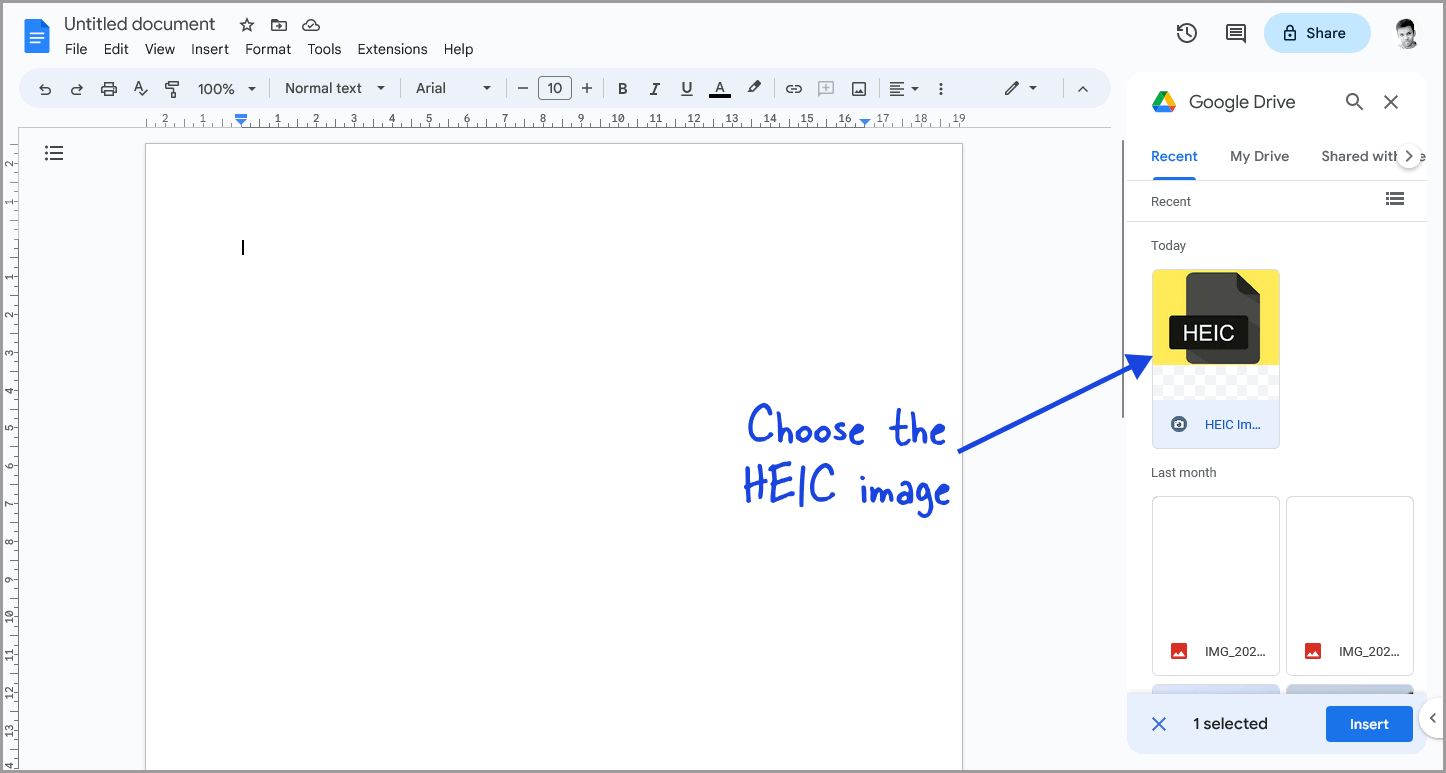
On the right side of the page, you will now see the Google Drive panel.
Ensure that the “Recent” tab is selected.
Next, select the HEIC image file that you want to insert into the document.
Step 5: Click “Insert”
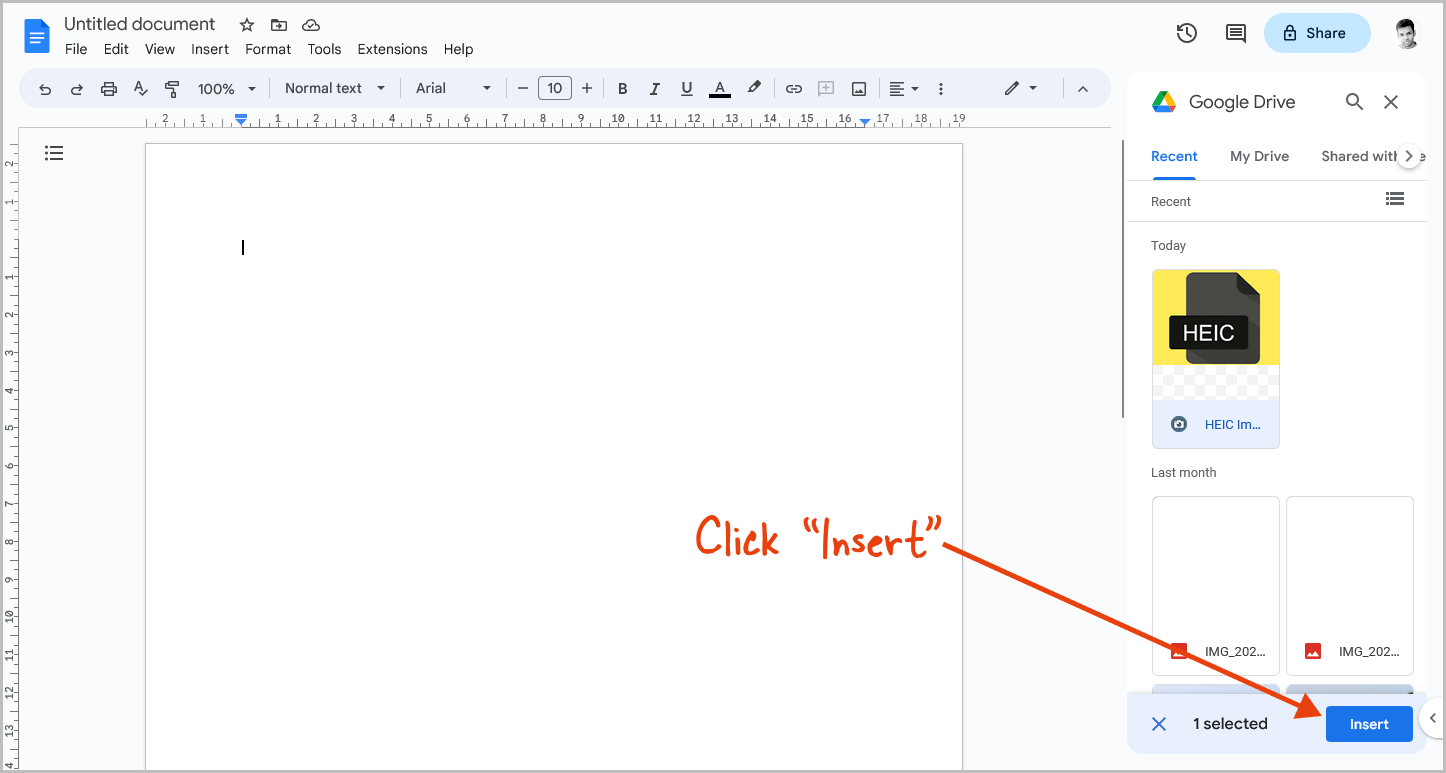
After selecting all the images you want to insert in your document, click on the “Insert” button located at the bottom of the Google Drive panel.
This will allow you to successfully insert images of different file types, including HEIC images, without encountering the “Unsupported image type” error message.
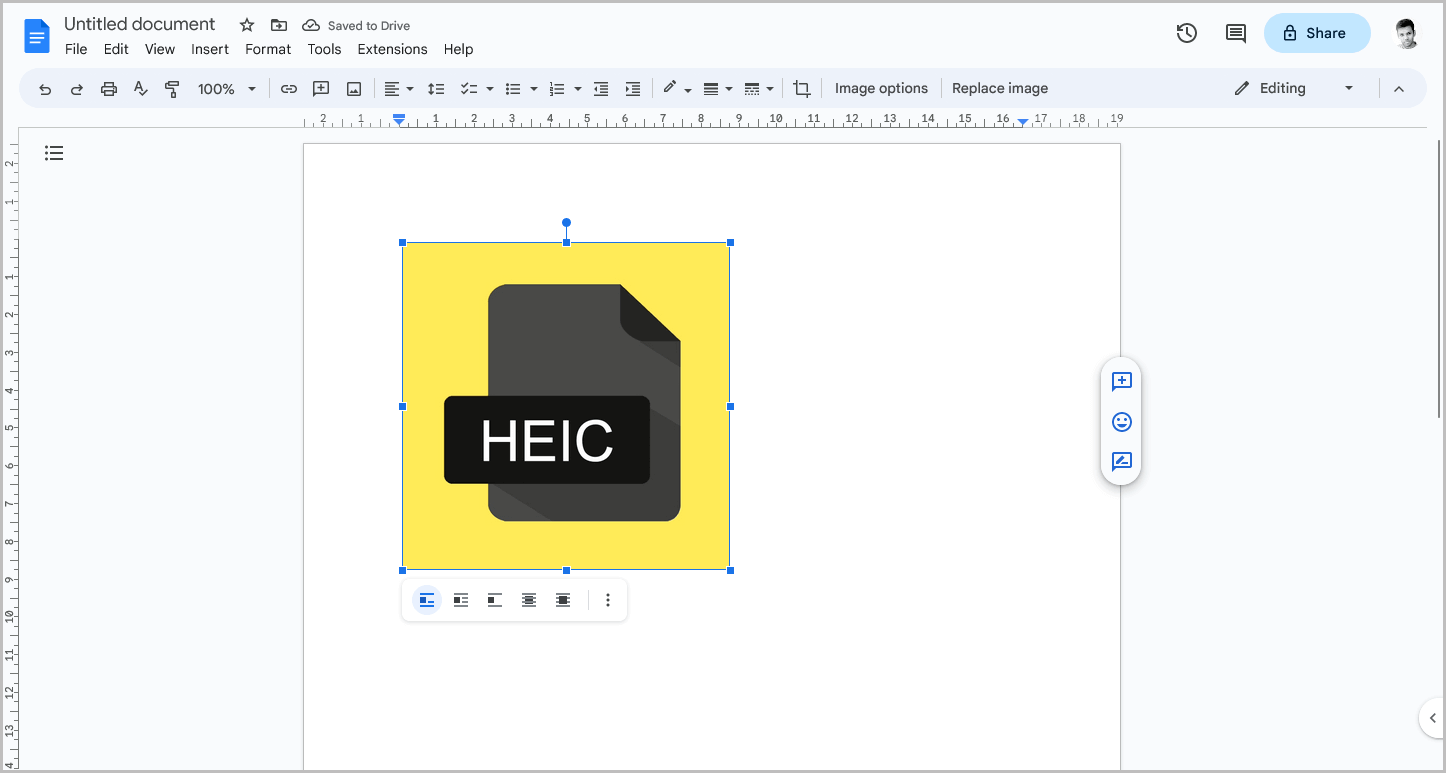
One benefit of using this method to insert images is that you can insert almost any image type into your document, regardless of its file type.
Additionally, you don’t have to worry about the images disappearing from your document if you delete the image files from your Google Drive.
I personally tested this by deleting the HEIC image file from my Google Drive and also from the trash bin, and to my surprise, the image was still present in the document.
Conclusion
In conclusion, although Google Docs does not natively support HEIC image types, it is possible to insert them into your documents by first uploading them to Google Drive.
Here are the steps to insert HEIC images into your Google Docs document:
- Upload the HEIC image to Google Drive
- Click “Insert” in Google Docs
- Select “Image” and then “Drive”
- Choose the HEIC image
- Click “Insert”
By following these simple steps, you can successfully insert HEIC images into your Google Docs document without having to convert them to another format.
This method also allows you to insert almost any image type into your document, regardless of its file type.

