Do you have a Google Docs document with too much header space?
Many people find that the header space takes up valuable real estate and makes the document look cluttered.
Fortunately, there is an easy way to remove header space in Google Docs.
In this tutorial, you’ll learn how to remove header space in Google Docs, step-by-step.
Also read: (opens in new tab)
Google Docs Header on First Page Only
How to Delete Page Break in Google Docs
How to Group Images in Google Docs
How to Create Vertical Line in Google Docs
How to Remove Header Space in Google Docs
Step 1: Double-click in the header area
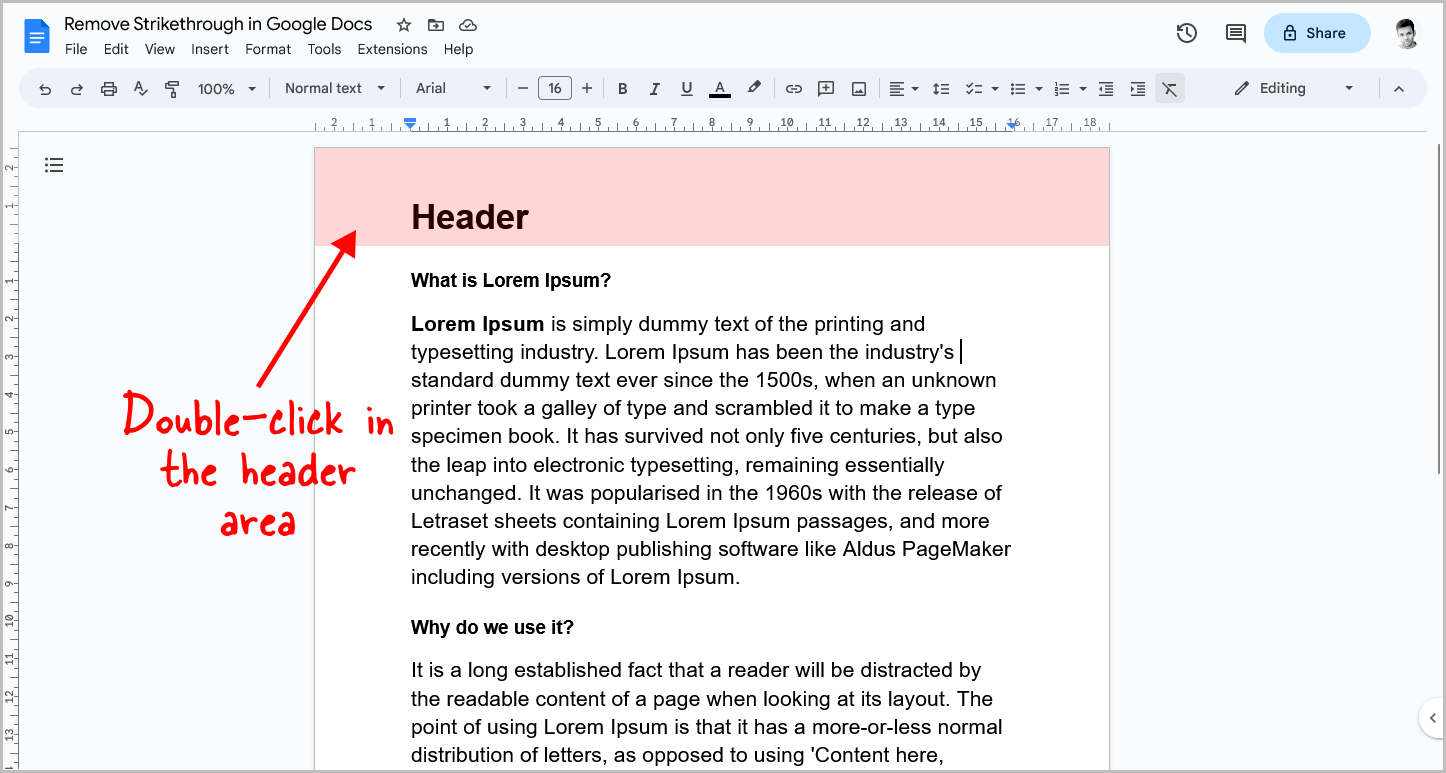
The first step is to remove any unwanted text in the header area.
To do so, double-click anywhere on the header area of the document.
This will activate the header area for the document.
Step 2: Choose “Header format” from the “Options” menu
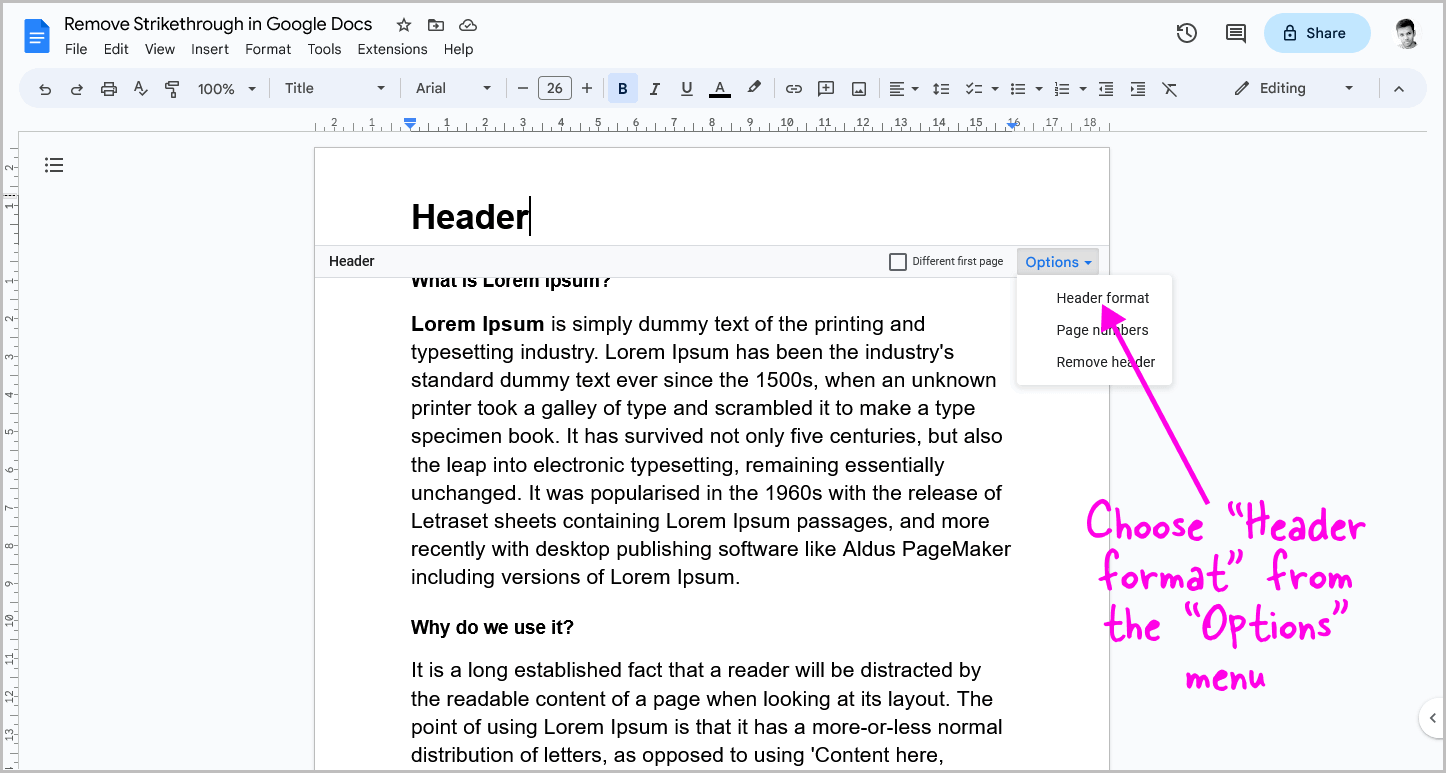
Once you activate the Header area, a rectangle box will appear at the top of the page.
In the lower right corner of the Header area, you’ll see an “Options” menu.
Click on the menu and select “Header format” from the drop-down menu.
Step 3: Set the header margin to “0”
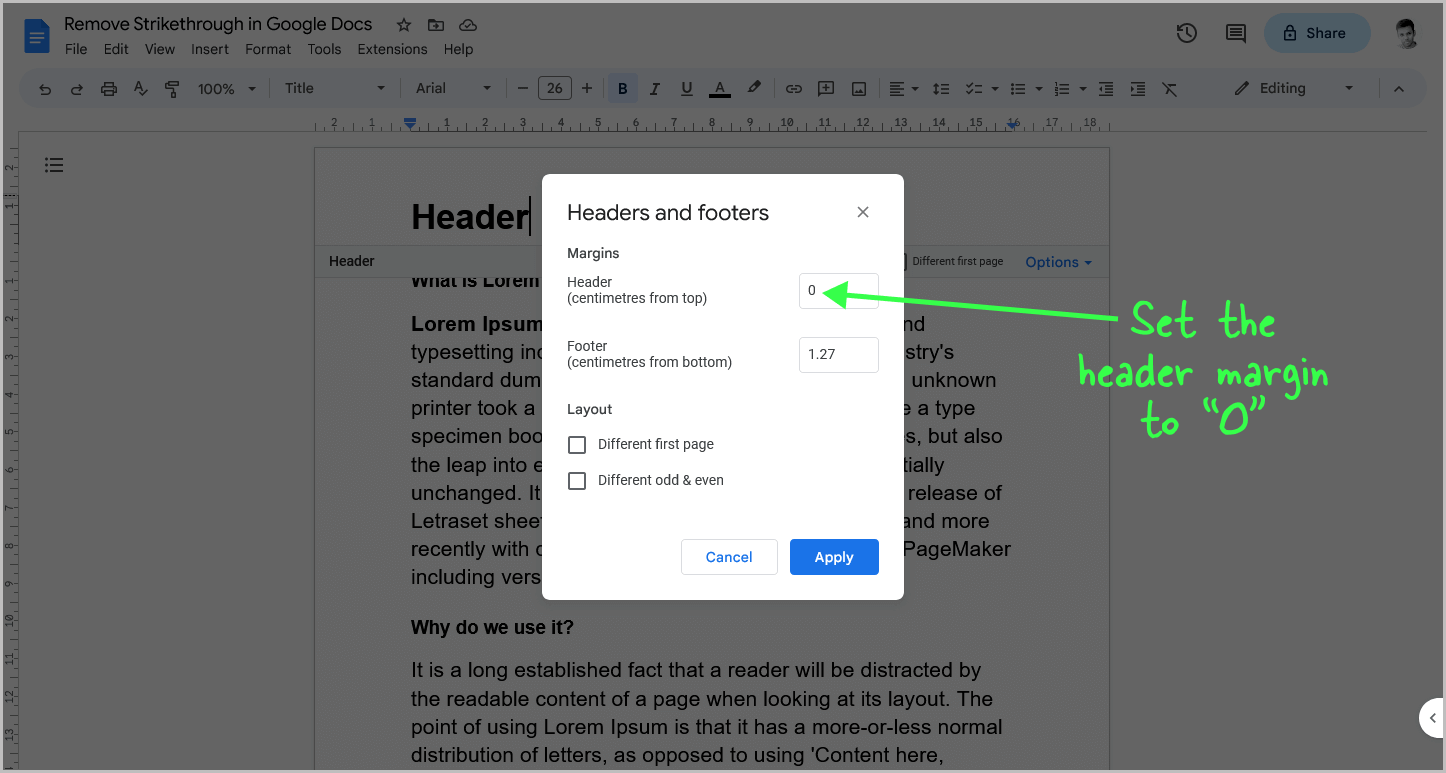
You will now see the “Headers and Footers” pop-up window.
By default, the header and footer margins are set to 1.27 cm.
Click inside the “Header” margin area and enter “0” to remove the margin completely.
Press “Apply” and proceed to the next step.
Step 4: Select “Remove header” from the “Options” menu
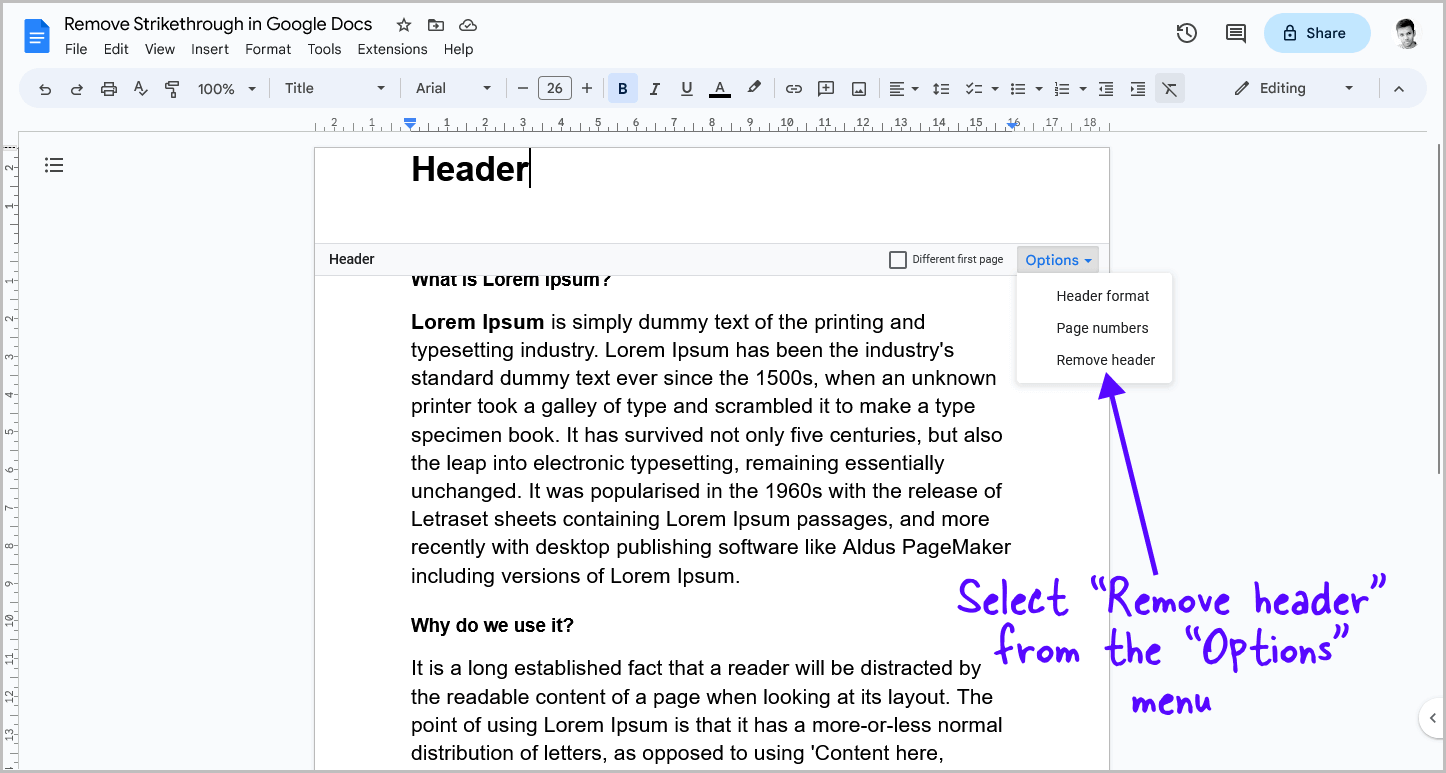
Now that we have reduced the header margin, it’s time to remove the header.
To do this, click on the “Options” menu and select “Remove header”.
This will remove the header from the document.
Step 5: Go to File > Page setup
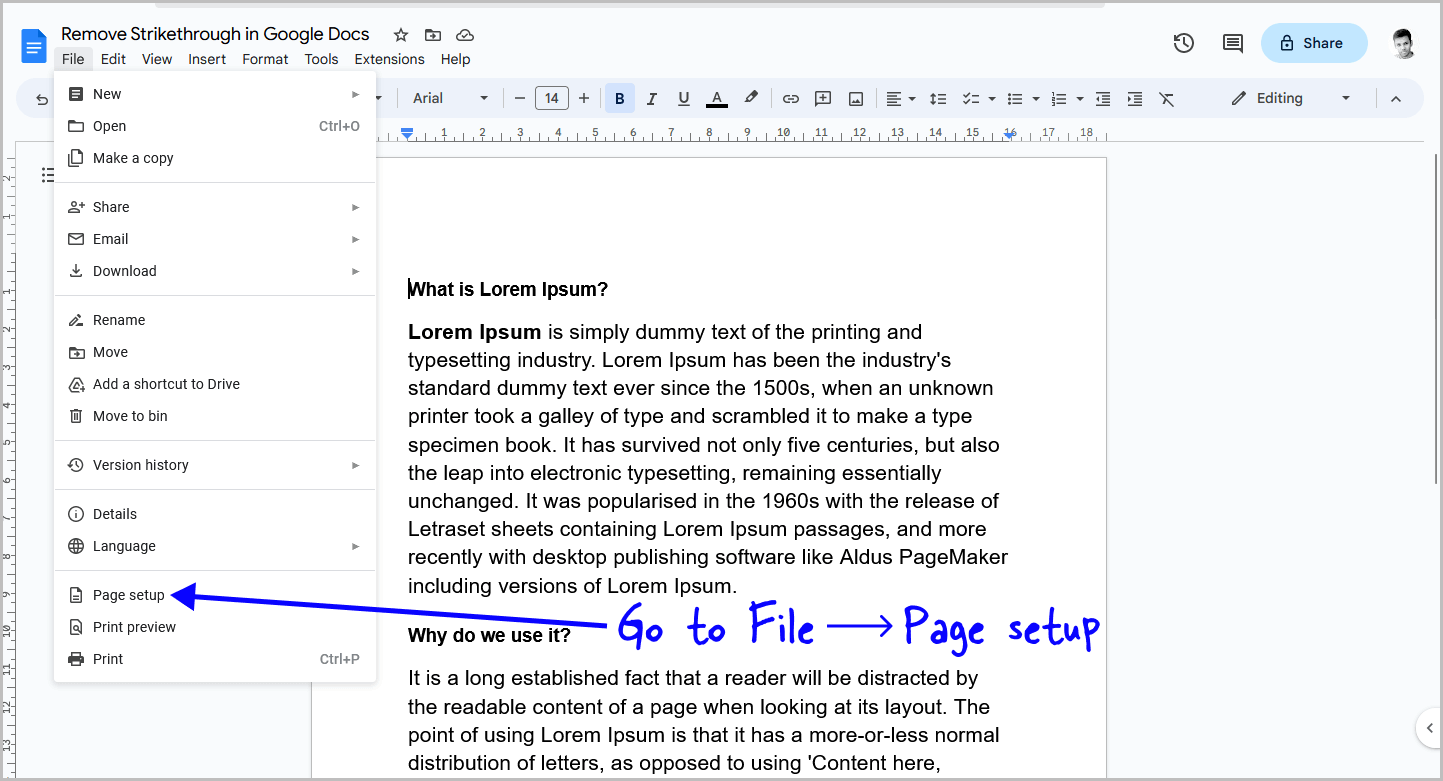
Even after removing the header, you may still see white space at the top of the document due to page margins.
To completely remove the header space, you can eliminate the top margin.
To do so, click on the “File” option and select “Page setup” from the menu.
Step 6: Set the top margin to “0” and click “OK”
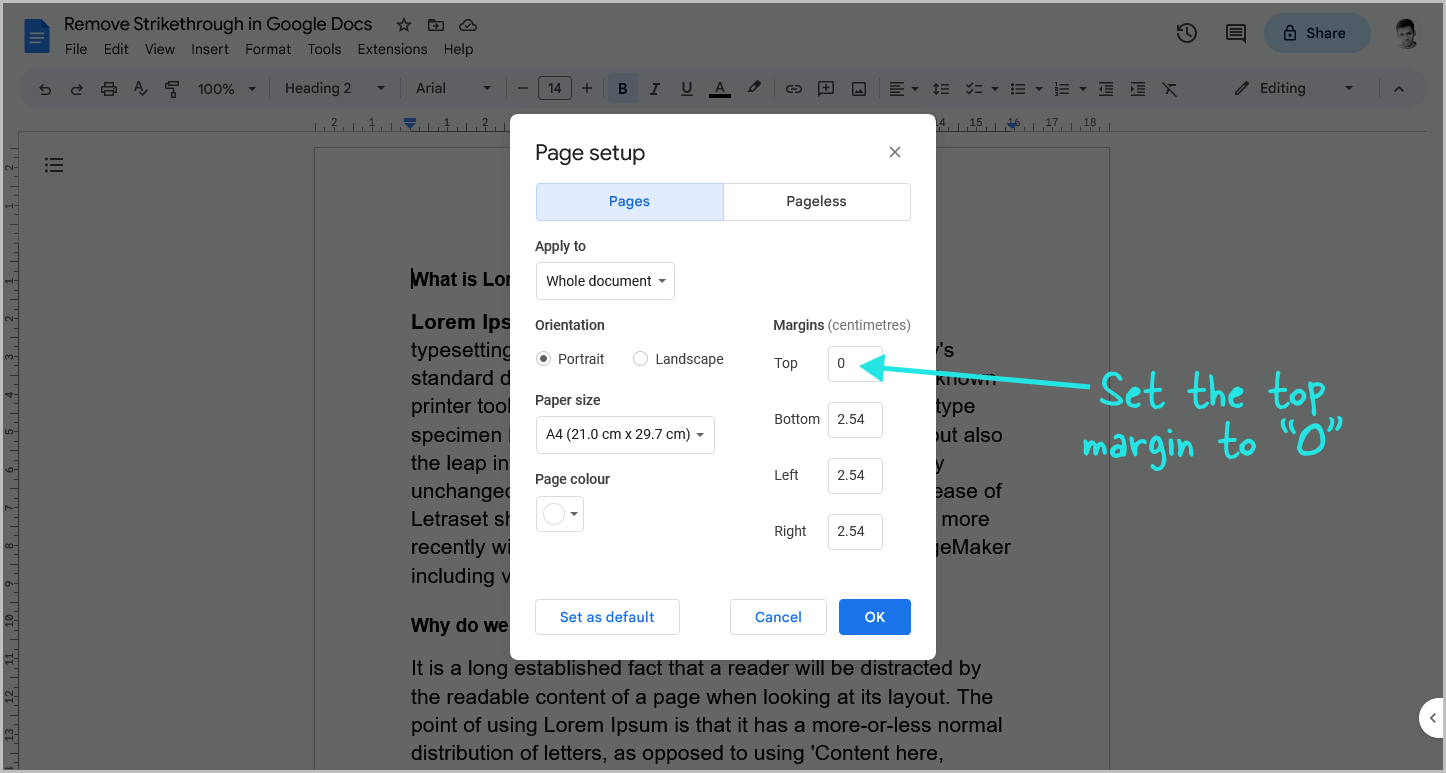
You will now see the “Page setup” pop-up. In the “Margins” section of the pop-up, the “Top” margin is currently set to “2.54 cm” or “1 inch”.
Click inside the “Top” margin area and enter “0” into the box.
Finally, press “OK” to confirm the change.
The header area will now be completely removed.
Alternatively, you can simply follow steps 5 and 6, but following the initial steps will also remove the header margin, giving you extra space at the top of the document.
FAQs
How do I get rid of top spacing in Google Docs?
To remove the top spacing in Google Docs, follow these steps:
- Set the header margin to “0”.
- Remove the header.
- Set the top margin of the page to “0”.
Why can’t I remove the header in Docs?
If you have removed the header and are still seeing the header space at the top of the document, you need to set the top margin of the page to “0”.
How to reduce header space in Google Docs?
To reduce the header space on a page, you can set the header margin to “0”. Additionally, setting the “Top” page margin to “0” can further reduce the space.
How to take off header on Google Docs?
To take off the header in Google Docs, set the “Header” margin to “0” and then set the top page margin to “0”.
Summary
Removing header space in Google Docs is a quick and easy process that can help make your documents look more polished and professional.
Here’s how to remove header space in Google Docs:
- Double-click in the header area to activate it.
- Choose “Header format” from the “Options” menu.
- Set the header margin to “0”.
- Select “Remove header” from the “Options” menu.
- Go to File > Page setup.
- Set the top margin to “0” and click “OK”.

