Do you want to know how to show invisibles in Google Docs?
When you create a document in Google Docs, there are many invisible characters, such as line breaks, paragraph marks, and spaces, that can create formatting issues.
Since these characters are invisible, you cannot see them.
Fortunately, with the new update, Google Docs has introduced a feature that enables you to view these invisible characters and delete unwanted ones.
In this guide, we will show you how to show invisibles in Google Docs, helping you to improve the formatting of your document.
Also read: (opens in new tab)
How to Select Multiple Images in Google Docs
How to Lock an Image in Google Docs
How to Switch Back to the Old Layout in Google Docs
Using a Picture as a Bullet Point in Google Docs
How to Show Invisibles in Google Docs
Step 1: Open the document
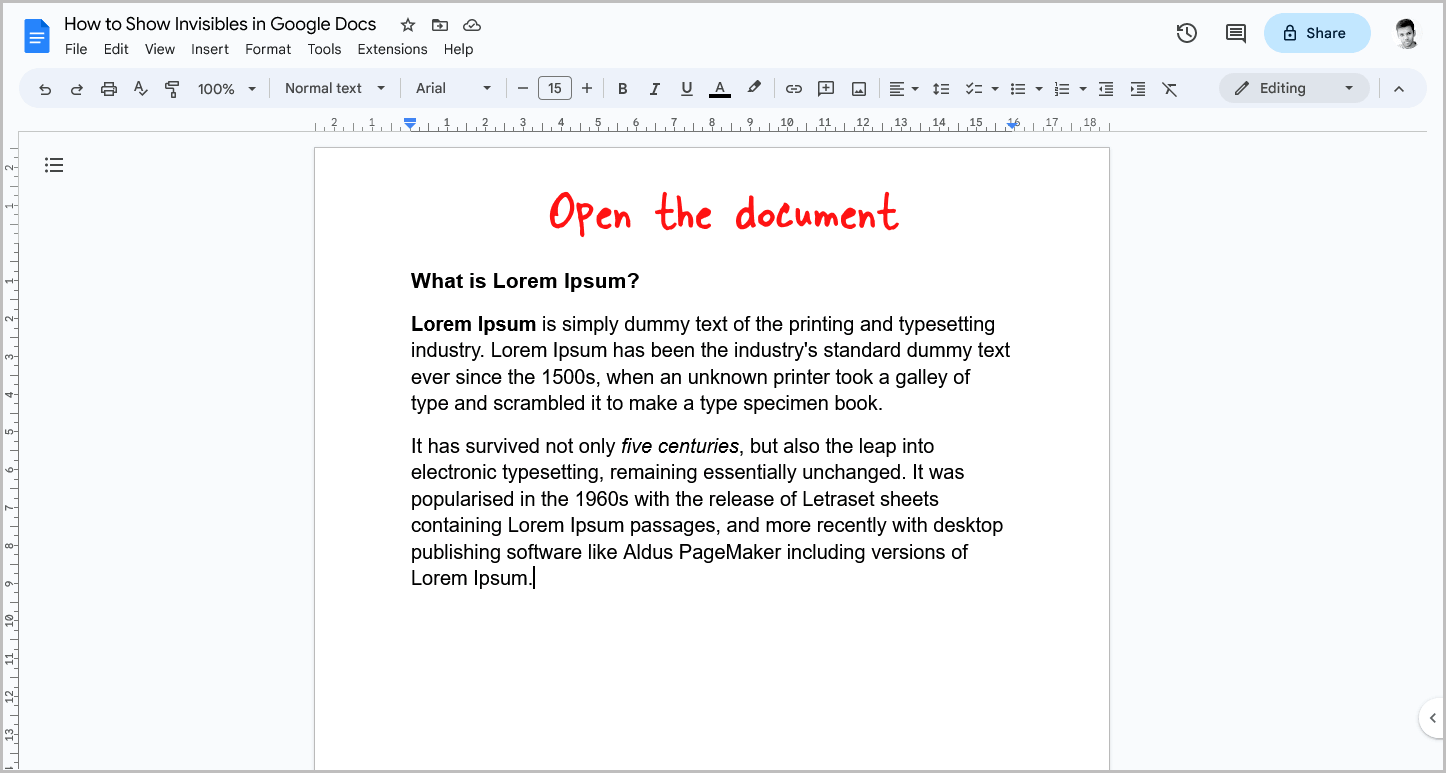
The first step is to open the Google Doc in which you want to view the invisible characters.
To do this, go to docs.google.com and select the document of your choice.
Step 2: Click on the “View” option from the top menu
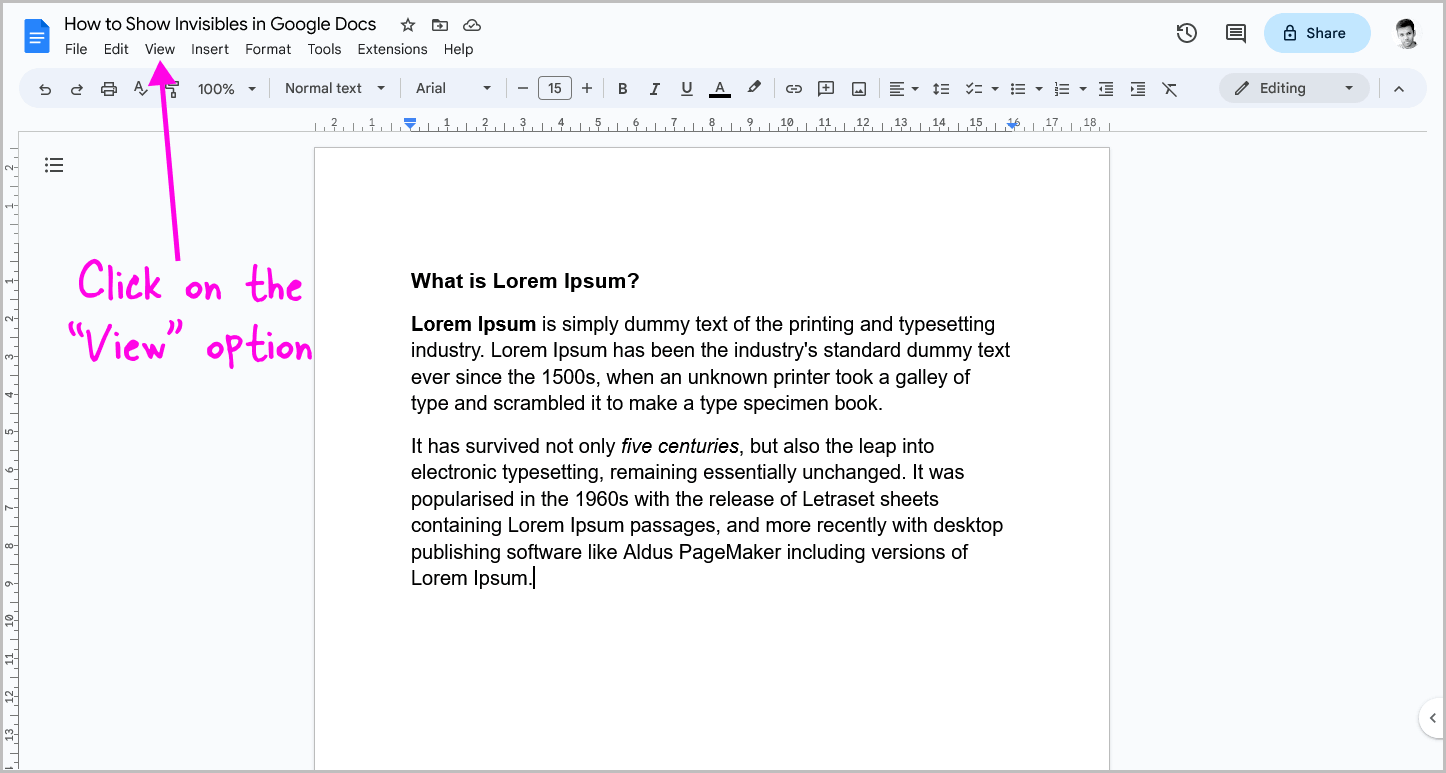
After opening the document, you will see a menu above the toolbar.
This menu contains various options.
Select the “View” option from the top menu.
Step 3: Select “Show non-printing characters”
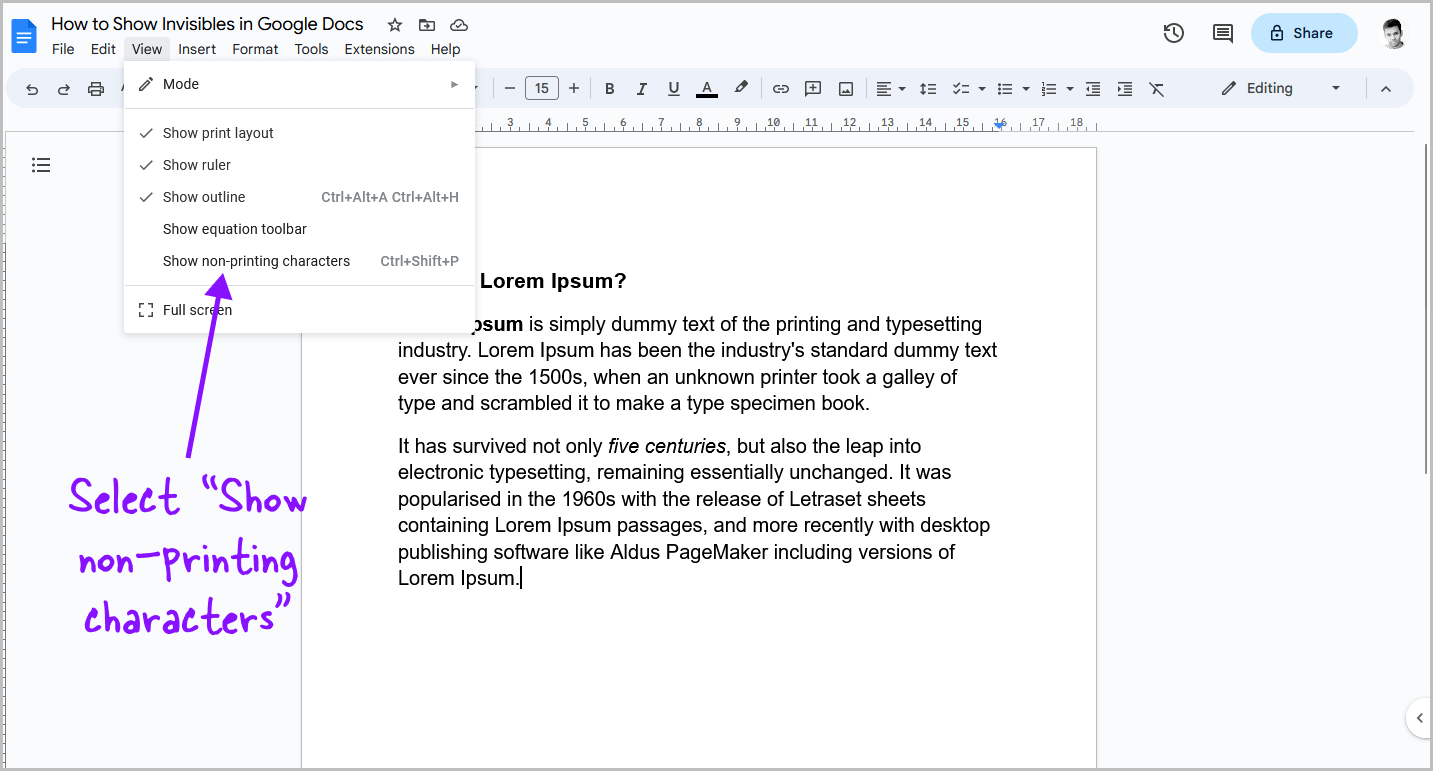
After clicking on the “View” option, a drop-down menu with various options will appear.
Select “Show non-printing characters” from the menu.
Make sure that there is a check mark next to the option in the drop-down menu. This indicates that the option is enabled.
Alternatively, you can use the keyboard shortcut “Ctrl+Shift+P”.
Step 4: Delete any unwanted characters
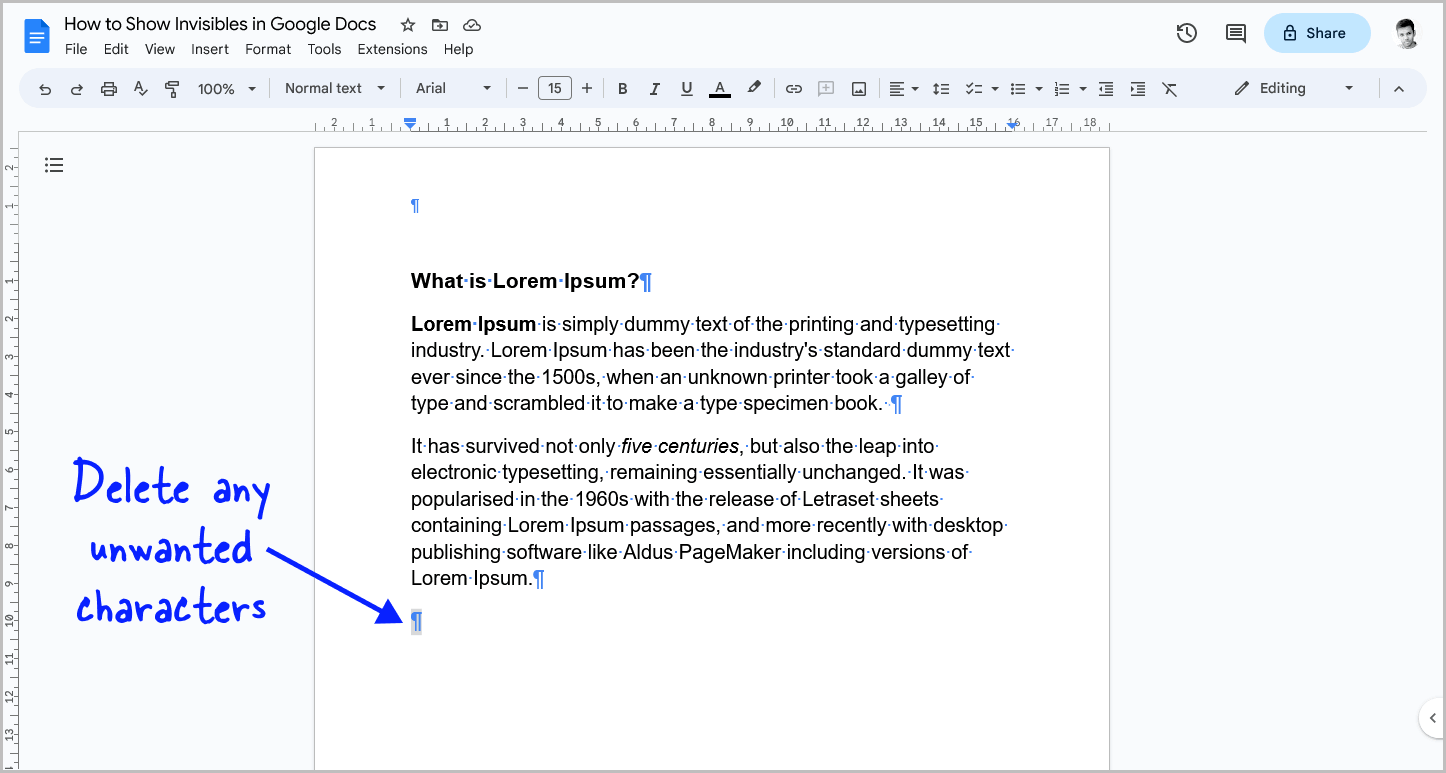
Now, if you look closely, your document will show all the characters that were invisible.
Go through the document and remove any unwanted characters.
If you accidentally delete something, simply press Ctrl+Z to undo the action.
Step 5: Select “Show non-printing characters” again to hide the characters
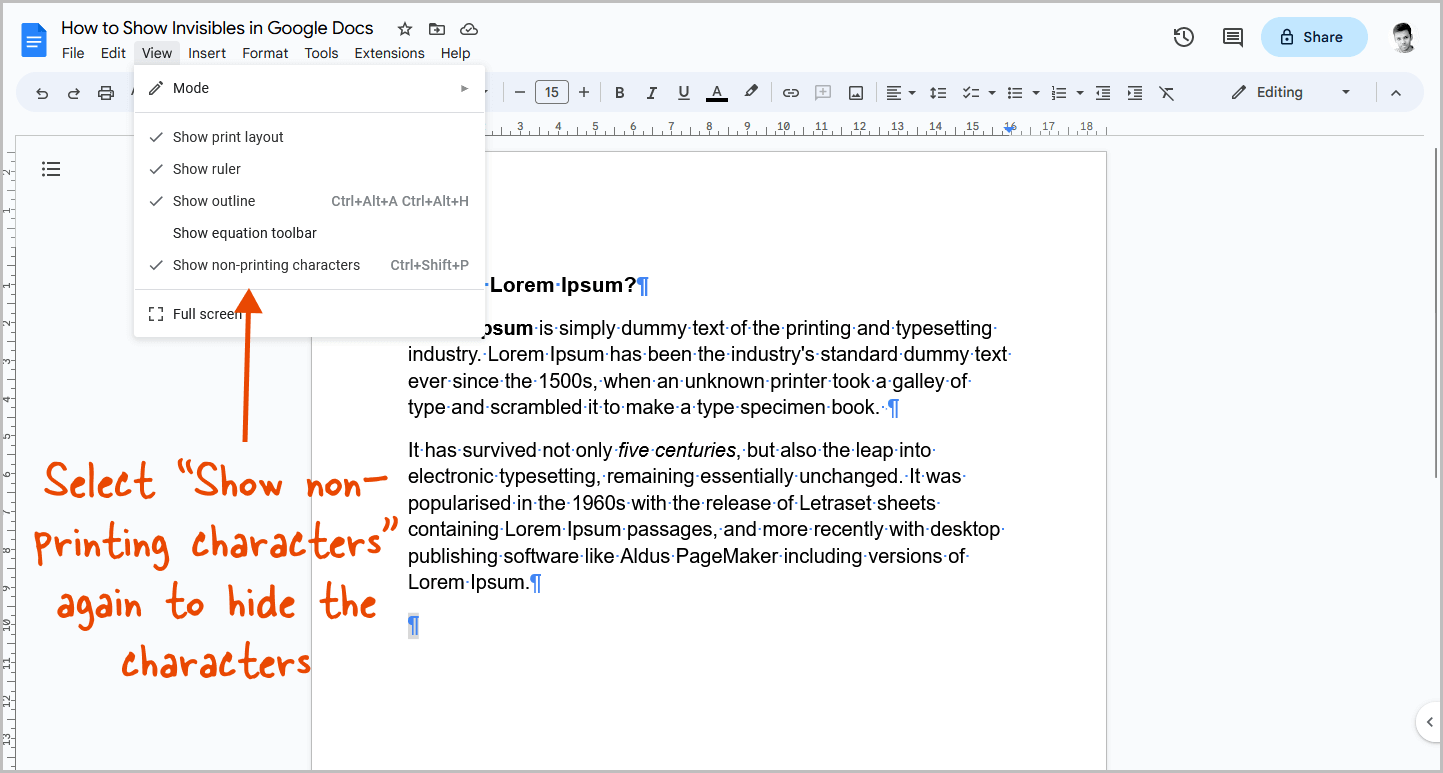
Once you have deleted the unwanted characters, it’s time to hide them again.
To do this, go to “View” and select “Show non-printing characters” from the drop-down menu.
Conclusion
In this guide, we have shown you how to show invisibles in Google Docs.
By following these simple steps, you can easily view and delete unwanted invisible characters in your document, improving the formatting and readability of your work.
Here is a quick summary of the steps:
- Open the document in Google Docs.
- Click on the “View” option from the top menu.
- Select “Show non-printing characters” from the drop-down menu.
- Delete any unwanted characters.
- Select “Show non-printing characters” again to hide the characters.

