Do you want to know how to blur an image in Google Slides?
When creating a slide in Google Slides, if you insert an image or any other element and want to blur a certain area of the image, you may need to use the blur tool.
However, there is no blur tool available in Google Slides.
Some people use the “Opacity” tool, which can make the image look less opaque, but that is not the correct way to blur an image.
Instead, follow the workaround explained in this guide.
In this tutorial, you will learn how to blur an image in Google Slides.
Also read: (opens in new tab)
Crop Video in Google Slides
Google Slides Supported Image Formats
Google Slides Error Rendering Shape
How to Share Google Slides in Presentation Mode
Google Slides Semi Transparent Shape
How to Lock an Image in Google Slides
How to Blur an Image in Google Slides
Step 1: Go to Onlinepngtools.com/blur-png

Since Google Slides does not have a built-in blur tool, we will need to use an external tool to achieve this effect.
There are many online blur tools available, but I prefer using Onlinepngtools.com/blur-png.
This tool is free and easy to use.
Click on the link above to go directly to the tool page.
Step 2: Upload the image you want to blur
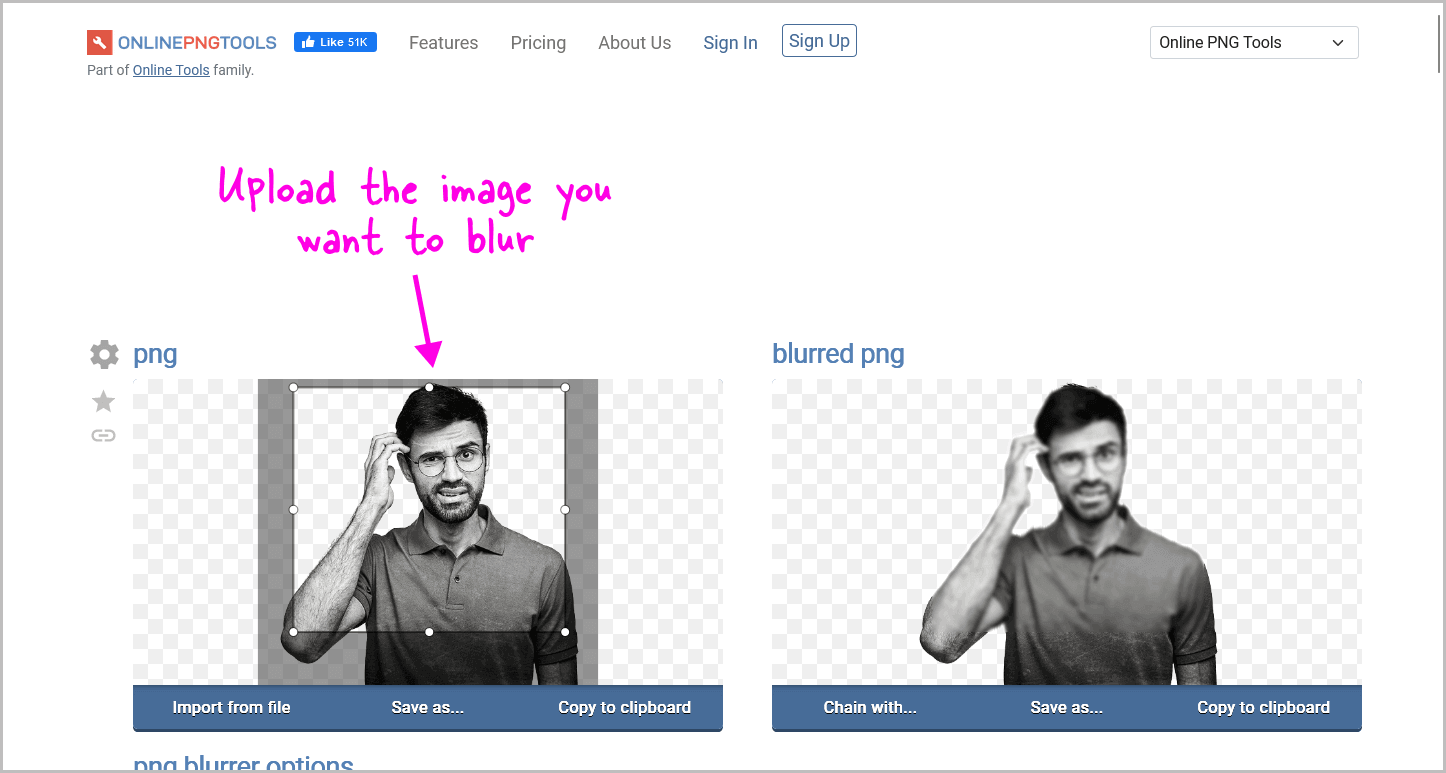
Here, you will see two boxes: a grey box on the left and a blue box on the right.
Drag and drop the image that you want to blur into the grey box.
If your image is in a slide and you want to download it, simply click on the “Slideshow” button in the top right corner of the page. Then, right-click on the image you want and select “Save Image as…”. Finally, click on “Save” to download the image.
Step 3: Select the area you want to blur
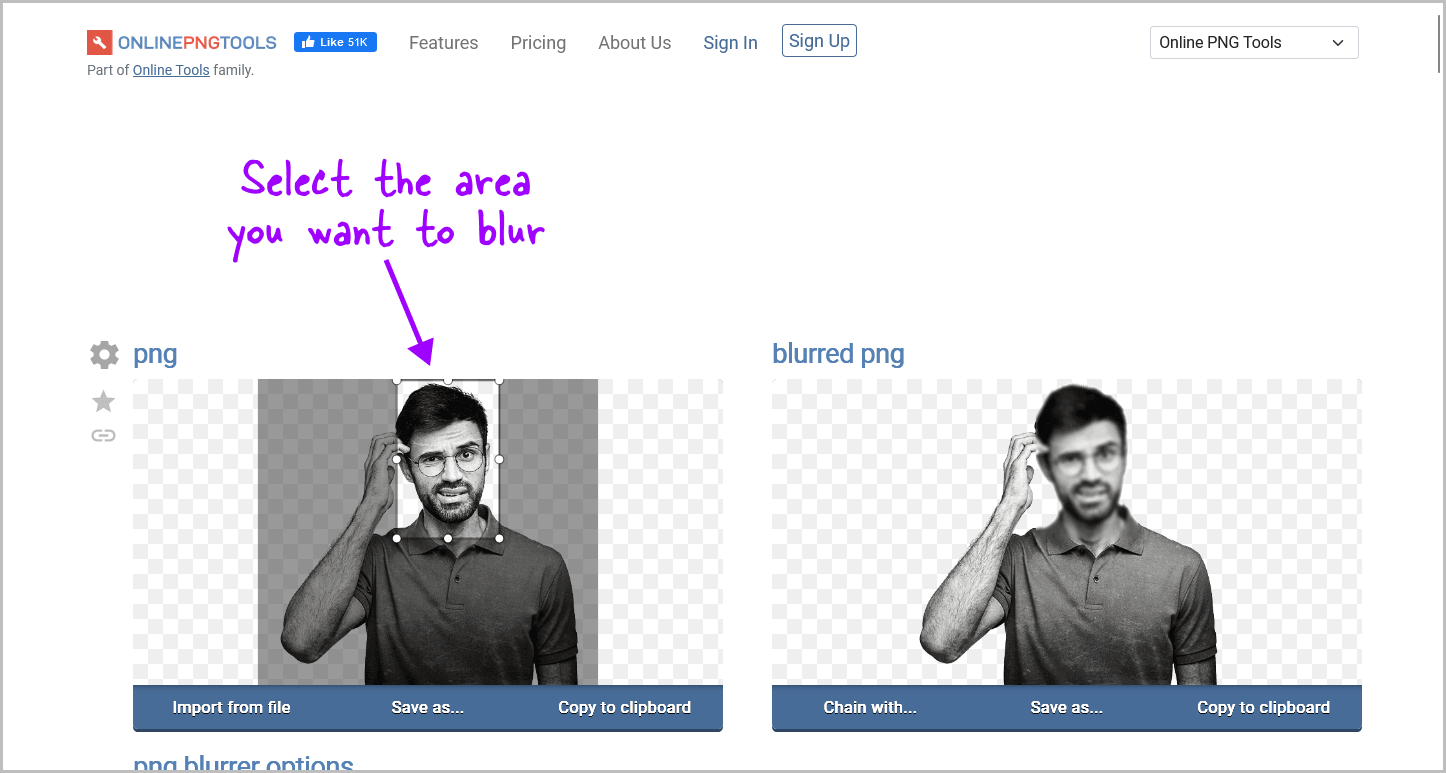
You will see the crop tool.
Use this tool to select the area of the image that you want to blur.
If you want to blur the entire image, select the whole image.
The results will be shown in real-time in the blue box on the right.
Step 4: Adjust the strength of the blur
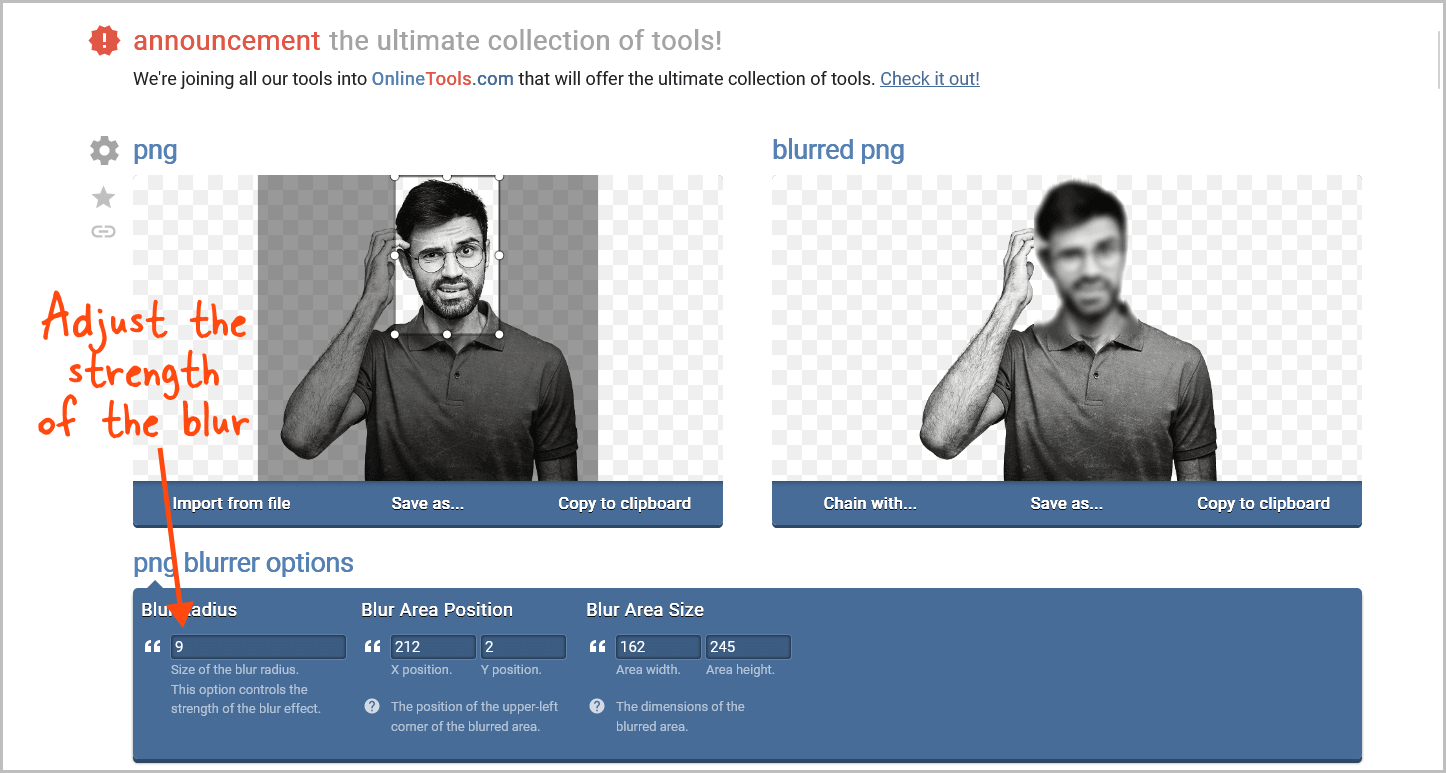
Below the grey box, you will see the “png blurrer options” section.
There is a box under the text “Blur Radius”.
By default, the strength is set to “10”.
However, you can adjust the blur strength by changing this value.
Enter a strength value of your choice to increase or decrease the blur strength of the selected part.
Step 5: Preview the blurred image and click “Save as…”
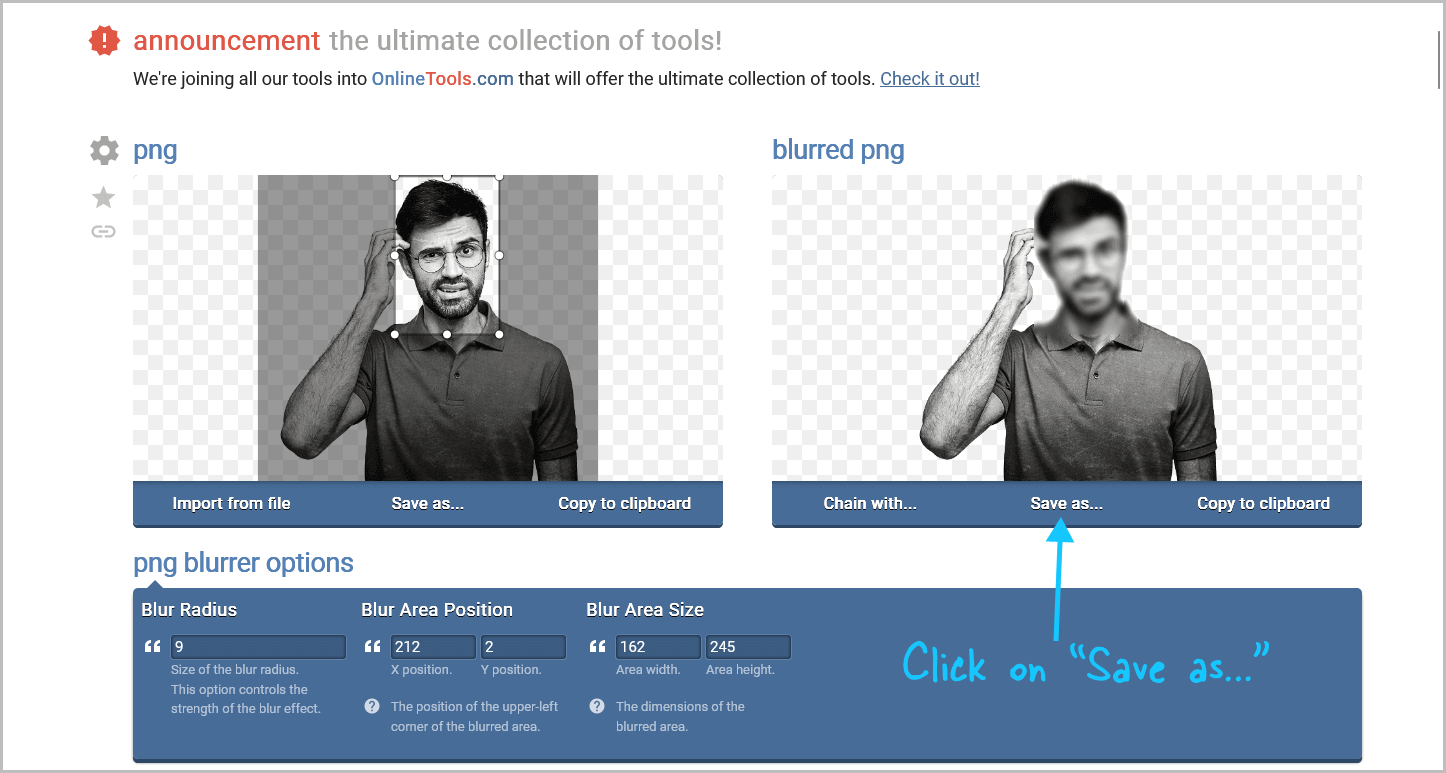
Now, view the final blurred image in the blue box on the right.
If you are satisfied with the changes, click on the “Save as…” option.
If desired, you can adjust the blur strength and area to achieve the desired results.
Step 6: Click the “Download” button and then upload the image to your slide
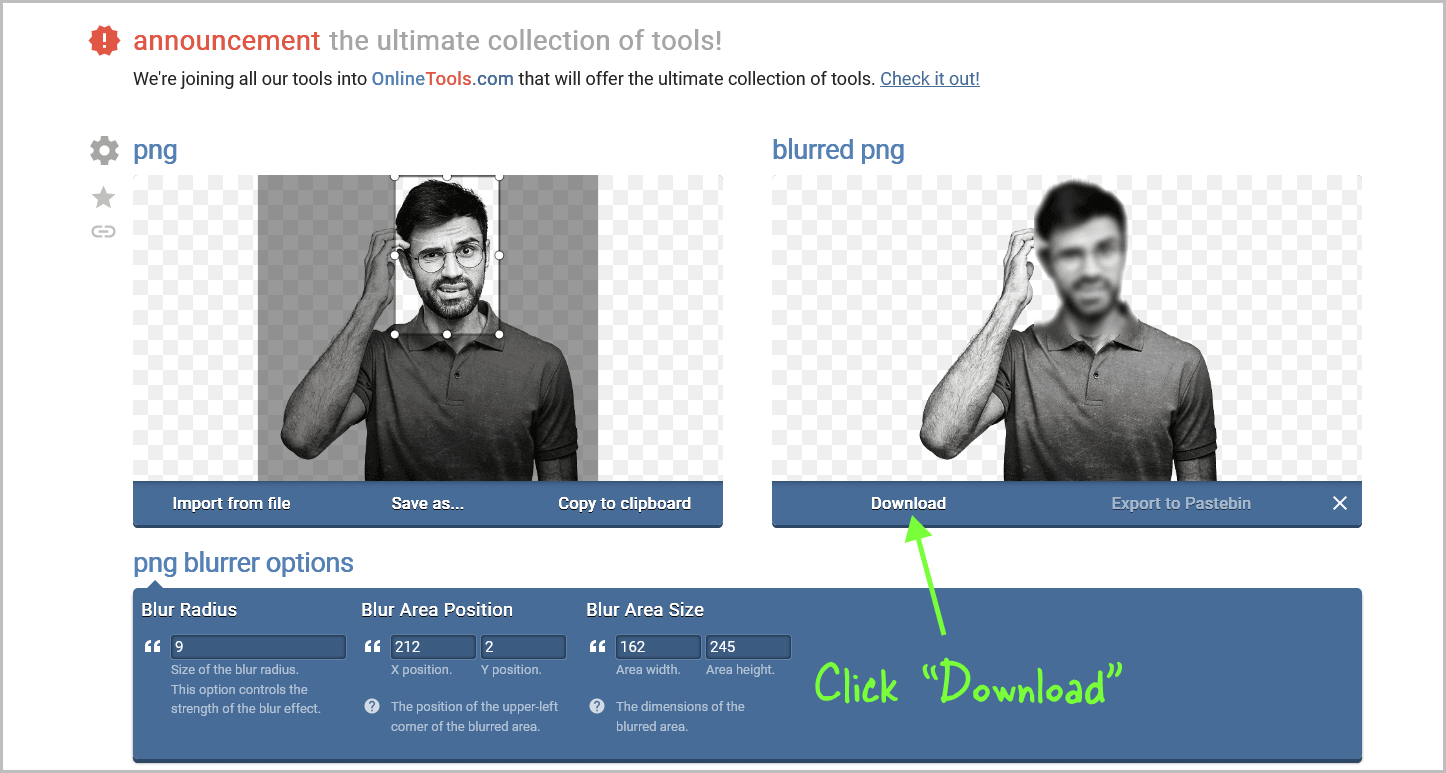
Finally, click on “Download” to save the image to your device.
You can now drag and drop the blurred image onto your slide.
Summary
Blurring an image in Google Slides may seem difficult at first, but by following these simple steps, you can achieve the desired effect quickly and easily.
Here’s how to blur an image in Google Slides:
- Go to Onlinepngtools.com/blur-png
- Upload the image you want to blur
- Select the area you want to blur
- Adjust the strength of the blur
- Preview the blurred image and click “Save as…”
- Click the “Download” button and then upload the image to your slide
With these steps, you can now effectively blur any part of your image in Google Slides.

