Do you want to learn how to add a header to the first page of your Google Docs?
Normally, when you add a header to the first page, it automatically shows up on all the other pages too.
This can be frustrating if you only want the header on the first page.
But guess what?
There’s a simple solution!
In this article, I’ll show you how to insert a header on just the first page of your Google Docs, step by step.
Also read: (opens in new tab)
How to Make Lined Paper in Google Docs
Using a Picture as a Bullet Point in Google Docs
How to Double Underline in Google Docs
How Many Lines Are on a Google Doc
Google Docs Header on First Page Only
To put header only on first page in google docs, delete current headers. Click Insert > Headers and footers > Header, enable “Different first page”, add the header. On the second page, double-click the header, select Format > Headers and footers > Remove header.
Step 1: Remove any existing headers
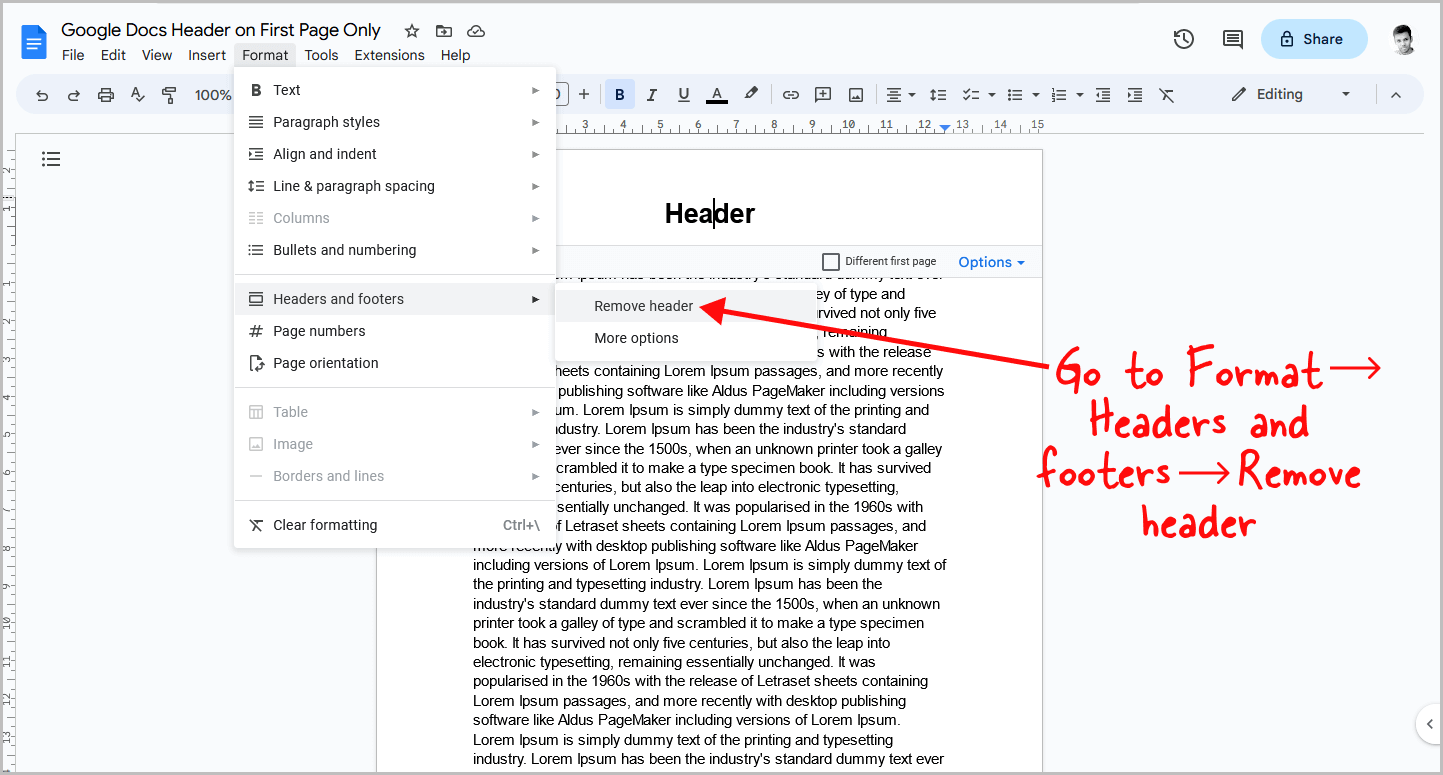
Let’s start by removing any existing headers in your document.
To do this, double-click on the header located on the first page.
Next, navigate to the “Format” menu and select “Headers and footers”.
From there, choose the option to “Remove header”.
This action will remove all headers from the document.
Now that the headers have been successfully removed, you can move on to the next step.
Step 2: Go to Insert > Headers and footers > Header
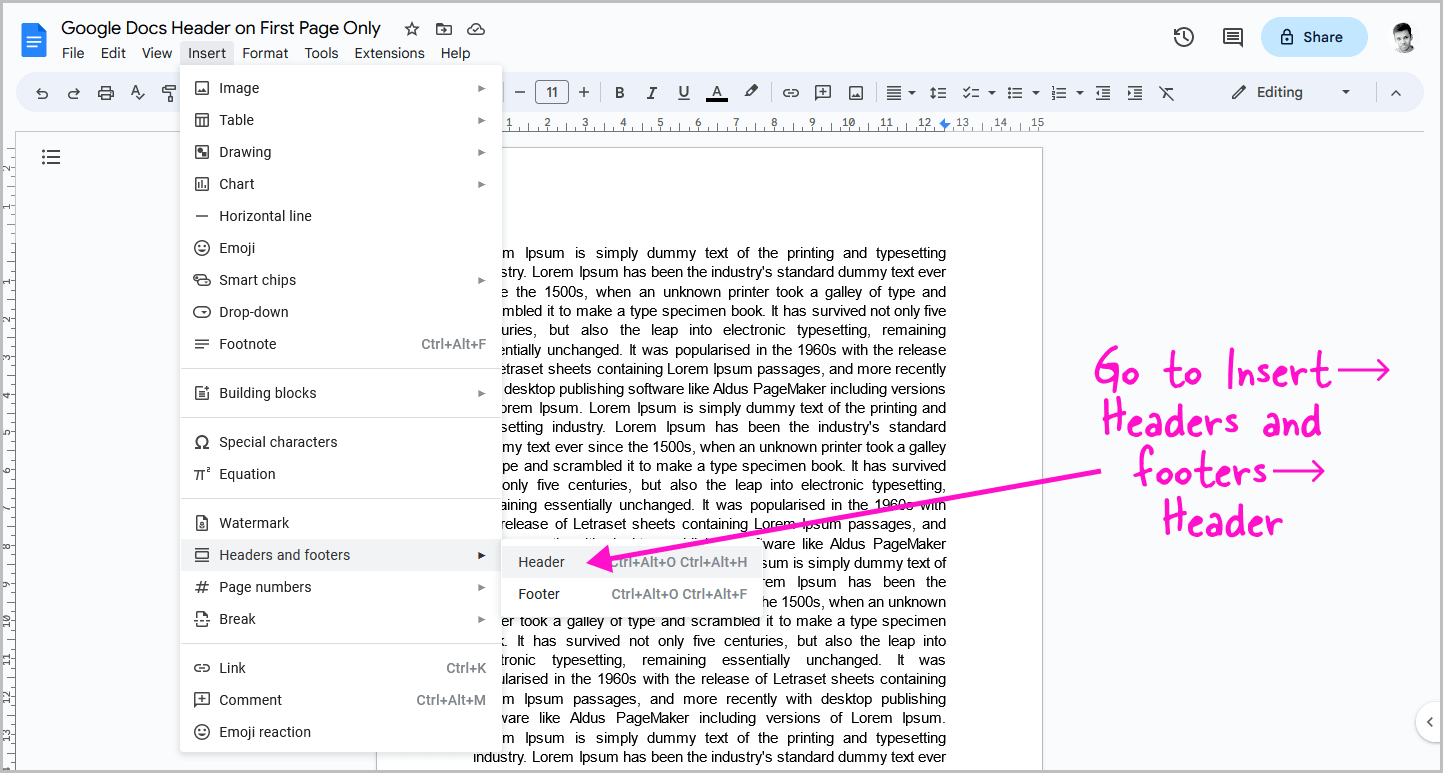
To begin, navigate to the first page of your document.
Next, locate and click on the “Insert” option in the top menu.
From the dropdown menu that appears, choose “Headers and footers.”
Finally, select the “Header” option.
At this point, you will notice the header appearing on the first page.
Alternatively, you can simply double-click on the header area of the page to make changes to the header content.
Step 3: Enable the “Different first page” option
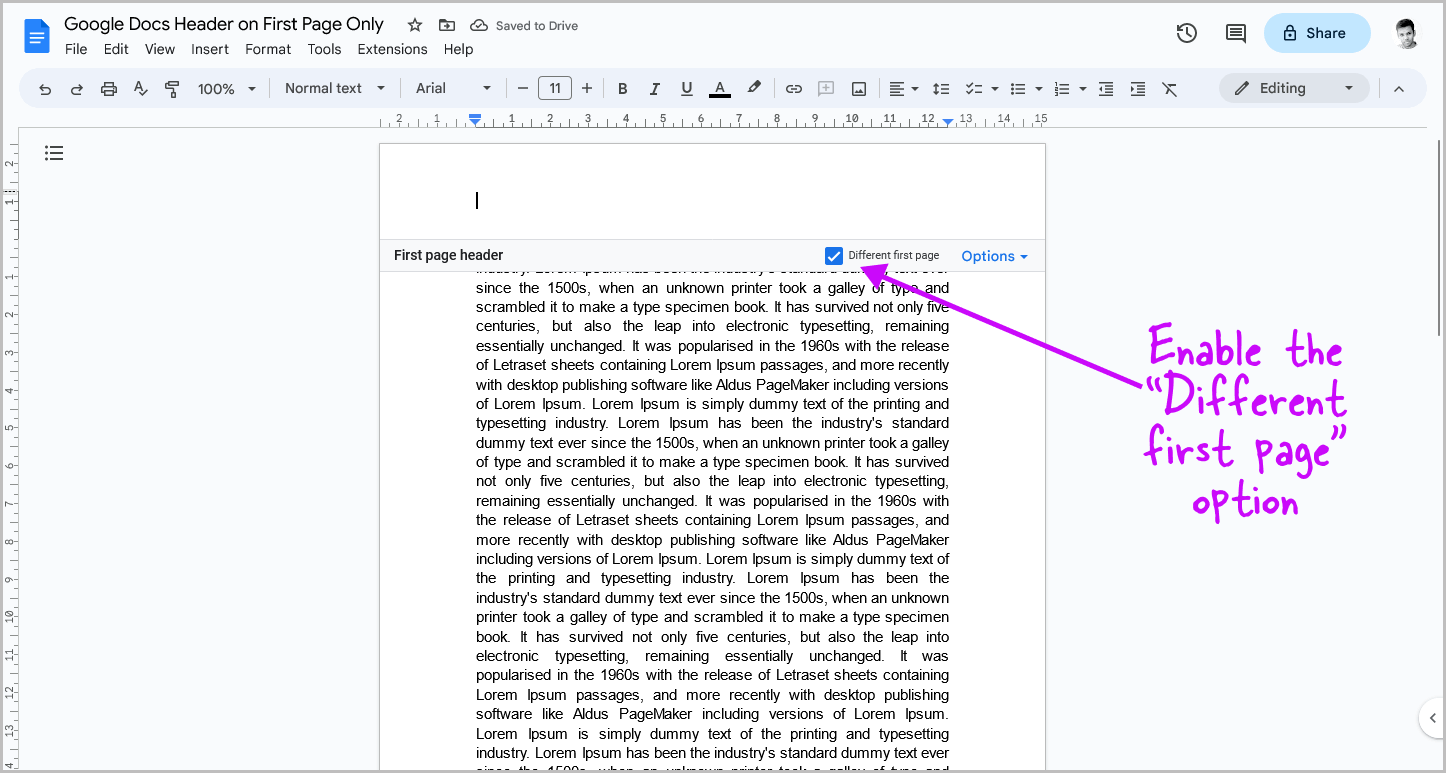
Now, you will notice the Header area on the page.
Towards the bottom right of the header box, you will find a checkbox labeled “Different first page.” Simply click on this checkbox to enable it.
Once you have done that, you can proceed to the next step.
Step 4: Insert the header on the first page
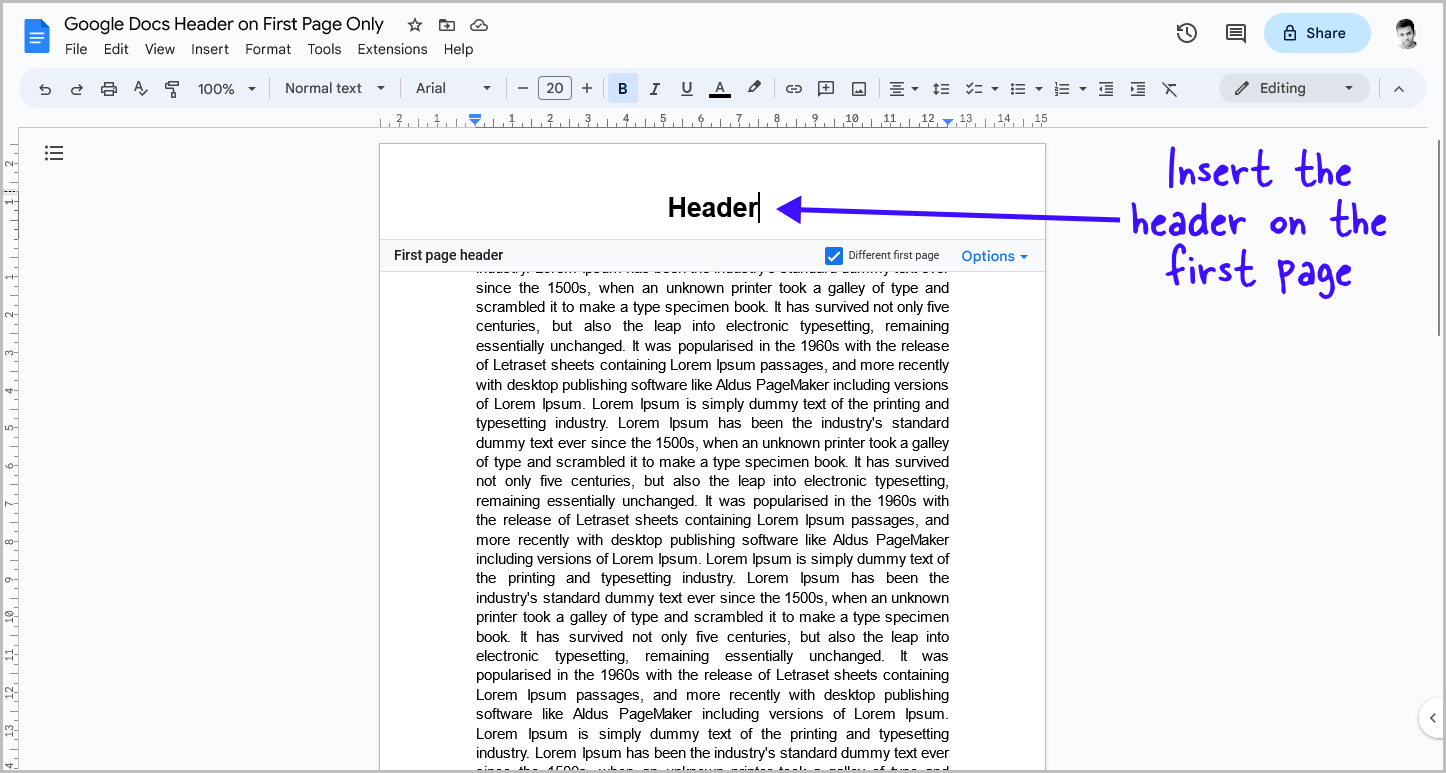
Now, let’s insert the header on the first page.
Simply click anywhere within the header area and start typing your desired header text.
You can format the header just as you would with regular text in Google Docs.
Step 5: Double-click the header on the second page
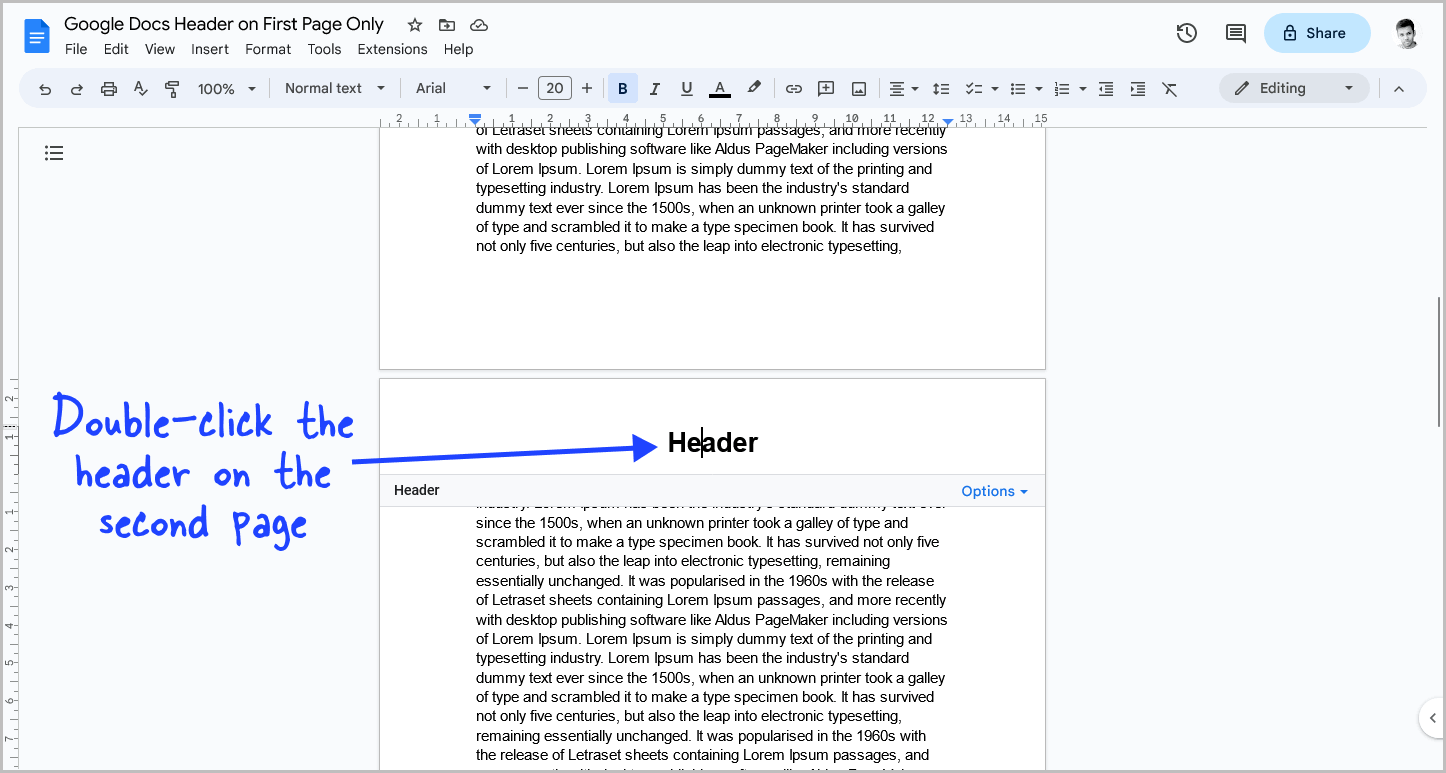
You will notice that the header has been automatically inserted on all the remaining pages of your Google Docs document.
Now, scroll down to the second page and double-click on the header area.
By doing so, you are indicating to Google Docs that you want to make changes to the header specifically on the second page.
Now, you can proceed to the next step.
Step 6: Go to Format > Headers and footers > Remove header
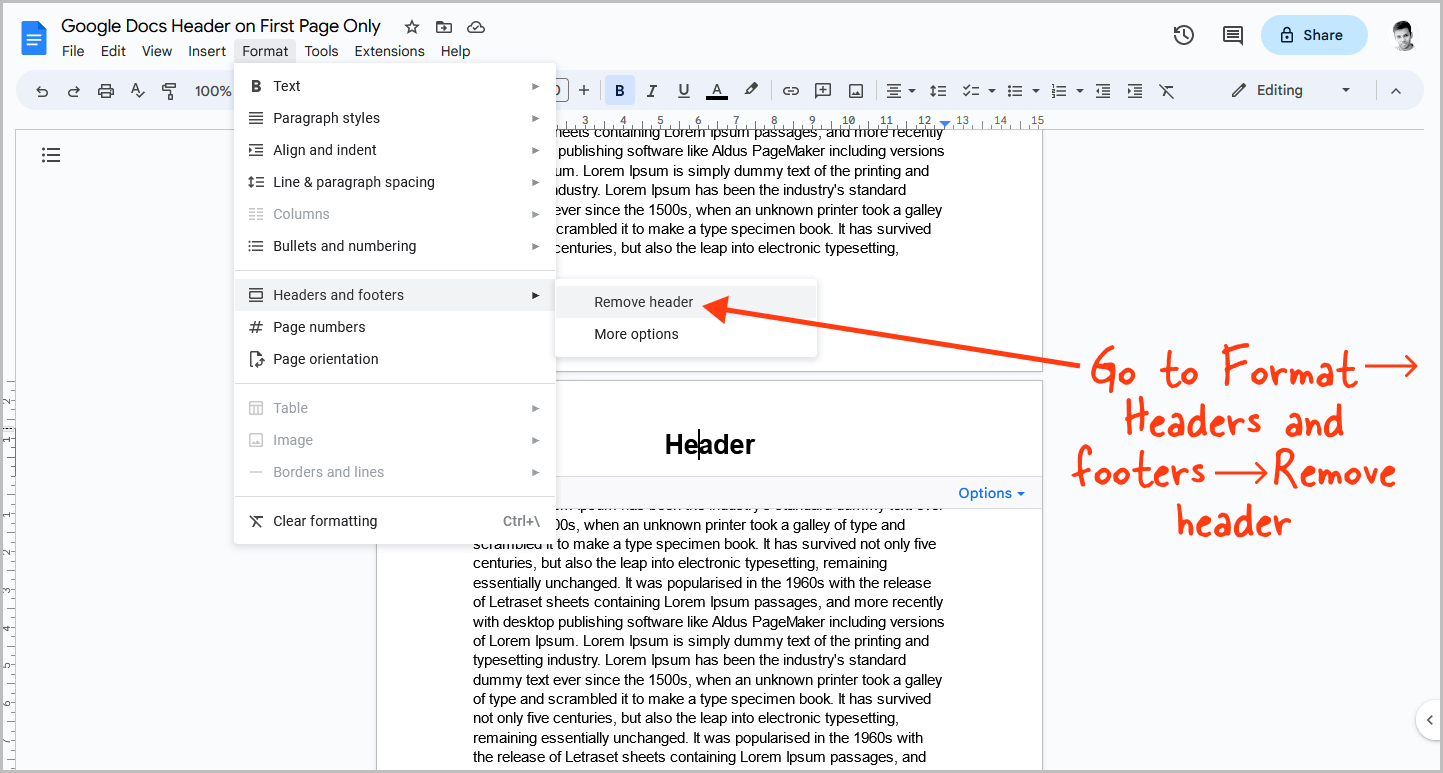
After double-clicking on the header of the second page, navigate to the top menu and click on the “Format” option.
From the drop-down menu, select “Headers and footers.”
Finally, choose the “Remove header” option from the menu.
You will notice that the header from the second page is now removed, along with the headers from the subsequent pages.
However, if you scroll up, you will observe that the header on the first page is still intact.
FAQs
How to Make Header Only on First Page Google Docs?
To make the header appear only on the first page in Google Docs, follow these steps: double-click on the header area of the first page, enable the “Different first page” option and then enter the header. Finally, remove the header on the second page.
How to Only Have Header on First Page Google Docs?
To only have a header on first page, Google Docs, enable the “Different first page” option before typing the header. Then, ensure to remove the header from the second page of the document.
How to Put Header Only on First Page Google Docs?
Here is how to put the header only on the first page in Google Docs:
- Remove any existing headers.
- Go to Insert > Headers and footers > Header.
- Enable the “Different first page” option.
- Insert the header on the first page.
- Double-click the header on the second page.
- Go to Format > Headers and footers > Remove header.
Conclusion
In conclusion, adding a header exclusively to the first page in Google Docs is a simple process that can be achieved by following these steps:
- Remove any existing headers.
- Go to Insert > Headers and footers > Header.
- Enable the “Different first page” option.
- Insert the header on the first page.
- Double-click the header on the second page.
- Go to Format > Headers and footers > Remove header.
By implementing these steps, you can effectively create a header that appears only on the first page of your Google Docs document.

