Need lined paper for your next writing project? You’re in luck!
By following the steps below, you can quickly produce a lined paper that you can either type on or print and write on by hand.
While some people may be tempted to use the “Horizontal line” feature in Google Docs to create lined paper, this method has limitations.
For instance, you cannot modify the color or thickness of a horizontal line. Additionally, the distance between two horizontal lines is not adjustable.
Others may create the look of lined paper by inserting multiple underscore symbols, but this approach is also flawed.
Fortunately, there is a better way! In this article, we will guide you through the process of creating lined paper in Google Docs.
Our method will allow you to customize the lines to your desired thickness, color, and spacing.
At the end of the tutorial, we will also provide you with a Lined Paper Template!
Also read: (Opens in new tab)
How to Make Labels in Google Docs
How to Rearrange Pages in Google Docs
How to Share Multiple Google Docs at Once
How to Make Uneven Columns in Google Docs
How to Make Lined Paper in Google Docs?
Step 1: Go to Insert > Table > 1×1
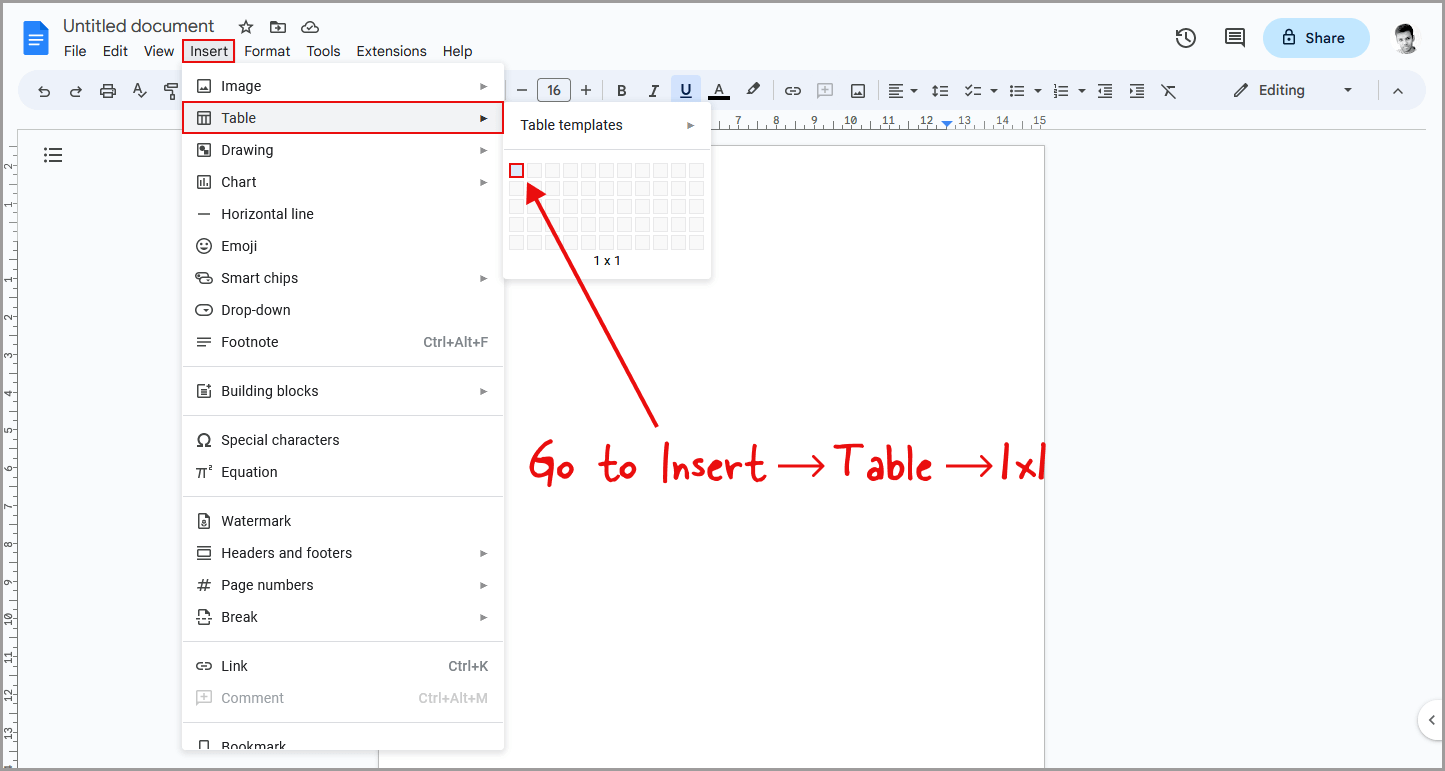
Since Google Docs do not allow for customizing horizontal lines, we will need to use a workaround by inserting a table and subsequently removing the side borders to give the appearance of lined paper.
Once the table is inserted, you can customize the line thickness and color to your liking.
To insert a table, start by clicking on the “Insert” option located in the top menu.
From the drop-down menu, select “Table”.
Then choose the “1×1” table option from the list.
Step 2: Remove the side borders
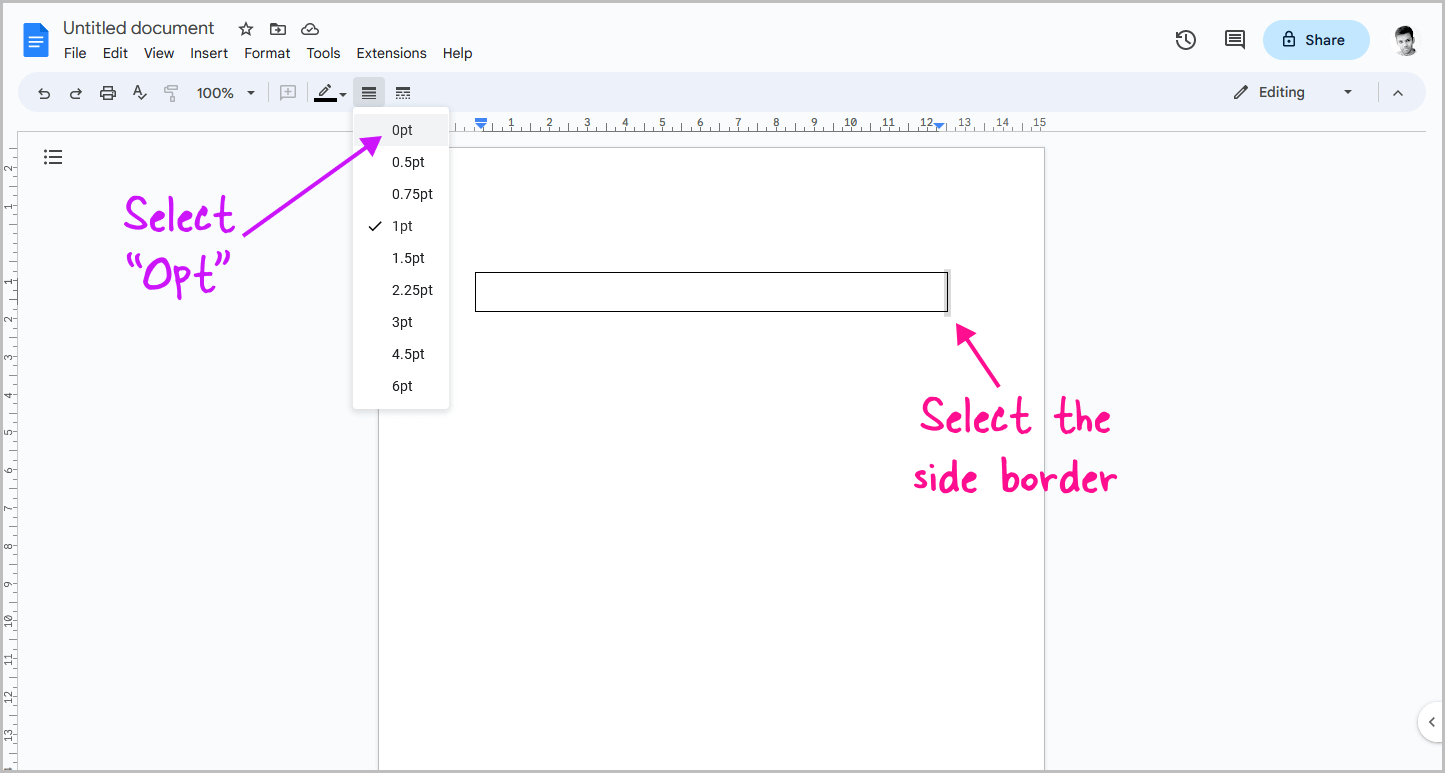
Once you have inserted the “1×1” table, you might want to consider removing some of its borders to make it look more visually appealing.
A helpful way to do that is to click on the right side border of the table first to select it.
Then, navigate to the toolbar and select the “Border width” option.
From there, you can choose to set the border’s thickness to “0pt”.
After you have done that, select the left side border of the table and repeat the process to make it borderless as well.
Step 3: Right-click on the table and select “Insert row below”
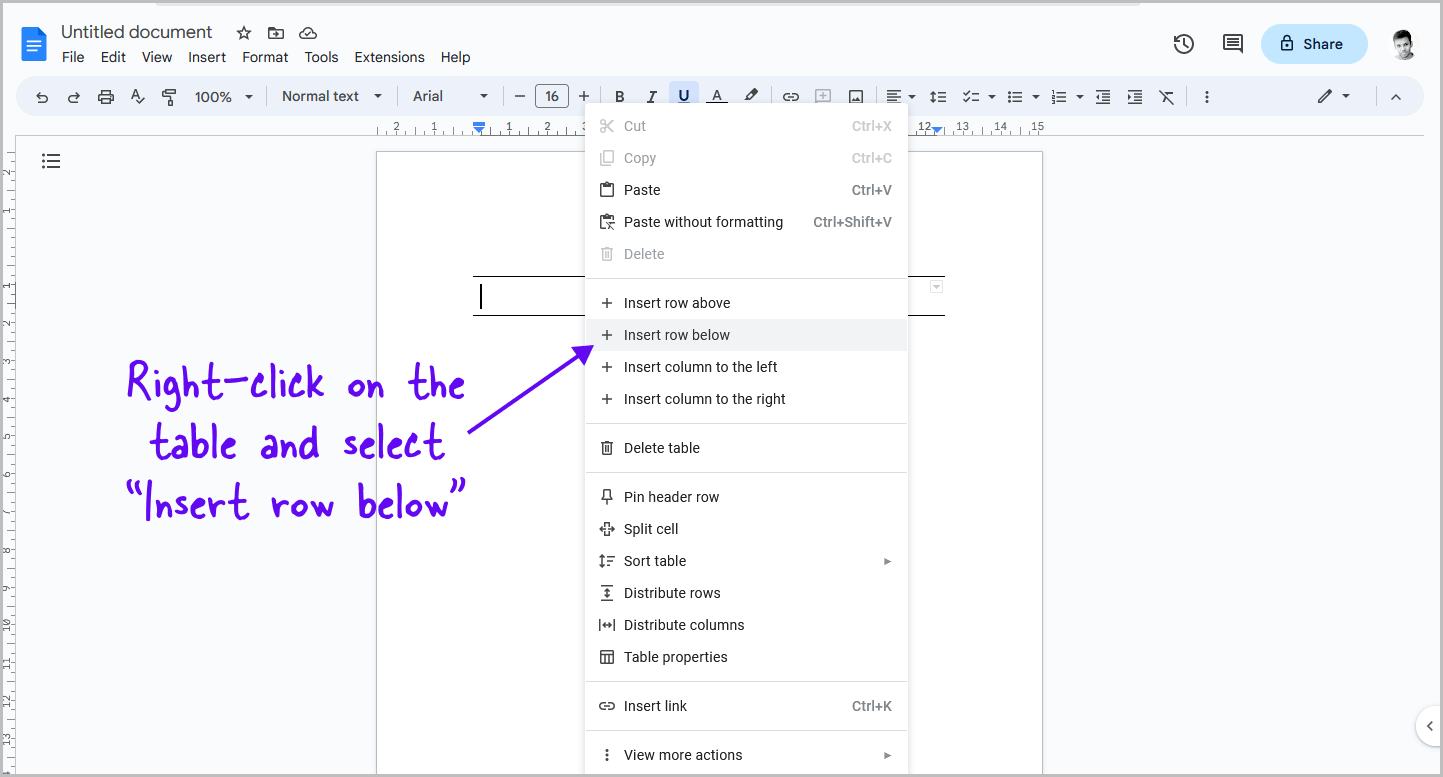
Once the first line of the table is complete, you can simply add more rows below to fill the page with lines.
To do so, right-click on the table and select “Insert row below” from the context menu.
This will add the second line to the page.
Step 4: Hover your cursor over the second row and click on the “+” icon
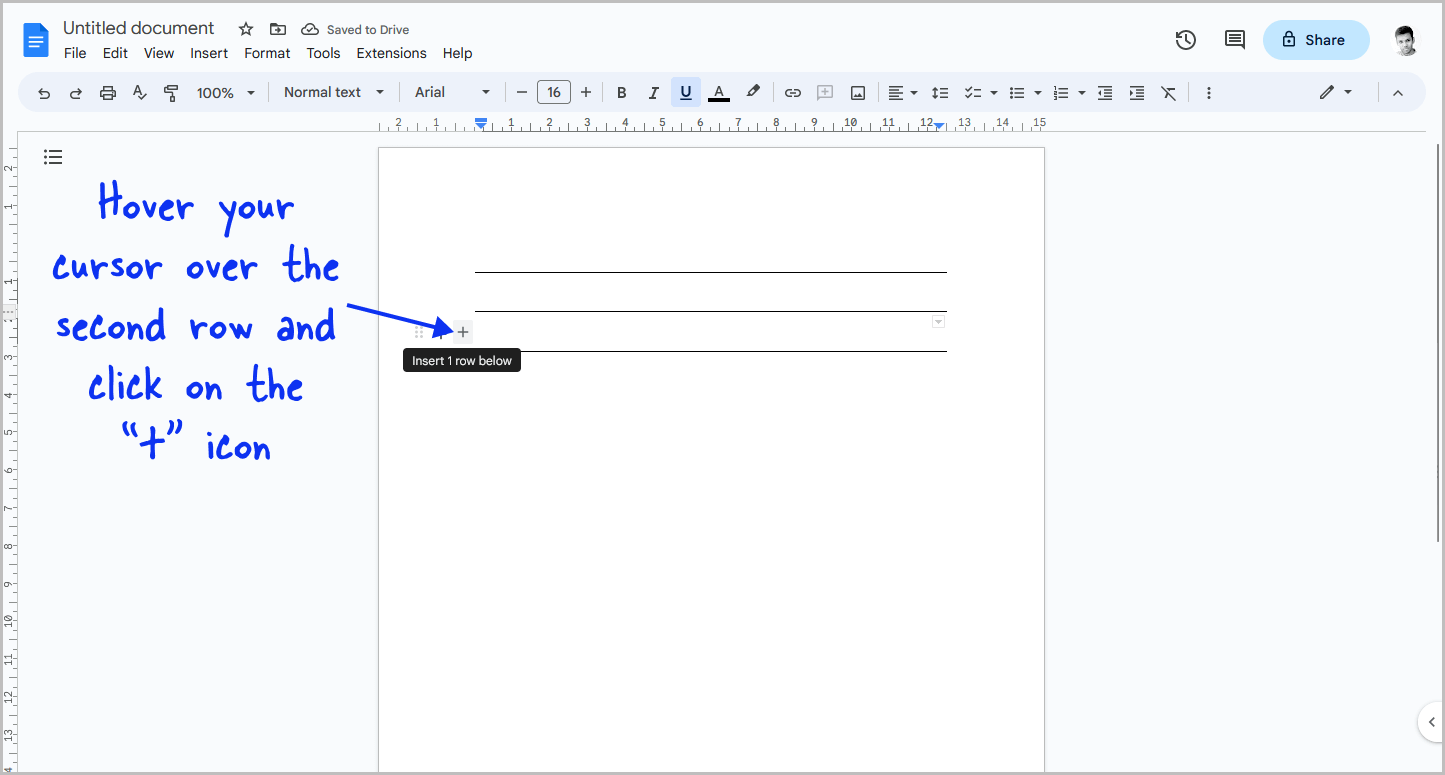
Adding a new row to a table can be a time-consuming task, especially if you have to do it multiple times.
Fortunately, there is an easier way to add new rows without having to go through the context menu every time.
Instead, you can simply hover your mouse cursor over the first or second row and a “plus” icon will appear on the left side of the row.
Click on this icon to add a new row.
Step 5: Repeat step 4 until you reach the end
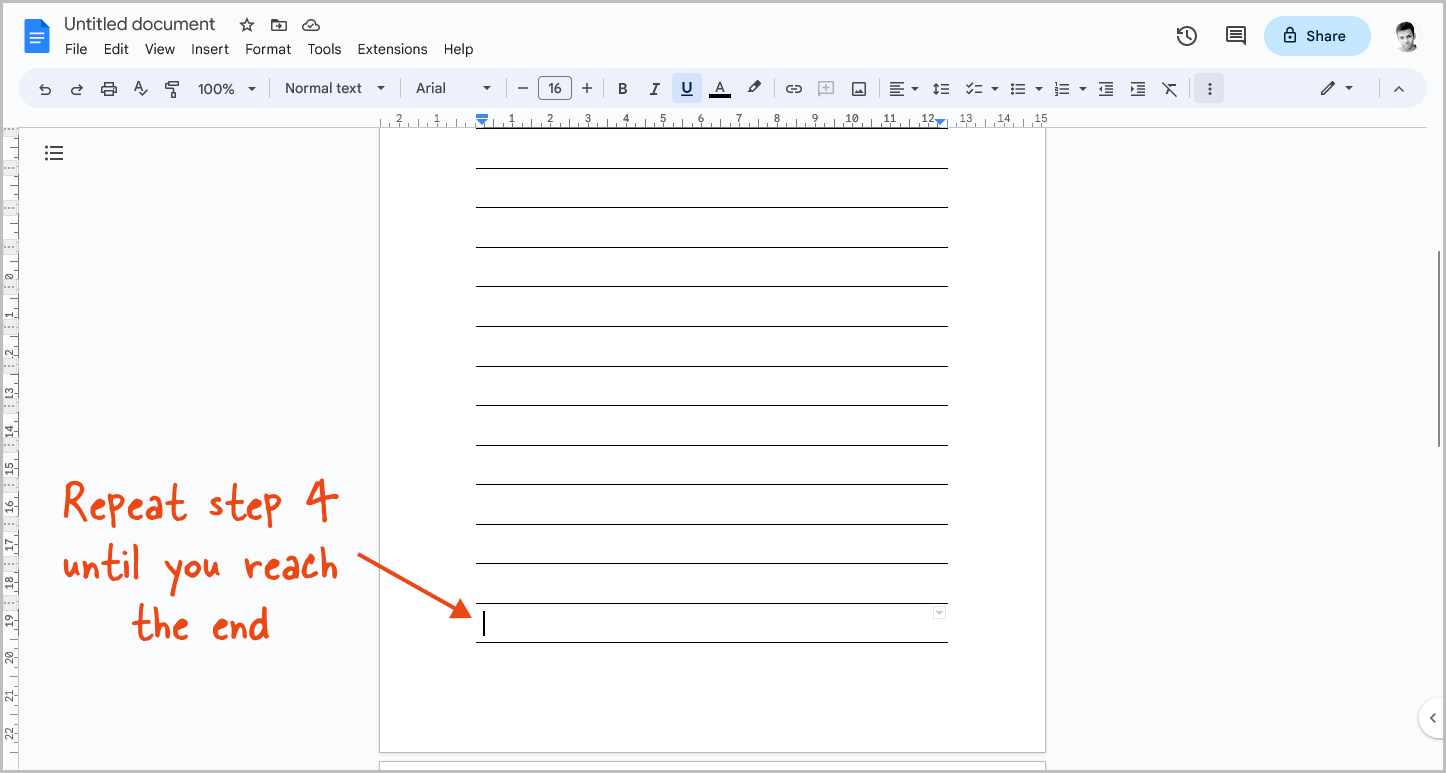
To insert additional lines into your Google Docs document, simply repeat the previous steps until you have reached the end of the page.
Once you have reached the end of the page, press the Ctrl+A key combination to select the table and then press Ctrl+C to copy the lines.
To paste the lines onto the second page, navigate to the second page and press Ctrl+V.
By repeating this process, you can add as many lined pages as you want to your Google Docs document.
Note: When typing on the lines, manually move the cursor to the second line using your mouse. Because the lines are created using a table, the cursor will not automatically move to the second line.
Step 6: Customize the line color
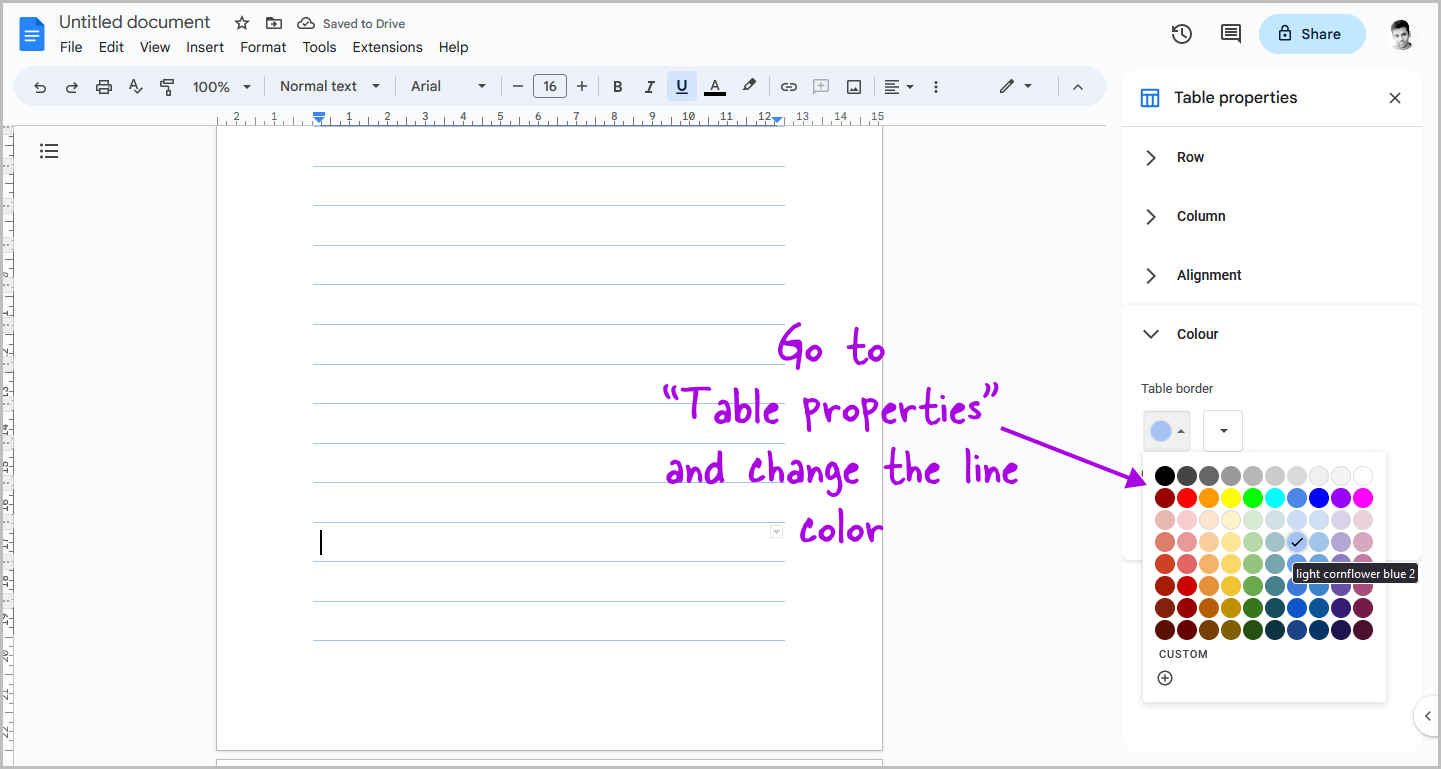
This is an optional step that you could skip if you are satisfied with the existing lines.
However, it is worth noting that creating lines using this method provides additional customization options.
For instance, you can change the color of the lines!
To do this, simply right-click anywhere inside the table and select “Table properties” from the context menu.
This will open the “Table properties” sidebar, where you can find the “Color” setting.
Click on it and then select the “Table border color” option.
From here, you can select the color that best suits your needs.
How to Add Writing Lines in Google Docs?
To add writing lines in Google Docs, simply insert a 1×1 table. Then, remove the side borders and add additional rows to create more lines.
Lined Paper Template Google Docs
Here is a free line paper template for Google Docs: Link
Lined Paper Template Google Docs (A 4 with1 inch margins): Link
Google Docs Notebook Template
Here is a free Google Docs Notebook template: Link
Google Docs Diary Template
Here is a free Google Docs Diary template: Link
Conclusion
In conclusion, creating lined paper in Google Docs is a simple process that can be done in just a few steps.
By using a table and customizing the border properties, you can produce a lined paper that meets your specific needs.
Whether you want to type on the lines or print and write on them by hand, this method allows for the customization of line color, thickness, and spacing.
With the included Lined Paper Template, you can get started right away and produce professional-looking documents with ease.

