Do you want to know how to create alternating color rows in a Google Docs table?
If you insert a table in Google Docs, you may find yourself wanting to alternate row colors for better readability and organization.
This can be particularly helpful for large tables with many rows of data.
Unfortunately, Google Docs does not have a built-in feature to alternate the colors of rows in your tables.
However, there are still convenient ways to achieve this effect.
In this article, you will learn how to create alternating color rows in a Google Docs table.
Also read: (opens in new tab)
Google Docs Highlight Shortcut
Google Doc Cursor Parking Lot
How to Center a Table in Google Docs
How to Convert Table to Text in Google Docs
Google Docs Table Alternating Colors
Step 1: Go to https://docs.google.com/spreadsheets/

Since Google Docs doesn’t have a built-in feature for alternating row colors in tables, we’ll use Google Sheets to create the table with alternate color rows.
Then, we can copy and paste it into Google Docs.
Google Sheets has an option to create alternate color rows.
To start, go to https://docs.google.com/spreadsheets/ and proceed to the next step.
Step 2: Select a blank template

To create a new blank spreadsheet in Google Sheets, click on the “Blank” template.
Step 3: Insert the table data
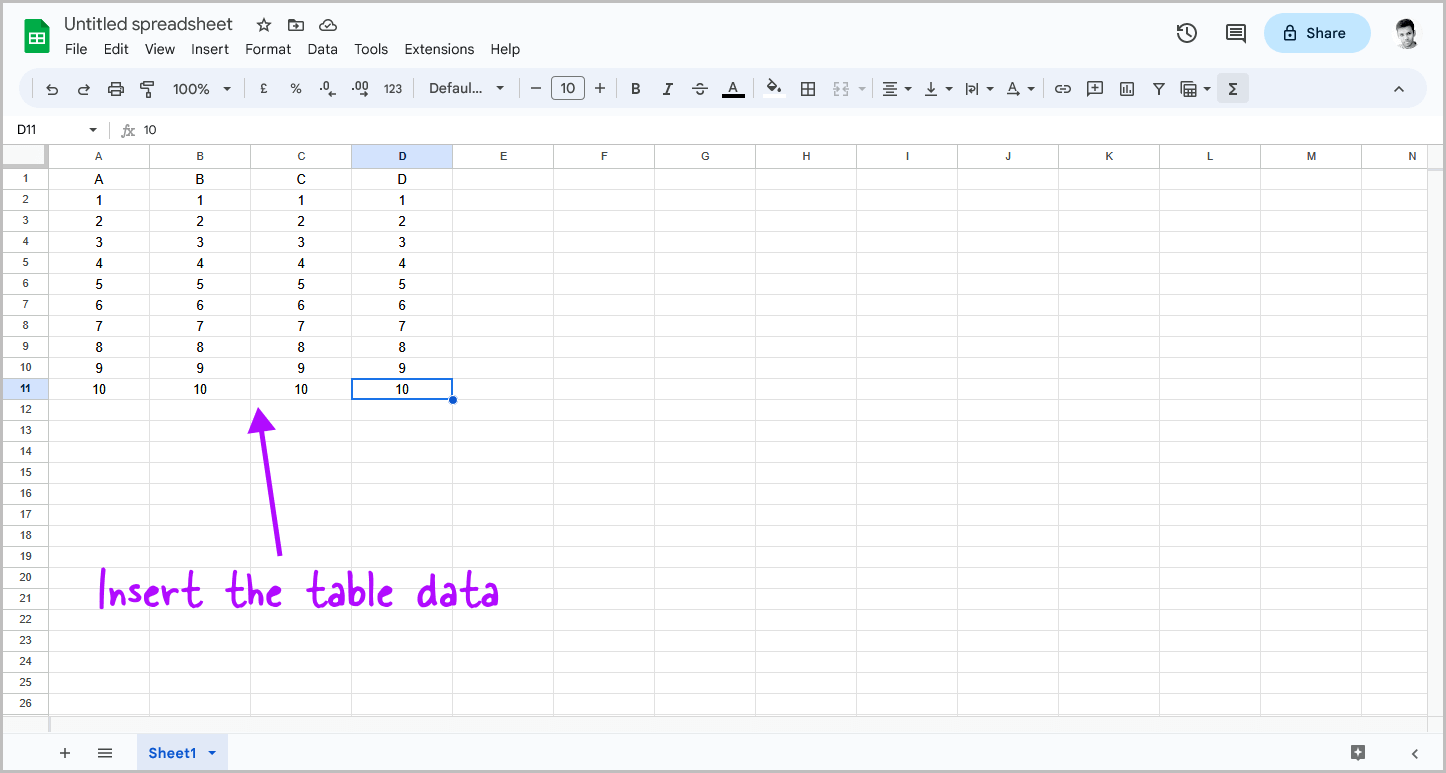
Now, start entering the table data that you want to insert into Google Docs.
If you create a blank table in Sheets and then paste it into your Google Doc, the colors may disappear after a few seconds.
By inserting the data in Sheets, you can avoid this issue and ensure that the table is formatted correctly in your Google Doc.
Step 4: Select the table
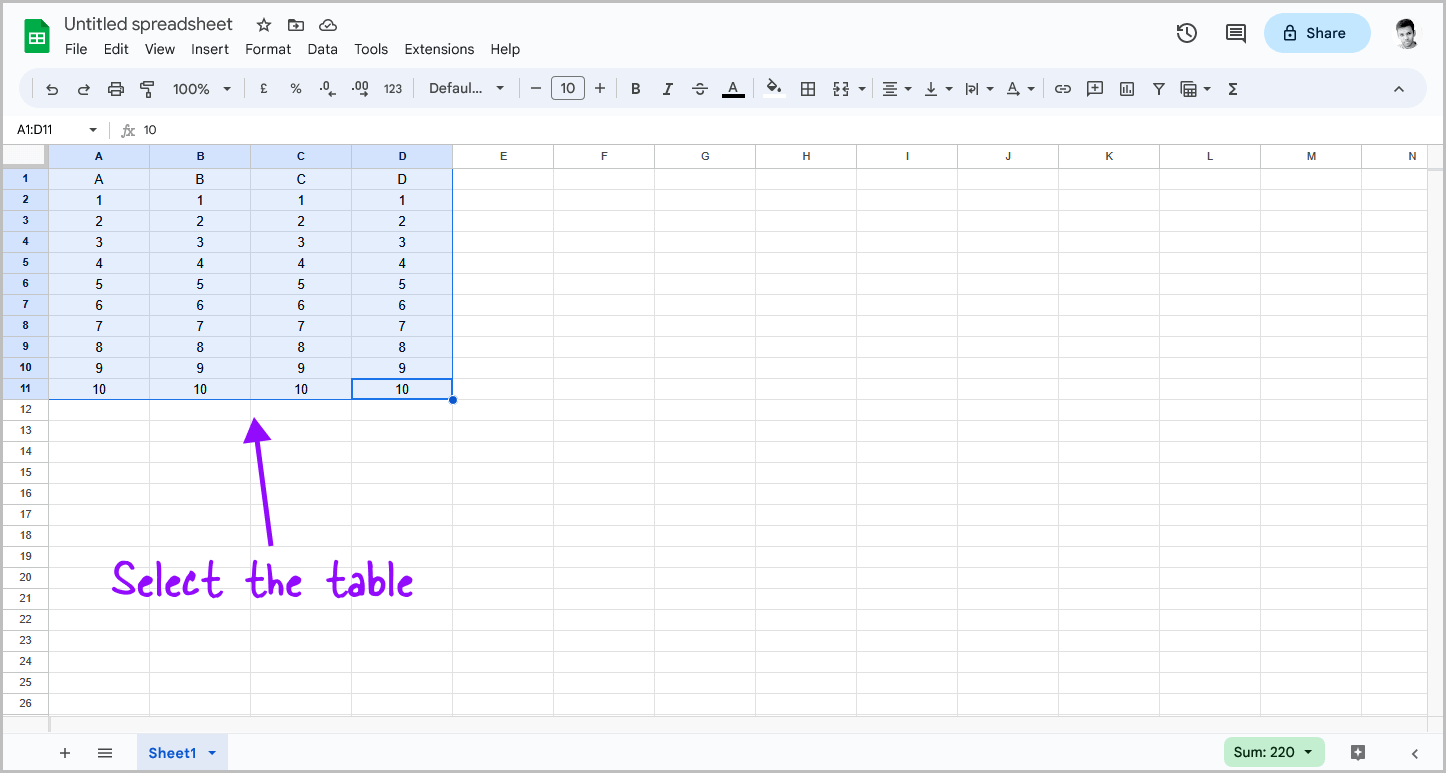
After entering the data, simply use your mouse and select the table.
Step 5: Go to Format > Alternating colors
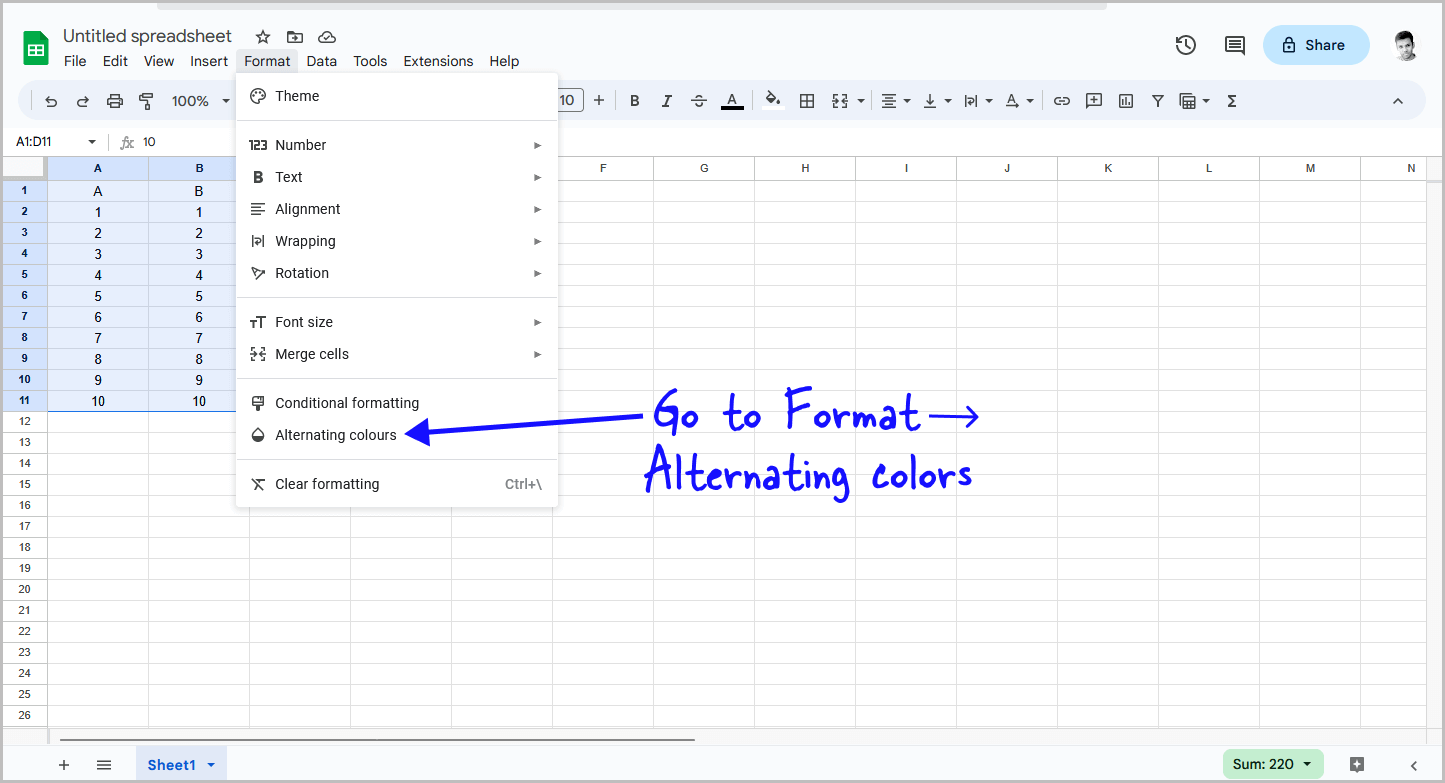
After selecting the table, select the “Format” option from the top menu, and then choose the “Alternating colors” option from the drop-down menu.
Step 6: Choose a style and click on “Done”
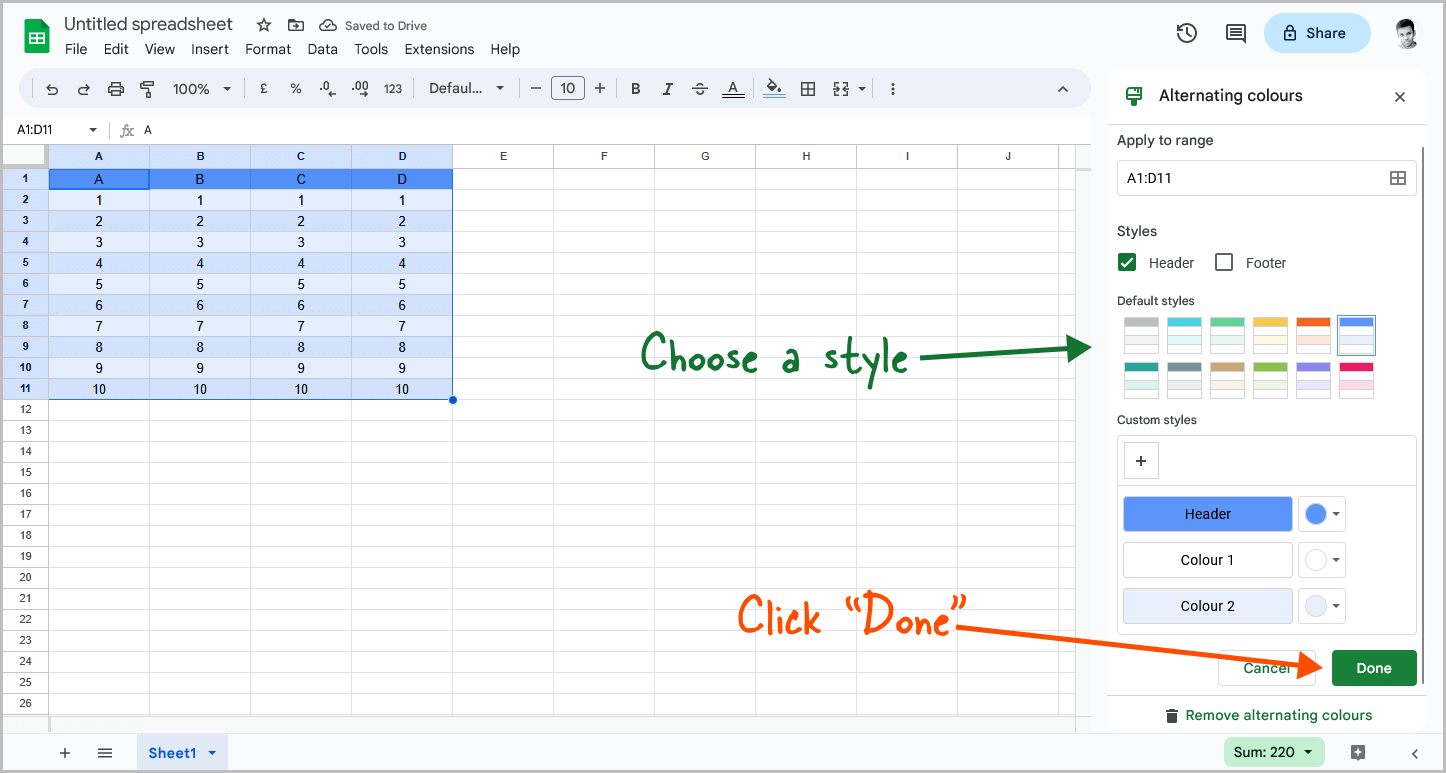
There are various styles available in Sheets.
You can choose a style you like or create a custom style.
If you don’t want the table header, uncheck the “Header” option in the styles panel.
After selecting the style, click on the “Done” button.
Step 7: Copy the table
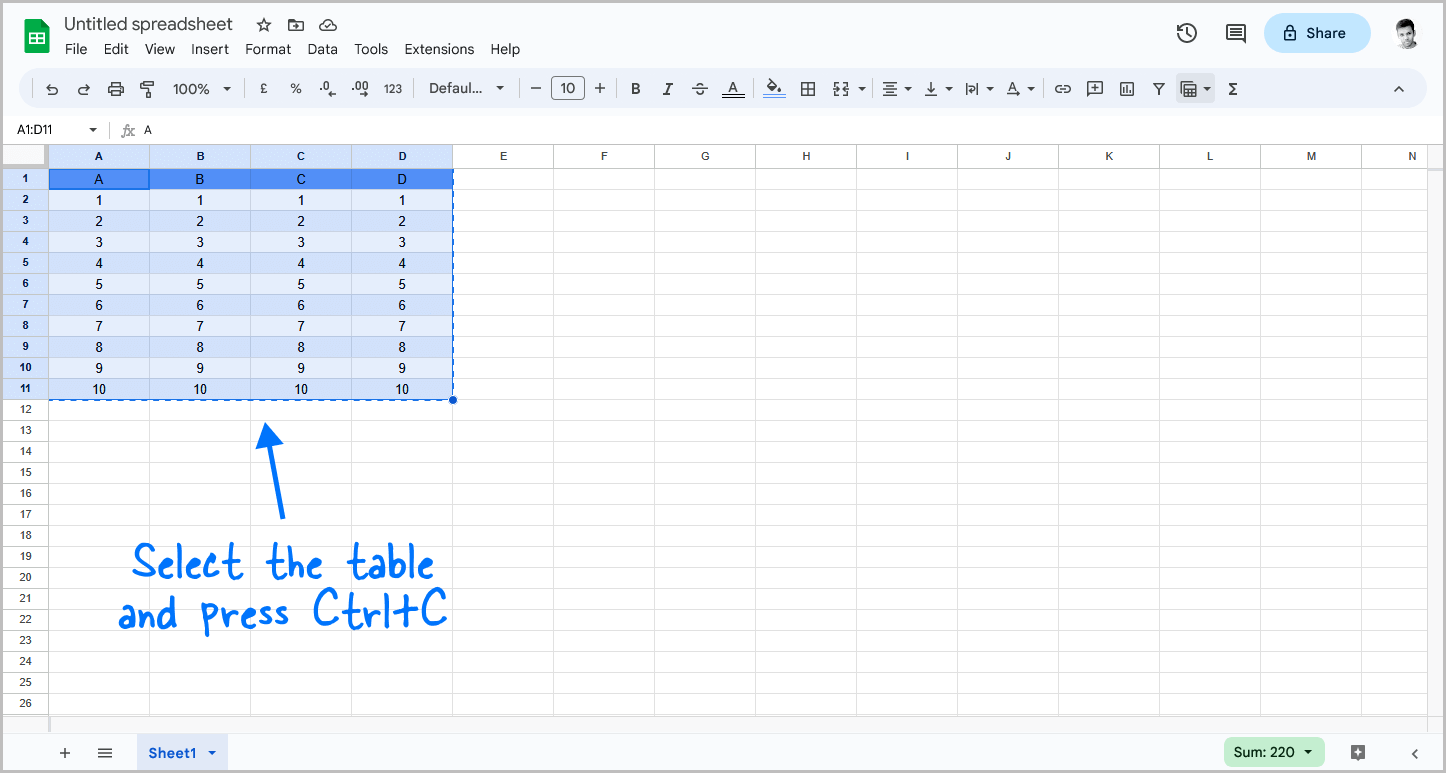
Now, once again, select the entire table and press Ctrl+C to copy the table with its formatting to your clipboard.
Step 8: Go to your Google Doc and press Ctrl+V

Now, open your Google Doc and bring the cursor to the location where you want to insert the table.
Press Ctrl+V to paste the table
Step 9: Select “Paste unlinked” and then click on “Paste”
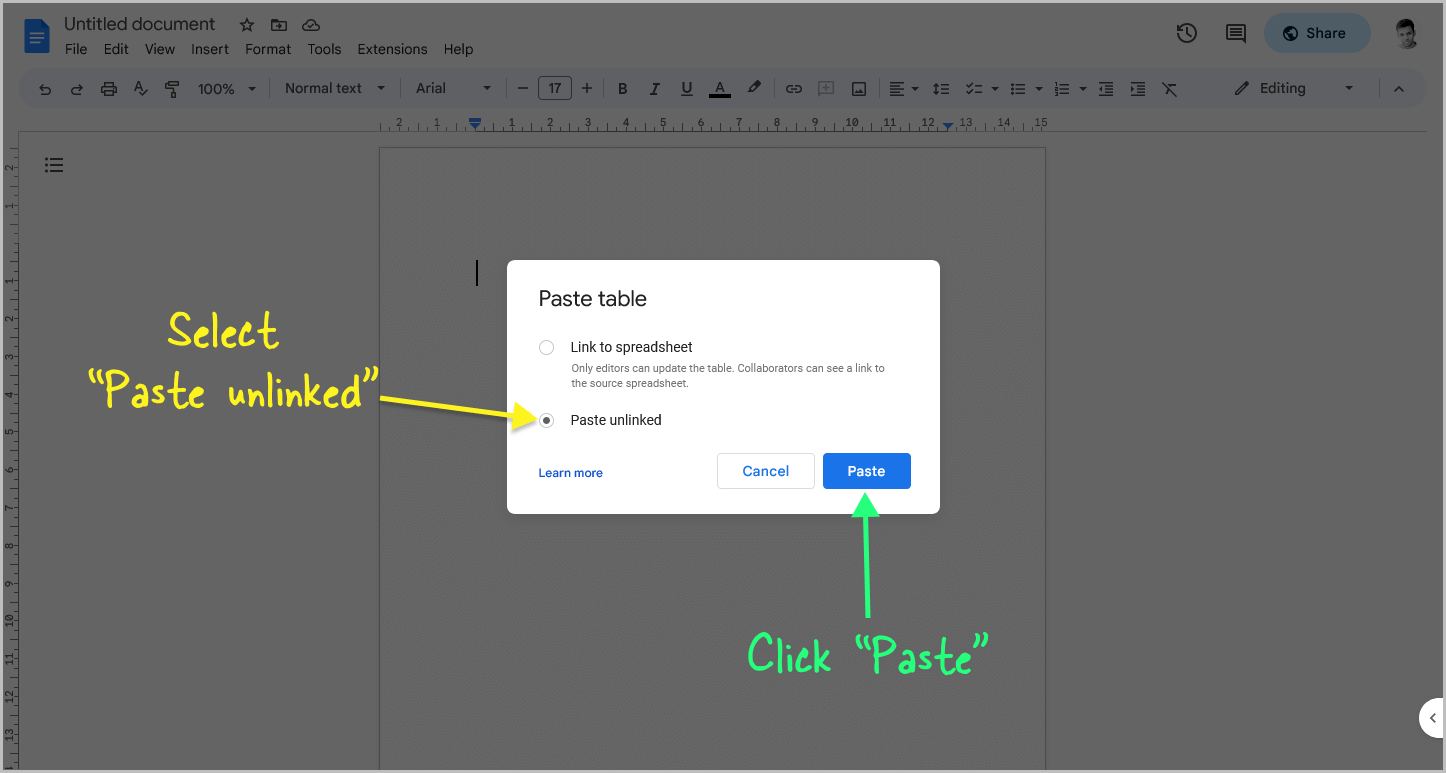
You will now see a pop-up window with two options: Link to Spreadsheet and Paste Unlinked.
Select the “Paste Unlinked” option and then click the “Paste” button to insert the table into the document.
Also read: How to Make a Table Smaller in Google Docs
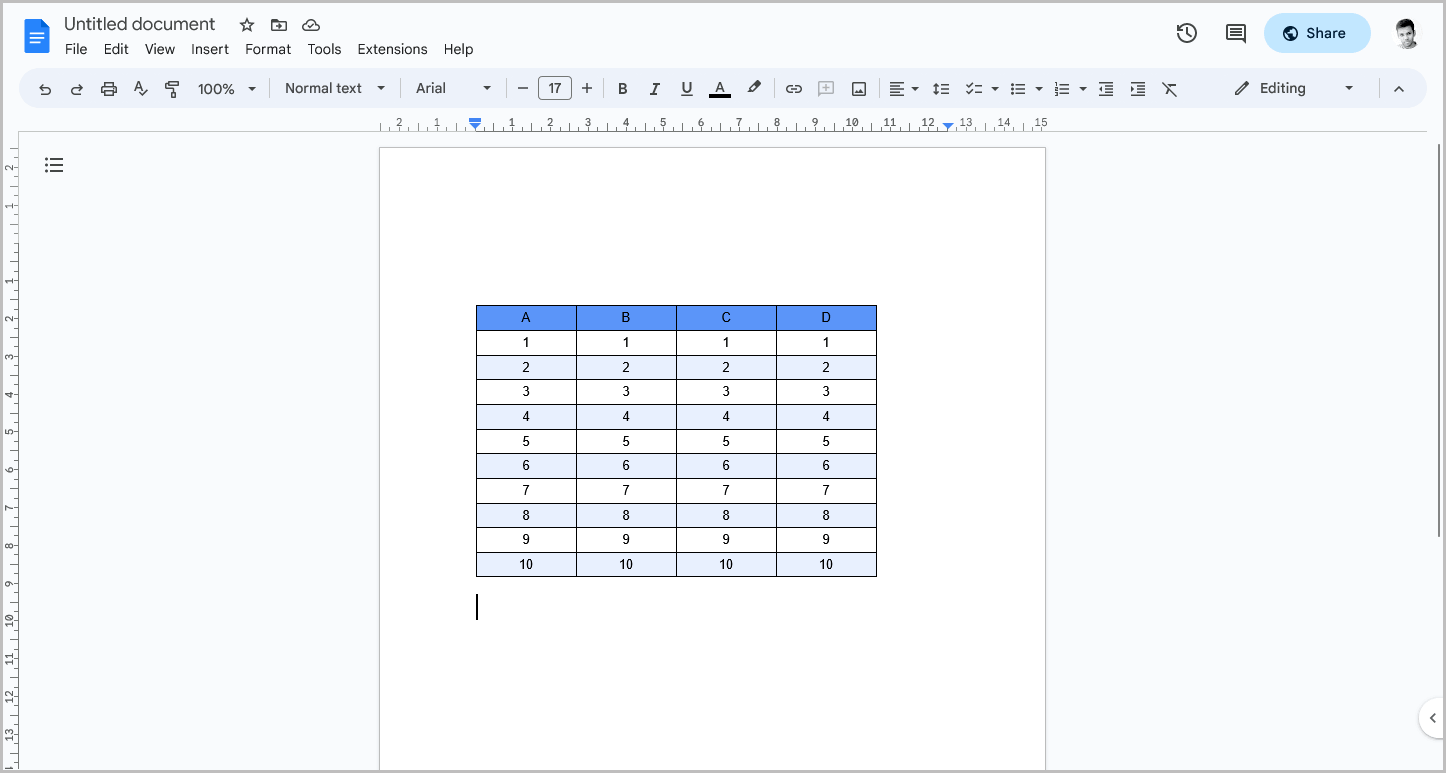
Alternatively, you can link the table to the spreadsheet, which will allow you to update the table in Google Docs directly from Sheets.
After making changes to the table in Sheets, simply click the table in Google Docs and click the “Update” option to reflect the changes in the document.
Conclusion
Creating alternating color rows in a Google Docs table may not be a built-in feature, but it is still possible to achieve this effect by using Google Sheets.
To summarize, here are the steps to create alternating color rows in a Google Docs table:
- Go to https://docs.google.com/spreadsheets/
- Select a blank template.
- Insert the table data.
- Select the table.
- Go to Format > Alternating colors.
- Choose a style and click on “Done.”
- Copy the table.
- Go to your Google Doc.
- Press Ctrl+V.
- Select “Paste unlinked” and then click on “Paste.”

