Do you want to learn how to make Google Slides view-only?
When creating a presentation on Google Slides, you can share it with other users to collaborate with them.
However, there may be times when you want to make the slides view-only so that those with whom you’ve shared the presentation cannot edit the slides, but only view them.
Is it possible to do this in Google Slides?
Absolutely!
In this article, you’ll learn how to make your Google Slides view-only.
Also read: (opens in new tab)
How to Track Changes in Google Slides
How to Time Google Slides for 20 Seconds
How to Lock an Image in Google Slides
How to Select Multiple Slides on Google Slides
How to Add Your Bitmoji to Google Slides
How to Make Google Slides View Only?
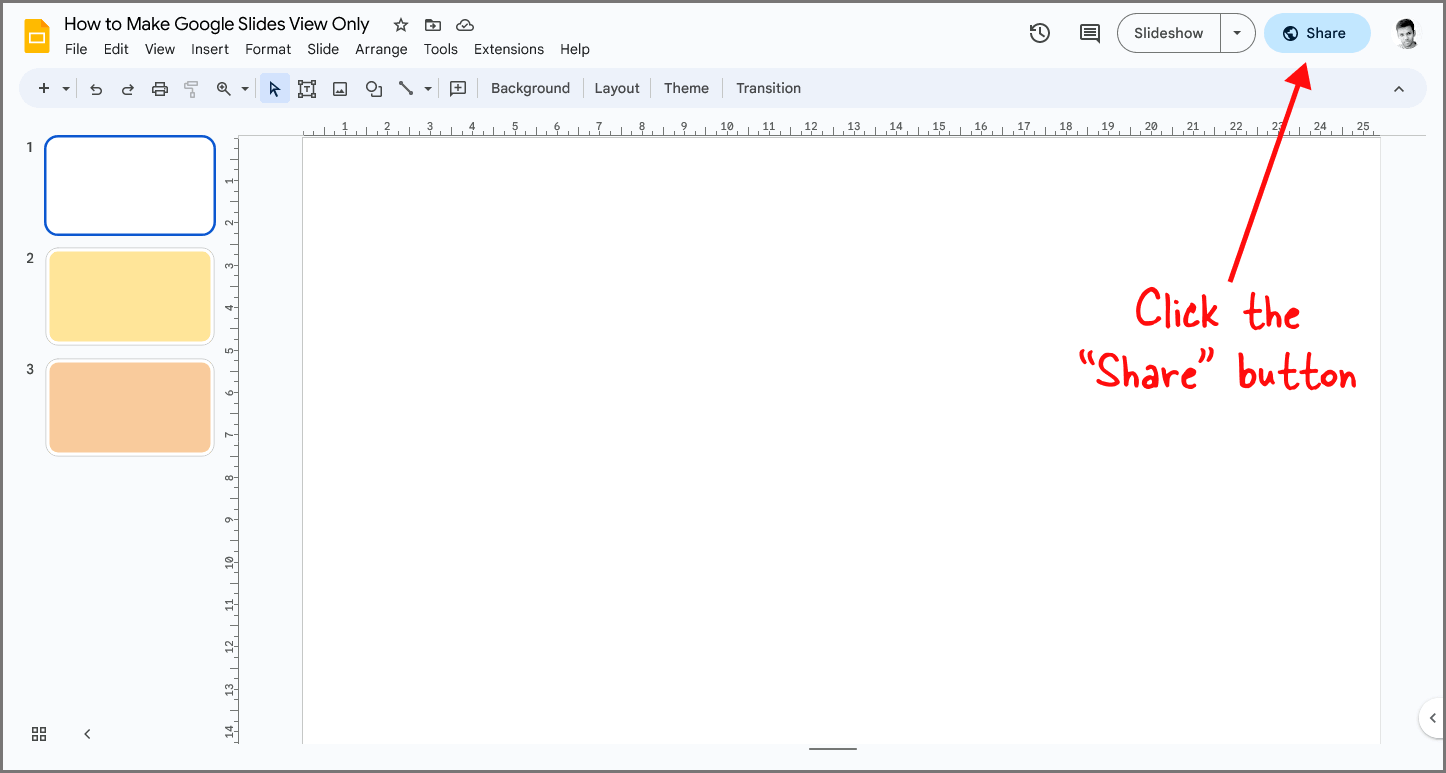
Step 1: Click the “Share” button

To get started, open the presentation you want to share.
Once you have the slide open, you’ll see the “Share” button located in the top right corner of the page.
Click on the “Share” button and proceed to the next step.
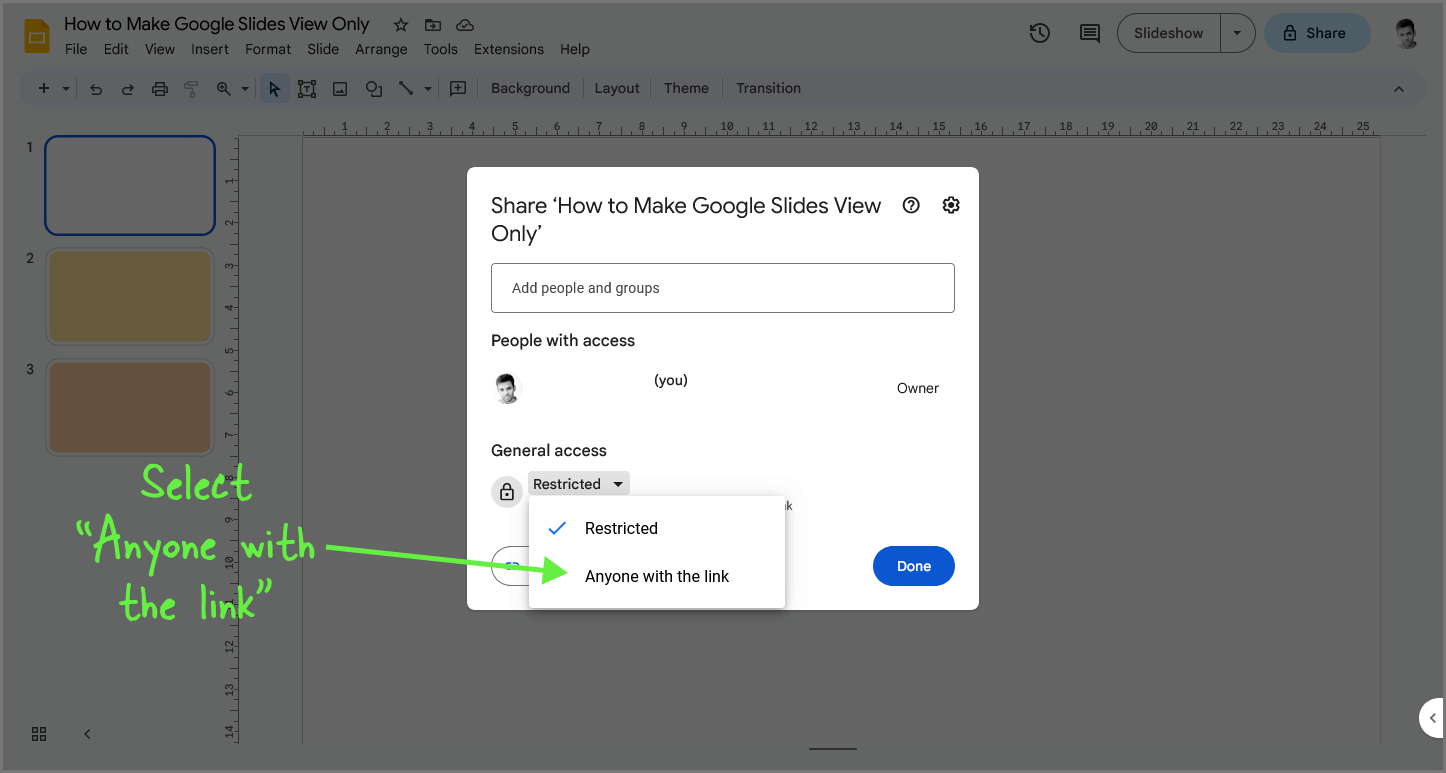
Step 2: Under General access, select “Anyone with the link”

You will now see a pop-up with sharing settings.
You can either create a link and share it, or you can manually enter each user’s email address, select their role, and then share the slides.
Personally, I prefer creating a link and sharing that.
Under the “General access” settings, click the drop-down menu and select “Anyone with the link”.
Google Slides will create a link that you can share with others, but first, we need to edit the role of the user(s) who will access the slides.
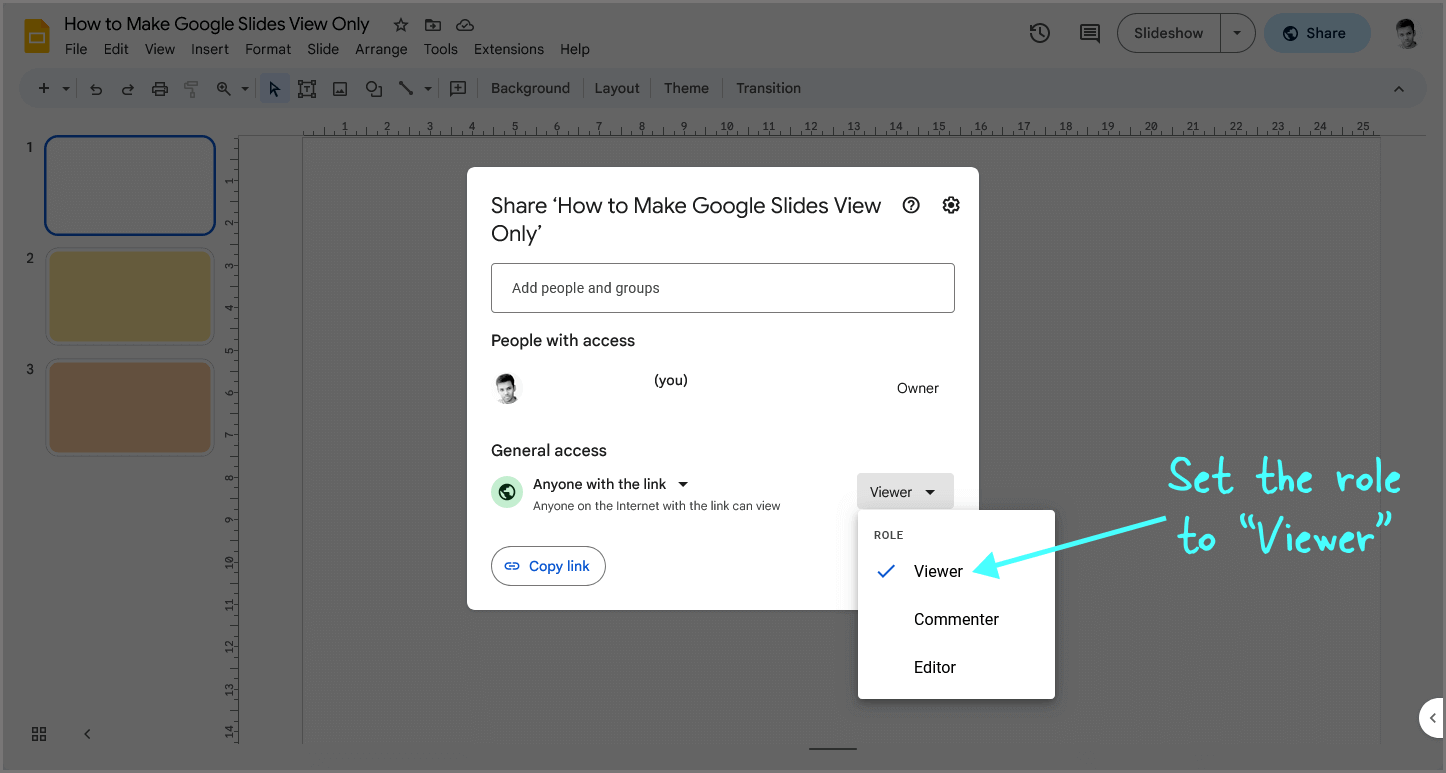
Step 3: Set the role to “Viewer”

To select the role menu in Google Slides, first, locate it next to the “Anyone with the link” menu.
You will see three roles: Viewer, Commenter, and Editor. If you want users to only view the slides, select the “Viewer” role.
Alternatively, you can select the “Commenter” role. With the “Commenter” role, users can view the slides and suggest edits by right-clicking on any element on the slide and selecting the “Comment” option.
The comments will only be visible to the commenter and the owner of the slides.
If you want users to edit the slides, select the “Editor” role.
Did you know that you can create a link that will directly present the slides to anyone who accesses it?
They will only see the slides and not the toolbar and other features that an owner can see.
For more information, read this guide: How to Share Google Slides in Presentation Mode
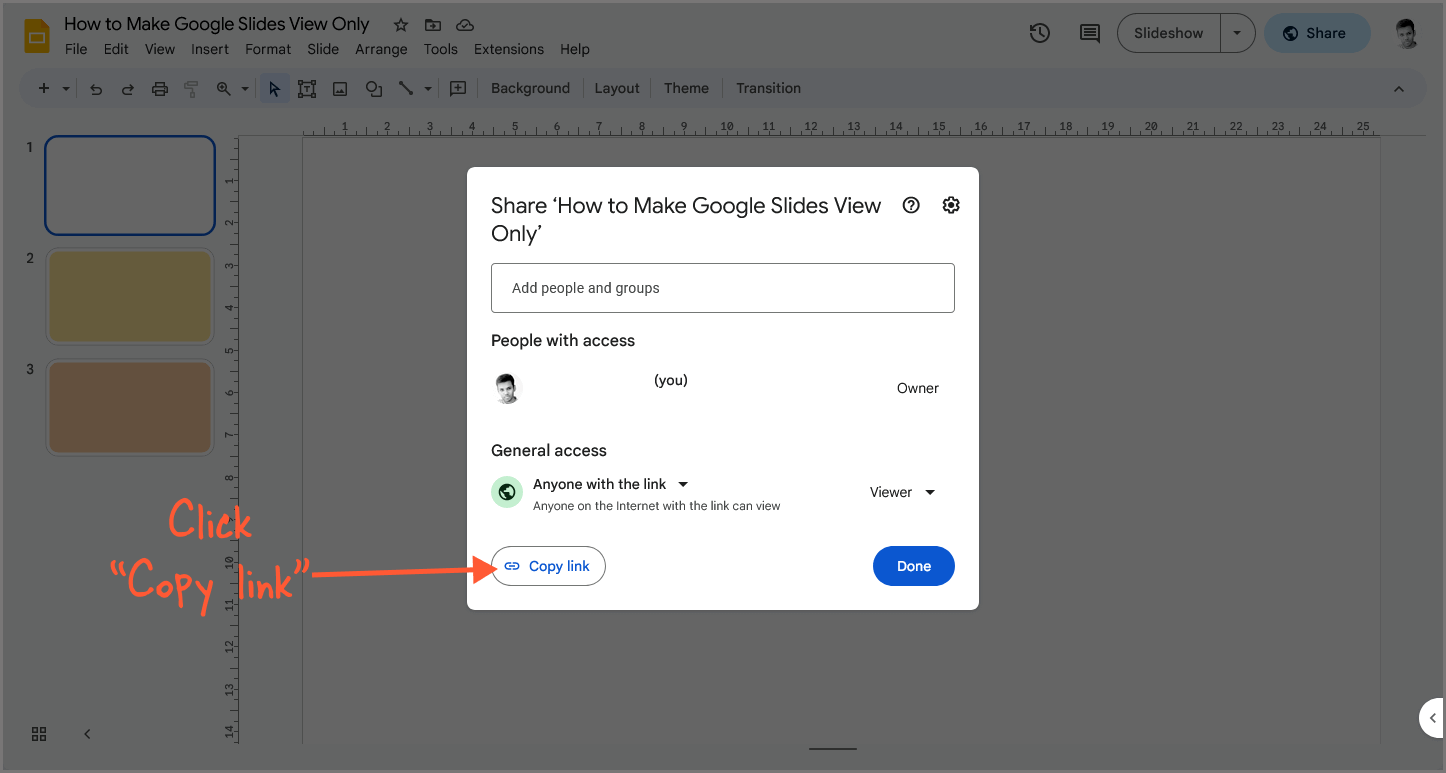
Step 4: Click “Copy link” and share it with others

Finally, click the “Copy link” button and share the link with the people you want to access the slides.
Users will only be able to view the slides and won’t be able to edit them.
If you want to allow users to edit the slides, go back to step 3 and select the “Editor” role.
FAQs
Can you share Google Slides as view only?
Yes, you can share Google Slides as view-only. In order to do so, you need to select the “Viewer” role under the sharing settings for the presentation. Once you’ve created a link to share the slides, users will only be able to view them and won’t be able to edit them.
How do I change a Google slide from view only to edit?
To change a Google Slide from view-only to edit, you need to select the “Editor” role under the sharing settings for the presentation. Once you’ve done this and shared the slides with others, they will be able to edit the slides.
Why does my Google Slides say view only?
You have been granted the “Viewer” role by the owner. To edit the slides, click “View only,” then select “Request edit access.” Once the owner grants edit access, you will be able to edit the slides.
How do you lock a Google slide so it cannot be edited?
To lock a Google slide so it cannot be edited, select the “Viewer” role under the sharing settings for the presentation.
Conclusion
Making your Google Slides view-only is easy! Here are the steps to follow:
- Click the “Share” button.
- Under General access, select “Anyone with the link”.
- Set the role to “Viewer”.
- Click “Copy link” and share it with others.
Now you know how to make your Google Slides view-only.
If you want to allow users to edit the slides, simply go back to step 3 and select the “Editor” role.

